400+ Pictures - 2-Day Car Detailing Class in Stuart Florida with Mike Phillips and Dr. Beasley's - February 2025

Mike Phillips

Administrator
Staff member
Joined
May 21, 2021
Messages
2,005
Reaction score
1,079
Points
113
Location
Stuart, Florida
Website
themikephillipsforum.com
400+ Pictures - 2-Day Car Detailing Class in Stuart Florida with Mike Phillips and Dr. Beasley's - February 2025


Congratulations to everyone that attended this class and thank you for all your hard work to take 5 cars in various conditions and turning them ALL into SHOW CARS!

full


Below are the pictures showing you class in the order to topics were covered and the cars were detailed.


Mike
 
Last edited:
Continued....

Here's the graduating class for the February 2025 2-Day 100% Hands-on Detailing Class!

NOTE:
To everyone that attended this class, if you would like the full size resolution of any of the pictures in this write-up, just shoot me an email and I can get it for you. Full size resolution will print out best for framing and displaying.


Henrique from Margate, Florida!

full


full


Jonathan from Morristown, New Jersey!

full


full


Randall from Elkmont, Alabama!

full


full


Shawn from Stuart, Florida!

full


full


Veronika from Key West, Florida!

full


full


P from Rockledge, Florida!

full


full


Horacio from New Braunfels, Texas!

full


full


Balasz from Clearwater, Florida!

full


full


Dennis from Fort Pierce, Florida!

full


Dan aka The Detail Doctor from Del Ray, Florida! Dan is a professional detailer as well as a good friend and always ready to help others with his time and experience in the detailing world.

full


full


Craig from Palm City, Florida- Craig is a long-time friend of mine and total gear-head extraordinaire and always ready, willing and able to give us a hand for these intense classes.

full


Billy from Wellington, Florida! - Billy is a true professional detailer as well as an alumni student from past classes and always a ready to lend a helping hand for these classes!

full


GREAT JOB EVERYONE!

All 5 cars you detailed came out looking freaking amazing!


Mike
 
Last edited:
Continued...


4 Major Topics using 5 Training Cars in 2 Days!

Just to note, we covered a LOT more than 4 topics over the course of this 2-day class, but the major topics have to do with the different approaches for doing paint correction.

  1. Three-Step or Show Car Detailing Paint Correction plus Ceramic Coating - 1941 Chevy Streetrod
  2. Two-Step Paint Correction plus Ceramic Coating - 1977 Pontiac Can Am Muscle Car
  3. One-Step Ceramic AIO or All-in-One Paint Correction - 2013 Mustang & 1970 VW Shorty Bus
  4. Remove Orange Peel via Wet Sanding by Hand and Dry Sanding by Machine plus Show Car Detailing - 1934 Ford 3-Window Coupe
Final Results
I'll add all the action shots showing all the topics covered in our 2-day class, but below I'm putting the focus on the AFTER results and Group Shots. And if you're looking for a car or boat detailing class that is hands-on, not sitting in a chair looking at a PowerPoint presentation for hours - then know that ALL our classes look like what you're going to see in this recap article for the February 2-Day Class.


Next classes are,

April 12th, 2025 - Matte Car Detailing Class - Chicago IL - $249.95 - Instructor Christyan Velasquez

April 19th, 2025 - 1-Day Auto Detailing Class - Chicago IL - $295.00 - Instructor Christyan Velasquez

April 25th, 2025 - Intro to PPF Detailing Class - Chicago IL - $550.00 - Instructor Christyan Velasquez

May 2nd & 3rd - 2-Day Paint Correction Class at the American Muscle Car Museum - Melbourne, FL - $1,295.00 - Instructors Mike Phillips, Jason Rose & Christian Camurovski

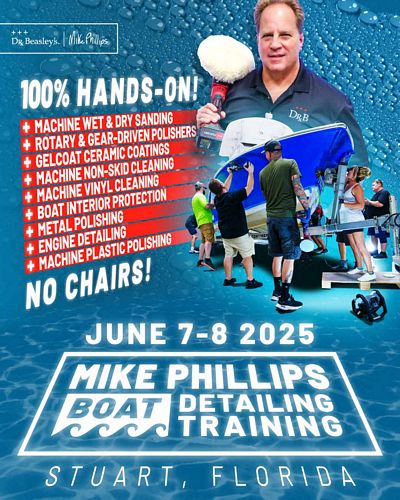
June 7th & 8th - 2 Day Extreme Boat Detailing Class - Stuart, FL - $1,295.00 - Instructor - Mike Phillips

September 20th & 21st - 2-Day Paint Correction & Ceramic Coating Class - Stuart, FL - $1,295.00 - Instructor Mike Phillips


Now onto the final results and group shot pictures...

Three-Step or Show Car Detailing Paint Correction plus Ceramic Coating - 1941 Chevy Streetrod


full


full


full


full


full


full


full


Two-Step Paint Correction plus Ceramic Coating - 1977 Pontiac Can Am Muscle Car

full


full


full


full


One-Step Ceramic AIO or All-in-One Paint Correction - 2013 Mustang & 1970 VW Shorty Bus

2013 Mustang

full


full


full


1970 VW Shorty Bus
full


full


full


full


full


full


Remove Orange Peel via Wet Sanding by Hand and Dry Sanding by Machine plus Show Car Detailing - 1934 Ford 3-Window Coupe

full


full


full


full


full


While the above pictures are impressive, next up are all the ACTION SHOTS - these show you what YOU get to do when you take one of our classes.


Mike
 
Last edited:
Remove Orange Peel via Wet Sanding by Hand and Dry Sanding by Machine plus Show Car Detailing - 1934 Ford 3-Window Coupe

full


Awesome photos of my 34 Ford. Great job on getting the orange 🍊 peel and runs in paint.

I couldn't be happier with the way it turned out. It is amazing, like a mirror finish.

Thanks again,

Jerry
 
Last edited by a moderator:
More...

Class starts at 7:30am sharp
First up we go over how to use Dr. Beasley's Prep Wash to do a waterless wash and then inspect the paint to see if the paint is contaminated and needs claying.

full


Show Car Detailing
The first topic Saturday morning is the topic of show car detailing or multiple-step detailing. This is where you basically do whatever it takes to turn a neglected finish into a show car finish. While the paint on all cars is different, my goal is to show a true, 3-step process and for this I brought in a 1941 Chevy Streetrod with a modern basecoat/clearcoat finish. This is the perfect TRAINING car to learn show car detailing because the paint is filled with the years of swirls and scratches, but there's also holograms from a rotary polisher and SANDING SCRATCHES everywhere in the paint.


full


full


full


full


full


full


full


full


full


full


Step 1: Rotary Training Time
It's now 8:30am, the paint is clean and ready for paint correction and the first tool the class will learn to use is the powerful rotary polisher!

full


full


full


full


full


full


full


full


full


full


Detailometer Readings
I got busy getting the class going and forgot to take Detailometer readings, not problem, this section on the hood has not been touched by the class yet.

full


full


full


full


full


full


full


So Important
Anytime you're using a wool pad on a rotary polisher it's VITAL to clean your pad OFTEN! Dirty wool pads put deeper hologram scratches into the paint, and this will require more time and work to polish out swirl free. Here's Veronika using a steel spur to clean or spur a dirty pad.

full


full


Window Frames
A tricky area to buff on any car are the window frames. The paint on the window frames looked just as bad as the paint on all the rest of the body panels. This means, in order to remove all the swirls, scratches and sanding marks, we'll need to buff these areas with the wool pad on the rotary with the Dr. Beasley's CoreCut NSP Primer.

Here's Veronika tackling the window frames like a BOSS!

full


full


full


full


full


full


Mike
 
Last edited:
More...


Step 2: Machine polish to remove holograms and swirls left by the rotary step.
For this the class is using Dr. Beasley's NSP 150 with yellow Buff and Shine EdgeGuard foam buffing pads.

full


full


full


full


full


full


full


full


full


full


full


full


full


full


full


Mike
 
Last edited:
More...


Step 3: Final Polishing for Show Car Quality Results

After the first polishing step to remove the holograms from the fibers of the wool pad, next the class switches to Dr. Beasley's NSP 95 with much softer, Buff and Shine white foam finishing pads.

full


full


full


full


full


full


full


full


full


full


full


Step 4: Last step, installing the Dr. Beasley's Nano-Resin 2.0 Ceramic Coating

full


Finishing Touches - Machine applying the Dr. Beasley's Tire Conditioner

full


full


full


full


full


full


full


full


And here are the final results!
This is the first car on the first day and the class already has a LOT of hands-on time with rotary and orbital polishers to create a show car finish on paint that was filled with swirls and sanding scratches. Then they applied a ceramic coating and gave the paint a glass-like look.

full


full


full


full


full


full


full


Mike
 
Last edited:
Continued....


2-Step Paint Correction and Ceramic Coating
Now that the class has learned a 3-step process, (show car detailing), with the 1941 Chevy, next we're going to go over how to do a 2-step process. If you're a Do-it-Yourselfer, this would be a 2-step approach, if you're a professional, this would be your mid-range package. A package that is priced between your show car detailing package, and your budget package.

1977 Pontiac Can Am - Rare Muscle Car

full


I don't normally like to use white and light colored cars for detailing classes for 3 reasons.

1: Too difficult for the students to see DRAMATIC before and after results from all their hard work.
2: Too difficult to capture great before and after pictures.
3: Too difficult to capture great before and after videos.

And after this class and this car, I'll likely never use another white car, it's just not as effective as black and dark colored cars.


Hologram Video
As you can see from the video below taken with the car outside and the sun high overhead, the paint on this Can Am has been butchered by some other detailer and the misuse of a rotary polisher.


Before Pictures
Like mentioned above, it's more difficult to get GREAT before pictures when photographing white paint, so here's the best I could do. The video of the car outside does a much better job of showing the holograms. The below pictures are still pictures of holograms, you just don't see the tell-tell signs that indicate holograms like shared in the video.

full


full


full


full


full


full


full


full


full


Limited PowerPoint Presentation
I don't use PowerPoints to teach in my class, I do that part. I do like to use a PowerPoint to simply share the process in a way my students can use to remember the cars, the process and the tools, pads and products used. Plus, I think it's cool and powerful that in some of the pictures, the car the students are working on is the same car in the PowerPoint. No other class ever does this but then most classes don't bring in this volume of cool cars for the class to train on.

full


CoreCut and CoreCut+
These are two brand new compounds Dr. Beasley's is launching in the spring of 2025. These use the same spherical abrasive technology except these cut incredibly fast. This was good timing as our Test Spot revealed this car and incredibly HARD paint. So, in order to remove the holograms from the other guy, using the new CoreCut and CoreCut+ enabled us to easily remove the holograms as well as all the other normal paint defects like swirls, scratches, water spots and oxidation.

full


Go Time!
It's shortly after lunch and after warming up on the 1941 Chevy, the class is ready to get back to it. For this first step, the class is using,
  1. Dr. Beasley's CoreCut.
  2. Buff and Shine Blueberry EdgeGuard foam pads.
  3. FLEX BEAST and Supa BEAST 8mm gear-driven orbital polishers.

full


full


When is the last time you detailed a 1977 Pontiac Can Am?
Here's Veronika doing the paint correction to the air scoop on the 1977 Can Am. Also note the PowerPoint presentation on the wall behind her. A single slide per car, that's it. And what a lot of students do is take a picture of each slide to help them remember everything we used and everything we did to each car.

full


full


full


full


full


full


full


full


full


Here's Craig, (holding the swirl finder light), who is my long-time friend and total automotive gearhead. Here's Craig working with Dennis to inspect the results from his work.

full


FLEX PXE-80
When you need to buff out thin panels or work around different components, or in this case work around the vinyl graphics, it's hard to beat a micro-tool like the FLEX PiXiE in rotary mode with a 3" extension. When you take one of our classes, you get a chance to use a wide range of tools. This gets you hands-on time with tools perhaps you've never used before you ever make a purchase. This way you know what you like and what you don't like, and you can avoid wasting time and money.

full


full


Mike
 
Last edited:
Continued....


Second Paint Correction Step - Finish Polishing
The next step is to perfect the results from the first step while maximizing gloss and clarity.

For this step, the class switches over to,
  1. Dr. Beasley's NSP Primer 95
  2. Buff and Shine Yellow EdgeGuard Polishing Pads
  3. FLEX BEAST, Supa BEAST and CBEAST

full


full


There are 66 - 110 volt electrical outlets in our training garage. We can power over 20 polishers at the same time and NEVER blow a breaker.

full


full


full


full


full


full


Ceramic Sealing the Paint
After all the polishing work, the class used the Dr. Beasley's Nano-Resin MX Ceramic Coating. This is a 2-part system with the first part being the application and removal of the Paint Coating Builder.

full


full


full


full


full


full


After removing the Paint Coating Builder, next the class installs the Nano-Resin MX Ceramic Coating.

full


full


full


full


When is the last time you ceramic coated a classic muscle car like this 1977 Pontiac Can Am?

full


full


full


full


full


Here's the final results...

Two-Step Paint Correction plus Ceramic Coating - 1977 Pontiac Can Am Muscle Car

full


full


full


And here's the team that did the amazing transformation!

full


Time for the Can Am to go home with the owner.

full


Mike
 
Last edited:
Continued...

Saturday Night Meet & Greet
This is one of my favorite parts of these classes and that's to get out of the shop and enjoy some great food and while having the opportunity to get to know each other out of the work environment.

Kind of a tradition to get your picture taken in the Shark mouth!

full


full


full


full


Mike
 
Last edited:
Wait a minute--those Core Cut products are powders that you mix up as needed??

Oh no... I have samples of the abrasive technology and the nanogel here at the Stuart, Florida shop for video work, trade shows and classes.

full


As someone that has taught a lot of classes, made a lot of videos and wrote a lot of articles in my life, I know it's a lot easier for people to WRAP their brain around something and better understand it when they can see it, touch it and feel it.

Stay tuned for a new video we're shooting in April on our abrasive technology and our new products, CoreCut and CoreCut+

The Dr. Beasley's manufacture plant is in Chicago, Illinois. Dr. Beasley's is a true manufacturer and our products are formulated, created and packaged in Chicago. These are simply sample I had sent to me for the reasons stated above.

Great question, thanks for asking.


Mike
 
Oh no... I have samples of the abrasive technology and the nanogel here at the Stuart, Florida shop for video work, trade shows and classes.

As someone that has taught a lot of classes, made a lot of videos and wrote a lot of articles in my life, I know it's a lot easier for people to WRAP their brain around something and better understand it when they can see it, touch it and feel it.
That was my second guess, LOL

Great question, thanks for asking.
You give me too much credit--IIRC you said you didn't get to walk around SEMA this year, your old acquaintance Anthony Orosco was demo'ing a line of powder polishes that you mix up--so I thought maybe that was the new thing.
 
Continued...


Extreme Prep Wash & Wet Wash Engine Detail

First up Sunday morning, we go over Wet Wash Engine Detailing and Extreme Prep Wash.

1970 VW Shorty Bus
Here's a picture of how this bus looked when the current owner purchased it.

full


Later, he modified it from a bus to a pickup. When it arrived here it was covered with a layer of barn dust and some type of contamination, so first up, she's getting a bath.

full


Starting on time!

full


full


full


full


Wet Wash Engine Detail
There are two types of engine detailing,

Wet Wash Engine Detail - This is a traditional style that includes using degreasers, brushes and either a pressure washer or water hose.

Cosmetic Engine Detail - Wiping engine compartment clean and dressing the plastic and paint. (new cars are mostly plastic surfaces under the hood)


For this older 2013 Mustang Convertible, we're going to go over how to do a Wet Wash Engine Detail. The class will start by spraying all the painted portions of the underside of the hood using a degreaser, then agitating and rinsing. Next, they'll tackle the engine and engine compartment and then give the entire underside of the hood and engine compartment a final rinse.

full


full


full


full


full


full


full


full


full


full


full


No Check Engine Light comes on and that is one of the goals.

full


Here's the engine compartment all clean and dry. Later we'll dress the engine compartment when we move the car back inside.

full


full


full


EGO POWER+ 3200 PSI 1.2-GPM Cold Water Battery Pressure Washer
Here's Veronica slathering foam over the Mustang. She's using the MJJC Foam Cannon S V3.0 with Dr. Beasley's Ceramic Body Wash.

full


full


full


Once foamed, the class washes the canvas cloth top using RaggTopp Convertible Top Brushes followed by washing all the body panels.

full


Not pictured is re-foaming the car and then mechanically decontaminating the paint as well as machine scrubbing the tires.


Mike
 
Last edited:
Continued...


1-Step Ceramic AIO Paint Correction
If you're a do-it-yourselfer, a 1-Step AIO is a great way to quickly take care of any daily drivers. For the VW and the Mustang, the class is going to use the Dr. Beasley's NSP Z1, which is a ceramic all-in-one. It will compound, polish and protect in a single step. Be sure to check out the AFTER results below.

full


full


full


full


full


full


full


full


full


Nice shine you got going their Blake!

full


full


full


full


full


full


full


full


full


We machine scrubbed the tires during the washing step, now we're machine applying the tire dressing.

full


full


full


Mike
 
Last edited:
Continued...


Here's the final results...

Keep in mind, these results were achieved in a SINGLE paint correction step or what we call one and done.


2013 Mustang

full


full


full


1970 VW Shorty Bus

full


full


full


full


full


full


Great work everyone!

Mike
 
Last edited:
Continued...

Sunday - How to remove Orange Peel for a Show Car finish!
Below is m single PowerPoint slide for the sanding class. Below you'll see the class in action as they work through all 5 steps for this topic.

full


Electronics Grade - Nikken Finishing Papers
Wow! I've been sharing these super high-quality finishing papers since joining Meguiar's as an outside sales rep and trainer back in 1987, that's a long time! Until someone proves to me a better sandpaper, I'm sticking with and using the Nikken brand.

full


Meguiar's has historically had the marketing rights for the Nikken brand for all of North America. For a while, Griot's Garage offered these same finishing papers under the Griot's BOSS brand. I'm not sure if Griot's continues to sell these, but you can find these via Meguiar's. Shoot me an email if you need help finding these sandpapers. The backing pad you see in the picture is also a Meguiar's backing pad, it's actually works great for the majority of people and their sanding projects. Plus as you can see, you can easily cut them to make your own custom sanding backing pad as you see I do.

full


What does Orange Peel look like?
This 1934 Ford was recently painted using a basecoat/clearcoat paint system and it has a ton of Orange Peel. I'll share the BEFORE towards the end of this sanding section and then share the AFTER pictures immediately afterwards but here's a couple of pictures of the front driver's side fender showing the level of orange peel.

full


Here's a close-up of the same section of paint above.
full


It's GO TIME!
No chairs, no sitting, no PowerPoint. After a lesson on how to correctly wet sand by hand, I turn the class loose and then walk around and watch. When I see someone doing it right, I let them know. When I find someone close, I pause them and then gently and politely tweak their technique. The best way to learn how to wet sand by hand is to just do it. The best way to become an expert at wet sanding by hand is to do it a LOT or get a job at a local body shop or custom paint shop.

full


full


full


full


full


full


full


full


full


full


full


full


full


full


full


full


full


full


full


full


full


Mike
 
Last edited:
Continued...

Second Step - Machine Dry Sanding using Eagle Abrasives by KOVAX with FLEX Cordless Sanders
After hand wet sanding with Nikken 2000, next up the class will learn to refine the hand sanding scratches by re-sanding by machine. For this they'll be using the Eagle Abrasives K-2500 Buflex 6" and 3" sanding discs. For tools they'll be using the FLEX FX3411 Cordless 1.6mm DA Sander with the KOVAX Medium Interface Pad and the FLEX PXE-80 Cordless Polisher with the optional 6mm random orbit drive unit and KOVAX Medium Interface Pads.

full


As you look through the fenders, note how after refining 2000 grit to 2500 grit, you can see the paint starting to become more reflective.

full


full


full


full


full


full


full


full


full


full


full


full


See how the paint is becoming shinier and more reflective?

full


full


full


Here's the final results after a 2-step sanding process

full


full


full


full


full


full


full


full


full


full


Mike
 
Last edited:
Continued...

Step 3: Remove sanding scratches
The next thing we need to do is remove all the sanding marks or sanding scratches to restore a rich, high-gloss finish. For this the class will be using the Dr. Beasley's CoreCut, which is a brand new fast cutting compound. To work the CoreCut the class will be using rotary polishers and wool cutting pads from Buff and Shine.

full


Technique Tip - Tape-off and Cover-up
Anytime you're using a rotary polisher, there can be some accidental product splatter from centrifugal force from the action of a single rotating direction of the buffing pad on a rotary polisher. To avoid getting splatter dots inside the grill where it will be all but impossible to clean, we start this aspect of the process

full


full


It's Rotary Go Time!
The class has already had a lot of time behind the rotary when they did the first paint correction step to the 1941 Chevy Streetrod. Now they get to build on that experience with more hands-on time using rotary polishers to remove their sanding marks. By the time anyone leaves one of these classes they know now to use the rotary polisher, when to use the rotary polisher and most important - they have CONFIDENCE when using this type of tool

full


full


full


full


full


full


Dr. Beasley's NSP CoreCut and CoreCut+
This is an incredibly fast cutting compound. It can be used with any type of tool or pad.

full


full


full


full


full


full


full


full


full


full


full


full


full


full


full


full


full


Mike
 
Last edited:
Continued...

Step 4 and 5: Machine polish and install the ceramic coating
Once we were satisfied 100% of the sanding scratches were removed, next up it's time to machine polish using foam pads on orbital polishers and Dr. Beasley's NSP 95 Primer.

As you look at the pictures, notice how clear and glossy the paint is becoming.

full


full


full


full


full


full


full


full


full


full


full


full


full


full


full


full


full


full


full


Mike
 
Last edited:
Continued...

Before Pictures
Here's a few pictures to show the level of Orange Peel in the paint before the class started.

full


full


full


full


full


full


full


full


full


full


full


full


full


full


full


full


full


full


Final Results
Here's the final results after a 2-step sanding process, compounding with wool pads, polishing with foam pads and sealing the paint with a ceramic coating.

full


full


full


full


full


Freaking Amazing Results Everyone!

full


Mike
 
Last edited:
Continued...

How to Restore Faded, Cloudy Headlights using a Rotary Polisher for the Sanding Step
Most people use some type of orbital sander or orbital polisher to sand faded, yellowed, oxidized headlights - and this approach will work. I share a way to do the sanding step using a rotary polisher. The key difference being - because the rotary polisher is gear-driven, there's simply ZERO sanding disc stalling like you get with orbital sanders and orbital polishers. Thus it's FASTER!

Outside the Dr. Beasley's O.R., there's an old Ford F150 parked. I'm not sure the year, but someone in the class thought it was about a 2000 or 2001? Regardless, the headlights are incredibly neglected, and it looks like these had an OEM clearcoat that has disintegrated or failed. So to me, this makes for a GREAT headlight training car, we simply had to take all our supplies to the truck since we didn't have the key to drive the truck into the shop. And "yes", the owner of the truck gave us permission to restore the headlights as a part of this class.

full


full


full


full


Factory OEM Clearcoat on the Headlights

full


Here you can see the jagged line between the underlying hard plastic lens and the OEM coating that is disintegrating or failing.

full


Machine Wet Sanding with a Rotary Polisher and Mirka Abralon Sanding Discs
First we spray a little soapy water onto the headlights.

full


Next we machine sand using 500, 1000, 2000 and 3000 Mirka Abralon sanding discs.

full


full


Next the class cuts the headlights using a wool pad on a rotary polisher with the NEW Dr. Beasley's NSP CoreCut Primer.

full


After removing 100% of the sanding scratches, next we remove the holograms and maximize gloss, clarity and smoothness of the lenses.

full


Dr. Beasley's Headlight Coating Kit
After all the sanding, cutting and polishing, next the class installs the Dr. Beasley's Headlight Coating. The first part is a Prep Spray, to ensure the plastic is surgically clean.

full


Then we apply the Headlight Coating

full


full


After waiting for about a minute, the class levels the coating and removes any excess.

full


full


Final Results
Not bad when you consider this truck is about a Quarter of a Century Old. :)

full


full


full


How to Safely Sand Headlights with a Rotary Polisher
Here's everything the class used for this process.

full


The SECRET is in the Foam Interface Pads
The secret to safely machine sanding plastic headlights using a rotary polisher is to simply use a foam interface pad between the backing plate and the sanding discs. I recommend 2 interface pads, but you can get away with just one interface pads or jump all the way up to 3 interface pads for maximum flexibility and conforming to any curves in the lens.

full


Dr. Beasley's Headlight Ceramic Coating Kit

full


NEW - Dr. Beasley's NSP Primers CoreCut
There are two new aggressive and very fast cutting compounds in the Dr. Beasley's product line, CoreCut and CoreCut+. For polishing after the compounding step, the class used Dr. Beasley's NSP 150 and then coated the headlights.

full


We also did this same process to the 2013 Mustang Convertible


BEFORE


full


full


full


full


AFTER

full


Mike
 
Last edited:
Continued...


Class is OVER!​


Thank you to everyone that attended this class. We appreciate that while going through the different class topics and working on so many cool and special interest cars, that everyone was focused on the task-at-hand and zero mistakes were made and every car came out looking freaking amazing!


Have a Great Time at the Most Hands-On Car Detailing Classes on planet Earth!​


Next classes are,

April 12th, 2025 – Matte Car Detailing Class – Chicago IL – $249.95 – Instructor Christyan Velasquez

April 19th, 2025 – 1-Day Auto Detailing Class – Chicago IL – $295.00 – Instructor Christyan Velasquez

April 25th, 2025 – Intro to PPF Detailing Class – Chicago IL – $550.00 – Instructor Christyan Velasquez

May 2nd & 3rd – 2-Day Paint Correction Class at the American Muscle Car Museum – Melbourne, FL – $1,295.00 – Instructors Mike Phillips, Jason Rose & Christian Camurovski

June 7th & 8th – 2 Day Extreme Boat Detailing Class – Stuart, FL – $1,295.00 – Instructor – Mike Phillips

September 20th & 21st – 2-Day Paint Correction & Ceramic Coating Class – Stuart, FL – $1,295.00 – Instructor Mike Phillips


My Personal Offer to Help

I’ve been answering car detailing questions professionally since 2002 and moving forward, if after reading this article you have any questions about polishing and waxing, or how to use an AIO, my contact information is below, reach out to me, I’m always happy to help.

Would You Like to Learn How to Machine Polish Like a Pro?

  • Would you like to take your detailing skills to a higher level?
  • Do you find you learn better by doing versus sitting in a chair looking at a PowerPoint presentation about car detailing?
Here at Dr. Beasley’s O.R., (Operating Room), in sunny Stuart, Florida, we teach the most hands-on car and boat detailing classes on planet Earth. And we prove it too. You can find write-ups on the Dr. Beasley’s Blog that photo-documents just how hands-on our classes are plus you’ll see the kinds of cars and boats you’ll be training on.

Click the link below to find the dates, locations, topics, and prices for all upcoming detailing classes.

Upcoming Detailing Classes – Prices – Info – Topics – Locations

And if you ever have any questions, always feel free to reach out to me personally via text, phone call or email.

I hope to see you in a future detailing class!

Sincerely,

Mike Phillips
Chief Education Officer for Dr. Beasley’s
Mike@drbeasleys.com
760-515-0444
 
Back
Top