Mak
Member
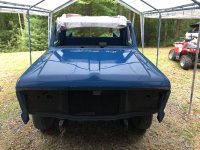
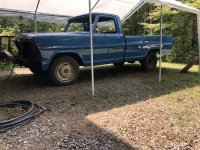
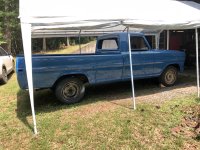
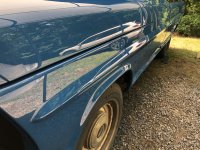
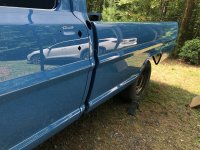
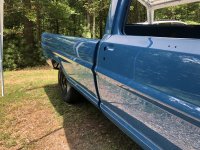
This is far from a professional quality job but it’s turned out to be a fair looking driver and about as good as I could have expected for my first paint job.
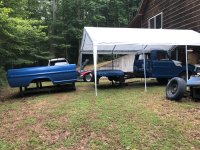
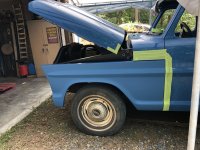
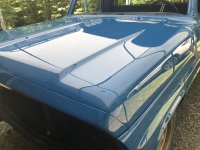
Starting to look like a truck again and I see some light at the end of the tunnel… My son came up and helped me get the hood mounted and bed back on the frame. We had originally scheduled to do on May the 4th, but my impatient grandson arrived two months eariy… needless to say I accomplished nothing on that trip. Thankful to say though that he is fine and we are up providing babysitting services through August. I’m trying to sneak in a couple days work each week though before we head back to FL.
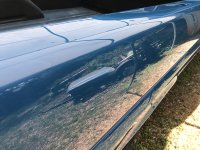
I’ve still got some tweaking to do on the panel fit, alignment and gaps. I have the cut & buff work completed on all but some smaller miscellaneous parts like the gas cap and bumper stone guard, etc Got the steering column reinstalled and the gas tank back in the cab. Have to pick up four different sizes of fuel lines so I can get the old and cut pieces reattached so I can start moving it under its own power again. I abandoned my previous tailgates and just ordered a new reproduction. Got it sprayed with epoxy and completed blocking and getting it flat. It took a LOT of work for a brand new part… Then one final spray of color coming this weekend…. I had originally tried to utilize the original tailgate and a spare to make one good one, but it was too far gone. Then spent a lot of time working on an original spare, but realized it was bowed after wasting a lot of hours…
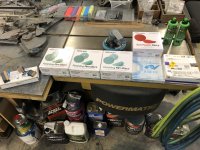
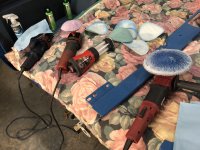
I also have to respray the leading edge of the hood. Fortunately I have a pinch weld seam I can use as the tape line when dealing with a bad burn through on the front corner. Also have some pigtails/random orbit swirls here and there in various spots I’ll need to hit again with the wool pad at some point in the future. For now though I’m going to quit while I’m ahead and get the rest done since they are minor and tough to see unless I get the viewing angle and lighting just right. Man, I’m having a hard time with the learning curve with the buffer…. Can’t ever see those remaining RO scratches until after I’ve polished with the foam pad. Frustrating after spending so much time carefully progressing through and making 12+ passes in opposite directions with the grits up through the Trizact 8000. Definitely seems to be as much of an art to the buffing stages as there is with laying the paint. Something learned only after many years of experience I guess. Still hope to get the timing right to get in one of Mike’s future classes. The knowledge here and direct input has sure been invaluable.
Maybe with some luck I’ll be able to finish before Spring depending on how often we can get back up here. Not looking forward to the glass reinstall or dealing with the side window felts and weatherstrips. Realized I have a huge list of parts to get ordered before I can get it all back together. That will have to wait for a follow-up trip. Gaskets and spacers for taillights and markers, carpet underlayment, window seals, etc, etc. Agonizing over how to deal with the chrome bits… rechrome my original parts or buy new? I don’t know what the differences are between a rechrome job vs just buying a new part which seems significantly cheaper…. How good is a reproduction bumper or door handles compared to the originals? Who makes the best quality replacements?
Oh well, if I can get it running again before we leave at the end of the month then I will feel like I finally made some real progress. Just having the bed back on the frame and the majority of the cut & buff complete feels like a big step.
Attachments
-
 IMG_2033.jpeg4.3 MB · Views: 6
 -
 IMG_0832.jpeg2.6 MB · Views: 7
 -
 IMG_1030.jpeg2.2 MB · Views: 6
 -
 IMG_2048.jpeg3.1 MB · Views: 5
 -
 IMG_2106.jpeg2.6 MB · Views: 4
 -
 IMG_2138.jpeg4.4 MB · Views: 3
 -
 IMG_2147.jpeg3.7 MB · Views: 3
 -
 IMG_2155.jpeg3.2 MB · Views: 3
 -
 IMG_2157.jpeg3.4 MB · Views: 3
 -
 IMG_2163.jpeg3.1 MB · Views: 3
 -
 IMG_2168.jpeg2.4 MB · Views: 4
 -
 IMG_2148.jpeg3.9 MB · Views: 5
 -
 IMG_4347.jpeg746.9 KB · Views: 7


