My guess is the previous owner's practice of maintaining the single stage paint using Penetrol/Linseed Oil is what's maintained it to the point it's in currently.
Some will argue that applying a seed oil to old single stage paint isn't the correct way, but at a minimum, having the oil present IN the paint has prevented oxidation.
Without the oil, the paint dries out and oxidizes.
I do agree that the oil has likely played a significant role in maintaining the paint in its current condition. From what I've seen, the Linseed Oil/Penetrol treatment seems to be quite common in the patina community, so much so that companies now produce their own versions, such as Poppy's Patina Shine Juice and Sweet Patina Sauce Patina Preserver, even if opinions differ on whether it's the "correct" approach from a detailing perspective.
To be honest, I never used to be a fan of patina. I've always been someone who preferred clean, polished paint and vehicles that looked as close to perfect as possible. However, after moving to Miami and experiencing the realities of daily driving and parking, my perspective has changed quite a bit. The number of scratches, door dings, and dents caused by other people's lack of care has led to more frustration than I care to admit.
As a result, I've gradually come to appreciate the appeal of patina, particularly on classic trucks. There's something refreshing about being able to enjoy and use the vehicle without constantly worrying about every mark or imperfection. In a strange way, I've found myself embracing the "dark side" and appreciating the character and history that comes with an honest, aged finish.
I would skip using the Comet Technique is there is NO visible, chalky looking oxidiation.
If the paint already has a clear/hard/shine - then the Comet Wash would be overkill.
For those that will read this into the future, look at how the paint on the recent Barn Find we used in our February 2026 class is or was chalky with oxidation.
Thanks for clearing that up. I was definitely leaning more towards a regular wash and clay bar treatment rather than the Comet wash, but I was still a bit confused about when the Comet technique was actually appropriate. Your explanation helps a lot, and I now understand it's more of an option for heavily oxidized paint rather than paint that is already holding some gloss and doesn't show significant chalky oxidation.
That barn find transformation from the February 2026 class was amazing! Seeing how much heavily oxidized single-stage paint can be brought back was really impressive, and it reinforced my long-standing interest in learning more about these techniques.
I'm very interested in attending one of your classes and will be signing up for the September class (provided there are still spots available by the time I've saved up for it over the next month or so).
The only single stage car we've detailed in a class in the past that could have benefited from the #7 treatment would have been the 1965 Plymouth Valiant Barn Find - but instead of using #7 to both gorge the vintage paint with oils and also at the same time ABRADE the paint via the rubbing action to remove the years/decades of oxidation.
But instead, we used the Comet Wash Technique. After the first buffing step, where now we could really see the paint clearly - we could then see this was a repainted car - not original paint. Couldn't tell until we carved off all the years of oxidation.
And while this repaint was still probably 20 years old, even without the #7 treatment the paint shined up real nice.
There is another issue with the #7 pre-soak treatment and that's 3M changed the original formula. The product used a plant oil that obviously came from something green or khaki colored (the color in the bottle was never uniform from year to year due to climatic changes in growing seasons), and while I spoke with a chemist at Meguiar's at the time of the change and he assured me the pertinent oil is still in the formula - it's just now the formula is white.
I'm not sure if I buy into this or not - but there's also nothing that can be done about it at this time.
I think the #7 Rub Down Technique is still a valid technique so if preserving this original paint is a priority - then I would do this,
Step 1: Wash & Dry - use a quality pH neutral car wash soap.
Step 2: #7 Rub Down Technique - repeat if results from first application and removal improve appearance.
Step 3: Upon looking at the results from the #7 treatment - determine if you want to machine polish or not.
Machine polishing is great for removing swirls and scratches, but if the paint is aged - it's possible you will not be able to remove all the swirls and scratches so machine polishing will simply remove more perfectly good paint.
If you do machine polish - be sure to do a super good Test Spot. I've come across old single stage apint that simply did NOT like machine polisign with anything - it would make the paint look cloudy.
So dial in your Test Spot and make sure you're getting the results you hope and dream about and if not - consider applying either a wax or sealant.
Thank you for the detailed explanation. That actually makes a lot of sense, particularly the point about not really knowing exactly what you're working with until you've had a chance to evaluate the paint more closely. The Valiant example was especially interesting because, like my truck, I don't really know the full history of the paint or what might be hiding beneath the surface. There is always the possibility that what appears to be original paint may actually be an older repaint, faux patina, or a combination of all.
I also appreciate the insight regarding the #7 formula change. Having spent a fair amount of time reading your articles and watching your videos on the #7 Rub Down Technique, I was curious why it didn't seem to be appearing as frequently in more recent projects. It sounds like the technique is still valid, but perhaps should be viewed as one tool in the toolbox rather than a mandatory step for every single-stage paint restoration.
Your suggested process aligns well with my primary goal, which is preservation rather than maximum correction. While I certainly wouldn't mind gaining some gloss and richness in the paint, I'm much more concerned with maintaining the character of the truck and preserving as much of the existing paint as possible.
The point about machine polishing is also very helpful. I think it's easy for people to get caught up chasing perfection, but on a 60-year-old truck there is only so much paint available to work with. Based on your advice, I'll approach machine polishing cautiously and only after evaluating the results of the #7 treatment. I'll also be sure to spend plenty of time on a test spot before committing to the entire truck.
The possibility of older single-stage paint becoming cloudy during machine polishing is something I wasn't aware of, so that's definitely valuable information and another reason to proceed conservatively.
I also want to thank you for outlining a clear process to follow. Having the steps broken down the way you have gives me a lot more confidence in moving forward with what will essentially be my first real paint correction project!
I've hand-polished plenty of cars over the years, but if I'm being honest, I mostly just followed the instructions on the bottle without having a deeper understanding of the products, paint systems, or the reasoning behind each step. I've been reading your articles and watching your videos for the better part of eight years now, so it's nice to finally feel like I have a practical roadmap to apply some of that knowledge.
One of the reasons I never really got around to doing much paint correction work is that I don't have my own garage. Living in a condo in Miami has its challenges, and the HOA generally doesn't appreciate residents doing much of anything automotive on the property. Between the lack of a dedicated workspace, access to power, and the usual condo restrictions, it's been a bit of a hurdle.
Question?
Can you share some pictures? You can even text them to me and then I'll resize and insert them for you.
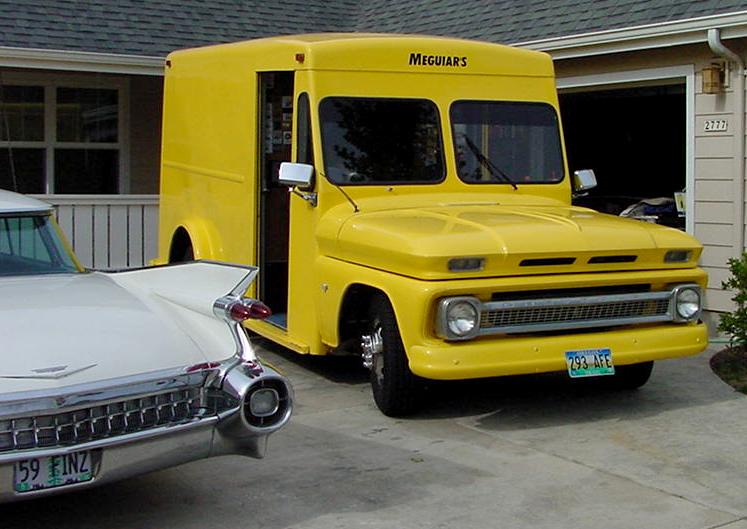
A good "front side angle shot" so everyone can see the actual truck and then maybe a few shots of the paint on various body panels.
Like this,
The Front Side Angle Shot - Photography for the Car Detailing World by Mike Phillips
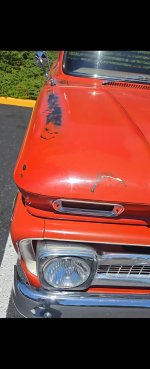
These are the photos I took when I purchased the truck. It's currently on its way to me (being transported), so I won't be able to take any better or more detailed pictures for a few days.
From my understanding, the truck would still have some of the Linseed Oil/Penetrol treatment on the paint in these pictures, so what you're seeing may not be a true representation of the paint's condition once that coating is removed.


Thank you again for taking the time to reply to my original post and for sharing your knowledge. I genuinely appreciate it.
I'll admit I'm a little star struck to be getting advice directly from you! I've been reading your articles and watching your videos for years, so having you take the time to walk me through a process for my own truck means a lot.
I'm hoping to attend your September class if there are still spots available by the time I've saved up for it. It would be great to meet you in person and learn from you directly.
Have a great day, and thanks again for all your help.