278 Pictures - 1-Day November 2025 Car Detailing Class - 3 Cars Detailed! - No Chairs! - ALL Hands-on!

More....


Detailometer BEFORE and AFTER Readings

BEFORE

full


full


full


AFTER
I had moved the Corvette outside for the owner to pick up after hours and before I left, I took the after readings i the same place that I took the before readings.

full


full


full


full


Where's the class pictures?
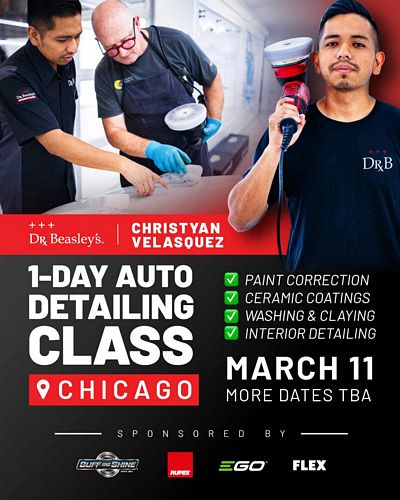
And this is what I mean when I say our classes are the MOST documented out of any other car detailing class anywhere else on planet Earth. No other company goes to this extent to show you what their classes look like or what you'll get to do when you take their class. Sure, you can find the AD PICTURE - this is the ad that targets people wanting to take a detailing class but it's like the only picture you can go by and it's usually some person holding a buffer on the hood of a car. The problem is, the actual class doesn't reflect this ad. What you discover when you take the class is you're going to sit in a chair, watch a PowerPoint presentation and then if you're lucky, after the lunch break you'll get to work on a demo hood, or a test panel or if you're really lucky, a rental car or some car that was in the parking lot. So do your research, don't disappoint yourself by taking an academic class.

So do your research and if after looking at the pictures you discover this is the type of class you want to take, then clear your schedule and get signed up for a future class.


Click here to get signed up for a future class


Mike
 
More...

Corvette Tinted Clearcoats
When the team switched over to WHITE foam polishing pads and because the Dr. Beasley's Primers are all WHITE - after the team did some buffing, I saw a YELLOW color on the face of the pads?

My FEAR is they had buffed through the clearcoat and exposed the yellow basecoat. But I did a quick search on the Interweb and found that the 2007 Corvette came with a TINTED CLEARCOAT and this was the yellow color we were seeing on the face of the buffing pads. COMPLETELY NORMAL - NO PROBLEMS.

full


Anytime you're buffing on a tinted clearcoat, you'll see the color of the tint on the face of the buffing pad. What they do when they paint the car, to give the paint a special-effects appearance, they put a little color from the basecoat into the clearcoat paint - thus tinted clearcoat.

full


See this thread on CorvetteForum.com

Tinted Coat Paint


Mike
 
More...


Topic 3 - Car Number 3 - Budget 1-Step Ceramic AIO Paint Correction
At this point in the class, these folks have already learned,

1: Show Car Detailing - Multiple-Step Process & Ceramic Coating
2: 2-Step Paint Correction & Ceramic Coatings

Now it's time to learn a faster way to detail a car by using a one-step ceramic AIO. For this the students will be using the Dr. Beasley's Z1 and their choice of orbital polisher with Buff and Shine EdgeGuard white foam polishing/finishing pads.

The Biggest Problem for Anyone NEW to Detailing for Dollars
The biggest problem I see in the professional car detailing industry is people new to the business don't understand the concept or business model of having multiple menu items, also called packages at different price points. The different price points reflect the amount of time needed to perform the paint correction and ceramic coating process.

The problem most people have when starting out is becuase they don't have or understand the concept of offering different packages for their customrs, they tend to do show car detailing, that is the MOST steps they can do for EVERY car. And this means they're making about $1.00 an hour. You'll get burnt out and quit using this business model. A part of having at least 3 different levels of paint correction service is when selling the budget package, you don't educate the customer that this budget package will NOT remove all the deeper scratches. It will remove millions of shallow scratches, but the deeper scratches will remain and after removing the millions of shallow scratches, the deeper scratches that remain will stand out like a Sore Thumb. If you didn't educate the customer about this reality, when they pick up the car, and see deeper scratches still remaining, they may not be happy and even feel ripped off. This is your fault. You must educate your customers and set real-world expectations.

Also let all your potential customers know if they want ALL of the swirls and scratches removed, even the deeper defects, you're more than happy to do this for them, but it's at a HIGHER PRICE POINT. Once your potential customer understands this, they can choose the package that best fits their budget and if they pick an entry level package, they will understand this will not remove 100% of the defects - BUT - also let them know the paint will still look freaking amazing after you work your magic.

The 3 Minimum Packages or Approaches
For professionals, I use the term packages, as these should be your offerings for paying customers depending upon their car, their wants/needs and their budget. For Do-it-Yourselfers, then I use the word approaches. There's no difference between packages and approaches, the big picture idea is because a do-it-yourselfer isn't doing this for money, it's not really a package. BUT a lot of do-it-yourselfers have multiple cars and for some cars they want to do the show car detailing APPROACH and for other cars, they may want to do the 2-Step Paint Correction and Ceramic Coating APPROACH and for their mundane daily driver, they many want to use a Budge or one-step APPROACH. So, packages for pros and approaches for DIYers.


For this next and last car, the class will be using the budget or 1-step approach to detail this Camaro. This means the class is NOT going to remove the deeper swirls and scratches and it's also not going to remove the Orange Peel in the custom paint job on this Camaro. But it's still going to look amazing.

full


Mike
 
More...

1968 Camaro Rally Sport
Here's the training car. This is a 1968 Camaro race car with a custom basecoat/clearcoat paint job. The owner told me when he and his father painted this Camaro, they did NOT spray a lot of clearcoat paint. Thus, I chose this car to teach how to use a 1-Step Ceramic AIO to buff out the car. If you read through this article, you'll see that I chose the Dodge Stealth for the first car because the paint was in horrible condition. Then we used a 2007 Corvette for the second topic, because the paint wasn't too bad.

I get cars that are in different conditions of paint quality to MATCH the topic being taught. There is a method to the madness. :)

Here's our victim over here in the corner, just waiting for her turn at the dance.

full


BEFORE PICTURES - Photo documentation
Here's BEFORE pictures taken both outside under bright sunlight as well as inside the shop using bright overhead LED lights.

Outside Pictures showing HOLOGRAMS caused by finishing with a rotary polisher

full


full


full


full


full


full


full


full


Inside Pictures

full


full


full


full


full


full


full


full


Detailometer BEFORE Readings

full


full


full


Ouch! There's lots of room for improvement, even though all we're doing is a SINGLE paint correction step.

full


Mike
 
Last edited:
More...

It's Go TIME!
No chairs. Zero sitting. No PowerPoint. If you want a comfy chair, please take some other car detailing class.

full


Dr. Beasley's One-Step Ceramic AIO

full


Here's Eugene and Mark tackling the front clip. Looks like both gentlemen have chosen the FLEX Supa BEAST as their tool of choice.

full


Technique Tip - When buffing out large panels - start in the MIDDLE and work your way outwards. Don't start at the outer edges and work you way to the middle. You can see Eugene, Nelson and even Doug all the way at the back of the driver's side of the car - ALL starting in the middle of the panels and working their way outward.

full


Why I like Buff and Shine EdgeGuard Foam Buffing Pads
Look carefully at Eugene as he tackles the vertical side of the air induction scoop on the hood. Look where the edge of the buffing pad is meeting the horizontal portion of the hood where it meets the air scoop.

full


full


See it?
See where the edge of the pad is making contact with both the vertical portion and also the horizontal portion of the paint?

full


EdgeGuard - Safer Buffing of Complex Body Panels
Not only can Eugene buff out the vertical surface but he's also able to buff out the concave portion where the vertical side meets the horizontal portion of the hood. More paint correction and you're SAFE. (you still need to focus on the task at hand when buffing these areas)

full


Butt Time
Thank you, Nicoloas, for always getting the lower body panels, less fun than STANDING but vitally important. I call this Butt Time. I hate Butt Time, but it's part of the job. And of course, it helps to have a cushion to sit on instead of sitting on hard concrete.

full


Looks like Doug has chosen the FLEX Supa BEAST for the roof.

full


full


All cars in our classes get Topical Glass Polishing
I do teach Sub-Surface Glass Polishing for these classes, but this is a FREE, BONUS class that takes place the day BEFORE the actual class. And the reason why is because, as you can see by these pictures, there's ZERO extra time to cover a time-intensive topic like Sub-Surface Glass Polishing.

full


Looks like Walter has chosen the FLEX Supa BEAST. Nelson has chose the RUPES Mille and Juan has chosen the FLEX Supa BEAST. I care not what polisher you like; my job is to simply get the polishers into your hands so you can get real-world experience with the tools so you can have an authentic, real-world opinion on the different tools, not just conjecture.

full


Mike
 
Last edited:
More...

Here's the Final Results!
Not bad at all for a simple, one-step process.

full


full


full


And here's the tired team that performed the one-step paint correction and ceramic coating process.

full


They're smiling, but I can guarantee you - they are tired!
We started at 7:30am SHARP and outside of a short lunch break, there's zero downtime.

full


Mike
 
Last edited:
More...

Here's videos and pictures from the Sub-Surface Glass Polishing Class held the day before this class.

Removing Wiper Scratches out of the Windshield on a 1964 Corvette Class with Mike Phillips


BEFORE Video


Process & After Video


Before & After Pictures
Below are the before and after pictures from this glass polishing class here at Dr. Beasley's in Stuart, Florida. This is a FREE/BONUS class that takes place the day BEFORE the actual class. There's simply not enough time to ADD this topic to the full schedule of topics we already cover in our classes. I hold these the day before the for anyone that wants to attend and because MOST of the people that historically taking a class I teach are flying here from other states, or other countries.

For example, in this class, Nelson flew here from Bogota, Columbia and Nicolas flew here from Buenos Airs Argentina. I get the car, I get her prepped, if anyone taking the actual class would like to learn how to take scratches out of glass, then it's up to them to figure out their travel schedule and get here.


Here's the victim - an all original 1964 Covette

full


BEFORE PICTURES
In the picture below, you can EASILY see the wiper scratches as they form an ARC pattern that mimic the way the wiper blades move over the glass. As I type, this car, and thus this original glass windshield are 62 years old. At some point over the last 62 years, the wipers either became worn-out enough to cause scratching, or some kind of airborne debris, like beach sand, (common to coastal towns and the desert), is blown onto the car. This contamination will land on the top portion of the rubber blade and the next time the wipers are turned on, it rubs any dirt or sand over the glass and overtime, you end up with some pretty bad wiper scratches in the glass of the windshield.

full


full


Not only are their wiper scratches in an arc pattern, there's also random scratches throughout the windshield.

full


full


full


full


full


full


full


full


full


full


full


full


full


full


full


full


full


Passenger Side
The passenger side actually had some scratches that are deep enough, if you drag your fingernail over the scratch, your fingernail will drop INTO the scratch. If this happens, the scratch is deep enough that the only time-efficient method to remove the scratch 100% is to machine sand the entire windshield and then buff out your sanding scratches. I do NOT recommend this for 99.9% of Earth's population. Too risky.

full


A better plan
When you have deeper scratches in a classic car windshield or even side or back glass, a safer approach is to lower your expectations, decide you'll LIVE with the deeper scratches and then do you best work to machine polish the glass. A thorough machine polishing using a dedicated glass polish with a rayon pad on a rotary polisher will easily remove the millions of shallow scratches and will clear-up the deeper scratches that polishing along will not remove.

full


More to come....


Mike
 
More...

How to Prep a Car for Glass Polishing
Here's what I do, you can borrow this approach if you like or skip it and pay the price later.

Step 1: Use painter's tape and tape around the trim on the windshield.

Step 2: Cover the car in a plastic car cover or drop cloth.

Step 3: Cut out the plastic around the windshield and then tape the plastic to the tape frame you've already applied to the outside of the windshield. It's faster and easier to tape the plastic to tape already applied to the window frame than it is to try to tape the edge of the plastic to the actual window frame.

full


full


full


full


full


full


full


More to come...

Mike
 
More...

It's Go TIME!

Up first are Eugene and Doug. Eugene is using the RUPES rotary polisher while Gene is using the FLEX rotary polisher.

full


full


full


full


See the Nr. 00002 on the sticker?
This is the Number #2 FLEX PE-150 corded rotary polisher given to me by Bob Eichelberg, formerly with FLEX, retired now. Thanks Bob!

full


What Kind of Polish?
In order to remove scratches out of glass you need a dedicated glass polish. A dedicated glass polish is a polish specifically formulated to abrade or chemically melt glass. There are two types of glass polishes that I've used that actually work. There are cerium oxide glass polishes and there's Dr. Beasley's GL Glass Polish that does NOT use cerium oxide but instead uses a unique ultra-hard nanoparticle abrasive technology.

From the Dr. Beasley's website

NSP GL Glass Polish
PATENTED NANOPARTICLE ABRASIVES FOR A FASTER, MORE EFFICIENT CUT
After rigorously testing multiple abrasive types, Jim sourced a unique, ultra-hard nanoparticle abrasive with diverse applications. This patented technology is used by the Air Force to polish F-35 fighter jet canopies for crystal clear in-flight visibility. Through careful engineering, Jim adapted the technology for automotive glass. Testing the technologies side-by-side, he found the patented nanoparticle abrasive to be superior to cerium oxide in speed, efficiency and clarity.

full


Urban Legends
I've been doing sub-surface and topical glass polishing for DECADES. Anytime I share any glass polishing project on any social media platforms, like Facebook, Instagram and YouTube, there's always an expert that states

Any compound will work

Of course, this is NOT true and of course, the expert NEVER backs up what they state by showing their process in any way, shape or form. It's always the same thing, lots of talk, no walk.


Lead by example
I never aske my class to do anything I'm not willing to do myself. Sub-surface glass polishing requires some muscle, tenacity and time. I'm willing to take on these types of projects and after taking this class, I'm confident the students taking our classes will know what to do and how to do and just as important, they'll know how much time is involved as well as physical work.

full


Here's Eugene, still working on the passenger side, while Nelson, who travelled all the way from Bogota, Columbia to take this class has now joined us and is working on the driver's side.

full


full


Switch Sides
You can see Nelson and Eugene have switched sides. Running a rotary polisher on an glass windshield at an ANGLE - stresses your deltoid muscles as you use your arm to press the rotary against the glass. A trick I use and teach is to switch sides and use the other arm for a while and if you feel your muscles getting tired, switch again. When I work by myself, I do this same thing with two workstations set up on each side. This way I can simply move from side-to-side without having to drag my tools, pads and towels from side to side.

full


Juan has joined us next. Juan came all the way from Kentucky to take this class.

full


full


full


Time to de-tape and check out the results
It's now late in the afternoon and time to wrap-up the glass polishing class.

full


Mike
 
More...


Here are the final results!

full


full


full


full


full


full


full


full


full


Accurate Photography
Here's before and after with the car parked in the exact same spot so the overhead LED light shines onto the windshield in the exact same spot.


Before

full


After

full


full


Here's the supplies you'll need...
  • Dr. Beasley's NSP GL
  • Rotary polisher
  • Foam interface pad
  • Rayon glass polishing discs
  • Glass cleaner and lots of microfiber towels

full


My comments
First, let's put this project in context. I think it's accurate to say, this is the first time for all of these people to do Sub-Surface Glass Polishing. Polishing scratches out of glass is nothing like polishing scratches out of car paint. Glass is super hard, and it doesn't abrade or polish like car paint. Due to the hardness of the glass, polishing a windshield out in the condition this windshield was in before we started will take both time and perspirations. But with enough time, you can remove the bulk of the swirls and scratches. The only defects left behind are the deeper scratches and this should be expected.

My opinion is, knowing this was each person's first time doing this type of work, they did GREAT! And more important, when they leave this class, they'll possess a brand-new skill that can help them moving forward anytime they are asked if they can remove scratches out of the glass on classic cars, muscle cars and streetrods.


Thanks everyone!

Mike
 
Back
Top