- Admin
- #1
- Joined
- May 21, 2021
- Messages
- 1,467
- Reaction score
- 799
- Points
- 113
- Location
- Stuart, Florida
- Website
- themikephillipsforum.com
How to Polish Paint by Hand - Written on Friday, October 28th, 1994
Below is the original version of the article.
Article: 6811 of rec.autos.misc
From: mike_d_phillips%80@hp6400.desk.hp.com (mike phillips)
Subject: How to Polish Paint by Hand (long)
Date: Fri, 28 Oct 1994 16:42:05 GMT
How to Polish Paint by Hand
~~~~~~~~~~~~~~~~~~~~~~~~~~~
First of all,... what is "Polishing Paint ??? the term is thrown around so
loosely. When your waxing paint, are you "Polishing" paint ???
I think simply put, polishing paint is the process by which the surface of the
paint is; through a series of abrading and/or cleaning processes, brought to
a smooth, clear and glossy finish.
There are many products available for this process, some work really well,
some do not.
There are many opinions on "How To" do this, some work really well while
others do not.
Polishing paint to a very high degree or state of "Flawlessnes" has in the past
been a mystery. Its not that the products haven't been available, for they
have been for 50 years or so. The problem has been getting good advise,.. in
other words finding or getting good and true working knowledge on "What to
do" and "How to do it".
Many hard core automotive enthusiest (A.E.'s or car nuts if you own an old
chevy) want and desire clear glossy flawless finishes, the kind that look as
though their "Wet". But even more people would just like to know how to do
good basic maintainence to; make it look good, preserve their finish and
protect their investment.
Whether you want a "Flawless Finish" or just want to know how to take care
of your paint finish the "Best" way possible, you need to know what polishing
is, and how to do it.
What Polishing Paint is
~~~~~~~~~~~~~~~~~~~~~~~
Polishing paint is "Scratching Paint"
Thats right. When you polish paint, to one degree or another, you are
scratching/microscratching the surface. If you do not see this scratching
taking place, it could be for one or more of the following reasons;
1. The wax or polish you are using is successfully filling in and sealing
these fine scratches you incur in the process.
2. The finish you are working on is not "smooth" enough to allow you to visibly
see these fine scratchess.
Regardless, the important point being that, the scratching takes place and you
understand the scratching is taking place.
The secret then to polishing paint is to do it in such a way that you put in the
least amount of scratches possible and you keep the 'depth' of the scratches
to a minimum.
The way you do this is to;
* use non-abrasive polishes and waxes
* use soft 100% terry cloth in all the polishing processes, this would
include both applying and removing polishes and waxes.
* use application and removal procedures that are controlled, methodical
and gentle.
Okay, so the products I use and recommend are the Meguiar's Mirror Glaze
Professional Line of products, (the tan bottle with the #Numbers)
If you already have a product line you are familiar with and happy with by all
means keep on using it.
One quick reason I choose this procuct line is; they are "Oil Based"
cleaners, polishes and waxes, this oil base provides a very important
benifit which is it acts as a "Lubricant" between the surface of the paint
and/or the application pad or removal cloth.
The application and removal products are; the round terry cloth wax applicators
with the foam inside, available at most auto parts stores for about a buck, and
your softest 100% terry cloth bath towels out of the closet next to your shower
facilities. If your married, either take the towels when your wife is out of
the house or purchase some new ones to replace the old ones you are going to
use. (old ones are better than brand new ones because their already 'broke in')
By using these three things you have already reduced the the amount and
depth of scratching that takes place in the polishing process. So product
choice is one way to reduce the amount of scratches and the depth of these
scratches.
Next is the "Way" or "Method" you use for applying and removing polishes
and waxes.
Most folks I have observed, (myself included before I learned differently)
apply products by using random circular motions with the application pad.
Currently their is an "Infomercial" on t.v. staring Dennis Weaver selling
a product called "Autofom". If you get a chance, watch the people in the ad
as they use the product,... how are they applying it ??? In circles. There is
one segment that shows 2 people "happily" applying Autofom to the hoods
of their cars in "Random" "Circular" motions. They think they are "Doing
their Best" when the truth is they are not only scratching the hell out of
their finish they are putting in random circular scratches all over the place
that will in time "Look like Hell".
Dennis Weaver isn't a polishing expert and neither is Autofom, if they really
knew what they were talking about they would have instructed their actors on
how to "Do it" correctly. But thats okay, Dennis Weaver is an actor and
Autofom is a Marketing/Consumer company. Their goal is to "Make Money"
they do this by convincing you (selling you) to buy their product.
They also seem to recommend a piece of foam over terry cloth for applying
their product. Yes foam will work and can be used, it just that the foam
covered terry cloth wax pads for a buck are better.
Anyway I use this to demonstrate how we learn to do things the "Wrong Way"
and thats by watching someone else do it wrong and then copying them.
(slam slam slam)
This goes back to what I said earlier, achieving a flawless fininsh or just
doing good basic maintainence isn't a mystery, finding and getting good advise
in other words finding good and true working knowledge on what to do and how
to do it is the problem.
So just how is it supposed to be done ? What is the correct/best way to Polish
your cars finish?
To be continued..........
Mike (I have to go to a meeting) Phillips
*=*=*=*=*=*=*=*=*=*=*=*=*=*=*=*=*=*=*=*=*=*=*=*=*=*=*=*=*=*=*=*=*=*=*=*=*=*=*=
Article: 6908 of rec.autos.misc
From: mike_d_phillips%80@hp6400.desk.hp.com (Mike Phillips)
Subject: How to polish paint by hand continued
Date: Sat, 29 Oct 1994 03:32:11 GMT
How to Polish Paint by hand,...continued
So just how is it supposed to be done???
Straight Lines. This may or may not sound right to you but bare with
me,
If you polish paint using random circular motions you will have
random circular scratches throughout the whole finish. These
scratches can be seen at any Angle, at any Height, in any Light.
If however you polish in straight line motions, going in the direction
of the length of the car, you will have to be at the right angle, the right
height, and have the right light to see them.
Its as simple as that, but this means that you have to consciencely
make the effort to do this everytime. I can speak from experience
that everytime I start to polish, I have a tendency to start making
circular motions, I have developed the habit to recognize this and
"Stop". I then internalize what I am doing, why I am doing it and
proceed in "Straight Line Motions" in the direction of the length of
the car. It is a hard habit to start if you have been polishing in random
circular motions for years.
I have received lots of e-mail asking how to get rid of "Swirl"
scratches. This is actually not specifically what their problem is.
The 2 most common scratch problems are "Buffer Swirl" caused by
a rotary buffer using wool pads and usually some sort of abrasive.
It can be caused by the fibers in the wool pad all by themselves.
The wool fibers, (thousands of them) Are An Abrasive in and of
themselves. Thats why you cant achieve a swirl free finish or
"REMOVE" buffer swirl using a wool pad, it can only be done with
a Foam Pad. Meguiar's realized this and came out with the first
foam buffing pad way back in 1965.
The other common scratch, the ones referred to me, can better be
described as "Cob Web" Scratches, "Cobwebbing" or "Spiderweb"
Scratches". After the car is washed and you look at it in the sun
you will usually see a hazy scratchy pattern that looks somewhat like
a spider web. These are caused by random circular motions when
you, Wash, Polish, and/or Remove polishes and waxes.
So instead of trying to remove spiderweb scractes, dont put them
in, in the first place.
If the paint is soft ie workable, you can change these random circular
scratches into straightline scratches just by switching over to straight-
line motions,
If your paint is a hard paint, you have a scratch problem. I have
addressed the problem/characteristics of hard paints which include
clearcoats in earlier posts but to sum it up I will go on record to say
"It is impossible to remove a scratch from a clearcoat by "Hand"
without leaving another scratch".
Hey, the masses wanted clearcoats so now we have them. Not my
fault.
So, use Straight line motions when you wash, polish and wax the finish.
For wiping off, its hard to not make random motions because you
are always trying to "Break" the hold the polish or wax has on the paint.
2 things, though,
1, after you "Break" and remove MOST of the polish or wax off, you
can then go to a straight line motion for wiping off the rest of the
residual polish or wax. You should at this time either be using a clean,
and I mean very clean side of the towel or start using a fresh
uncontaminated towel for the finish wiping. Always seek out your
softest towels and dedicate them for final wiping.
2, The polish is a lubricant, so even though you are removing it, it is
still sort of liquid (see How to apply and remove #7) and lubricating
the surface - as - you are removing it, this helps to reduce scratching.
Also,.. Wax is a "Dry Lubricant" so even though you are "Breaking"
"IT" off, "IT" is helping to provide lubrication between your towel and
the freshly waxed surface of the paint.
Any of that make sense ???? It has taken me years to figure it all out
and then regurgitate it out in a way someone else can understand it
without me personally standing there and showing them as I explain it.
I am sure you can all understand this would be much easier to show
and tell one on one.
One more thing, Use straight line motions in the direction of the
length of the car,...except.... when you have to polish a small area
or a long thin area where the length of this area is NOT in the direction
of the length of the car.
Example, say you have a sunroof, the area between the front lip of the
sunroof to the edge of the roof where the windshield starts, is about
4 to 8 inches wide, and as long as the sunroof, dont make straight line
motions in the direction of the length of the car here, I mean you can
if you want to, but it is easier to go ahead and polish in straightlline
motions in the directions of the "Length of the Panel". It will be a lot
easier and wont make that much difference.
Another thing, although I just told everyone to use straight line motions
when polishing and waxing, you can use circular motions in the
beginning to "help spread" the polish or wax around in the area you
are going to be polishing. At this point however you are not really
applying any preasure, you are just spreading the product around
so its not all in one pile. After you gently spread it around, then
proceed to polish.
And just "How Do You Polish" or "Wax" the surface of paint ???
Like this, pretend your wife or your girlfriend has a mild sunburn on
her back, she comes to you for help, her skin is naturally soft and
tender, but right now its a little "Dry" and a little "Sensitive", so you
are going to apply some moistureizing skin lotion. She drops her
bikini top, and lays face down on the bed, you gently pour some
lotion onto her back, you carefully and ever so gently "spread" the
most of it around, then you carefully, gently and with love rub the lotion
across and "into" the pores of her skin. You go back and forth in
straight lines, in the direction of the length of her body until the whole
area is covered and saturated with lotion.
When your through you allow it to soak in and then help her put her
top back on,..... maybe.
Of course in the case of the car, you will have to wipe of the excess
and the car won't give you a kiss when your through.
How much to do.....
Do a section at a time, this section can be about 1' by 1' or larger or
smaller depending on the panel and you preference, just don't get
wacky and try to do to large an area at one time or you will end up
not knowing how much attention each area received.
Do the whole car, thats right, do the whole car, and then remove.
In the case of a polish like #7, #3 or #9 you don't have to let it dry
before wiping it off, (it wont really dry) in the case of a wax you
should let it dry completely before wiping it off. Curing times for
waxes vary between; kind of wax, humidity, air flow, tempature, and
so on....
Thats all, I think, I hope this is helpfull to someone out there, It does
work.
Any questions ??? please post them on the net, I dont have time
to stay caught up on E-Mail right now and probably wont until after
I have published my firt edition of "The Art of Polishing Paint".
I do however have time to read my favorite bulletin boards, and will
answer any questions posted here.
Thank you
Mike
*=*=*=*=*=*=*=*=*=*=*=*=*=*=*=*=*=*=*=*=*=*=*=*=*=*=*=*=*=*=*=*=*=*=*=*=*=*=*=
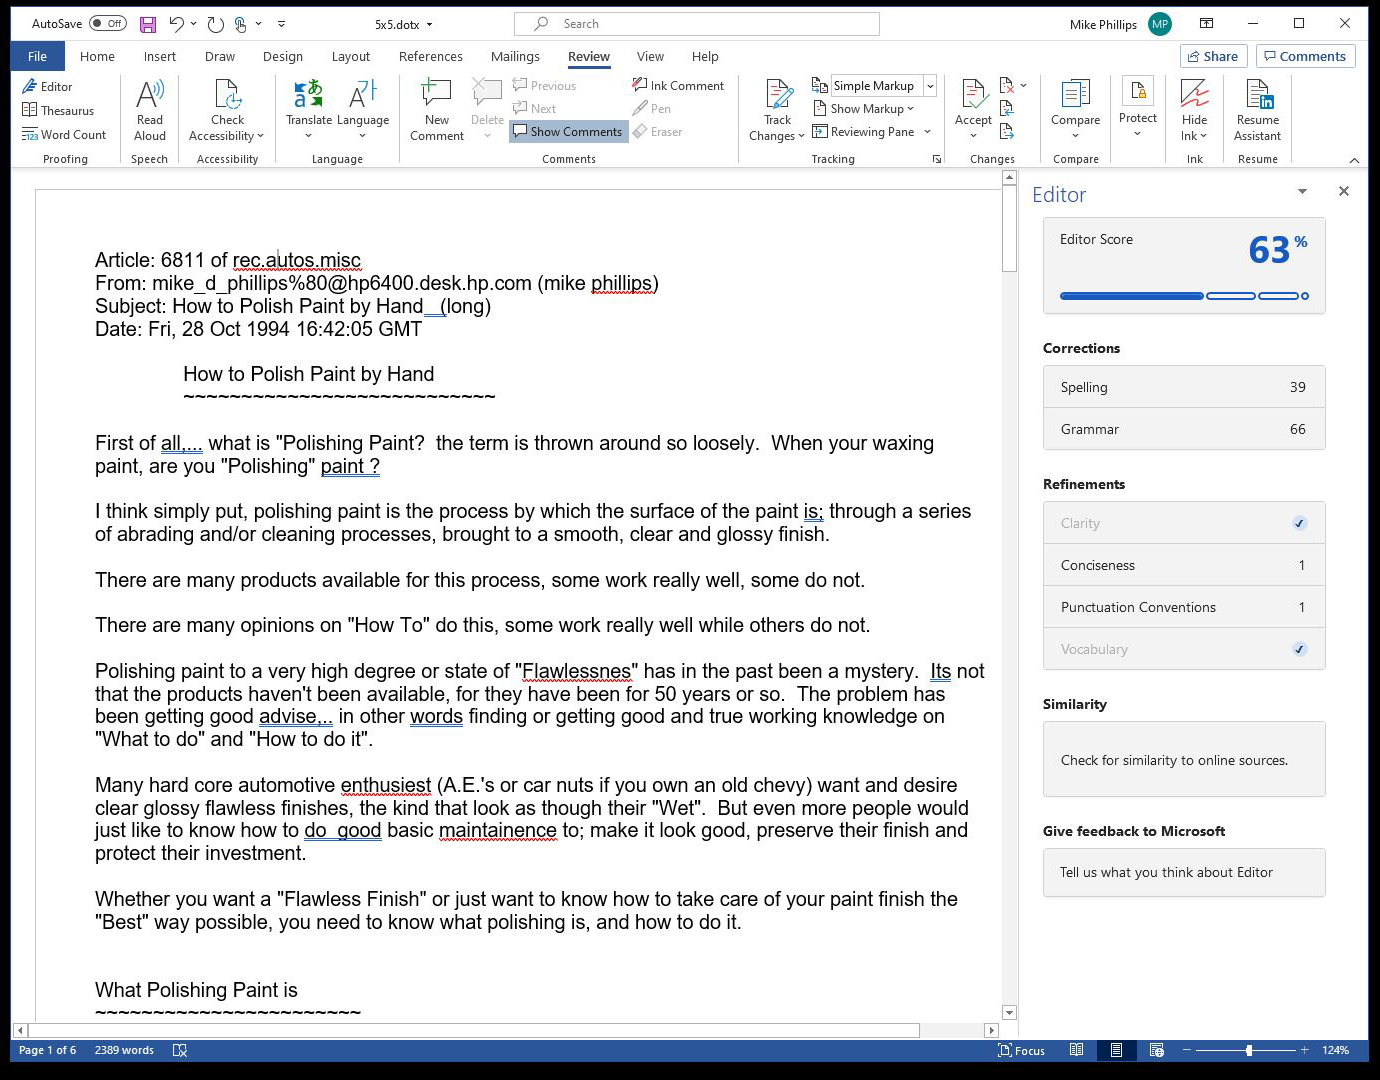
Here's a screenshot of the results after running the text through the MS Word Editor.
Below is the original version of the article.
Article: 6811 of rec.autos.misc
From: mike_d_phillips%80@hp6400.desk.hp.com (mike phillips)
Subject: How to Polish Paint by Hand (long)
Date: Fri, 28 Oct 1994 16:42:05 GMT
How to Polish Paint by Hand
~~~~~~~~~~~~~~~~~~~~~~~~~~~
First of all,... what is "Polishing Paint ??? the term is thrown around so
loosely. When your waxing paint, are you "Polishing" paint ???
I think simply put, polishing paint is the process by which the surface of the
paint is; through a series of abrading and/or cleaning processes, brought to
a smooth, clear and glossy finish.
There are many products available for this process, some work really well,
some do not.
There are many opinions on "How To" do this, some work really well while
others do not.
Polishing paint to a very high degree or state of "Flawlessnes" has in the past
been a mystery. Its not that the products haven't been available, for they
have been for 50 years or so. The problem has been getting good advise,.. in
other words finding or getting good and true working knowledge on "What to
do" and "How to do it".
Many hard core automotive enthusiest (A.E.'s or car nuts if you own an old
chevy) want and desire clear glossy flawless finishes, the kind that look as
though their "Wet". But even more people would just like to know how to do
good basic maintainence to; make it look good, preserve their finish and
protect their investment.
Whether you want a "Flawless Finish" or just want to know how to take care
of your paint finish the "Best" way possible, you need to know what polishing
is, and how to do it.
What Polishing Paint is
~~~~~~~~~~~~~~~~~~~~~~~
Polishing paint is "Scratching Paint"
Thats right. When you polish paint, to one degree or another, you are
scratching/microscratching the surface. If you do not see this scratching
taking place, it could be for one or more of the following reasons;
1. The wax or polish you are using is successfully filling in and sealing
these fine scratches you incur in the process.
2. The finish you are working on is not "smooth" enough to allow you to visibly
see these fine scratchess.
Regardless, the important point being that, the scratching takes place and you
understand the scratching is taking place.
The secret then to polishing paint is to do it in such a way that you put in the
least amount of scratches possible and you keep the 'depth' of the scratches
to a minimum.
The way you do this is to;
* use non-abrasive polishes and waxes
* use soft 100% terry cloth in all the polishing processes, this would
include both applying and removing polishes and waxes.
* use application and removal procedures that are controlled, methodical
and gentle.
Okay, so the products I use and recommend are the Meguiar's Mirror Glaze
Professional Line of products, (the tan bottle with the #Numbers)
If you already have a product line you are familiar with and happy with by all
means keep on using it.
One quick reason I choose this procuct line is; they are "Oil Based"
cleaners, polishes and waxes, this oil base provides a very important
benifit which is it acts as a "Lubricant" between the surface of the paint
and/or the application pad or removal cloth.
The application and removal products are; the round terry cloth wax applicators
with the foam inside, available at most auto parts stores for about a buck, and
your softest 100% terry cloth bath towels out of the closet next to your shower
facilities. If your married, either take the towels when your wife is out of
the house or purchase some new ones to replace the old ones you are going to
use. (old ones are better than brand new ones because their already 'broke in')
By using these three things you have already reduced the the amount and
depth of scratching that takes place in the polishing process. So product
choice is one way to reduce the amount of scratches and the depth of these
scratches.
Next is the "Way" or "Method" you use for applying and removing polishes
and waxes.
Most folks I have observed, (myself included before I learned differently)
apply products by using random circular motions with the application pad.
Currently their is an "Infomercial" on t.v. staring Dennis Weaver selling
a product called "Autofom". If you get a chance, watch the people in the ad
as they use the product,... how are they applying it ??? In circles. There is
one segment that shows 2 people "happily" applying Autofom to the hoods
of their cars in "Random" "Circular" motions. They think they are "Doing
their Best" when the truth is they are not only scratching the hell out of
their finish they are putting in random circular scratches all over the place
that will in time "Look like Hell".
Dennis Weaver isn't a polishing expert and neither is Autofom, if they really
knew what they were talking about they would have instructed their actors on
how to "Do it" correctly. But thats okay, Dennis Weaver is an actor and
Autofom is a Marketing/Consumer company. Their goal is to "Make Money"
they do this by convincing you (selling you) to buy their product.
They also seem to recommend a piece of foam over terry cloth for applying
their product. Yes foam will work and can be used, it just that the foam
covered terry cloth wax pads for a buck are better.
Anyway I use this to demonstrate how we learn to do things the "Wrong Way"
and thats by watching someone else do it wrong and then copying them.
(slam slam slam)
This goes back to what I said earlier, achieving a flawless fininsh or just
doing good basic maintainence isn't a mystery, finding and getting good advise
in other words finding good and true working knowledge on what to do and how
to do it is the problem.
So just how is it supposed to be done ? What is the correct/best way to Polish
your cars finish?
To be continued..........
Mike (I have to go to a meeting) Phillips
*=*=*=*=*=*=*=*=*=*=*=*=*=*=*=*=*=*=*=*=*=*=*=*=*=*=*=*=*=*=*=*=*=*=*=*=*=*=*=
Article: 6908 of rec.autos.misc
From: mike_d_phillips%80@hp6400.desk.hp.com (Mike Phillips)
Subject: How to polish paint by hand continued
Date: Sat, 29 Oct 1994 03:32:11 GMT
How to Polish Paint by hand,...continued
So just how is it supposed to be done???
Straight Lines. This may or may not sound right to you but bare with
me,
If you polish paint using random circular motions you will have
random circular scratches throughout the whole finish. These
scratches can be seen at any Angle, at any Height, in any Light.
If however you polish in straight line motions, going in the direction
of the length of the car, you will have to be at the right angle, the right
height, and have the right light to see them.
Its as simple as that, but this means that you have to consciencely
make the effort to do this everytime. I can speak from experience
that everytime I start to polish, I have a tendency to start making
circular motions, I have developed the habit to recognize this and
"Stop". I then internalize what I am doing, why I am doing it and
proceed in "Straight Line Motions" in the direction of the length of
the car. It is a hard habit to start if you have been polishing in random
circular motions for years.
I have received lots of e-mail asking how to get rid of "Swirl"
scratches. This is actually not specifically what their problem is.
The 2 most common scratch problems are "Buffer Swirl" caused by
a rotary buffer using wool pads and usually some sort of abrasive.
It can be caused by the fibers in the wool pad all by themselves.
The wool fibers, (thousands of them) Are An Abrasive in and of
themselves. Thats why you cant achieve a swirl free finish or
"REMOVE" buffer swirl using a wool pad, it can only be done with
a Foam Pad. Meguiar's realized this and came out with the first
foam buffing pad way back in 1965.
The other common scratch, the ones referred to me, can better be
described as "Cob Web" Scratches, "Cobwebbing" or "Spiderweb"
Scratches". After the car is washed and you look at it in the sun
you will usually see a hazy scratchy pattern that looks somewhat like
a spider web. These are caused by random circular motions when
you, Wash, Polish, and/or Remove polishes and waxes.
So instead of trying to remove spiderweb scractes, dont put them
in, in the first place.
If the paint is soft ie workable, you can change these random circular
scratches into straightline scratches just by switching over to straight-
line motions,
If your paint is a hard paint, you have a scratch problem. I have
addressed the problem/characteristics of hard paints which include
clearcoats in earlier posts but to sum it up I will go on record to say
"It is impossible to remove a scratch from a clearcoat by "Hand"
without leaving another scratch".
Hey, the masses wanted clearcoats so now we have them. Not my
fault.
So, use Straight line motions when you wash, polish and wax the finish.
For wiping off, its hard to not make random motions because you
are always trying to "Break" the hold the polish or wax has on the paint.
2 things, though,
1, after you "Break" and remove MOST of the polish or wax off, you
can then go to a straight line motion for wiping off the rest of the
residual polish or wax. You should at this time either be using a clean,
and I mean very clean side of the towel or start using a fresh
uncontaminated towel for the finish wiping. Always seek out your
softest towels and dedicate them for final wiping.
2, The polish is a lubricant, so even though you are removing it, it is
still sort of liquid (see How to apply and remove #7) and lubricating
the surface - as - you are removing it, this helps to reduce scratching.
Also,.. Wax is a "Dry Lubricant" so even though you are "Breaking"
"IT" off, "IT" is helping to provide lubrication between your towel and
the freshly waxed surface of the paint.
Any of that make sense ???? It has taken me years to figure it all out
and then regurgitate it out in a way someone else can understand it
without me personally standing there and showing them as I explain it.
I am sure you can all understand this would be much easier to show
and tell one on one.
One more thing, Use straight line motions in the direction of the
length of the car,...except.... when you have to polish a small area
or a long thin area where the length of this area is NOT in the direction
of the length of the car.
Example, say you have a sunroof, the area between the front lip of the
sunroof to the edge of the roof where the windshield starts, is about
4 to 8 inches wide, and as long as the sunroof, dont make straight line
motions in the direction of the length of the car here, I mean you can
if you want to, but it is easier to go ahead and polish in straightlline
motions in the directions of the "Length of the Panel". It will be a lot
easier and wont make that much difference.
Another thing, although I just told everyone to use straight line motions
when polishing and waxing, you can use circular motions in the
beginning to "help spread" the polish or wax around in the area you
are going to be polishing. At this point however you are not really
applying any preasure, you are just spreading the product around
so its not all in one pile. After you gently spread it around, then
proceed to polish.
And just "How Do You Polish" or "Wax" the surface of paint ???
Like this, pretend your wife or your girlfriend has a mild sunburn on
her back, she comes to you for help, her skin is naturally soft and
tender, but right now its a little "Dry" and a little "Sensitive", so you
are going to apply some moistureizing skin lotion. She drops her
bikini top, and lays face down on the bed, you gently pour some
lotion onto her back, you carefully and ever so gently "spread" the
most of it around, then you carefully, gently and with love rub the lotion
across and "into" the pores of her skin. You go back and forth in
straight lines, in the direction of the length of her body until the whole
area is covered and saturated with lotion.
When your through you allow it to soak in and then help her put her
top back on,..... maybe.
Of course in the case of the car, you will have to wipe of the excess
and the car won't give you a kiss when your through.
How much to do.....
Do a section at a time, this section can be about 1' by 1' or larger or
smaller depending on the panel and you preference, just don't get
wacky and try to do to large an area at one time or you will end up
not knowing how much attention each area received.
Do the whole car, thats right, do the whole car, and then remove.
In the case of a polish like #7, #3 or #9 you don't have to let it dry
before wiping it off, (it wont really dry) in the case of a wax you
should let it dry completely before wiping it off. Curing times for
waxes vary between; kind of wax, humidity, air flow, tempature, and
so on....
Thats all, I think, I hope this is helpfull to someone out there, It does
work.
Any questions ??? please post them on the net, I dont have time
to stay caught up on E-Mail right now and probably wont until after
I have published my firt edition of "The Art of Polishing Paint".
I do however have time to read my favorite bulletin boards, and will
answer any questions posted here.
Thank you
Mike
*=*=*=*=*=*=*=*=*=*=*=*=*=*=*=*=*=*=*=*=*=*=*=*=*=*=*=*=*=*=*=*=*=*=*=*=*=*=*=
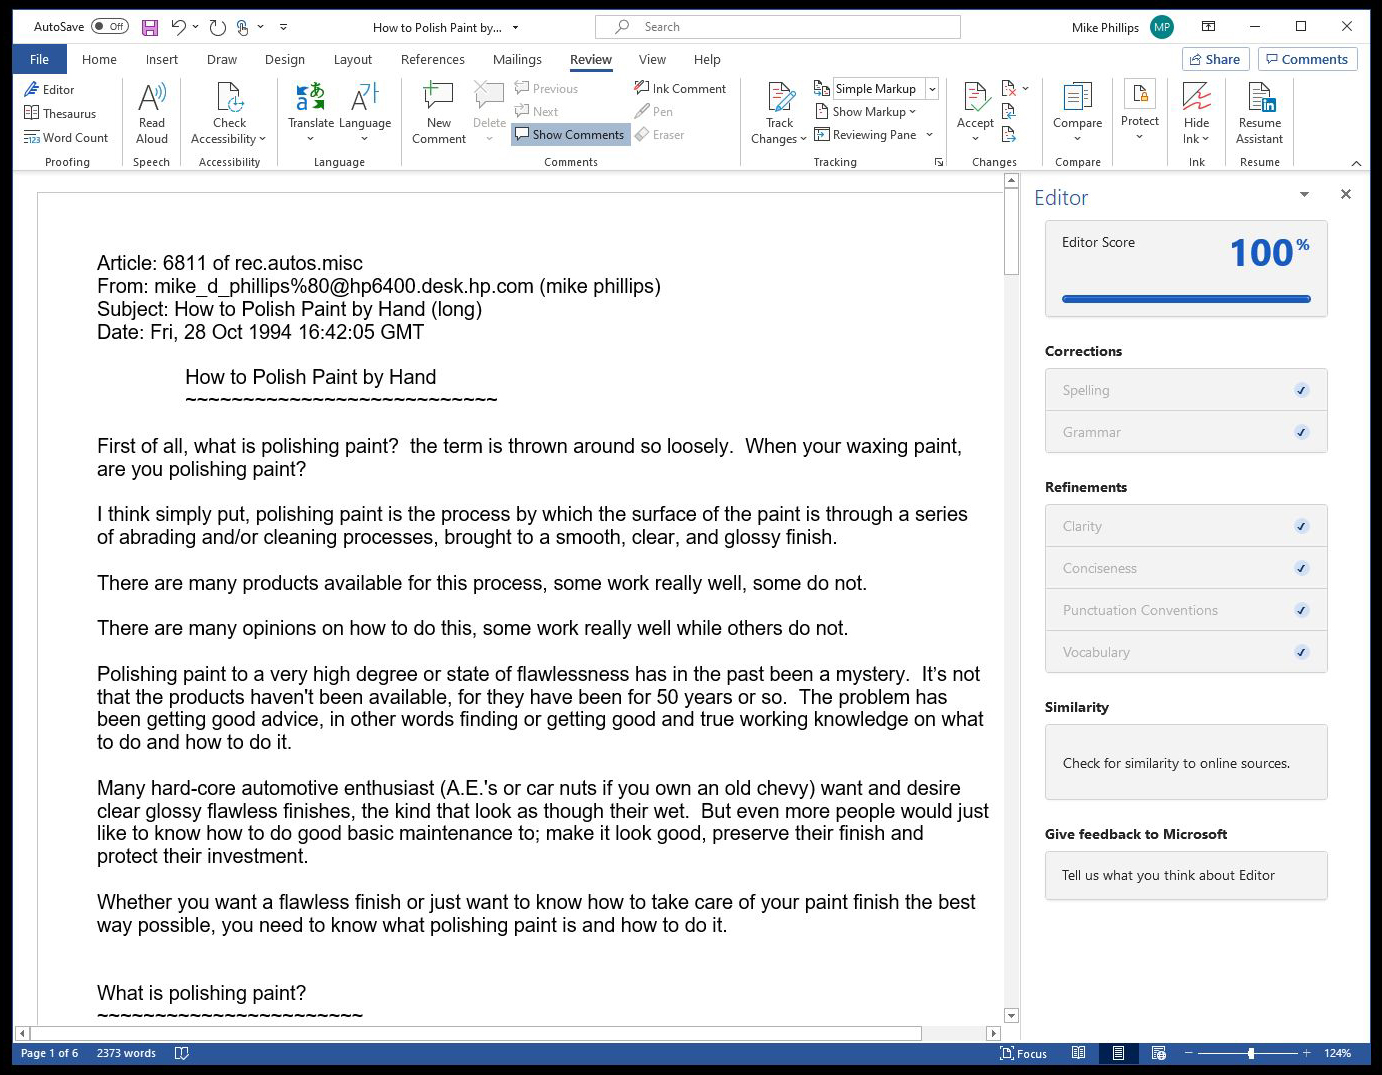
Here's a screenshot of the results after running the text through the MS Word Editor.
Last edited:
")