- Admin
- #1
- Joined
- May 21, 2021
- Messages
- 1,467
- Reaction score
- 799
- Points
- 113
- Location
- Stuart, Florida
- Website
- themikephillipsforum.com
Removing Windshield Swirls, Scratches & Wiper Marks on a ’69 GTO with Dr. Beasley’s NSP GL by Mike Phillips
Posted on July 28, 2023 by Mike Phillips
I’m fortunate that I get asked to detail a lot of classic American Detroit Iron, cars built before the 1980s when a lot of changes took place, like chrome bumpers being replaced by color-matched plastic bumper covers. Blech. Most of the cars I work on are the kind of cars you would see on display at a weekend “Cars & Coffee” car show or a “Cruise-In” after work at a local bar or restaurant. The cars themselves look great overall, but when viewed by an experienced detailer, the paint is almost always filled with swirls, scratches, water spots and oxidation. I’m not complaining! It keeps me busy taking care of all the locals toys.

Besides being an iconic muscle car that would have been cruising the streets as a daily driver back in the 1970s, it’s also a very rare and collectible version of the Pontiac GTO legacy.
A real common problem with older cars is that the glass windows tend to have a lot of random swirls, scratches, water spots and also wiper marks in the windshield. It’s actually a lot more common than most people think.
When people look at classic cars, antiques, streetrods and muscle cars, much of the time the focus is on the finish quality of the paint, the engine and/or the interior. Cars from before the 1980s had real style, and this is why people enjoy looking at them at car shows! They look different and I would say better than all the mundane daily drivers that now fill our busy highways, city streets and parking lots.
If you don’t purposefully look and even inspect the condition of the glass, often times you won’t see the multitude of swirls and scratches in the glass. These below surface defects can also be difficult to see without good lighting. Me? I always inspect the glass on older cars because experience tells me chances are good that not only does my customer’s car need the paint polished, it needs the glass polished too.
I hear ya… polishing scratches out of glass is a LOT more difficult than polishing scratches out of car paint or even gelcoat like you find on a lot of boats and motor homes (Besides teaching car detailing classes, I also teach boat detailing classes, so I’m pretty familiar with removing scratches out of car paint, gelcoat and glass). There’s a couple of key factors that will determine your success or failure when it comes to machine polishing to remove scratches out of glass and the good news is, you can do it and I’ll show you how!
Here’s the good news, if you’ve struggled to remove below surface defects like swirls, scratches and wiper marks out of glass, there’s a brand new product from Dr. Beasley’s now available to make removing sub-surface defects faster and easier. It’s called NSP GL.
Jim loves a challenge. In Jim’s mind, there are no problems, only solutions waiting to be discovered (by him). Unbeknownst to me at the time, Jim was working on a brand new nanoparticle abrasive technology that works faster and more efficiently than any other glass polish on the market. Even better yet, this glass polish works on BOTH types of glass polishing processes: Topical Glass Polishing and Sub-Surface Glass Polishing.
Most glass on the market are only good for and intended for topical glass polishing, that is removing things ON the surface, for example, hard water spots, drizzle stains and road film. The new Dr. Beasley’s NSP GL EXCELS at removing topical defects. The more difficult problem to solve, however, is sub-surface defects, things like swirls, scratches, etchings, tiny pits and wiper marks. Conventional sub-surface glass polishes rely on old technology like cerium oxide, and while this works, it’s not as fast or effective as Jim’s new formulation.
The Dr. Beasley’s NSP GL uses patented nanoparticle abrasive technology adapted from the defense industry. It’s ultra hard (a 10 on the Mohs Hardness Scale) and the incredible thing about it is the particle size is a minuscule at .1 micron. This is why when you feel some between your fingers, unlike other products, there’s NOTHING to feel!


The technology used to create this glass polish is also used for such things as laser production, sapphire polishing and even fighter jet canopy polishing! Good enough for the men and women that protect our skies, good enough for your car’s windows!
While we’re excited about this new abrasive technology and how it will help both enthusiasts and professional detailers to correct and perfect sub-surface defects common to automotive window glass, we still want to emphasis – because glass is hard, it will still require time and effort to remove defects out of glass, we want to make you one of our many satisfied customers but glass polishing is an advanced technique, it’s NOTHING like polishing car paint. So lets all keep our expectations real-world.

Here’s the basic steps and then below, I’ll elaborate on each step.
Prep
Supplies needed
Process
1: Mist one side of glass windshield with water – use the Buddy System (see below)
2: Apply Dr. Beasley’s NSP GL directly onto face of rayon pad.
3: Press rayon pad against glass before turning on polisher.
4: Turn polisher on to a slow speed and spread the polish over glass.
5: Bring speed up to around 2600 RPM on a rotary polisher and the highest speed setting for any orbital polisher.
6: Apply 5-10 pounds of downward pressure and begin polishing the glass using an overlapping passes.
7: Polish the windshield using a crosshatch pattern, always overlapping each pass by 50%
8: Have buddy mist a spray of water onto glass as needed to keep film of glass polish wet on surface.
9: As needed or after approximately 6-8 section passes over the section of glass being polished – add more product. And repeat the polishing process with your buddy misting water onto glass as needed to keep glass polish film wet on surface.
The fastest and most effective tool for removing scratches out of glass is a rotary polisher that has a high RPM speed setting. 2600 RPM is a good range, slower 2000 RPM and faster, up to 2800 RPM will also work. Lower RPM setting will take longer, higher RPM ranges can work faster but also risk overheating glass.
Any quality orbital polisher like the FLEX XC 3401 (a.k.a. the BEAST) will work, the key is maintaining pad rotation. The FLEX BEAST is a gear-driven orbital polisher, and this means there is zero pad stalling. Most orbital polishers on the market are what are called free spinning random orbital polishers; these are NOT gear-driven, and this means the pad rotation and oscillation can stall out, which means the pad can slow down and even stop rotating for a number of reasons, these types of tools will work but will be slower than a gear-driven rotary or gear-driven orbital polisher.
I’ve used a Porter Cable 7424 Random Orbital Polisher to remove heavy or deep wiper marks out of the windshield on a 2004 Honda Accord. This is a free spinning, short stroke random orbital polisher and arguably one of the safest orbital polishers on the market. Another way to say safer is weaker. So if I can do it using a Porter Cable polisher, this means just about any polisher will work. The key is to maintain pad rotation. If the pad stalls out, slows down or stop spinning — like paint polishing — you are wasting your time.


This is a before and after shot where I placed a strip of masking tape and then only buffed on one side of the tape line. As you can see, the Porter Cable is completely capable of remove severe wiper marks if you’re capable of doing the work.
All polishers, and especially rotary polishers, are going to create heat to the glass being polished. This acts to dry up the polish prematurely. It’s the nature of the process. With Dr. Beasley’s patented abrasives, the abrasives are still viable, but in order to leverage them and to also keep glass surface temperatures lowered, misting some water onto the surface as you are polishing will re-activate the polish as well as lubricate the glass surface, which creates SLIP, and this helps to keep temperature lower. The best consensus I’ve discovered on maximum temperature to avoid are 160 degrees Fahrenheit or 70 degrees Celsius.
In my car and boat detailing classes, I teach a number of procedures and/or technique that simply work better, faster and more efficiently if done with two people. Anytime a process works better with two people I refer to this as using the Buddy System. Polishing glass to remove serious swirls, scratches, water spots or wiper marks, works best using the Buddy System.
The Buddy System works in two ways when glass polishing.
1: With one buddy misting water onto the glass as the other buddy runs the polisher, this speeds up the process because it’s a lot more efficient. Without a buddy, you as the person running the polisher must STOP running the polisher, grab the spray bottle of water, mist some onto the glass, set the bottle down, pick the polisher back up, turn it on, place the rayon pad against the now wet glass and start polishing again. Multiply this by a couple of hundred times and you have a much slower and less effective process.
2: Buffing out glass that is positioned at an angle on a car is a lot more physically challenging then buffing on flat horizontal surface, (the hood, roof and trunk lid), or buffing out vertical panels, like fenders and doors. It simply takes more physical strength to brace your feet, legs and back to maintain a stable position as you run the polisher over and over again on an angled surface. Do this one time, to one half of a windshield and then remember what you read here and in your mind say,
Gee, that guy is right.
Take it from me or learn on your own, buffing out a glass windshield is more taking than buffing out horizontal or vertical panels. With a BUDDY – you can trade-off. After one person buffs for a while, if they get tired, change places with the buddy misting water and visa-versa. Allow both of yourselves to share the blessing as I like to say.
No pat answer. How long it takes to machine polish and remove all of or at least all of the shallow scratches just depends on how much focused energy you put into the process. I’m pretty good at this but my friends that know my buffing style say I’m a machine. It’s not easy. It’s not fast. It is rewarding when you see the final results.
If you like, you can skip covering the car with a thin plastic drop cloth like you see me do in the pictures and simply wash the car when you’re finished. The Dr. Beasley’s NSP GL will liquefy and wash off with any quality car wash soap and lots of water to flush the splatter dots off the car.
Most of my work is not modern daily drivers, but cool stuff like this 1969 GTO Convertible. As a professional courtesy to the current and future owners, I don’t introduce running water into places where it can cause rust. Thus I cover and protect the car, so I don’t have to wash it later.
Great question! How long it takes depends on:
A: How deep are the scratches
If your fingernail catches in the scratch, you probably will not be able to remove it 100% but you can for sure improve it a lot.
B: Your technique
Running the polisher for up to 10 minutes without stopping is difficult for most people. To buff out one side of a windshield with average wiper marks, swirls and scratches will take about an hour. It will go faster if you don’t need to stop and take a lot of breaks. This is also where having a strong buddy helps.
My average time for buffing out the windshield on most cars is between 2-3 hours, not including prep or clean-up. I also don’t aim for 100% defect removal as in most cases, there’s always going to be deeper scratches that simply are not going to be removed without machine sanding first. I don’t recommend 99.999% of the population to machine sand glass, it’s really for super experienced professionals only.
Here’s the deal… sanding glass is easy, this means putting scratches into the glass. The tricky part is getting them out.
So allot yourself a half day on Saturday, start early and stay off your phone and you can be done in time for lunch.
Note that in the below pictures, I didn’t have a buddy. But I’m a machine, so I powered through the old fashioned way – doing the job by myself. My strong recommendation though – try to have a buddy, even if it’s your wife, girlfriend, kids or neighbor.
If the scratches are light or shallow — for example, I recently removed SHALLOW wiper marks on a 2019 QX50 — this only took 8-10 section passes over each side of the windshield and the wiper marks, (a type of scratch), were removed. For shallow scratches like this on a car that’s only a few years old, it was easy and fast to buff out an entire one-half of the windshield at one time.
For windshields with deeper wiper marks, swirls and scratches, it can be faster and/or easier to divide a half of the windshield in half, making the section size ¼ of the windshield, and then buff out this smaller section first followed by buffing out the other ¼ of the windshield.
The benefit to buffing out an entire half of a windshield at one time is it keeps the glass surface temperatures lower. The reason for this is because as you’re buffing one area of the windshield, any place you’re not buffing is cooling down. It is the dynamic between buffing and no buffing that keeps overall temperatures lower.
When you buff a small section, like one quarter of the windshield, there isn’t much time for cooling because you’re always running the spinning rayon pad over the glass without much slack time.
In the end it’s relative, you’re going to need to make a certain number of passes over each square inch of glass, but it can be easier to only tackle a ¼ of the windshield at one time versus an entire ½ of a windshield at one time.
When you do divide a windshield into ¼ sections, always start with the middle section first and work your way outward simply as a good best practice.
Another way to keep temperatures down is to buff one side for 5-10 minutes and then go buff the other side for 5-10 minutes and continue to alternate with this system.
From this picture, to most people, the car looks great as does the glass. But in reality, both the paint and the glass are filled with scratches. I’ll fix the glass first and then I’ll do all the paint correction and ceramic coat the paint.
Mass swirls and scratches in a car’s windshield create a safety risk. Anytime the sun is shining on the windshield, the swirls and scratches will create glare and make it difficult to see clearly through the glass. This is even more pronounced during early morning and late afternoon driving when the sun tends to be lower in the sky.
Below, you can see the scratches in the driver’s side of the windshield using overhead lights.
Note: If you’re new to my writing and video style, I’m known for documenting the heck out of before and after. I’m confident in the products I use for my personal work and teach in our detailing classes and I want you to be confident also.


Below you can see a arc-shaped scratch, this is a wiper mark – at some point the steel wiper arm came into contact with the glass and gouged it in a pattern that mimics the path the wiper blades travel over the windshield.


I purposefully took pictures to show the swirls and scratches are not only all over the entire windshield but also in the CORNERS. This is where a 3″ rayon glass polishing pad comes in real handy as the larger circumference of larger pads make it difficult to polish into the corners.


As you can see in the pictures below, the swirls and scratches are throughout the entire windshield.


Here’s the deal, it’s easier and faster to cover a car with a plastic drop cloth by first placing tape all the way around the window you’re going to polish. Next place the plastic drop cloth onto the car and then cut out the section of plastic where the windshield is AND THEN tape the cut out section of the plastic drop cloth the masking tape already in place around the windshield.
When placing tape around the windshield, place the tape about 3/8th of an inch ONTO the glass and SECURE or PRESS DOWN FIRMLY (like your life depends on it), so there’s great attachment strength between the the glass and the tape. This is important because as the combination of polish and water are slung into the tape it can loosen and you’ll never get it to attach securely again.
This means the polish/water slurry will get into, under and behind any decorative trim (like on this 1969 GTO) and also onto any rubber window gasket material as well as around the sides of the window and at the bottom of the window. On modern cars, there’s usually a lot of plastic cladding around the wiper arms. I prefer to cover and protect the wiper arms, blades and plastic cladding when buffing glass on modern cars. Dr. Beasley’s NSP GL will not stain these areas but it’s faster to clean up if you protect these areas in the first place before starting.


Because this car has a vinyl top and I’m not doing a normal water hose and bucket wash after the glass polishing, I’m placing an extra strip of tape onto the chrome trim and then onto the vinyl top. Like the saying goes, an ounce of prevention saves hours of clean-up.

Here I’ve unfurled the roll of plastic drop cloth and next I’ll start attaching the plastic to the car.

See how I’ve attached and pulled the plastic tight.

IMPORTANT – Start your cut at the top of the windshield. Cut along the tape line.[/B] Then cut both sides and LASTLY cut along the bottom of the windshield. After cutting out the section of plastic in front of the glass windshield, next tape the edges of the plastic to the tape frame you already have in place.


I’ve done this a LOT in my life and for the value of this car and my time, I have a large chunk of plastic drop cloth from another project and I’m going to attach it to the roof and then bring it all the way down the back of the car.


This is the second windshield I’ve polished out in this private man cave collection of cars and as such, I have already covered up a nearby vintage, restored Harley Davidson Motorcycle. The last thing I want to do is take a toothbrush to the intricate and complicated design of a Harley Davidson Motorcycle and especially the spokes and fins on the engine.

It might seem like overkill, but I use a high speed rotary polisher for glass polishing and when you’re buffing for long periods of time using a rotary, the centrifugal force created by a spinning pad tends to sling the wet water and polish slurry everywhere. Behind the plastic is a 1978 Ford Bronco Custom, of which at the time of typing this article, I’ve also polished the driver’s side window and in front of it is a 1978 AMC Pacer, with the original paint and scratches in the glass, that you’ll see in a future video and write-up.

Might seem excessive, but this is how I do it. I’m now comfortable with how well everything is covered and protected. It’s time to get busy.
The passenger side glass window has a LOT of scratches running in straight lines from top to bottom where the glass has dragged against the inner window frame over the decades. I’ll do my best to clean this glass up after the windshield.

Same best practice – I’ve done a very thorough job of framing the window in tape and then taping the plastic to the tape frame.


The rotary polisher I’m using is the FLEX PE14-3 125 with a high RPM speed setting of 3700 RPM. When it comes to glass polishing, besides the abrasive technology and the rayon pad, speed is your friend. Optimum RPM after spreading the polish out is approximately 2200 to 2600 RPM and this FLEX rotary handles this requirement easily. FLEX makes the best automotive polishers on planet Earth. I normally buff glass at 2600 RPM, which is around the 4-5 setting on the speed dial.


And just to document, yest this is the same car and windshield as shown in pictures above.


Before starting, attach your foam interface pad to the face of the backing plate. Some interface pads have holes for vacuum applications, but any type of interface pads, holes or no holes will work.

What’s important is the thick foam core. This makes polishing easier on you and also helps to maintain 100% contact between the rayon glass polishing pad and the glass you’re polishing. Keep in mind most windshields have a curve to their design, that’s where the cushion and flexibility provided by the foam core comes into play.

Always do your best to center both the interface pad and the rayon glass polishing pad onto the backing plate.


For the initial application when starting out with a clean DRY rayon glass polishing pad, apply a circle of product onto the face of the pad. After the pad breaks in, you can reduce the amount of product to a few nickle sized drops.

Mist some clean water onto the glass before polishing, and then during polishing, when possible, have a buddy present to mist water while you polish and switch back and forth to prevent fatigue.


If I wasn’t writing this article and wanting to show you the power of the Dr. Beasley’s NSP GL Glass Polish, I would NOT have placed a tape-line down the side of the windshield. I did this in order to get before and after pictures after polishing for only 10 minutes. The results are impressive, but will be even better after I take my pictures, remove that strip of tape and get down to business.


There are literally millions, if not billions of splatter dots on top of the plastic on top of the car hood. Same goes for the roof, the back of the car and even the vertical panels. It’s so much more rewarding at the end of the job to ball up the tape and plastic than it is to wipe off all the splatter.

Just to note, you must use a rayon pad to do this type of sub-surface glass polishing. Foam pads, wool pads, microfiber pads simply do not work. The good news is, for a windshield, you really only need on pad. And after use, you can hand wash it in a sink and then place it somewhere flat and clean to air dry for use the next time you need to do some glass polishing.


More to come
-Mike
")
Posted on July 28, 2023 by Mike Phillips
Perfecting glass to match perfecting the paint
I’m fortunate that I get asked to detail a lot of classic American Detroit Iron, cars built before the 1980s when a lot of changes took place, like chrome bumpers being replaced by color-matched plastic bumper covers. Blech. Most of the cars I work on are the kind of cars you would see on display at a weekend “Cars & Coffee” car show or a “Cruise-In” after work at a local bar or restaurant. The cars themselves look great overall, but when viewed by an experienced detailer, the paint is almost always filled with swirls, scratches, water spots and oxidation. I’m not complaining! It keeps me busy taking care of all the locals toys.
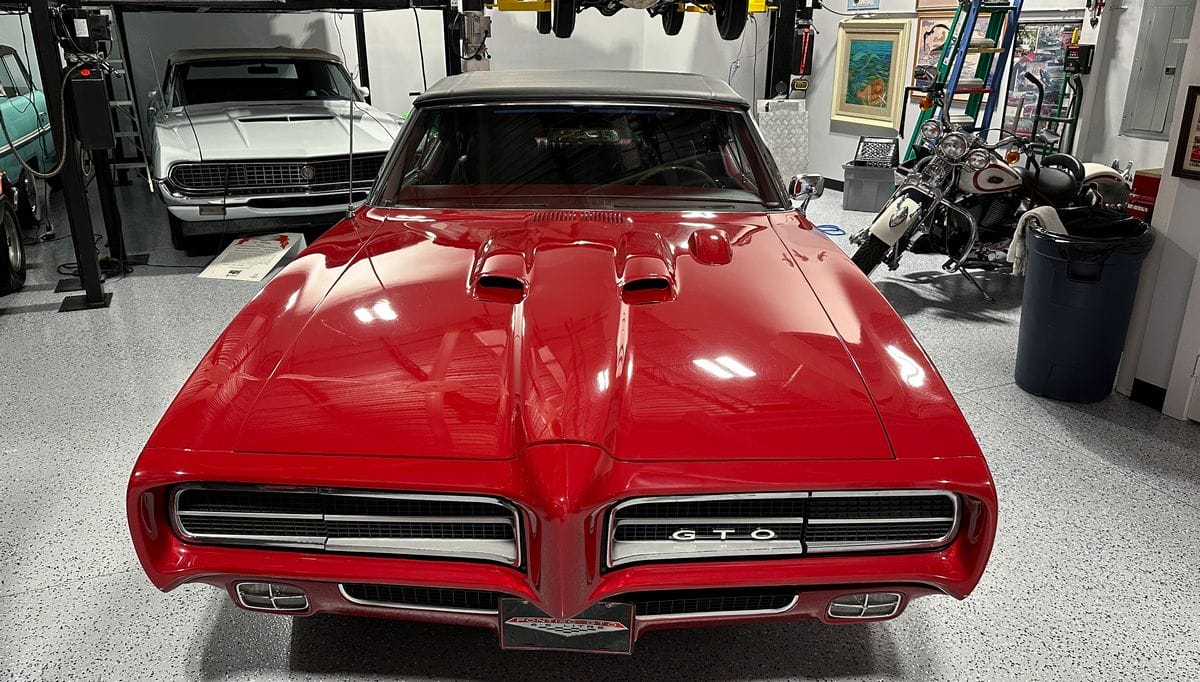
Here’s a good example of classic Detroit Iron!
Besides being an iconic muscle car that would have been cruising the streets as a daily driver back in the 1970s, it’s also a very rare and collectible version of the Pontiac GTO legacy.
Scratched glass is actually super common
A real common problem with older cars is that the glass windows tend to have a lot of random swirls, scratches, water spots and also wiper marks in the windshield. It’s actually a lot more common than most people think.
When people look at classic cars, antiques, streetrods and muscle cars, much of the time the focus is on the finish quality of the paint, the engine and/or the interior. Cars from before the 1980s had real style, and this is why people enjoy looking at them at car shows! They look different and I would say better than all the mundane daily drivers that now fill our busy highways, city streets and parking lots.
If you don’t purposefully look and even inspect the condition of the glass, often times you won’t see the multitude of swirls and scratches in the glass. These below surface defects can also be difficult to see without good lighting. Me? I always inspect the glass on older cars because experience tells me chances are good that not only does my customer’s car need the paint polished, it needs the glass polished too.
But Mike, I’ve tried removing scratches out of glass with no luck!
I hear ya… polishing scratches out of glass is a LOT more difficult than polishing scratches out of car paint or even gelcoat like you find on a lot of boats and motor homes (Besides teaching car detailing classes, I also teach boat detailing classes, so I’m pretty familiar with removing scratches out of car paint, gelcoat and glass). There’s a couple of key factors that will determine your success or failure when it comes to machine polishing to remove scratches out of glass and the good news is, you can do it and I’ll show you how!
Dr. Beasley’s Patented Nanoparticle Abrasive
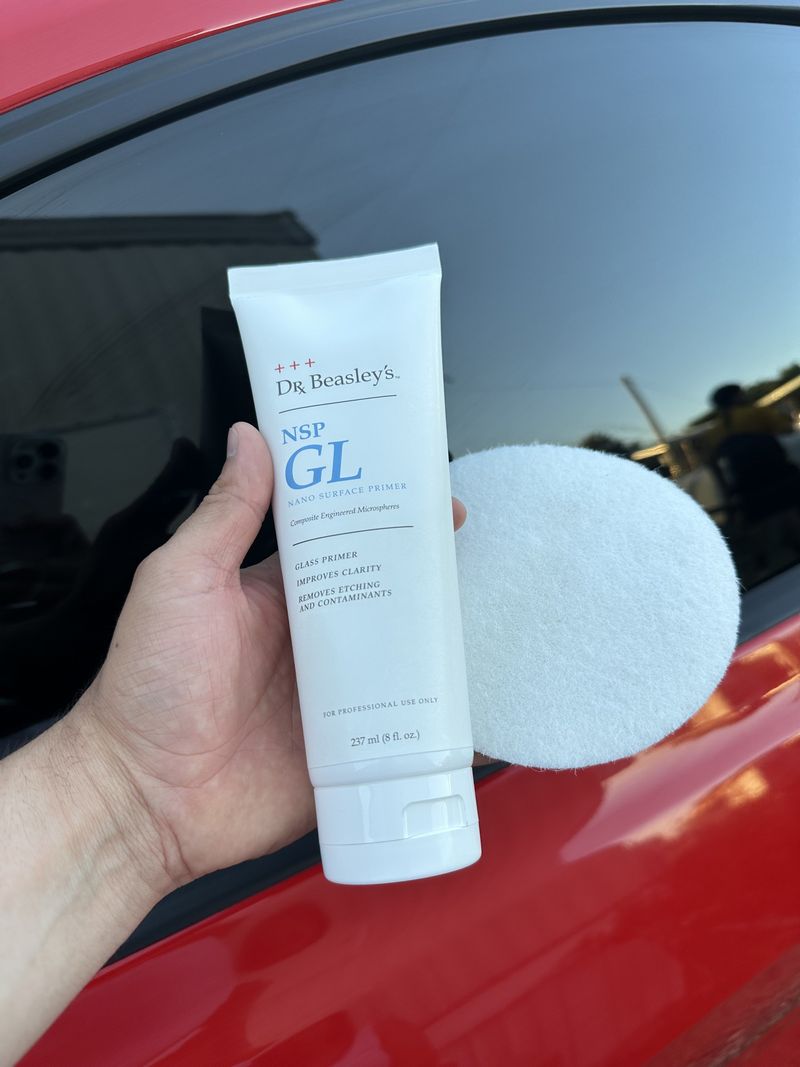
Here’s the good news, if you’ve struggled to remove below surface defects like swirls, scratches and wiper marks out of glass, there’s a brand new product from Dr. Beasley’s now available to make removing sub-surface defects faster and easier. It’s called NSP GL.
Enter Jim Lafeber aka Dr. Beasley!
Jim loves a challenge. In Jim’s mind, there are no problems, only solutions waiting to be discovered (by him). Unbeknownst to me at the time, Jim was working on a brand new nanoparticle abrasive technology that works faster and more efficiently than any other glass polish on the market. Even better yet, this glass polish works on BOTH types of glass polishing processes: Topical Glass Polishing and Sub-Surface Glass Polishing.
Most glass on the market are only good for and intended for topical glass polishing, that is removing things ON the surface, for example, hard water spots, drizzle stains and road film. The new Dr. Beasley’s NSP GL EXCELS at removing topical defects. The more difficult problem to solve, however, is sub-surface defects, things like swirls, scratches, etchings, tiny pits and wiper marks. Conventional sub-surface glass polishes rely on old technology like cerium oxide, and while this works, it’s not as fast or effective as Jim’s new formulation.
Microscopic in size and super hard!
The Dr. Beasley’s NSP GL uses patented nanoparticle abrasive technology adapted from the defense industry. It’s ultra hard (a 10 on the Mohs Hardness Scale) and the incredible thing about it is the particle size is a minuscule at .1 micron. This is why when you feel some between your fingers, unlike other products, there’s NOTHING to feel!
Just more advanced technology for the Future of Detailing!
The technology used to create this glass polish is also used for such things as laser production, sapphire polishing and even fighter jet canopy polishing! Good enough for the men and women that protect our skies, good enough for your car’s windows!
Under promise and over deliver
While we’re excited about this new abrasive technology and how it will help both enthusiasts and professional detailers to correct and perfect sub-surface defects common to automotive window glass, we still want to emphasis – because glass is hard, it will still require time and effort to remove defects out of glass, we want to make you one of our many satisfied customers but glass polishing is an advanced technique, it’s NOTHING like polishing car paint. So lets all keep our expectations real-world.
Step-by-Step Outline
Here’s the basic steps and then below, I’ll elaborate on each step.
Prep
- Clean glass and car – wash or waterless prep wash
- Create a tape frame around windshield to seal windshield trim and protect windshield gasket
- Cover car with plastic drop cloth – tape in place
- Cut out section around windshield starting at the top of windshield, then sides, bottom last.
- Tape plastic drop cloth to tape frame and secure tightly – important.
- Optional – cover up anything near the project you don’t want splatter dots on.
Supplies needed
- Dr. Beasley’s GL Nano Surface Primer - Because NSP GL is part of the Nano Surface Primer line, Dr. Beasley’s doesn’t like to call it a “polish”, and they instead use the term “primer” or “correcting primer”. For the sake of simplicity, I will still use the word “polish”.
- Rayon glass polishing pad
- Interface pad (goes between backing plate and rayon glass polishing pad)
- Rotary or orbital polisher
- Correct size backing plate to fit rayon glass polishing pad
- Spray bottle of distilled water
- Lots of clean, uncontaminated microfiber towels
- Safety glasses and hearing protection
Process
1: Mist one side of glass windshield with water – use the Buddy System (see below)
2: Apply Dr. Beasley’s NSP GL directly onto face of rayon pad.
3: Press rayon pad against glass before turning on polisher.
4: Turn polisher on to a slow speed and spread the polish over glass.
5: Bring speed up to around 2600 RPM on a rotary polisher and the highest speed setting for any orbital polisher.
6: Apply 5-10 pounds of downward pressure and begin polishing the glass using an overlapping passes.
7: Polish the windshield using a crosshatch pattern, always overlapping each pass by 50%
8: Have buddy mist a spray of water onto glass as needed to keep film of glass polish wet on surface.
9: As needed or after approximately 6-8 section passes over the section of glass being polished – add more product. And repeat the polishing process with your buddy misting water onto glass as needed to keep glass polish film wet on surface.
Best polisher = rotary polisher
The fastest and most effective tool for removing scratches out of glass is a rotary polisher that has a high RPM speed setting. 2600 RPM is a good range, slower 2000 RPM and faster, up to 2800 RPM will also work. Lower RPM setting will take longer, higher RPM ranges can work faster but also risk overheating glass.
Orbital Polishers
Any quality orbital polisher like the FLEX XC 3401 (a.k.a. the BEAST) will work, the key is maintaining pad rotation. The FLEX BEAST is a gear-driven orbital polisher, and this means there is zero pad stalling. Most orbital polishers on the market are what are called free spinning random orbital polishers; these are NOT gear-driven, and this means the pad rotation and oscillation can stall out, which means the pad can slow down and even stop rotating for a number of reasons, these types of tools will work but will be slower than a gear-driven rotary or gear-driven orbital polisher.
Personal Example
I’ve used a Porter Cable 7424 Random Orbital Polisher to remove heavy or deep wiper marks out of the windshield on a 2004 Honda Accord. This is a free spinning, short stroke random orbital polisher and arguably one of the safest orbital polishers on the market. Another way to say safer is weaker. So if I can do it using a Porter Cable polisher, this means just about any polisher will work. The key is to maintain pad rotation. If the pad stalls out, slows down or stop spinning — like paint polishing — you are wasting your time.
This is a before and after shot where I placed a strip of masking tape and then only buffed on one side of the tape line. As you can see, the Porter Cable is completely capable of remove severe wiper marks if you’re capable of doing the work.
Misting water
All polishers, and especially rotary polishers, are going to create heat to the glass being polished. This acts to dry up the polish prematurely. It’s the nature of the process. With Dr. Beasley’s patented abrasives, the abrasives are still viable, but in order to leverage them and to also keep glass surface temperatures lowered, misting some water onto the surface as you are polishing will re-activate the polish as well as lubricate the glass surface, which creates SLIP, and this helps to keep temperature lower. The best consensus I’ve discovered on maximum temperature to avoid are 160 degrees Fahrenheit or 70 degrees Celsius.
The Buddy System
In my car and boat detailing classes, I teach a number of procedures and/or technique that simply work better, faster and more efficiently if done with two people. Anytime a process works better with two people I refer to this as using the Buddy System. Polishing glass to remove serious swirls, scratches, water spots or wiper marks, works best using the Buddy System.
How Buddy System works with glass polishing
The Buddy System works in two ways when glass polishing.
1: With one buddy misting water onto the glass as the other buddy runs the polisher, this speeds up the process because it’s a lot more efficient. Without a buddy, you as the person running the polisher must STOP running the polisher, grab the spray bottle of water, mist some onto the glass, set the bottle down, pick the polisher back up, turn it on, place the rayon pad against the now wet glass and start polishing again. Multiply this by a couple of hundred times and you have a much slower and less effective process.
2: Buffing out glass that is positioned at an angle on a car is a lot more physically challenging then buffing on flat horizontal surface, (the hood, roof and trunk lid), or buffing out vertical panels, like fenders and doors. It simply takes more physical strength to brace your feet, legs and back to maintain a stable position as you run the polisher over and over again on an angled surface. Do this one time, to one half of a windshield and then remember what you read here and in your mind say,
Gee, that guy is right.
Take it from me or learn on your own, buffing out a glass windshield is more taking than buffing out horizontal or vertical panels. With a BUDDY – you can trade-off. After one person buffs for a while, if they get tired, change places with the buddy misting water and visa-versa. Allow both of yourselves to share the blessing as I like to say.
How long to buff?
No pat answer. How long it takes to machine polish and remove all of or at least all of the shallow scratches just depends on how much focused energy you put into the process. I’m pretty good at this but my friends that know my buffing style say I’m a machine. It’s not easy. It’s not fast. It is rewarding when you see the final results.
Why cover up the car?
If you like, you can skip covering the car with a thin plastic drop cloth like you see me do in the pictures and simply wash the car when you’re finished. The Dr. Beasley’s NSP GL will liquefy and wash off with any quality car wash soap and lots of water to flush the splatter dots off the car.
Me? I tend to cover and protect the vehicle
Most of my work is not modern daily drivers, but cool stuff like this 1969 GTO Convertible. As a professional courtesy to the current and future owners, I don’t introduce running water into places where it can cause rust. Thus I cover and protect the car, so I don’t have to wash it later.
How long does it take to polish out the scratches on the average size windshield?
Great question! How long it takes depends on:
A: How deep are the scratches
If your fingernail catches in the scratch, you probably will not be able to remove it 100% but you can for sure improve it a lot.
B: Your technique
Running the polisher for up to 10 minutes without stopping is difficult for most people. To buff out one side of a windshield with average wiper marks, swirls and scratches will take about an hour. It will go faster if you don’t need to stop and take a lot of breaks. This is also where having a strong buddy helps.
My average time for buffing out the windshield on most cars is between 2-3 hours, not including prep or clean-up. I also don’t aim for 100% defect removal as in most cases, there’s always going to be deeper scratches that simply are not going to be removed without machine sanding first. I don’t recommend 99.999% of the population to machine sand glass, it’s really for super experienced professionals only.
Here’s the deal… sanding glass is easy, this means putting scratches into the glass. The tricky part is getting them out.
So allot yourself a half day on Saturday, start early and stay off your phone and you can be done in time for lunch.
No buddy for me
Note that in the below pictures, I didn’t have a buddy. But I’m a machine, so I powered through the old fashioned way – doing the job by myself. My strong recommendation though – try to have a buddy, even if it’s your wife, girlfriend, kids or neighbor.
A comment about the size of section to tackle at one time
If the scratches are light or shallow — for example, I recently removed SHALLOW wiper marks on a 2019 QX50 — this only took 8-10 section passes over each side of the windshield and the wiper marks, (a type of scratch), were removed. For shallow scratches like this on a car that’s only a few years old, it was easy and fast to buff out an entire one-half of the windshield at one time.
For windshields with deeper wiper marks, swirls and scratches, it can be faster and/or easier to divide a half of the windshield in half, making the section size ¼ of the windshield, and then buff out this smaller section first followed by buffing out the other ¼ of the windshield.
The benefit to buffing out an entire half of a windshield at one time is it keeps the glass surface temperatures lower. The reason for this is because as you’re buffing one area of the windshield, any place you’re not buffing is cooling down. It is the dynamic between buffing and no buffing that keeps overall temperatures lower.
When you buff a small section, like one quarter of the windshield, there isn’t much time for cooling because you’re always running the spinning rayon pad over the glass without much slack time.
In the end it’s relative, you’re going to need to make a certain number of passes over each square inch of glass, but it can be easier to only tackle a ¼ of the windshield at one time versus an entire ½ of a windshield at one time.
When you do divide a windshield into ¼ sections, always start with the middle section first and work your way outward simply as a good best practice.
Alternate sides
Another way to keep temperatures down is to buff one side for 5-10 minutes and then go buff the other side for 5-10 minutes and continue to alternate with this system.
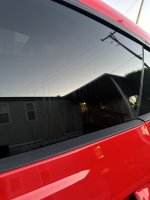
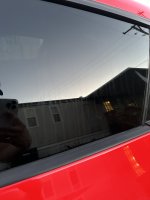
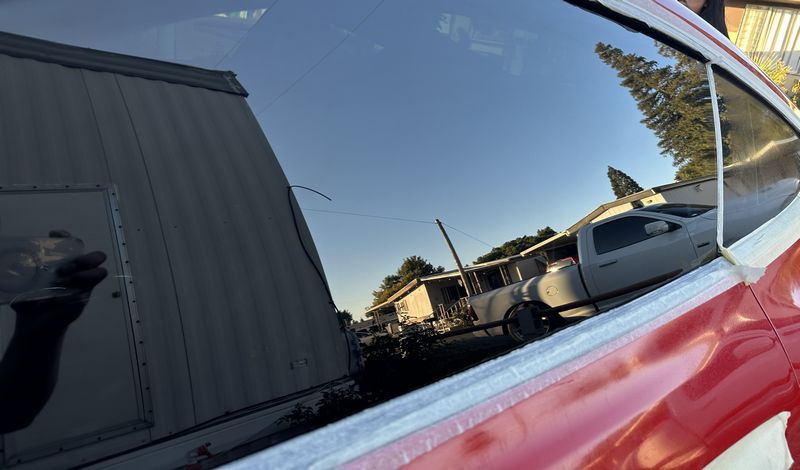
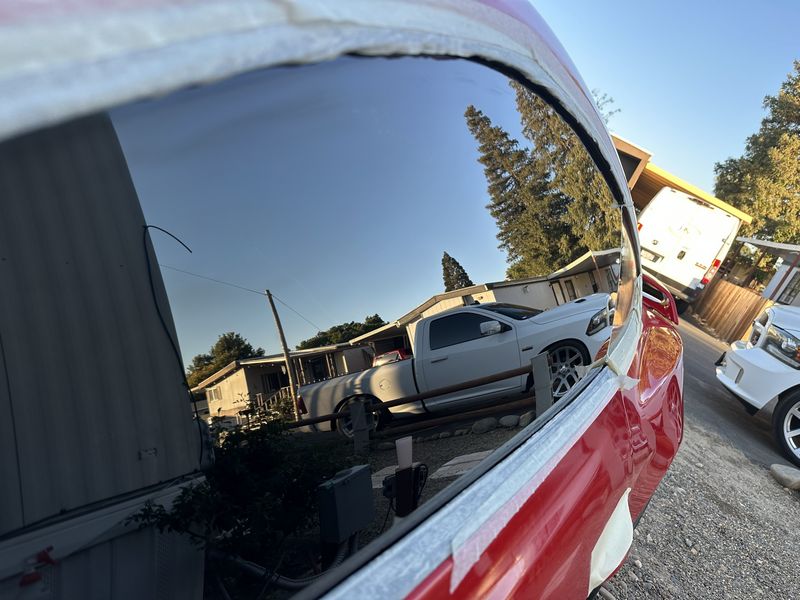
Demo car – 1969 GTO Convertible
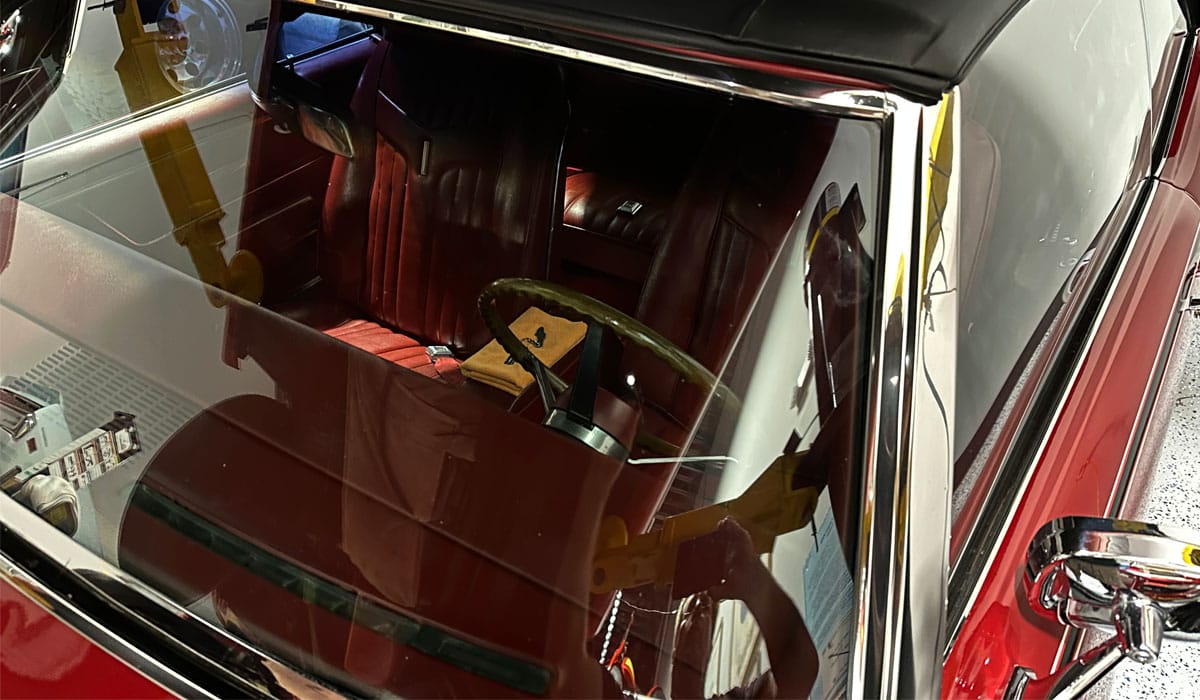
From this picture, to most people, the car looks great as does the glass. But in reality, both the paint and the glass are filled with scratches. I’ll fix the glass first and then I’ll do all the paint correction and ceramic coat the paint.
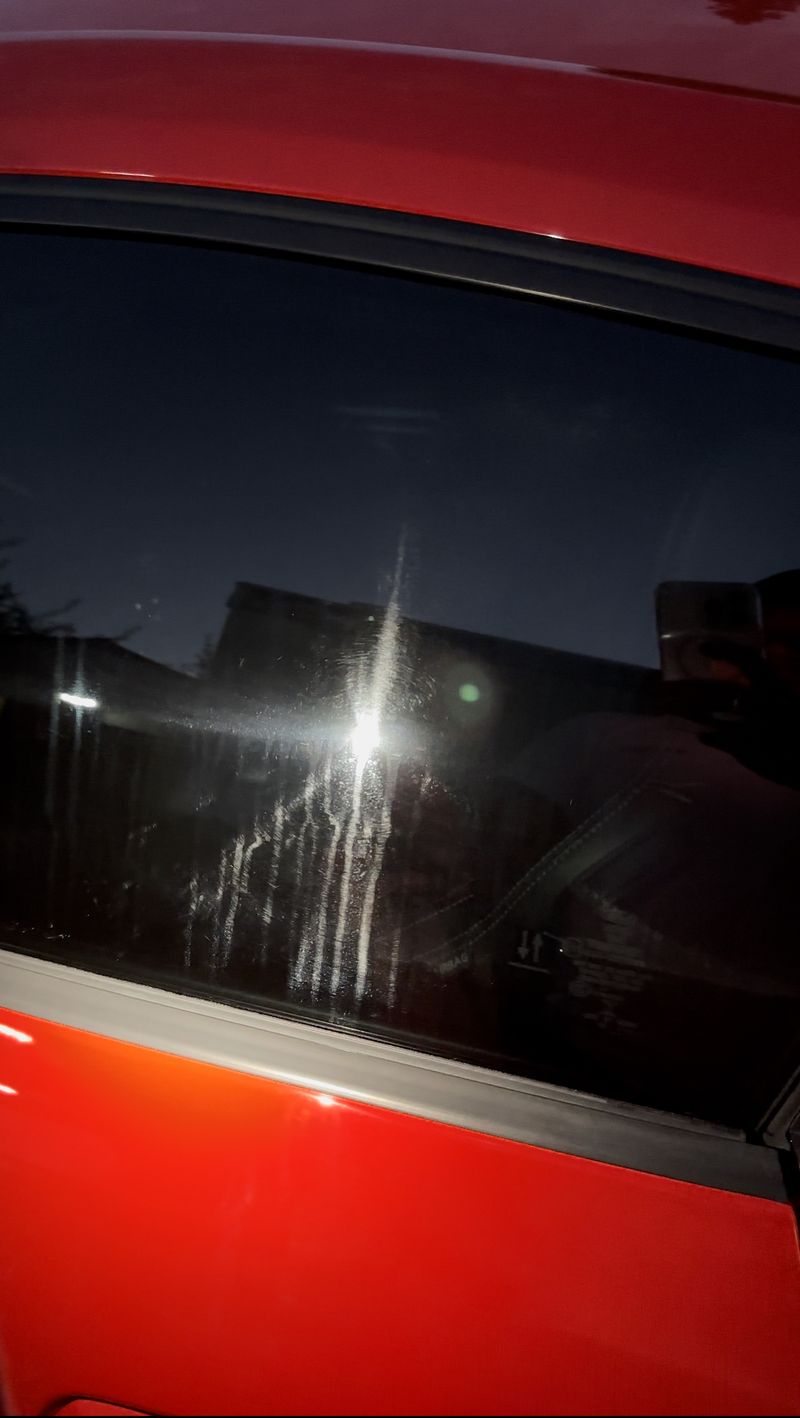
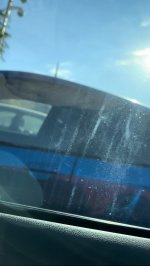
Safety risk
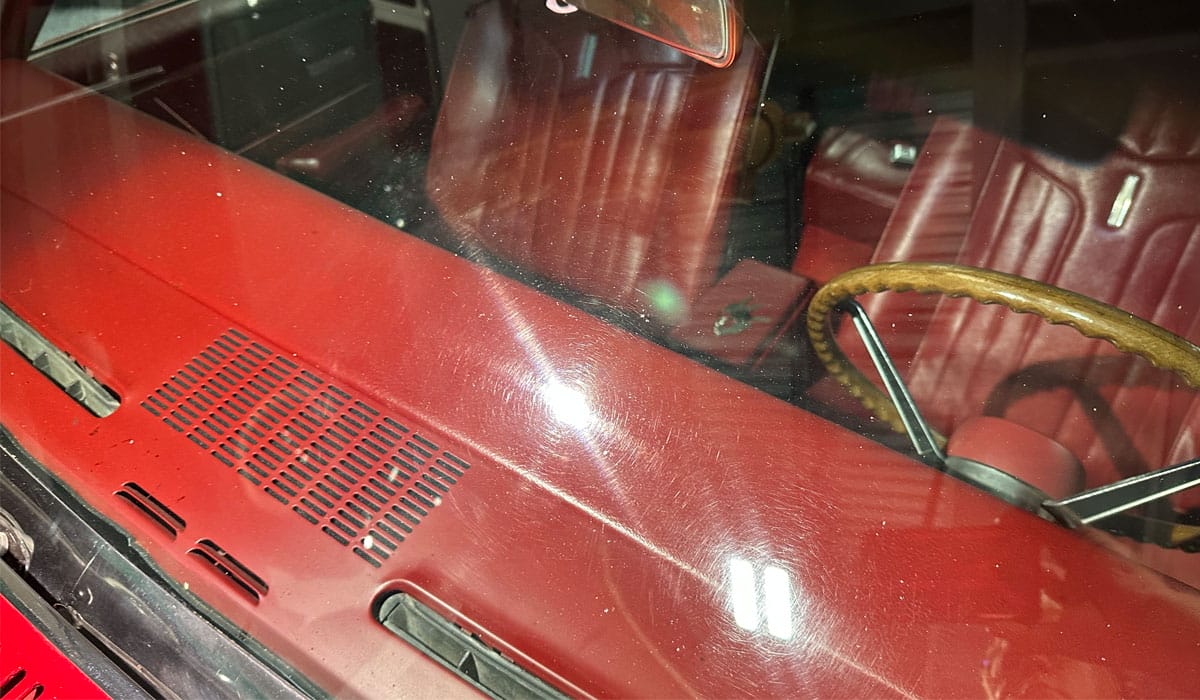
Mass swirls and scratches in a car’s windshield create a safety risk. Anytime the sun is shining on the windshield, the swirls and scratches will create glare and make it difficult to see clearly through the glass. This is even more pronounced during early morning and late afternoon driving when the sun tends to be lower in the sky.
Mass swirls, scratches and wiper marks
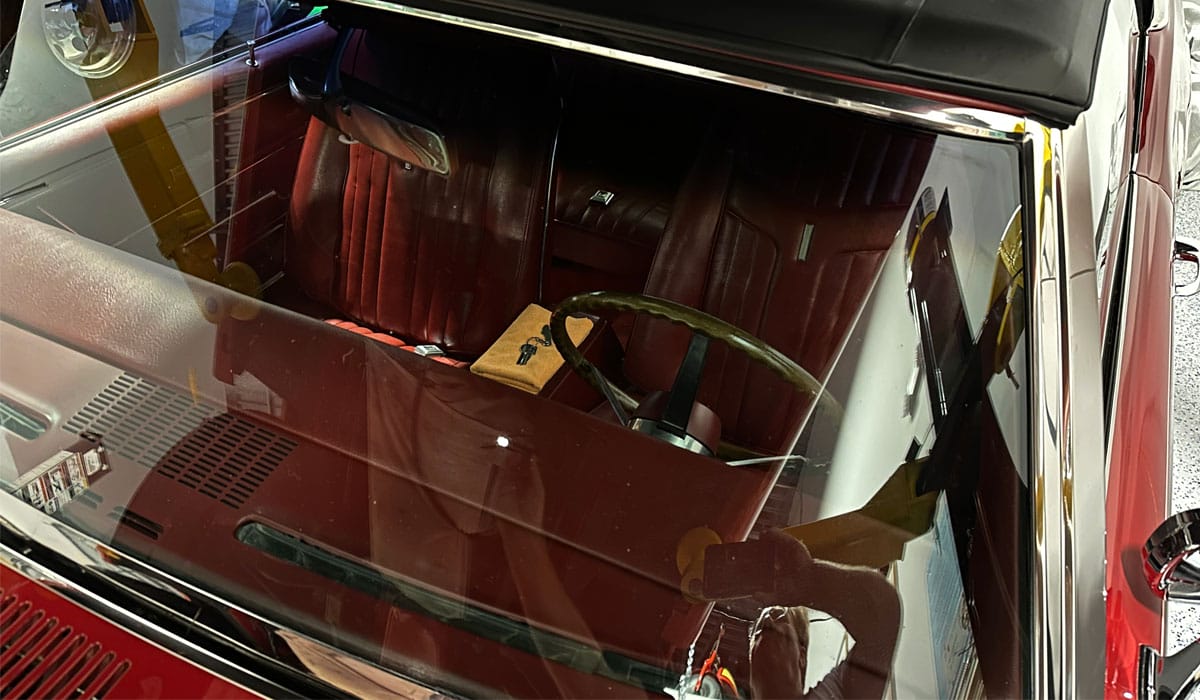
Below, you can see the scratches in the driver’s side of the windshield using overhead lights.
Note: If you’re new to my writing and video style, I’m known for documenting the heck out of before and after. I’m confident in the products I use for my personal work and teach in our detailing classes and I want you to be confident also.
Below you can see a arc-shaped scratch, this is a wiper mark – at some point the steel wiper arm came into contact with the glass and gouged it in a pattern that mimics the path the wiper blades travel over the windshield.
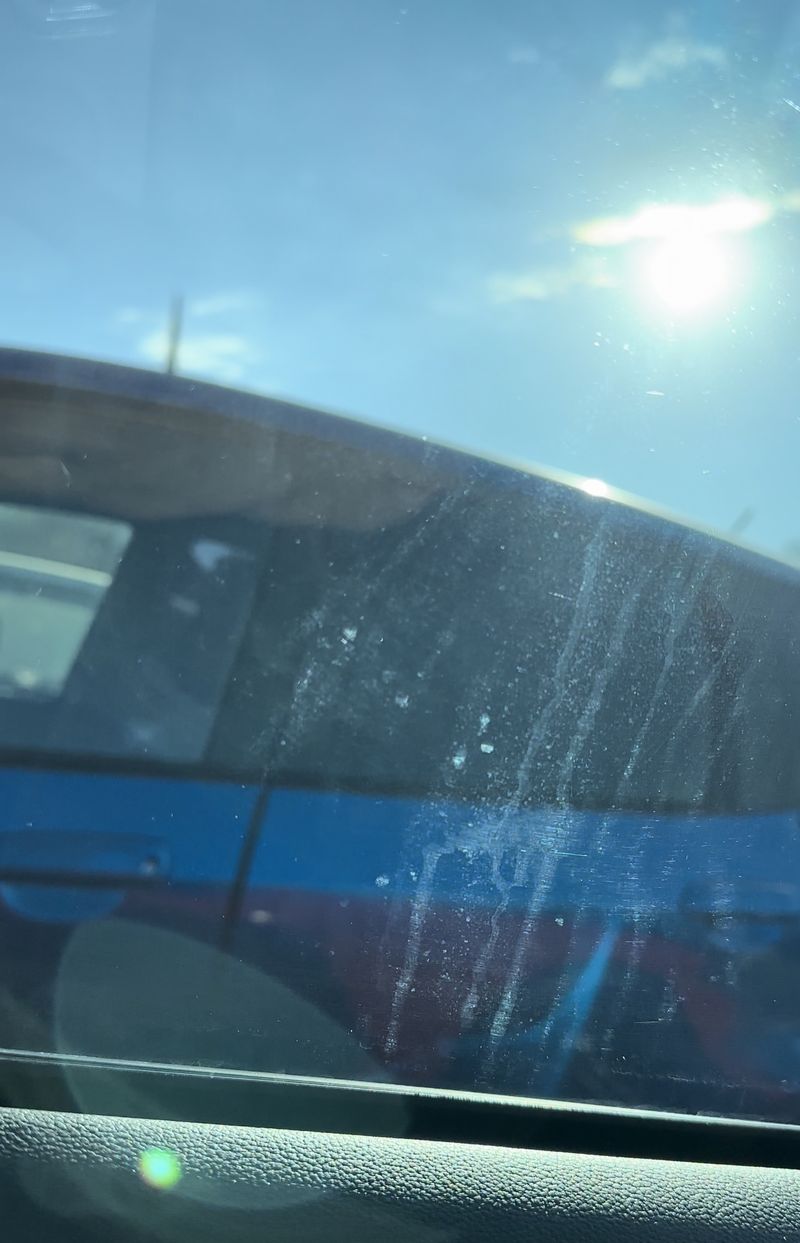
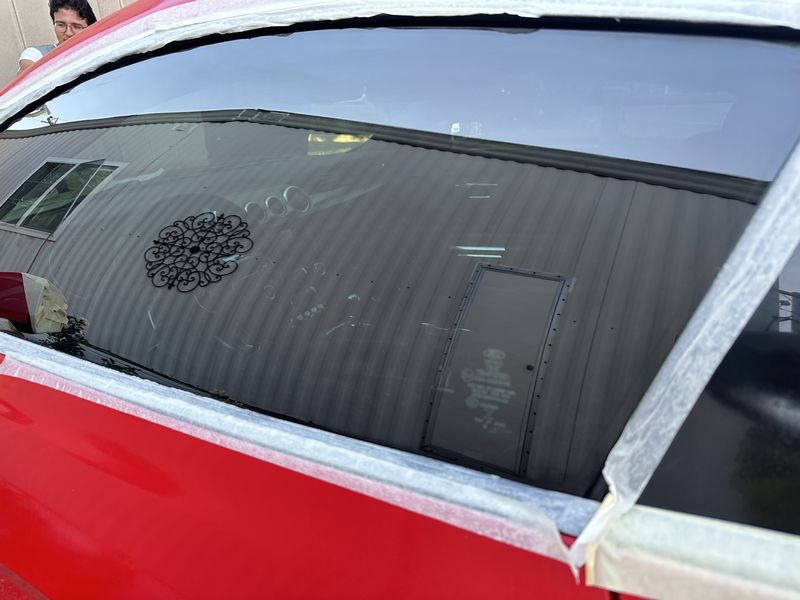
3″ Rayon Pads
I purposefully took pictures to show the swirls and scratches are not only all over the entire windshield but also in the CORNERS. This is where a 3″ rayon glass polishing pad comes in real handy as the larger circumference of larger pads make it difficult to polish into the corners.
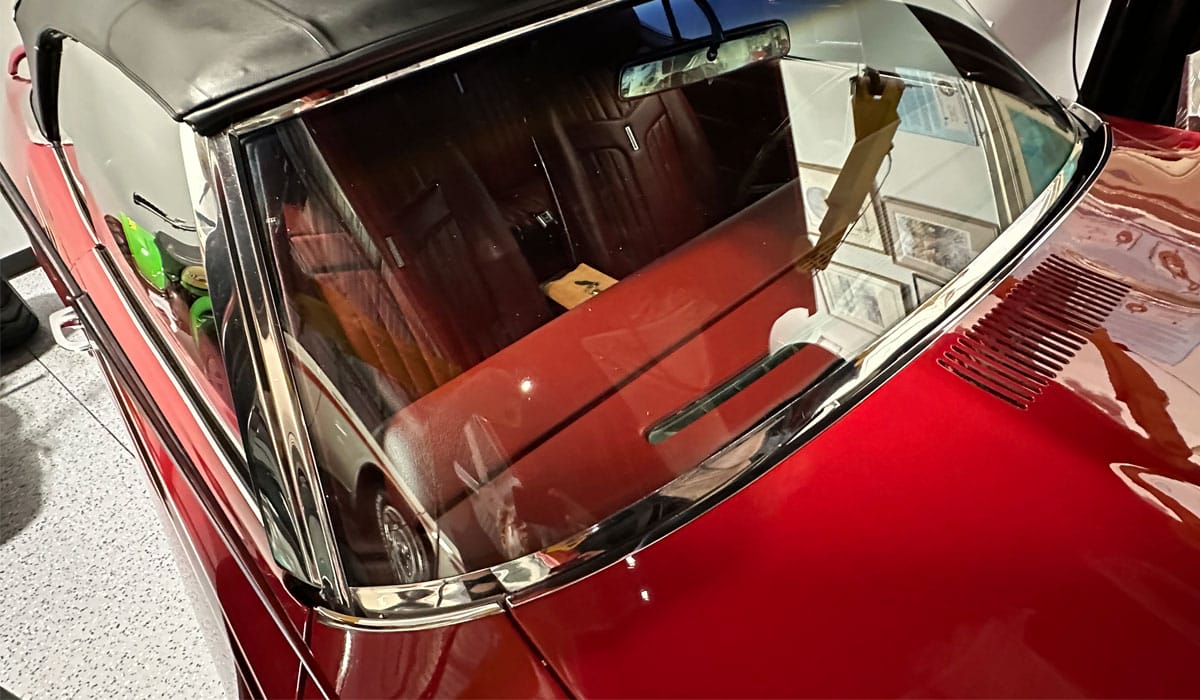
Passenger side windshield
As you can see in the pictures below, the swirls and scratches are throughout the entire windshield.
Frame the window frame with masking tape
Here’s the deal, it’s easier and faster to cover a car with a plastic drop cloth by first placing tape all the way around the window you’re going to polish. Next place the plastic drop cloth onto the car and then cut out the section of plastic where the windshield is AND THEN tape the cut out section of the plastic drop cloth the masking tape already in place around the windshield.
IMPORTANT
When placing tape around the windshield, place the tape about 3/8th of an inch ONTO the glass and SECURE or PRESS DOWN FIRMLY (like your life depends on it), so there’s great attachment strength between the the glass and the tape. This is important because as the combination of polish and water are slung into the tape it can loosen and you’ll never get it to attach securely again.
This means the polish/water slurry will get into, under and behind any decorative trim (like on this 1969 GTO) and also onto any rubber window gasket material as well as around the sides of the window and at the bottom of the window. On modern cars, there’s usually a lot of plastic cladding around the wiper arms. I prefer to cover and protect the wiper arms, blades and plastic cladding when buffing glass on modern cars. Dr. Beasley’s NSP GL will not stain these areas but it’s faster to clean up if you protect these areas in the first place before starting.
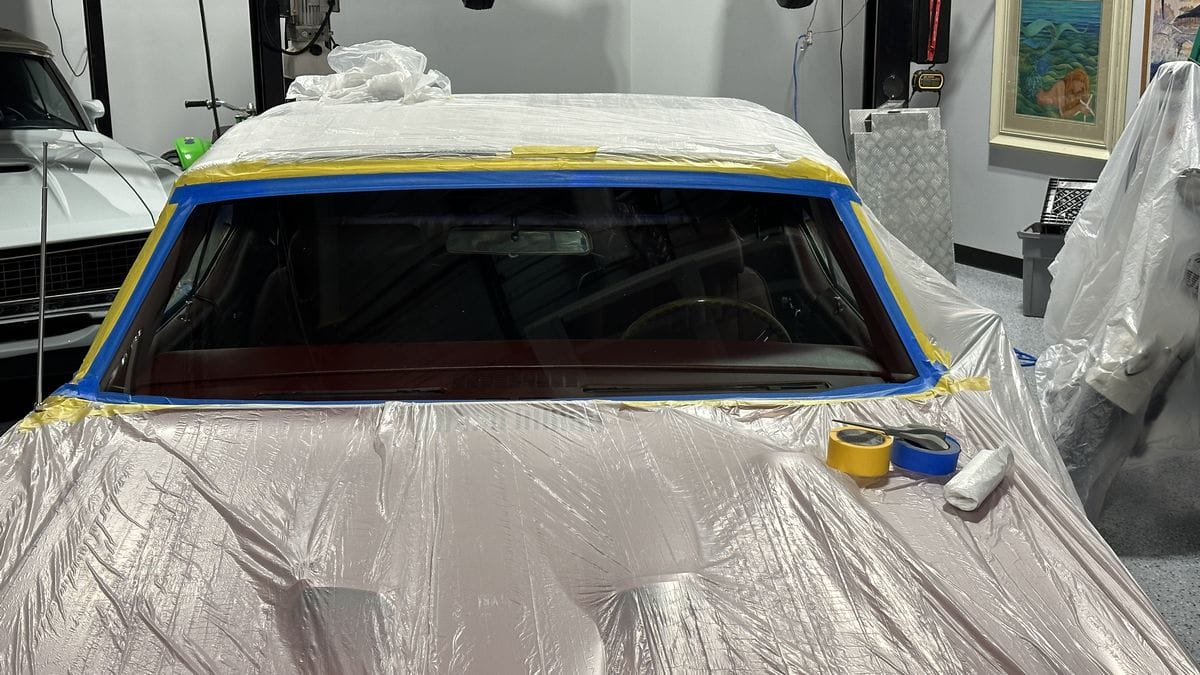
Because this car has a vinyl top and I’m not doing a normal water hose and bucket wash after the glass polishing, I’m placing an extra strip of tape onto the chrome trim and then onto the vinyl top. Like the saying goes, an ounce of prevention saves hours of clean-up.
Here I’ve unfurled the roll of plastic drop cloth and next I’ll start attaching the plastic to the car.
See how I’ve attached and pulled the plastic tight.
IMPORTANT – Start your cut at the top of the windshield. Cut along the tape line.[/B] Then cut both sides and LASTLY cut along the bottom of the windshield. After cutting out the section of plastic in front of the glass windshield, next tape the edges of the plastic to the tape frame you already have in place.
More plastic
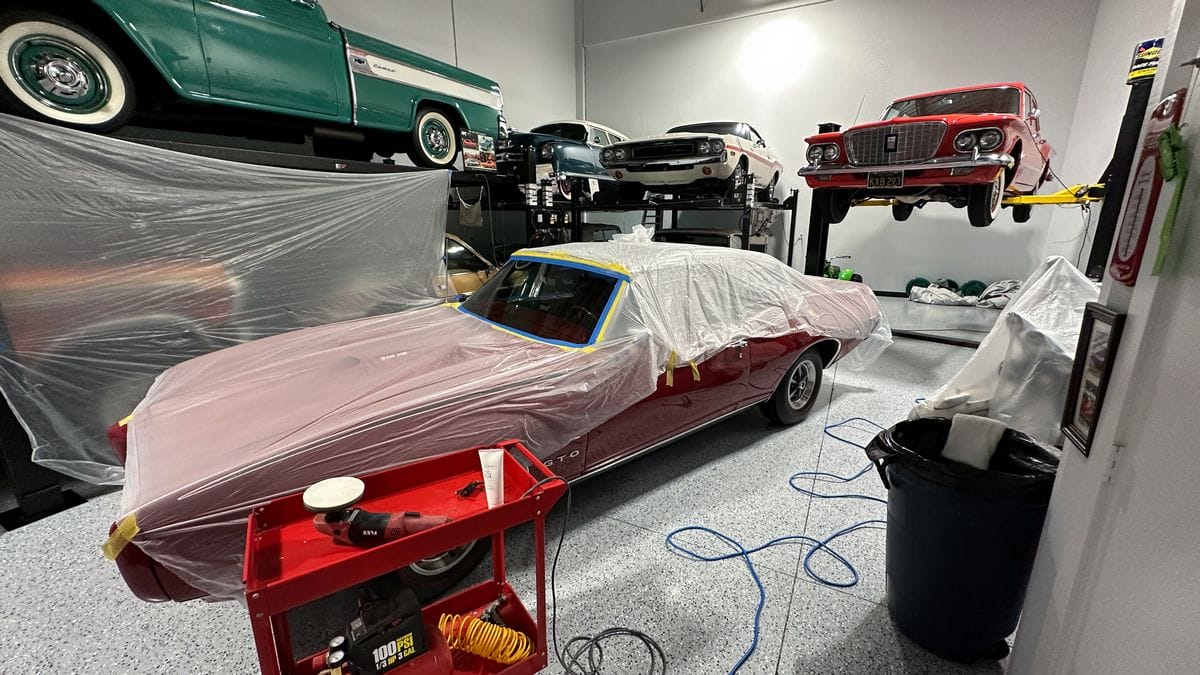
I’ve done this a LOT in my life and for the value of this car and my time, I have a large chunk of plastic drop cloth from another project and I’m going to attach it to the roof and then bring it all the way down the back of the car.
BOOM! This is how I cover and protect cool cars like this GTO before polishing.
This is the second windshield I’ve polished out in this private man cave collection of cars and as such, I have already covered up a nearby vintage, restored Harley Davidson Motorcycle. The last thing I want to do is take a toothbrush to the intricate and complicated design of a Harley Davidson Motorcycle and especially the spokes and fins on the engine.
More cover and protection
It might seem like overkill, but I use a high speed rotary polisher for glass polishing and when you’re buffing for long periods of time using a rotary, the centrifugal force created by a spinning pad tends to sling the wet water and polish slurry everywhere. Behind the plastic is a 1978 Ford Bronco Custom, of which at the time of typing this article, I’ve also polished the driver’s side window and in front of it is a 1978 AMC Pacer, with the original paint and scratches in the glass, that you’ll see in a future video and write-up.
This is how I roll!
Might seem excessive, but this is how I do it. I’m now comfortable with how well everything is covered and protected. It’s time to get busy.
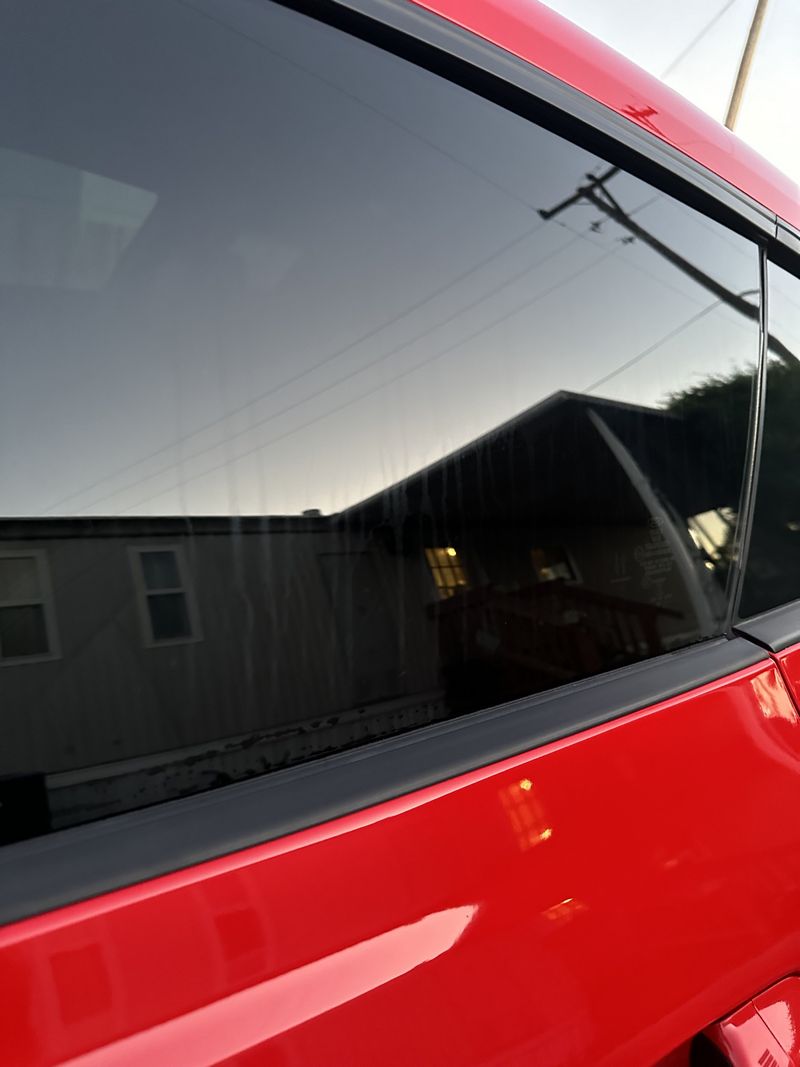
The passenger side glass window has a LOT of scratches running in straight lines from top to bottom where the glass has dragged against the inner window frame over the decades. I’ll do my best to clean this glass up after the windshield.
Same best practice – I’ve done a very thorough job of framing the window in tape and then taping the plastic to the tape frame.
Ready to start glass polishing!
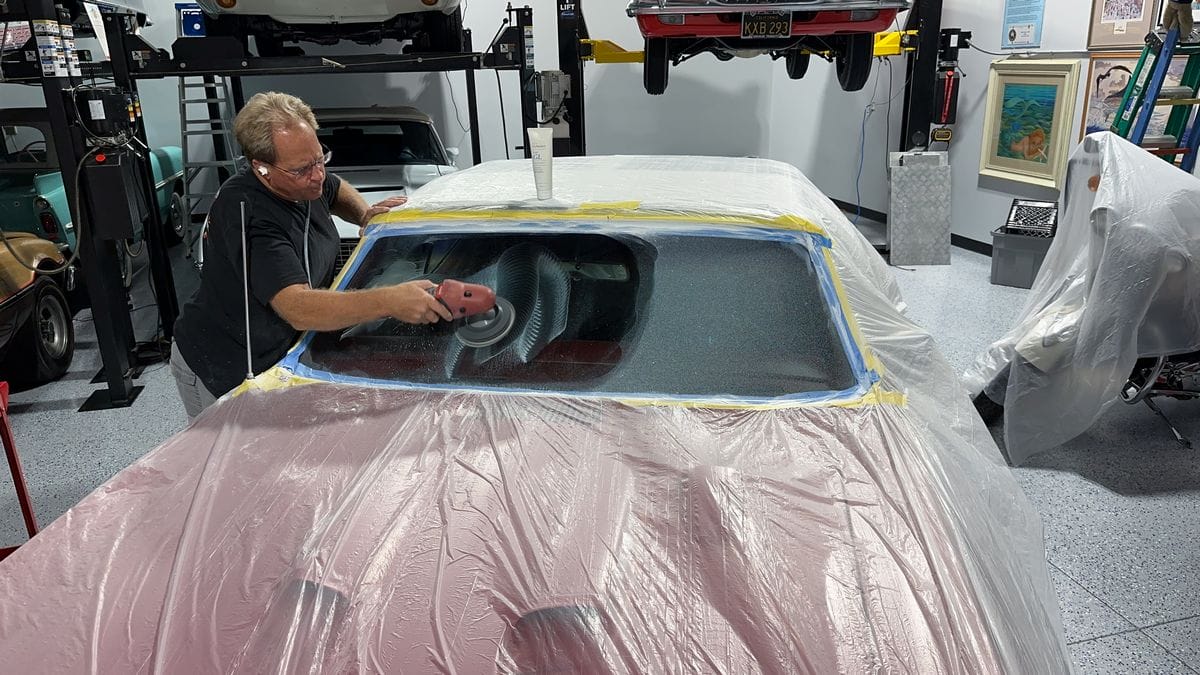
High speed FLEX rotary polisher
The rotary polisher I’m using is the FLEX PE14-3 125 with a high RPM speed setting of 3700 RPM. When it comes to glass polishing, besides the abrasive technology and the rayon pad, speed is your friend. Optimum RPM after spreading the polish out is approximately 2200 to 2600 RPM and this FLEX rotary handles this requirement easily. FLEX makes the best automotive polishers on planet Earth. I normally buff glass at 2600 RPM, which is around the 4-5 setting on the speed dial.
And just to document, yest this is the same car and windshield as shown in pictures above.
Here’s our hero product – Dr. Beasley’s GL Nano Surface Primer Glass Polish
Pre-polishing set-up
Before starting, attach your foam interface pad to the face of the backing plate. Some interface pads have holes for vacuum applications, but any type of interface pads, holes or no holes will work.
What’s important is the thick foam core. This makes polishing easier on you and also helps to maintain 100% contact between the rayon glass polishing pad and the glass you’re polishing. Keep in mind most windshields have a curve to their design, that’s where the cushion and flexibility provided by the foam core comes into play.
Always do your best to center both the interface pad and the rayon glass polishing pad onto the backing plate.
For the initial application when starting out with a clean DRY rayon glass polishing pad, apply a circle of product onto the face of the pad. After the pad breaks in, you can reduce the amount of product to a few nickle sized drops.
Mist some clean water onto the glass before polishing, and then during polishing, when possible, have a buddy present to mist water while you polish and switch back and forth to prevent fatigue.
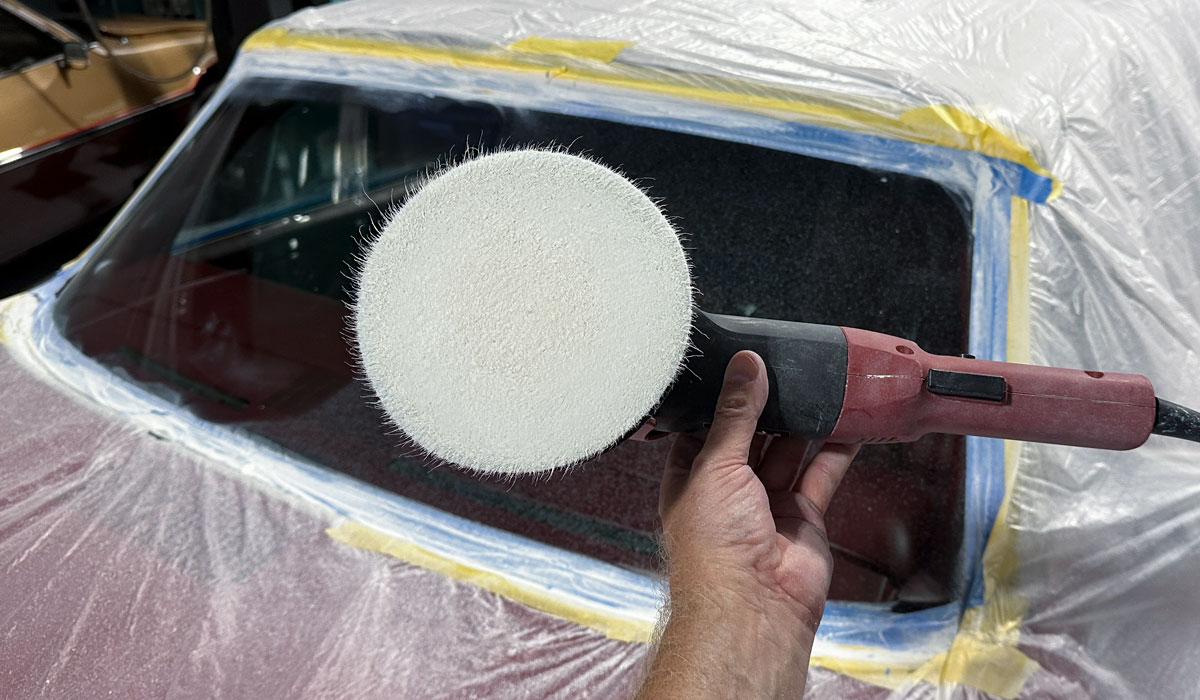
Getting busy… and yes, that’s one handed rotary buffing
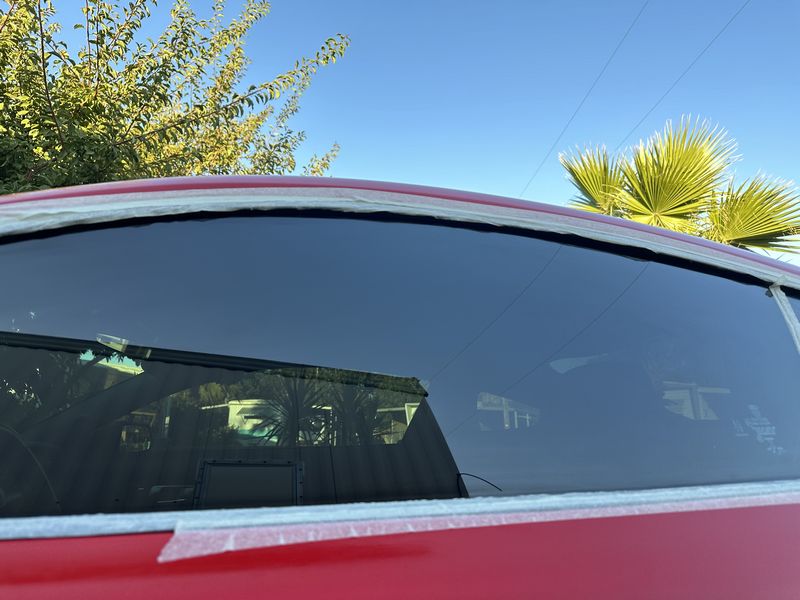
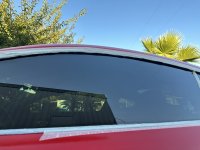
Before & After – Just for this article
If I wasn’t writing this article and wanting to show you the power of the Dr. Beasley’s NSP GL Glass Polish, I would NOT have placed a tape-line down the side of the windshield. I did this in order to get before and after pictures after polishing for only 10 minutes. The results are impressive, but will be even better after I take my pictures, remove that strip of tape and get down to business.
Before condition on the right side of the demarcation line
After results on the left hand side of the demarcation line
About 3 hours later…
In the below two pictures you can see I’ve machine polished both sides of the windshield. For my last few passes on both side, I try to make nice, uniform overlapping passes to as I like to say, shmoo things over.
Polish splatter
Here you can see the build-up of the polish and water mixture called slurry. This is after I’ve wiped all the polish off the glass and in the process, wiped a LOT of the polish off the tape too, it was a LOT worse.
Thick layer of polish slurry
Please take my word for it…
If you’re only going to remove topical water spots, drizzle stains and road film, or if the swirls, scratches and/or wiper marks are shallow then you don’t have to go nuts with covering and protecting the panels surrounding the windshield. BUT if like in this example, the original glass windshield on this 54-year old car are HORRENDOUS – then in order to work out a majority of below surface defects, you’re going to be polishing for a while and the results are going to be polish splatter slinging outward from the spinning pad. Someone is going to have to clean this up and it’s faster to cover up than it is to clean up.
Messy – See the splatter dots?
There are literally millions, if not billions of splatter dots on top of the plastic on top of the car hood. Same goes for the roof, the back of the car and even the vertical panels. It’s so much more rewarding at the end of the job to ball up the tape and plastic than it is to wipe off all the splatter.
Dr. Beasley’s Rayon Glass Polishing Pad
Just to note, you must use a rayon pad to do this type of sub-surface glass polishing. Foam pads, wool pads, microfiber pads simply do not work. The good news is, for a windshield, you really only need on pad. And after use, you can hand wash it in a sink and then place it somewhere flat and clean to air dry for use the next time you need to do some glass polishing.
Clean paint and vinyl under the plastic drop cloth
Be a good steward of our planet
Living in South Florida, (or anywhere), it’s important to be responsible when it comes to disposing of any type of waste. The last thing I want is for this plastic drop cloth to end up in our ocean and other water systems. I roll the plastic back off the car and then using some painter’s tape, I compress it into a small ball and tape it up to keep it from expanding and possibly blowing out of the dumpster. My goal is to help it as much as I can to get to the local landfill.
Clean as a whistle!
No splatter dots on the beautiful black vinyl top!
More to come
-Mike
Last edited: