


- Admin
- #1
- Joined
- May 21, 2021
- Messages
- 1,467
- Reaction score
- 799
- Points
- 113
- Location
- Stuart, Florida
- Website
- themikephillipsforum.com
Review: Harbor Freight HC109B Forced Rotation Dual Action Polisher
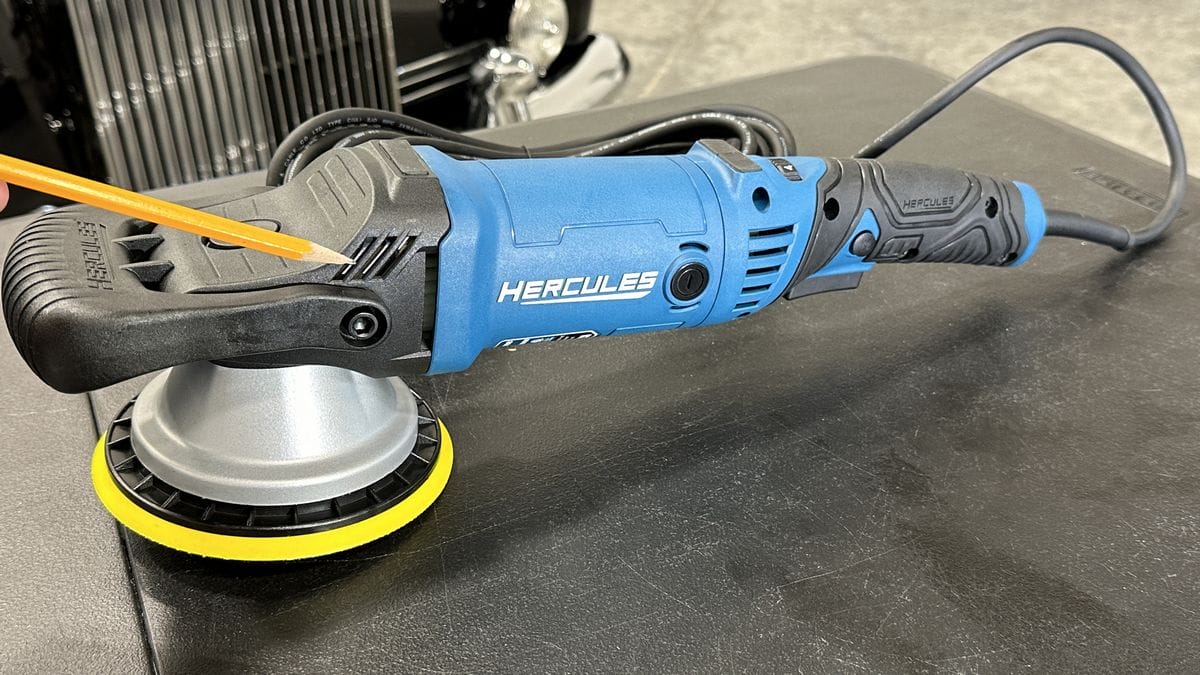
The Harbor Freight HC109B Forced Rotation Dual Action Polisher
It used to be people complained there weren’t a lot of options when it comes to car detailing power tools. Nowadays, people complain because there are so many car detailing polisher options! Me? I prefer the later, that is having too many options to choose from versus a limited number of options because I can pick and choose the best polisher for my style of car detailing and paint correction.
The Hercules Forced Rotation Dual Action Polisher is a 8mm gear-driver orbital polisher. This means, this tool will both rotate a buffing pad and oscillate a buffing pad at the same time with zero chance of pad stalling.
The majority of car detailing polishers on the market are what are called Free Spinning Random Orbital Polishers. Instead of being gear-driven, they have a free spinning spindle with a counterweight. When the tool is brought up to speed, the spinning counterweight creates inertia and his is what maintains pad rotation and pad oscillation.
The upside to free spinning random orbital polishers is they are very safe to use even by first-time detailers. The also tend to be very smooth in operation with very little felt vibration to the hands. This makes them more enjoyable to use especially when you consider that an average paint correction to a passenger size car can take anywhere from 3-8 hours of machine polishing.
Another upside to free spinning random orbital polishers is because they are less aggressive in their pad spinning action, they tend to finish out nicer more consistently on softer paints, whereas gear-driven tools may leave micro-marring.
The type of abrasive technology, choice of pad and your technique are also contributing factors to how a gear-driven orbital polisher will finish out on soft paint.
The downside to free spinning random orbital polishers is that anytime the pad is stalling out, or just vibrating or jiggling against the paint, this means for the most part, the tool and you, are not doing anything. By this I mean, if the goal is to remove swirls, scratches, water spots and oxidation, the most efficient way to do this is by maintaining pad rotation and pad oscillation. When the pad stops rotating and/or oscillating, you’re simply wasting time.
Some people will argue that you don’t need pad rotation, only pad oscillation to remove defects buy in my experience, when it comes to any brand of free spinning random orbital polishers, if you don’t have good pad rotation you also don’t have good pad oscillation and in my opinion, you just wasting time because the combination of abrasive technology and pad choice simply are not abrading the paint in a time-efficient manner.
With a gear-driven orbital polisher, because there is no chance of pad stalling, as I like to say, you can plow through the paint correction process as fast as humanly possible while maintaining pro-quality results.
Great question. 8mm is the length of the diameter of the orbit stroke. In the category of gear-driven orbital polishers, 8mm is considered a large or long stroke action. When compared to the category of free spinning random orbital polishers, 8mm is considered a short stroke action.
Other gear-driven orbital polishers are available in 5mm and free spinning random orbital polishers range from 5mm to 25mm. The difference comes down to continuous pad rotation and pad oscillation with gear-driven orbital polishers versus the possibility of pad stalling with free spinning random orbital polishers.
Notice I don’t use the word random to describe gear-driven orbital polishers? That’s because with a gear driven design, there is no random oscillation pattern like you get with a free spinning random orbital polisher.
The gear-driven design also means ZERO pad stalling, no matter how much pressure you apply to the buffing pad or whether you’ll holding the pad flat to the surface or at an angle. This one aspect means less time doing paint correction due to pad stalling, which means you can get the job done faster.
Some people that have tried gear-driven orbital polishers don’t like them because they feel the tool trying to pull them in a given direction. This is called the walking-effect, it’s as though the tool wants to walk or move away from you, or toward you or to one side or the other. The is the nature of the gear-driven feature and it’s also a sign of POWER.
Free spinning random orbital polishers don’t have this pulling sensation or walking-effect and are much much smoother to control. But this smoothness you feel is they byproduct of less brute strength as it relates to maintaining pad rotation and pad oscillation. To me, the pulling or waking-effect is not a problem as I much prefer the speed and power a gear-driven orbital polish offers.
If you feel a gear-driven orbital polisher trying to pull or walk in some direction, this is a sign YOU are not holding the pad flat to the surface. In other words, the tool is talking to you, teaching you to change how you hold the tool so as to keep the buffing pad flat to the surface.
When buffing using only an edge of a buffing pad with gear-driven orbital polishers it’s assumed it’s going to pull in some direction in the same way a rotary polisher will pull when buffing on and edge. It’s your job to learn and master this feature, not be scared of it or dislike it because it’s not as smooth as a free spinning random orbital polisher.
It’s a lot of power available to you, but you must learn how to use and control it and this only coms from spending time behind the tool.
When buffing with a free spinning random orbital polisher like a Porter Cable 7424XP, (a very common and affordable polisher), a common technique people will use to help their eyes to see and monitor pad rotation or pad stalling is to mark the side of the backing plate and/or place a mark on the side of a buffing pad.
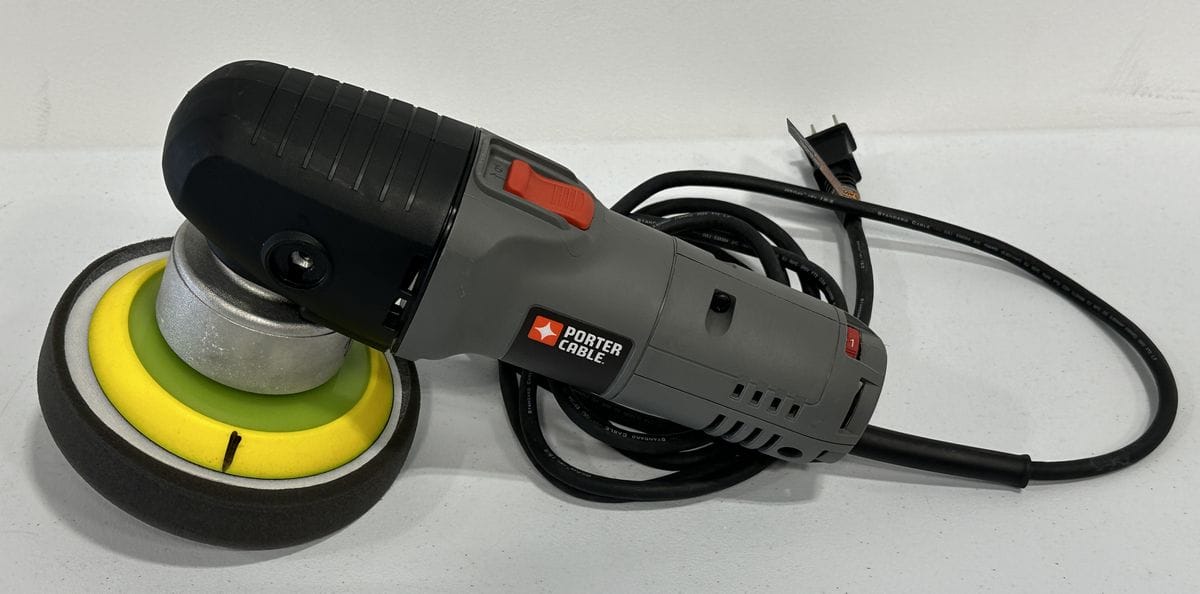
Without the black mark like you see in the above picture, the spinning or in the case of pad stalling, the vibrating or jiggling action of the buffing pad will appear to be a yellow blur.
The simple technique of adding a black line to either the backing plate or the buffing pad or both, will make it dramatically easier for your eyes to see and monitor if the pad is spinning and oscillating or just vibrating or jiggling against the paint, also called pad stalling.
The thing about this is, it means the entire time you’re doing paint correction with a free spinning random orbital polisher, you must constantly be LOOKING at the backing plate and buffing pad to see if they are in fact rotating and oscillating and if not, the try to overcome the pad stalling.
This can include,
Having to constantly LOOK to see if the buffing pad is spinning and/or oscillating, for hours is what I call BRAIN DRAIN!
With a gear-driven orbital polisher, you don’t have to LOOK. Because of the gear-driven mechanism, the pad is going to rotate and oscillate no matter what. Including whether or not you’re LOOKING at the spinning pad the entire time you’re buffing.
This means you can think about whatever you want to think about while doing the paint correction steps instead of constantly monitoring for pad rotation/oscillation. For example, instead of looking and monitoring for pad rotation you can use a technique I teach in our detailing classes and that is to count outload your section passes to maximize your time efficiency.
Both types of tool actions have their fans. And the only way to truly find out which type of tool is right for you, is to buff out some cars or as I like to say, put some time behind the buffer.
For me personally, I much prefer gear-driven tools for their power, speed and no brain drain.

Upon opening the box, there’s basically the tool and two plastic screws for holding on the plastic cap on the head of the tool incase you choose to use the tool without the Bail Handle plus an owner’s manual.


Just for fun, I used my 25′ tape measure to check, and the cord is in fact 25′ long.

Being a copy of the original FLEX XC 3401 VRG, I figured it would have the felt compression ring behind the backing plate.
While Harbor Freight does not state or recommend this felt compression ring needs to be lubricated, my experience is, it does in fact need to be lubricated. The reason why is to reduce friction and create slippage for anytime you’re pressing hard against the head of the polisher when doing heavy paint correction.
To access the felt compression ring, press the gear lockup button on the top head of the polisher to lockup the gears and then loosen the backing plate bolt using the included hex head wrench.
Use a light oil, in this example I’m using Air Tool Oil, but any quality lubricating oil will work, and apply the oil directly onto the felt ring.
The felt ring is a wear part, I’m not sure where you can get a replacement. One thing you can do however, is periodically remove the felt compression ring and flip it over and then reinstall and lubricate the felt compression ring.
To remove the felt ring, use a pointy instrument, I normally use a ordinary thumbtack. Be careful not to STRETCH the felt ring as this will make re-inserting it into the channel in the head of the polisher difficult.
When reinstalling the backing plate, it’s vitally important that you align the slotted hole in the backing plate with the slotted drive spindle. If you don’t properly align the slotted backing plate to the slotted spindle, and tighten the bolt down, you will damage the gear set inside the head of the tool as well as the gears on the backing plate.
If you look closely, you can see the slot in the backing plate is correctly aligned and the backing plate bolt can now be installed and tightened.
IMPORTANT: Always re-install the flat washer first, followed by the lock washer.
Using the included hex head wrench, tighten the backing plate to the tool until snug.
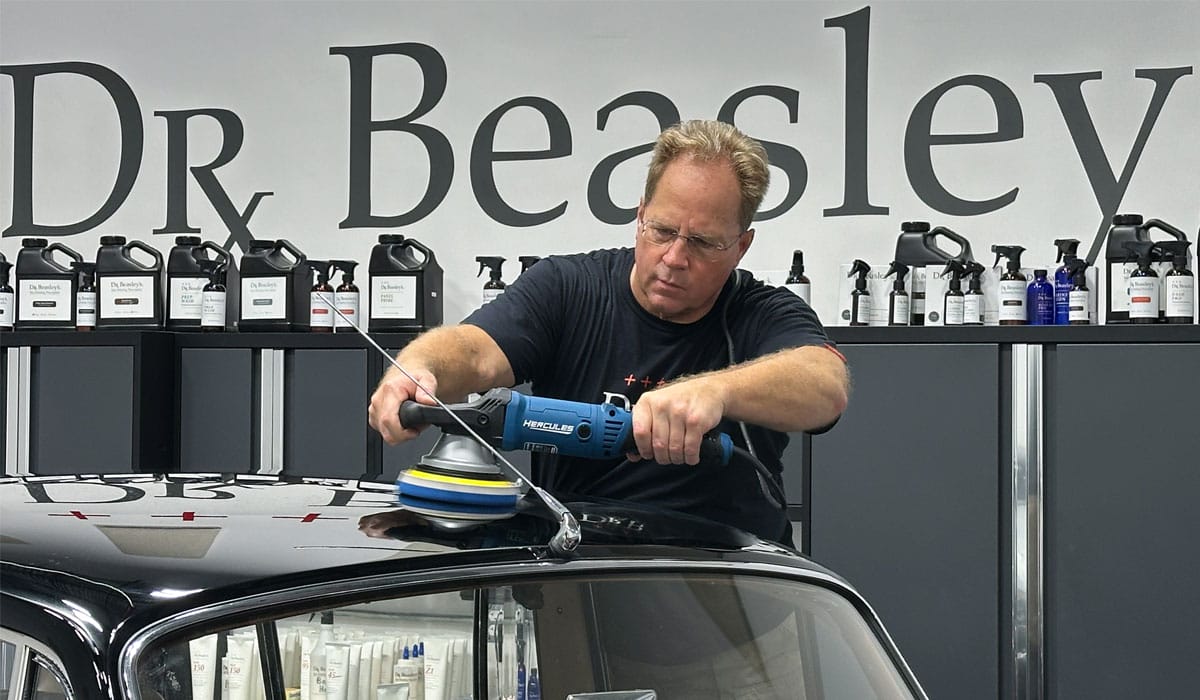
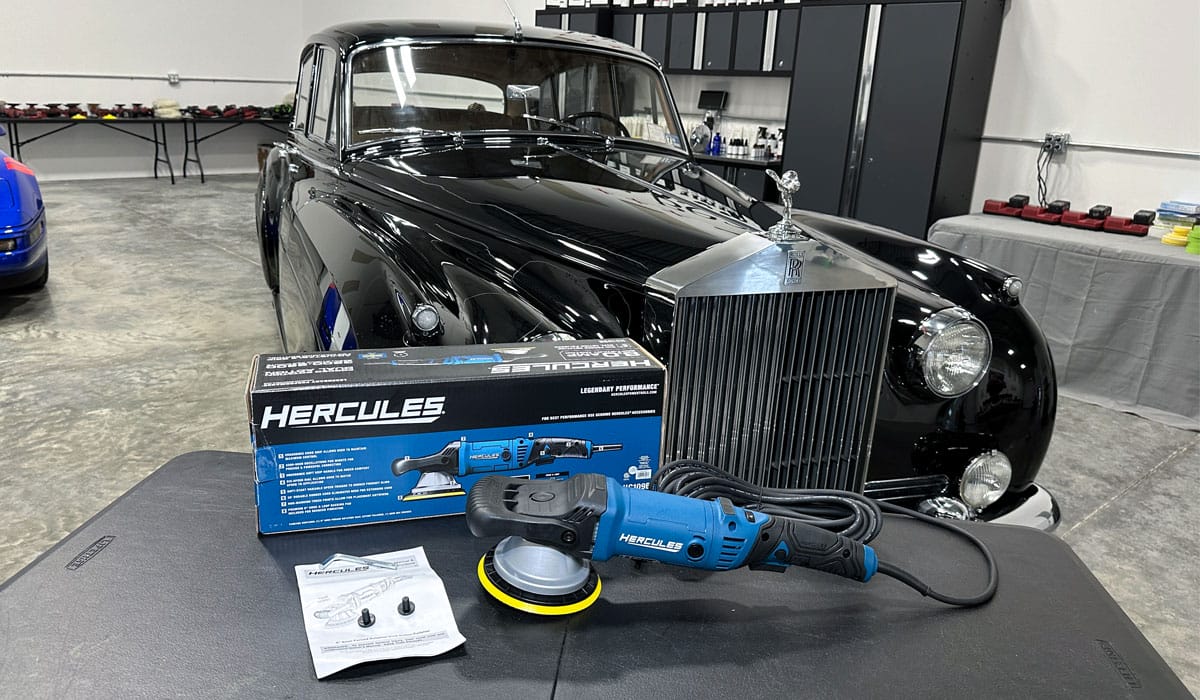
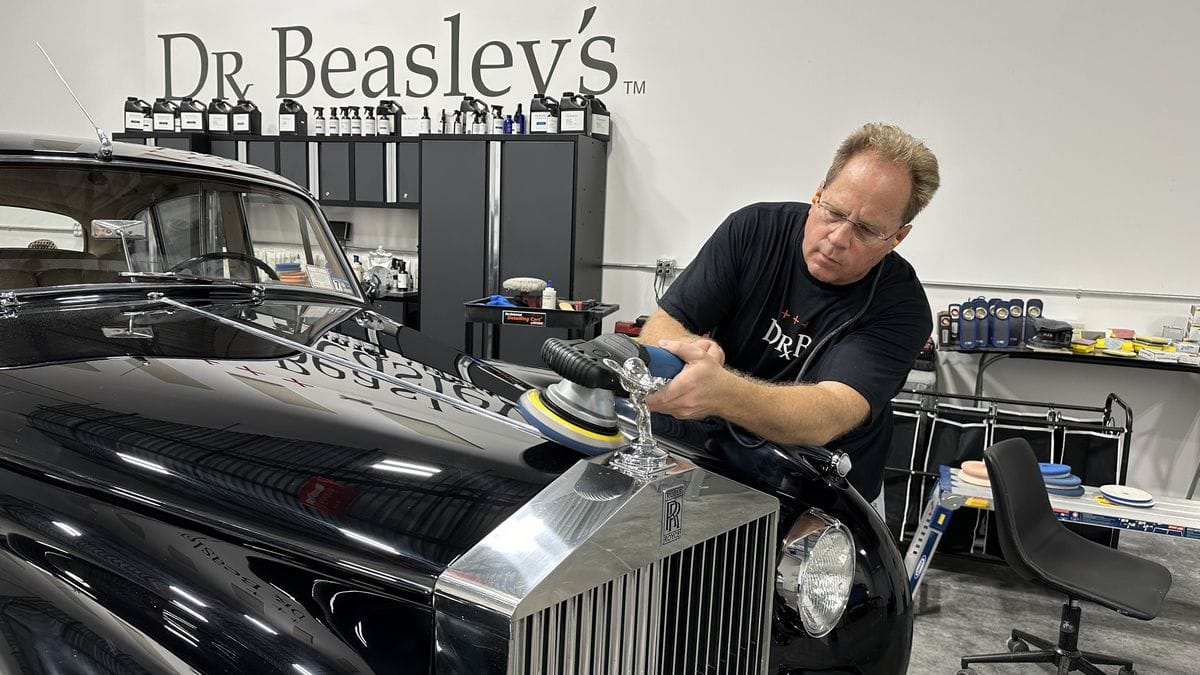
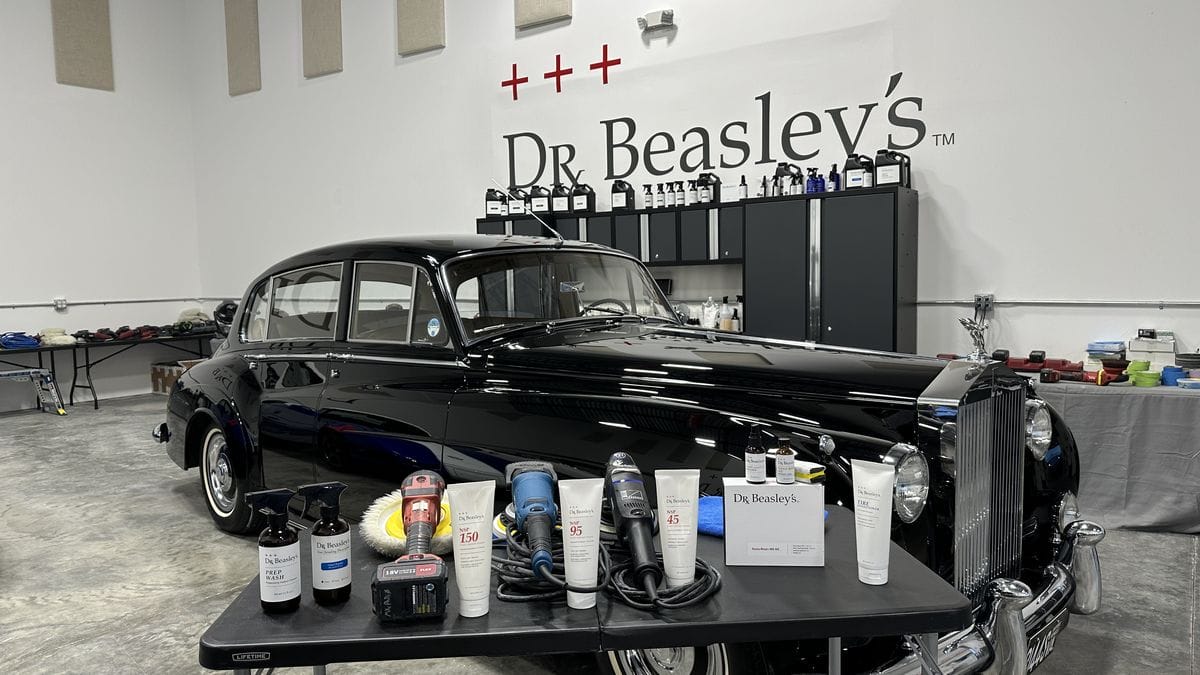
Now that I’ve lubricated the felt ring, it’s time to take the HF Forced Rotation Orbital Polisher for a test drive. To punish and torture this tool, I’m going to use it for the polishing step on this 1959 Rolls-Royce Silver Cloud. This is a HUGE car with plenty of real-estate in the way of body panels.
Using a large car like this will provide me with plenty of hands-on time behind this tool so I can share my real-world experience in this review.
This should be fun, a $100.00 tool to detail a $100,000.00 car!
In our detailing classes that include an Extreme Prep wash as a part of the class, we teach our class when washing a car to start with the wheels and tires first to avoid any standing rinse water on the painted body panels where you risk water spots while cleaning the wheels and tires.
For our Extreme Prep Wash portion of our classes, we teach how to machine clean tires and it gets the tires so much cleaner than working by hand with a tire brush.
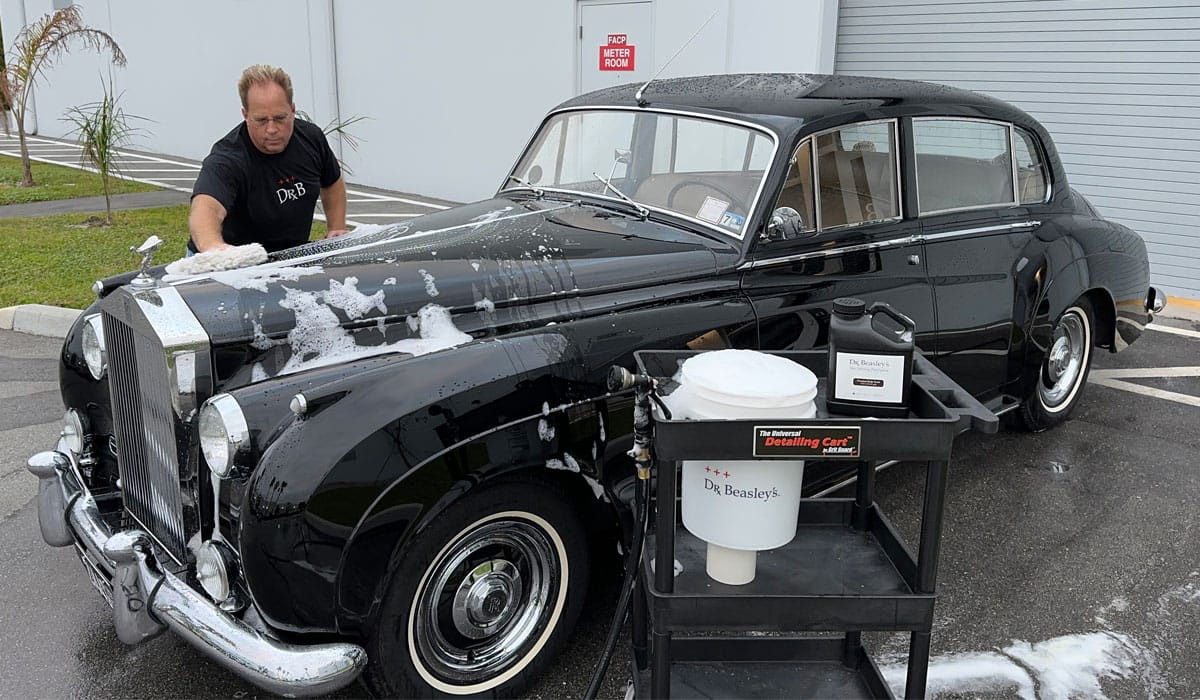
After cleaning all 4 wheel and tires, I give the Rolls-Royce a thorough washing using Dr. Beasley’s Premium Body Wash with a Dr. Beasley’s Wash Mitt.
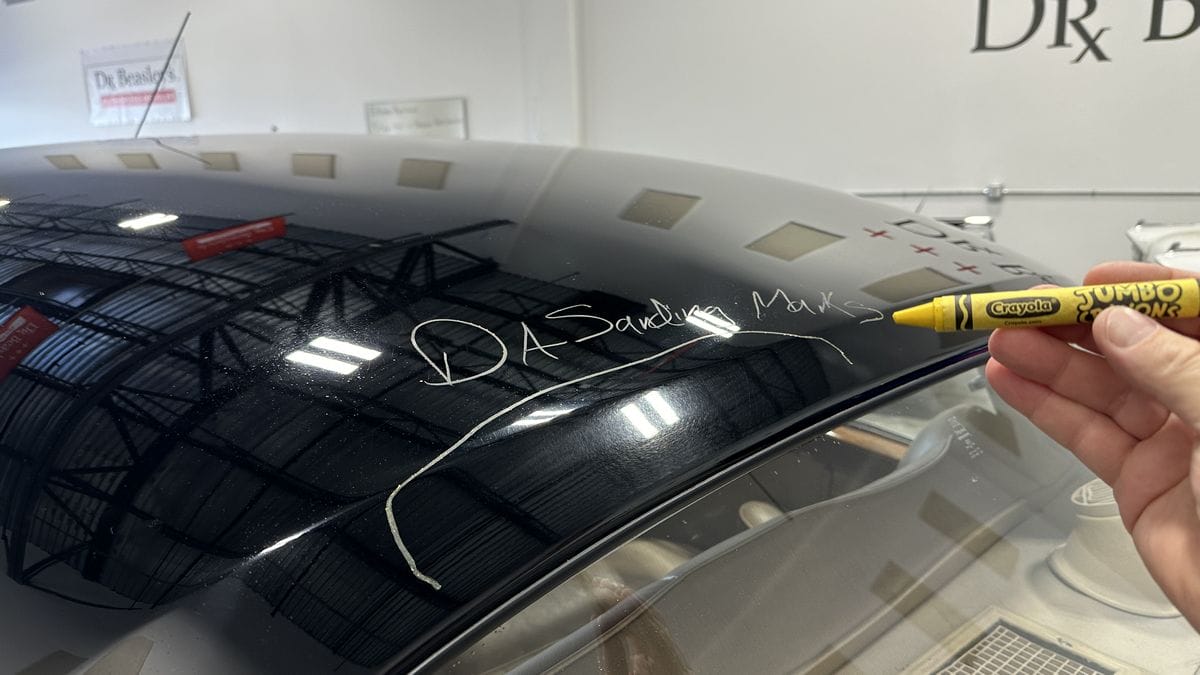
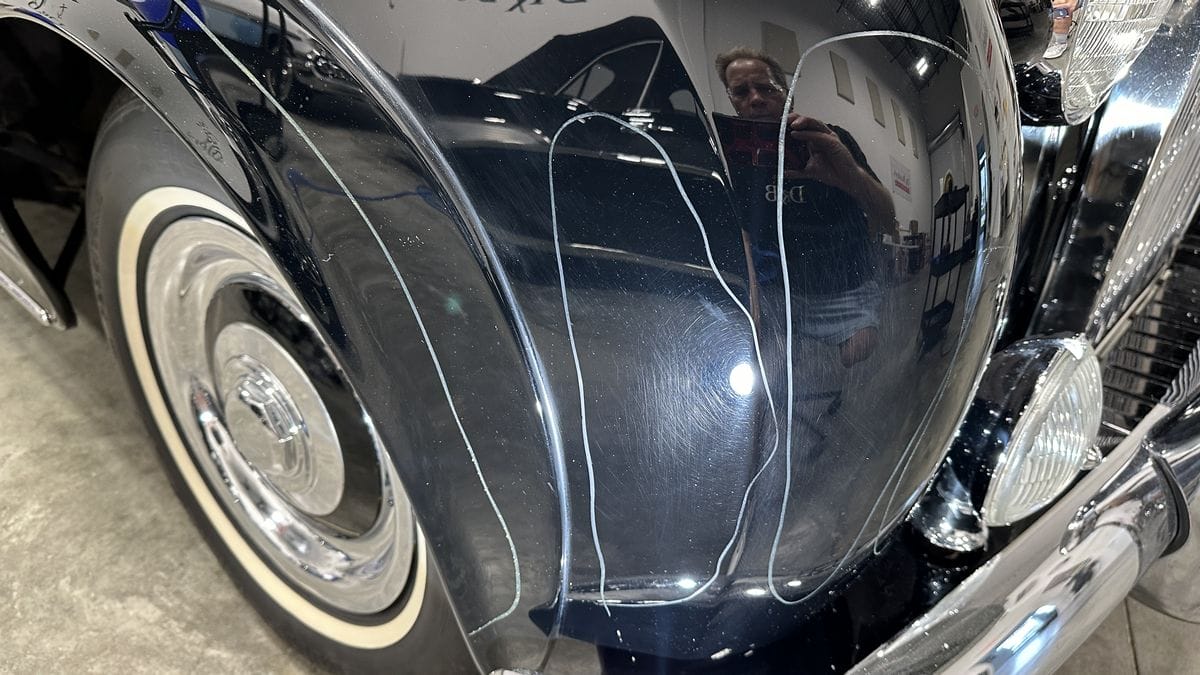
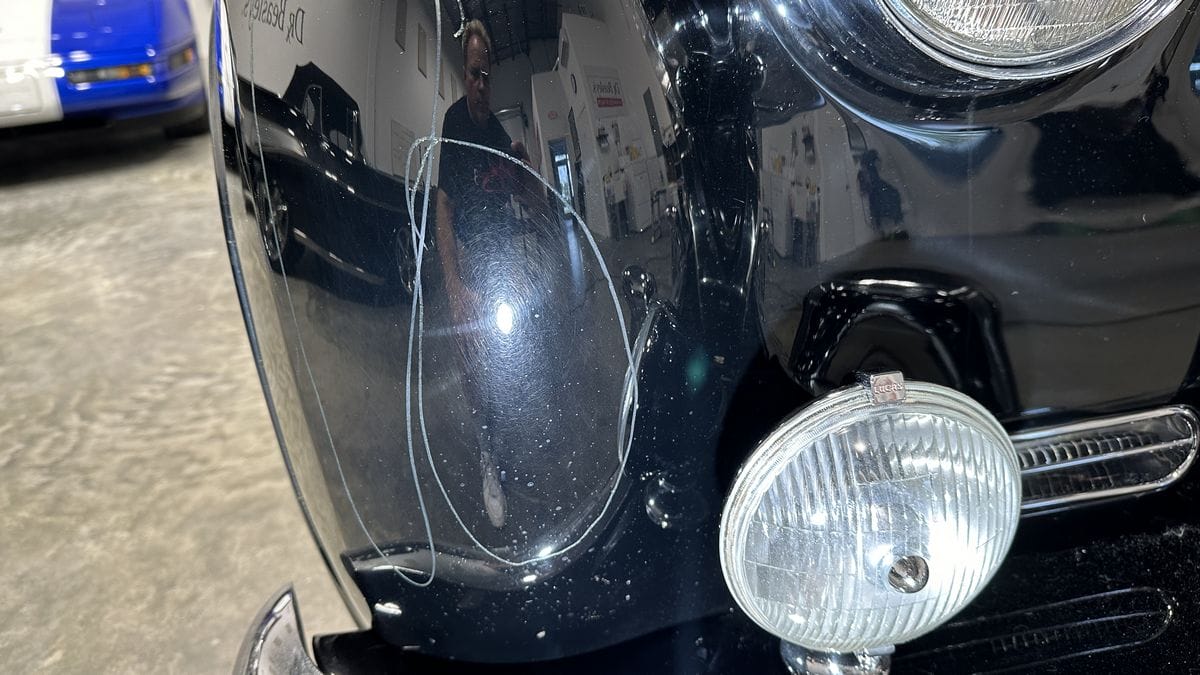
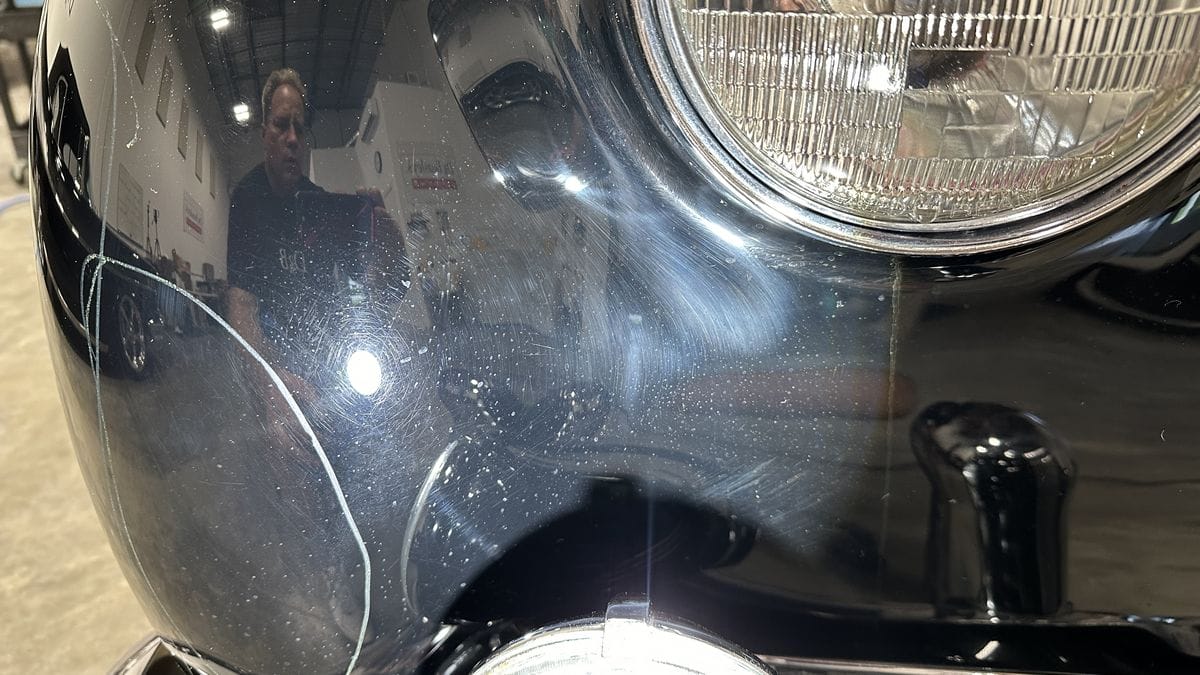
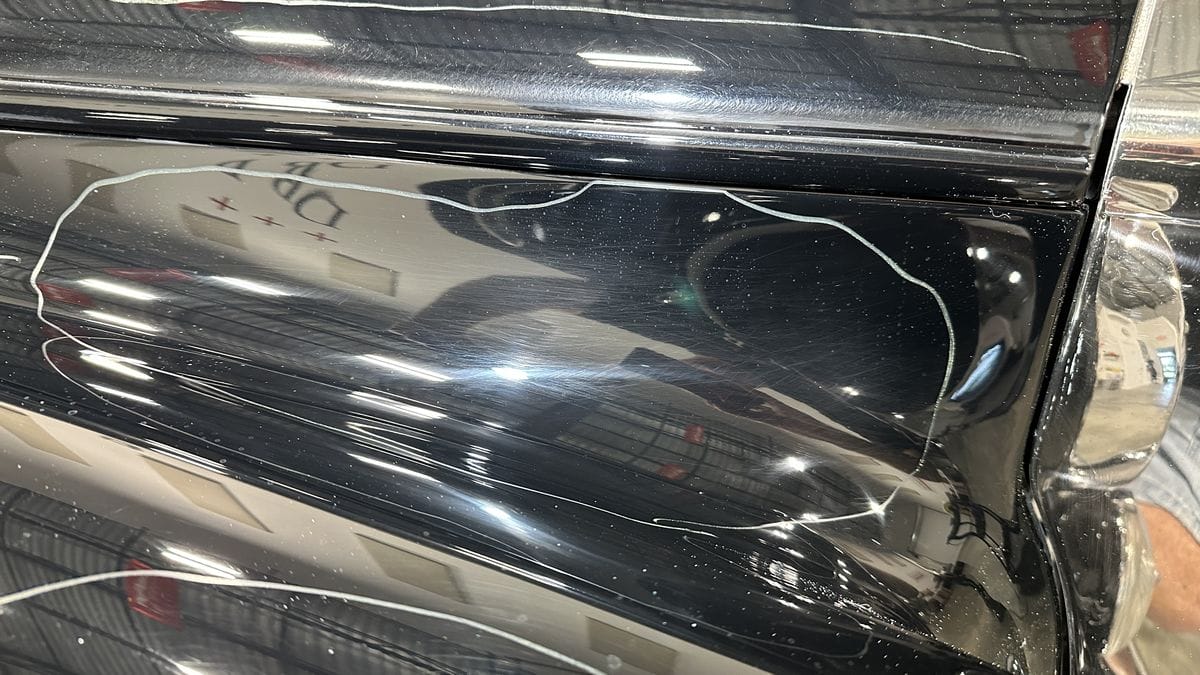
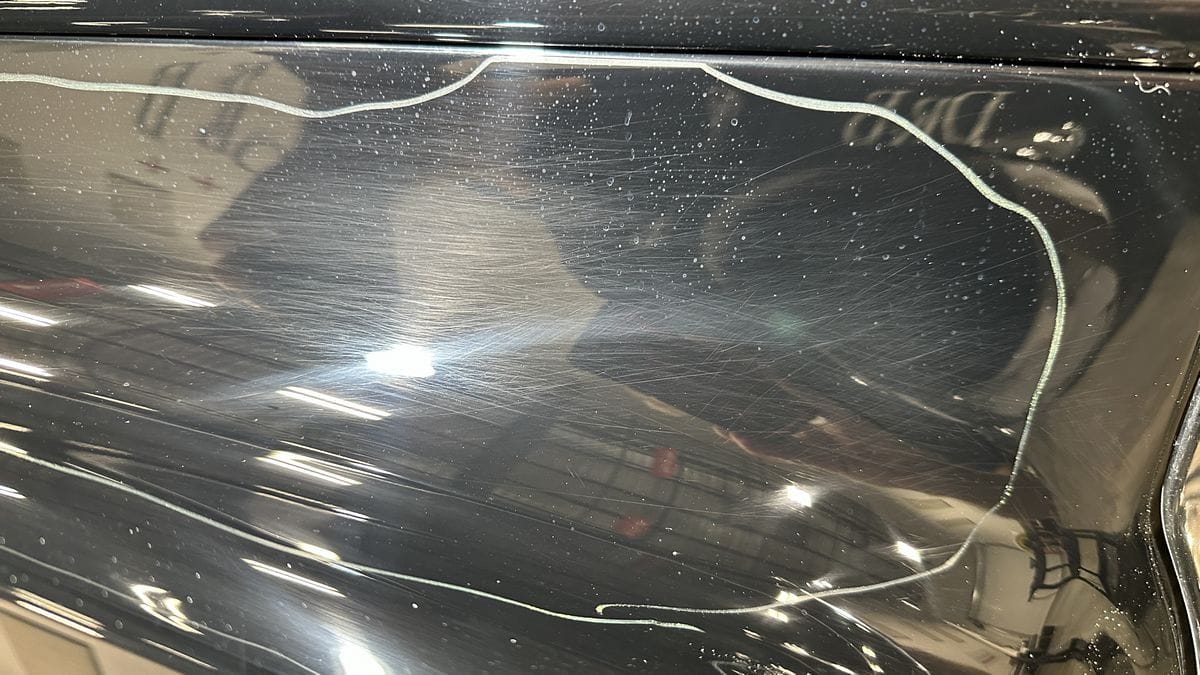
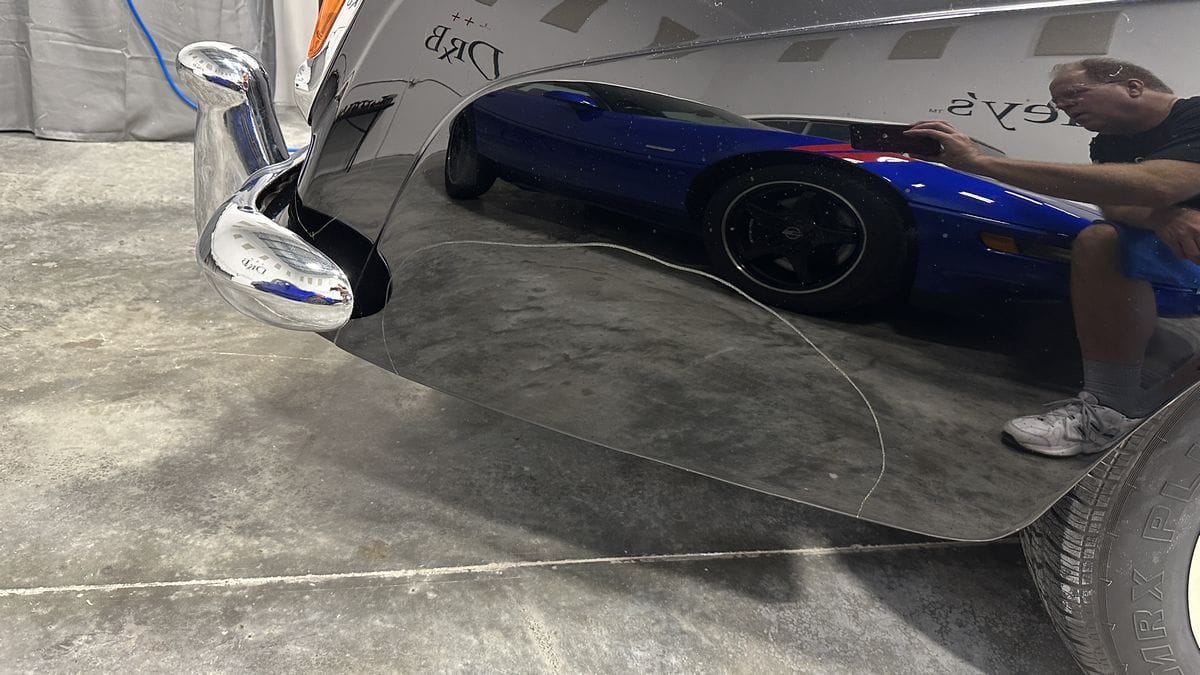
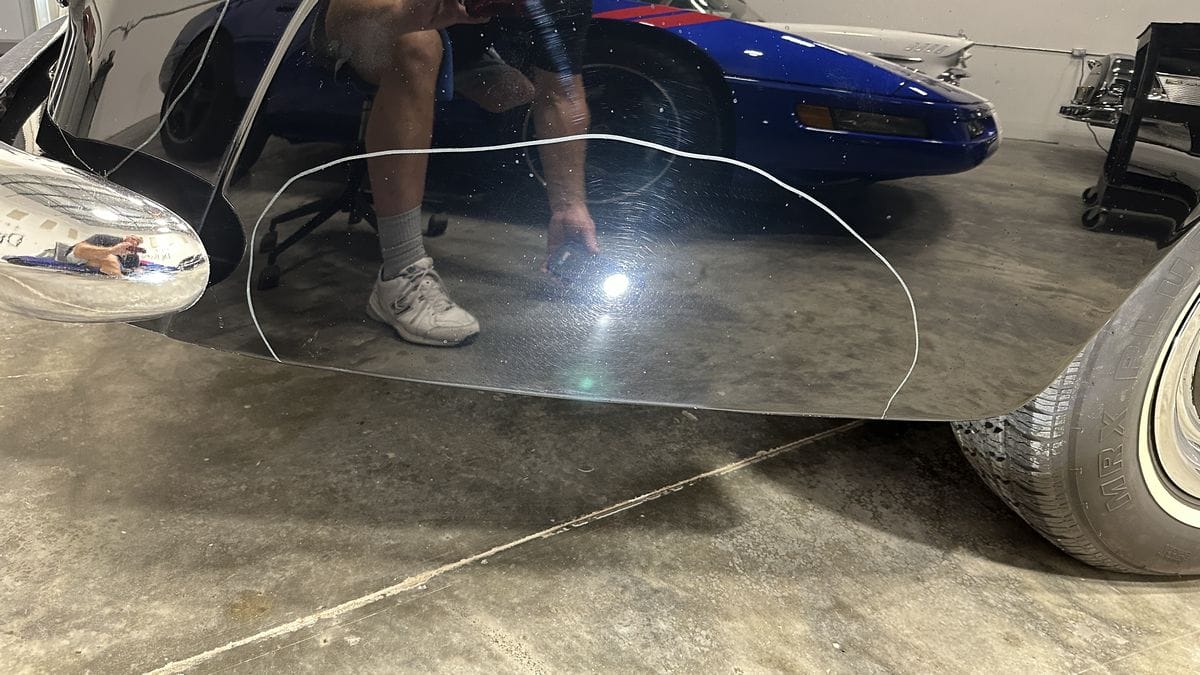
Now that the car is clean and moved into the Dr. Beasley’s O.R. (operating room), using overhead lights and a hand-held inspection light, I mark all of the worst defects I’ll need to remove. I call this the Crayon Hack as I use a Jumbo Crayon to mark all the areas with deep or serious paint defects that I’ll need to remover.
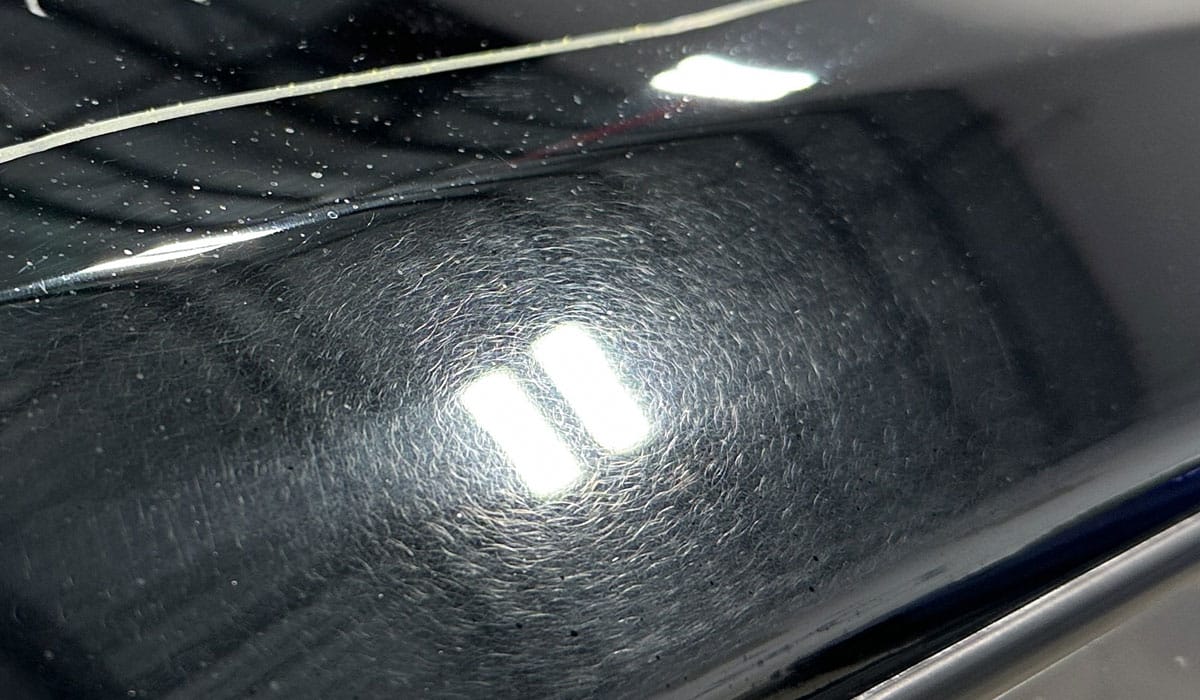
As you can see by the pictures below, there are a lot of swirls, scratches and sanding marks that need to be removed in order to restore a true showcar finish.

To get the paint on this Rolls-Royce right, I’m going to start with Dr. Beasley’s NSP 150 with a wool pad on a rotary polisher. The defects in the paint are too many and too deep to attempt to remove with an orbital polisher in a time-efficient manner.

After removing all the paint defects, it’s time to remove any hologram scratches left by the wool fiber pad and perfect the paint to maximize gloss and clarity.
When doing a multiple-step paint polishing process, it’s normal to start at the highest point, the roof, and then work your way down and around tackling all of the various body panels.
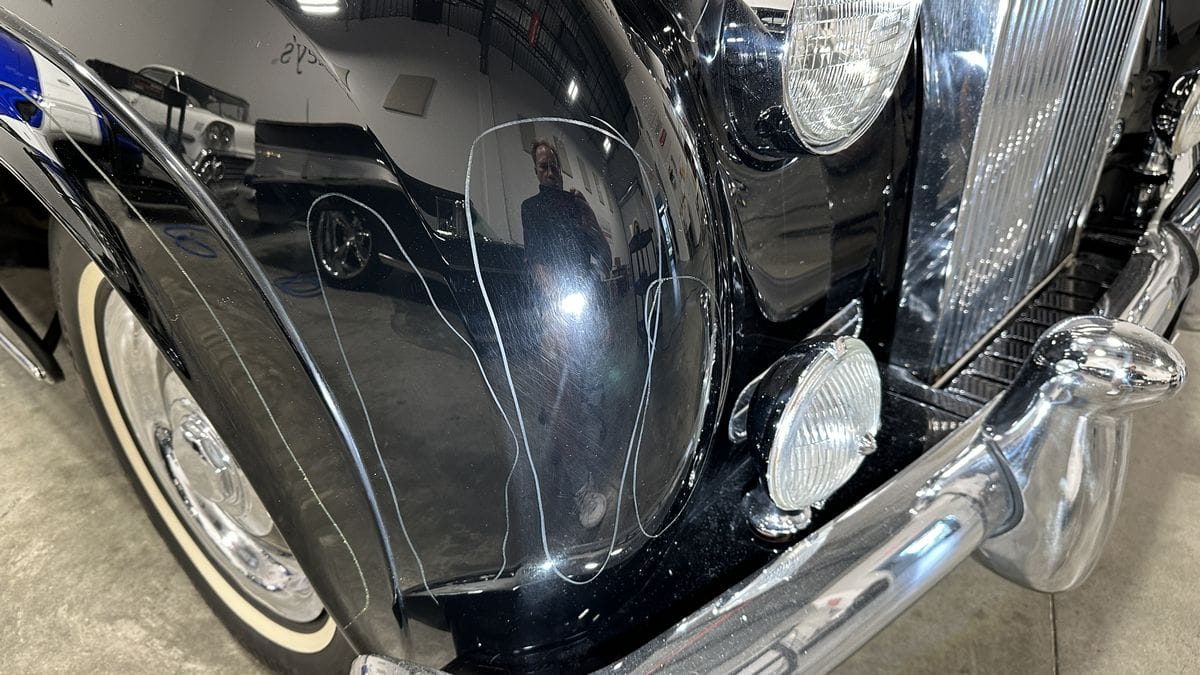
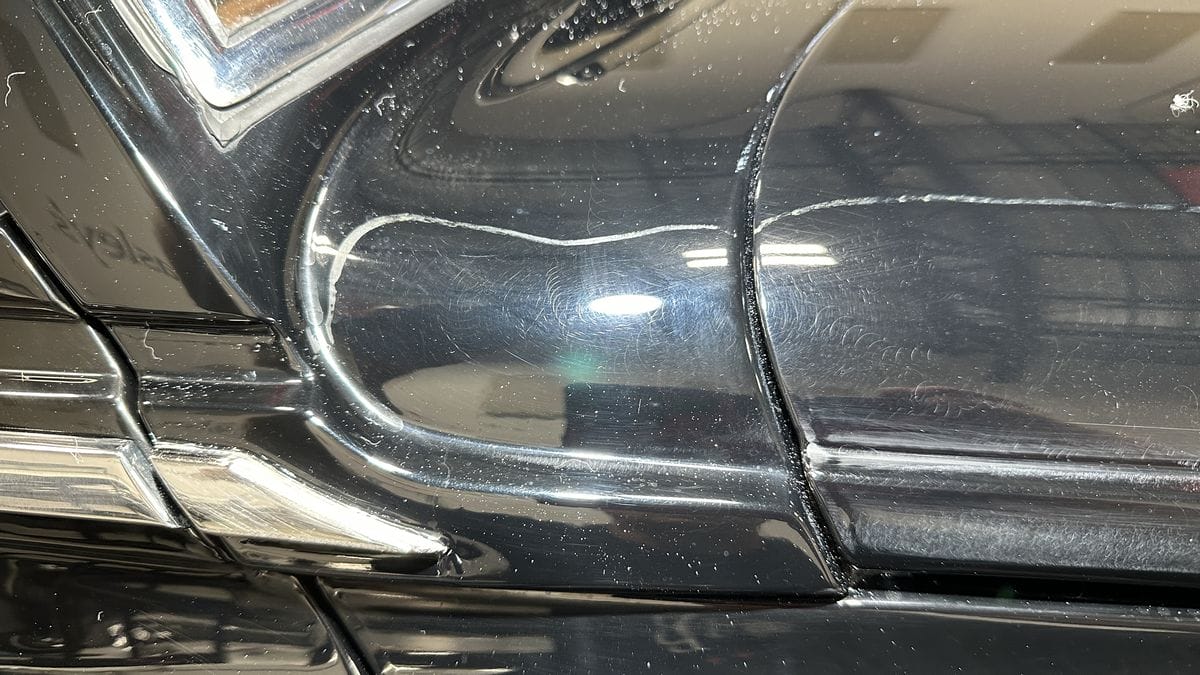
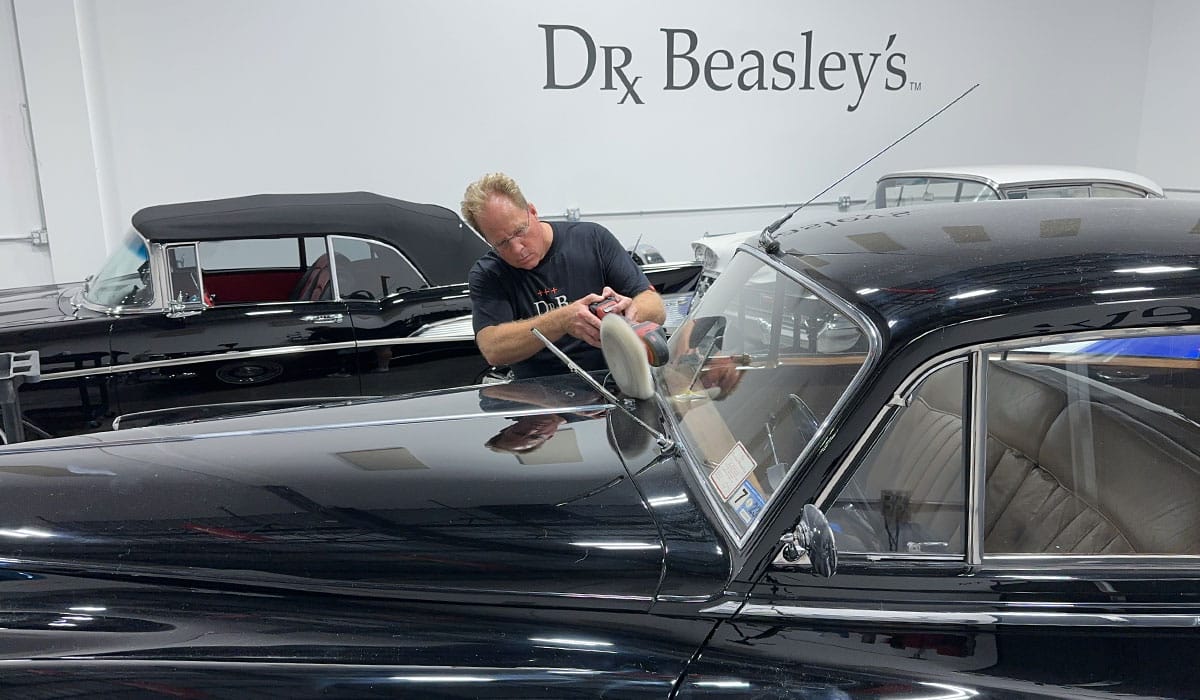
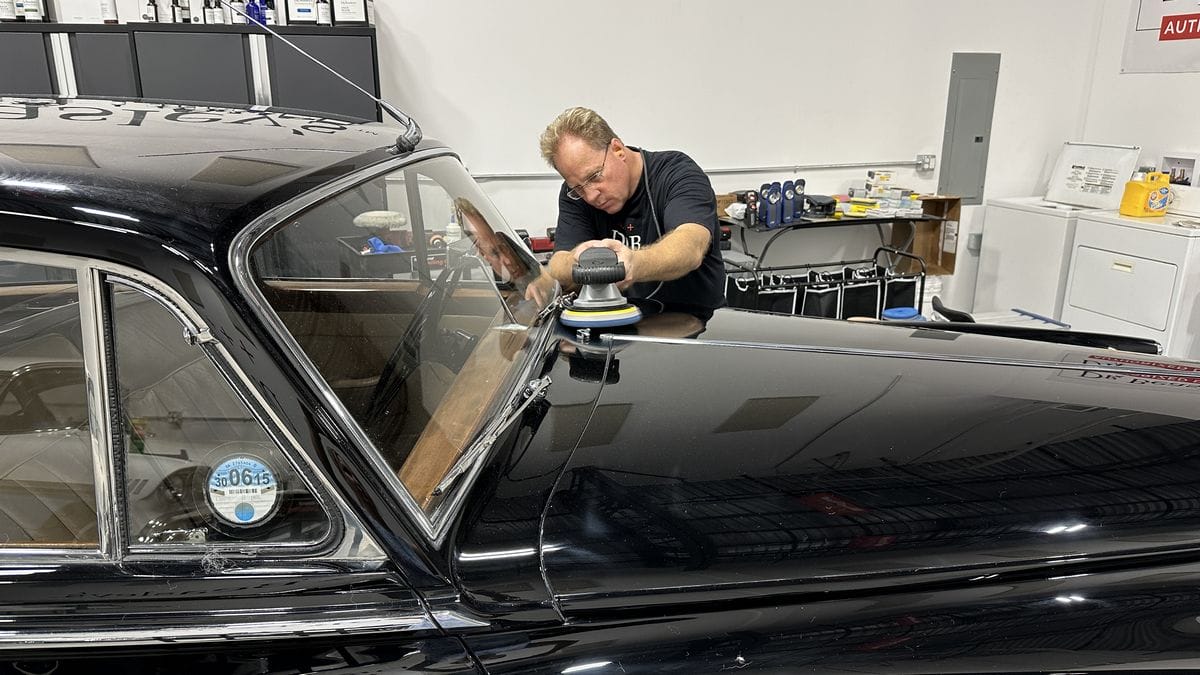
In the below picture, I’m using only the edge of the buffing pad to polish the panel between the windshield and the hood. The major benefit to using a gear-driven orbital polisher is there is zero pad stalling.
If I were using a free spinning random orbital polisher, I would not be able to maintain pad rotation when using just the outer portion of the buffing pad. Being able to adjust how I hold this tool to tackle all of the body panels, no matter what the shape or size, is a real time-saver.
With free spinning random orbital polishers, I would have to use multiple tools that range in size and thus range in pad size, to perform all the paint correction on this car.
I was both surprised and impressed with how smooth this tool felt even when buffing on the highest speed setting.
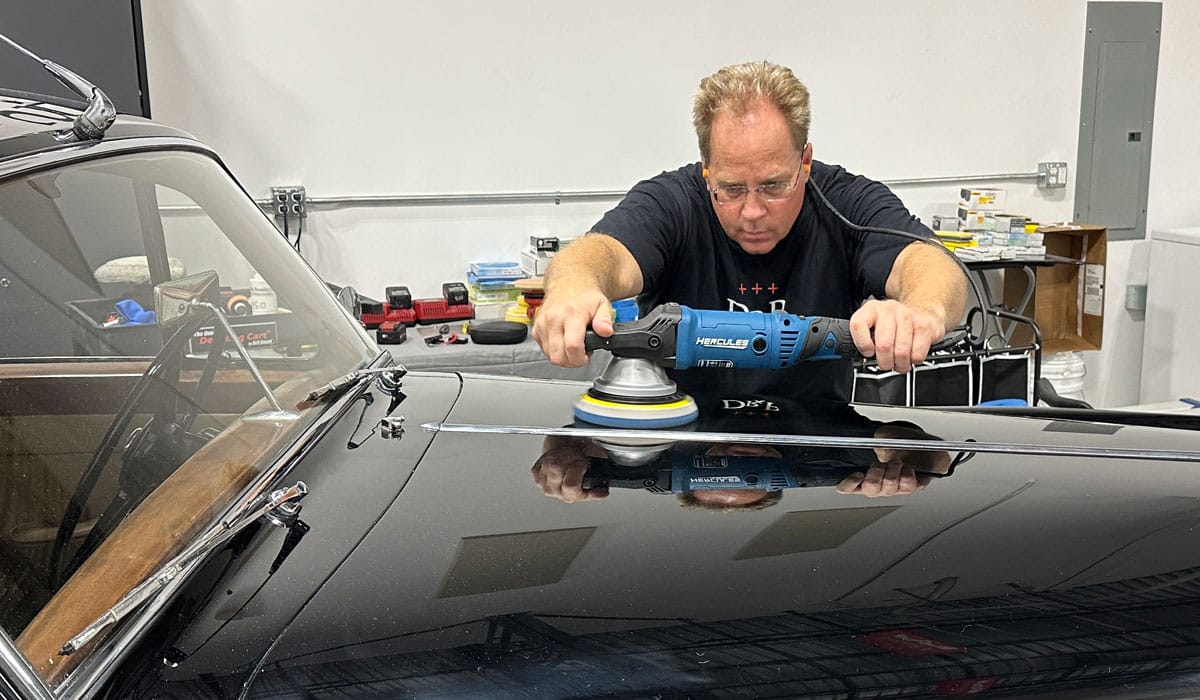
Here’s another example where I take advantage of the gear-driven aspect of this polisher. You can see how I’m tipping the polisher to do focused, intense polishing work on the paint next to the chrome grill.
You cannot do this easily or efficiently with free spinning random orbital polishers as the pads on free spinning random orbital polishers will tend to simply stall or stop rotating and oscillating.
Being able to use a single tool and tackle any body panel saves a lot of time since I don’t have to stop buffing with one tool, grab a different tool and start up again.

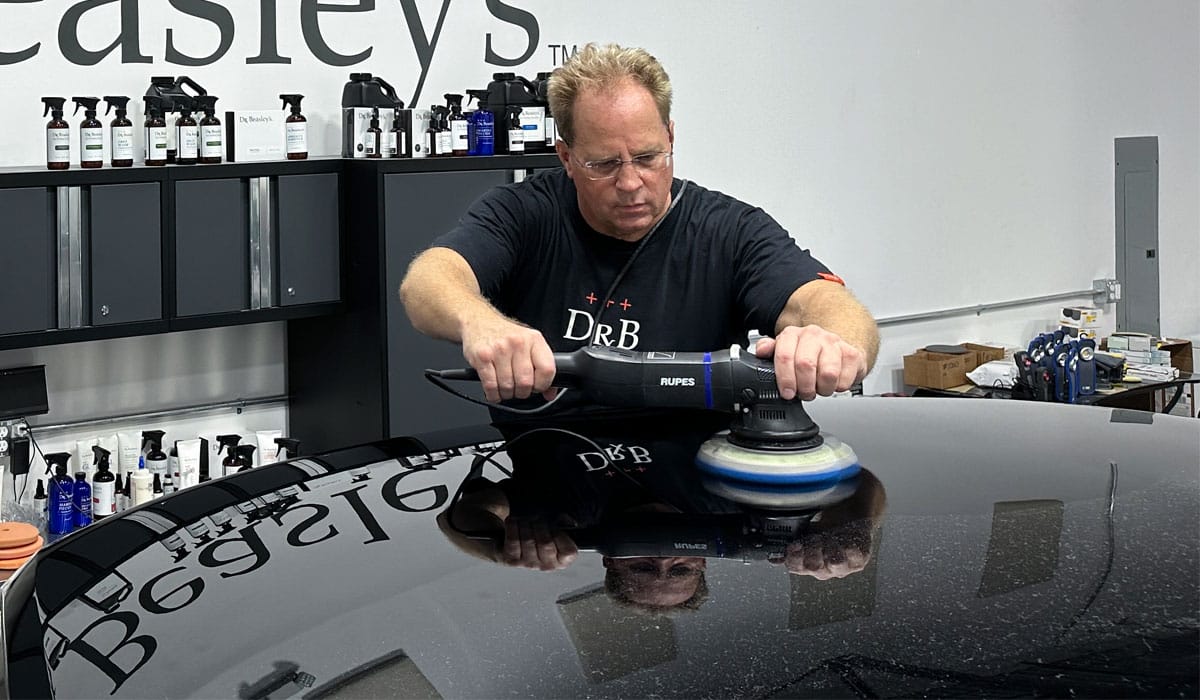
Because this was a true showcar detailing process, after the gear-driven polishing step, I switched over to one of my favorite free spinning random orbital polishers, the RUPES BigFoot 21, to perfect the paint with Dr. Beasley’s NSP 45 and prepare the paint for the installation of the Dr. Beasley’s Nano-Resin MX Ceramic Coating.

After around 9 hours of rotary cutting and 10 hours of orbital polishing with the Harbor Freight Forced Rotation Dual Action Orbital Polisher, the work is completed.
If you look closely, you can see me using the same swirl finder light for these after shots that I used to show the swirls in the before pictures. The paint is now swirl-free and has a black mirror finish.
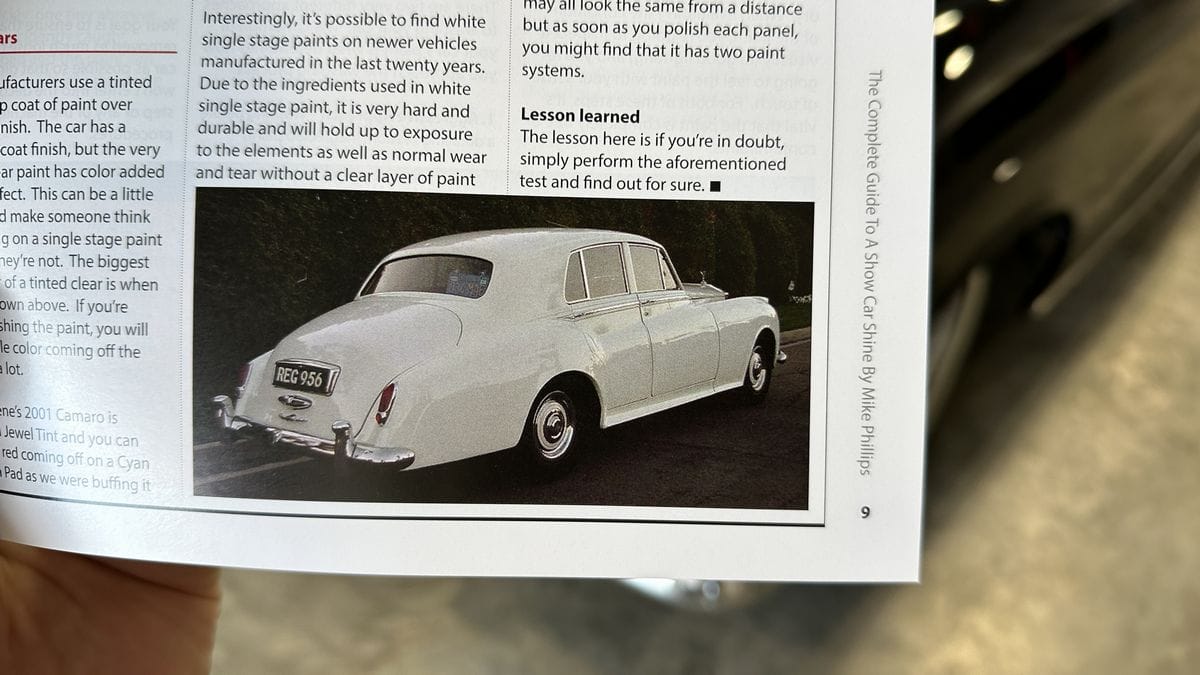
A few years back I detailed this same model Rolls Royce, only it was painted white. The quirky thing about the white Rolls-Royce Silver Cloud was that for some reason, the trunk lid was painted with single stage paint while all the other body panels were painted using a modern basecoat/clearcoat paint system.
I noticed the difference when after buffing on the trunk lid I saw white pigmented paint coming off the trunk lid and building-up on the face of my buffing pad.
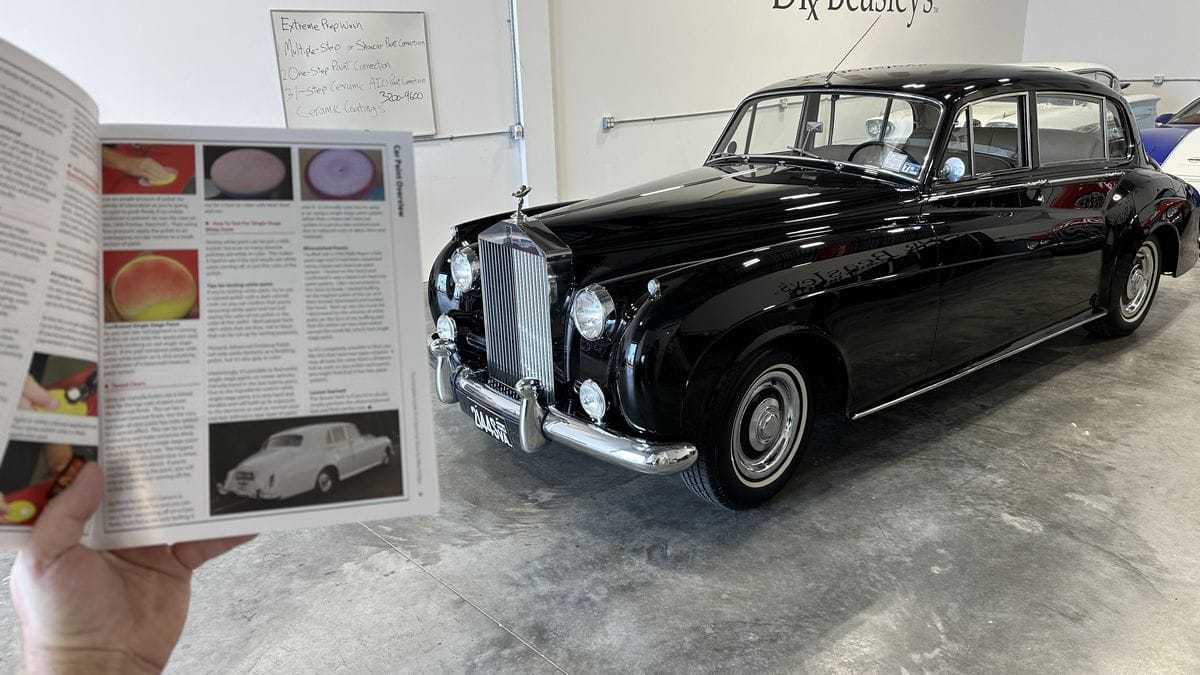
If look closely at the picture below, you can see a slight color difference between the single stage paint on the trunk lid and the basecoat/clearcoat paint on the rest of the car.
Dr. Beasley’s Prep Wash
Dr. Beasley’s Glass Cleanser
Dr. Beasley’s NSP 150
Dr. Beasley’s NSP 95
Dr. Beasley’s NSP 45
Dr. Beasley’s Nano-Resin MX Ceramic Coating Kit
Dr. Beasley’s Tire Conditioner
And of course, lots of buffing pads and microfiber towels.
Being a long-time user of other gear-driven orbital polishers, I was impressed with the power and smooth operation for this new tool from Harbor Freight. The build-quality appears to be very good. I wouldn’t say this tool is as good as the tool it is copied after, but for enthusiast car detailers, that only need a tool like this once a year or so, it’s a great bang for your buck.
Time will tell if the internal components like the bearings, gears, motor and electronic components will hold up to the kind of rigorous use by professionals that use and abuse their tools 6 days a week.
If you’re new to machine polishing or ready to move up from a free spinning random orbital polisher to a gear-driven orbital polisher, then at a suggested retail price of $129.99 the Hercules brand, Forced Rotation Dual-Action Polisher is a great option to consider.
Plus, with Harbor Freight warranty, they guarantee this tool to be free from defects in materials and workmanship 90 days from the date of purchase. You also have the option to purchase an extended warranty, which is what I did as we will be using this tool in our detailing classes where it will be used and abused by students learning paint correction.
If you’re reading this and tackling a project like this or any detailing project and you have questions, feel free to reach out and contact me, I’m happy to help see you through to success in your garage.
Here at Dr. Beasley’s we are strongly pro-education, and our detailing classes cover all the tools, pads and products necessary to tackle projects like this. If you would like to take your detailing skills and knowledge to a higher level, you can get more information about our classes like dates, locations, topics and pricing by clicking the link below.
Click here to for more information on Dr. Beasley’s Future of Detailing Classes
Mike Phillips
Cell: 760-515-0444
mike@drbeasleys.com
Hope to see you at a future class!
")
The Harbor Freight HC109B Forced Rotation Dual Action Polisher
It used to be people complained there weren’t a lot of options when it comes to car detailing power tools. Nowadays, people complain because there are so many car detailing polisher options! Me? I prefer the later, that is having too many options to choose from versus a limited number of options because I can pick and choose the best polisher for my style of car detailing and paint correction.
What is it?
The Hercules Forced Rotation Dual Action Polisher is a 8mm gear-driver orbital polisher. This means, this tool will both rotate a buffing pad and oscillate a buffing pad at the same time with zero chance of pad stalling.
The majority of car detailing polishers on the market are what are called Free Spinning Random Orbital Polishers. Instead of being gear-driven, they have a free spinning spindle with a counterweight. When the tool is brought up to speed, the spinning counterweight creates inertia and his is what maintains pad rotation and pad oscillation.
The upside to free spinning random orbital polishers is they are very safe to use even by first-time detailers. The also tend to be very smooth in operation with very little felt vibration to the hands. This makes them more enjoyable to use especially when you consider that an average paint correction to a passenger size car can take anywhere from 3-8 hours of machine polishing.
Another upside to free spinning random orbital polishers is because they are less aggressive in their pad spinning action, they tend to finish out nicer more consistently on softer paints, whereas gear-driven tools may leave micro-marring.
The type of abrasive technology, choice of pad and your technique are also contributing factors to how a gear-driven orbital polisher will finish out on soft paint.
The downside to free spinning random orbital polishers is that anytime the pad is stalling out, or just vibrating or jiggling against the paint, this means for the most part, the tool and you, are not doing anything. By this I mean, if the goal is to remove swirls, scratches, water spots and oxidation, the most efficient way to do this is by maintaining pad rotation and pad oscillation. When the pad stops rotating and/or oscillating, you’re simply wasting time.
Some people will argue that you don’t need pad rotation, only pad oscillation to remove defects buy in my experience, when it comes to any brand of free spinning random orbital polishers, if you don’t have good pad rotation you also don’t have good pad oscillation and in my opinion, you just wasting time because the combination of abrasive technology and pad choice simply are not abrading the paint in a time-efficient manner.
With a gear-driven orbital polisher, because there is no chance of pad stalling, as I like to say, you can plow through the paint correction process as fast as humanly possible while maintaining pro-quality results.
What does 8mm mean?
Great question. 8mm is the length of the diameter of the orbit stroke. In the category of gear-driven orbital polishers, 8mm is considered a large or long stroke action. When compared to the category of free spinning random orbital polishers, 8mm is considered a short stroke action.
Other gear-driven orbital polishers are available in 5mm and free spinning random orbital polishers range from 5mm to 25mm. The difference comes down to continuous pad rotation and pad oscillation with gear-driven orbital polishers versus the possibility of pad stalling with free spinning random orbital polishers.
Notice I don’t use the word random to describe gear-driven orbital polishers? That’s because with a gear driven design, there is no random oscillation pattern like you get with a free spinning random orbital polisher.
The gear-driven design also means ZERO pad stalling, no matter how much pressure you apply to the buffing pad or whether you’ll holding the pad flat to the surface or at an angle. This one aspect means less time doing paint correction due to pad stalling, which means you can get the job done faster.
Pulling or the walking-effect?
Some people that have tried gear-driven orbital polishers don’t like them because they feel the tool trying to pull them in a given direction. This is called the walking-effect, it’s as though the tool wants to walk or move away from you, or toward you or to one side or the other. The is the nature of the gear-driven feature and it’s also a sign of POWER.
Free spinning random orbital polishers don’t have this pulling sensation or walking-effect and are much much smoother to control. But this smoothness you feel is they byproduct of less brute strength as it relates to maintaining pad rotation and pad oscillation. To me, the pulling or waking-effect is not a problem as I much prefer the speed and power a gear-driven orbital polish offers.
If you feel a gear-driven orbital polisher trying to pull or walk in some direction, this is a sign YOU are not holding the pad flat to the surface. In other words, the tool is talking to you, teaching you to change how you hold the tool so as to keep the buffing pad flat to the surface.
When buffing using only an edge of a buffing pad with gear-driven orbital polishers it’s assumed it’s going to pull in some direction in the same way a rotary polisher will pull when buffing on and edge. It’s your job to learn and master this feature, not be scared of it or dislike it because it’s not as smooth as a free spinning random orbital polisher.
It’s a lot of power available to you, but you must learn how to use and control it and this only coms from spending time behind the tool.
Brain drain
When buffing with a free spinning random orbital polisher like a Porter Cable 7424XP, (a very common and affordable polisher), a common technique people will use to help their eyes to see and monitor pad rotation or pad stalling is to mark the side of the backing plate and/or place a mark on the side of a buffing pad.
Without the black mark like you see in the above picture, the spinning or in the case of pad stalling, the vibrating or jiggling action of the buffing pad will appear to be a yellow blur.
The simple technique of adding a black line to either the backing plate or the buffing pad or both, will make it dramatically easier for your eyes to see and monitor if the pad is spinning and oscillating or just vibrating or jiggling against the paint, also called pad stalling.
The thing about this is, it means the entire time you’re doing paint correction with a free spinning random orbital polisher, you must constantly be LOOKING at the backing plate and buffing pad to see if they are in fact rotating and oscillating and if not, the try to overcome the pad stalling.
This can include,
- Increasing tool speed.
- Changing how you’re holding the tool so the pad is flat to the paint surface.
- Switching to a fresh, dry pad. (dry foam pads rotate and oscillate better than wet soggy pads)
Having to constantly LOOK to see if the buffing pad is spinning and/or oscillating, for hours is what I call BRAIN DRAIN!
With a gear-driven orbital polisher, you don’t have to LOOK. Because of the gear-driven mechanism, the pad is going to rotate and oscillate no matter what. Including whether or not you’re LOOKING at the spinning pad the entire time you’re buffing.
This means you can think about whatever you want to think about while doing the paint correction steps instead of constantly monitoring for pad rotation/oscillation. For example, instead of looking and monitoring for pad rotation you can use a technique I teach in our detailing classes and that is to count outload your section passes to maximize your time efficiency.
Both types of tool actions have their fans. And the only way to truly find out which type of tool is right for you, is to buff out some cars or as I like to say, put some time behind the buffer.
For me personally, I much prefer gear-driven tools for their power, speed and no brain drain.
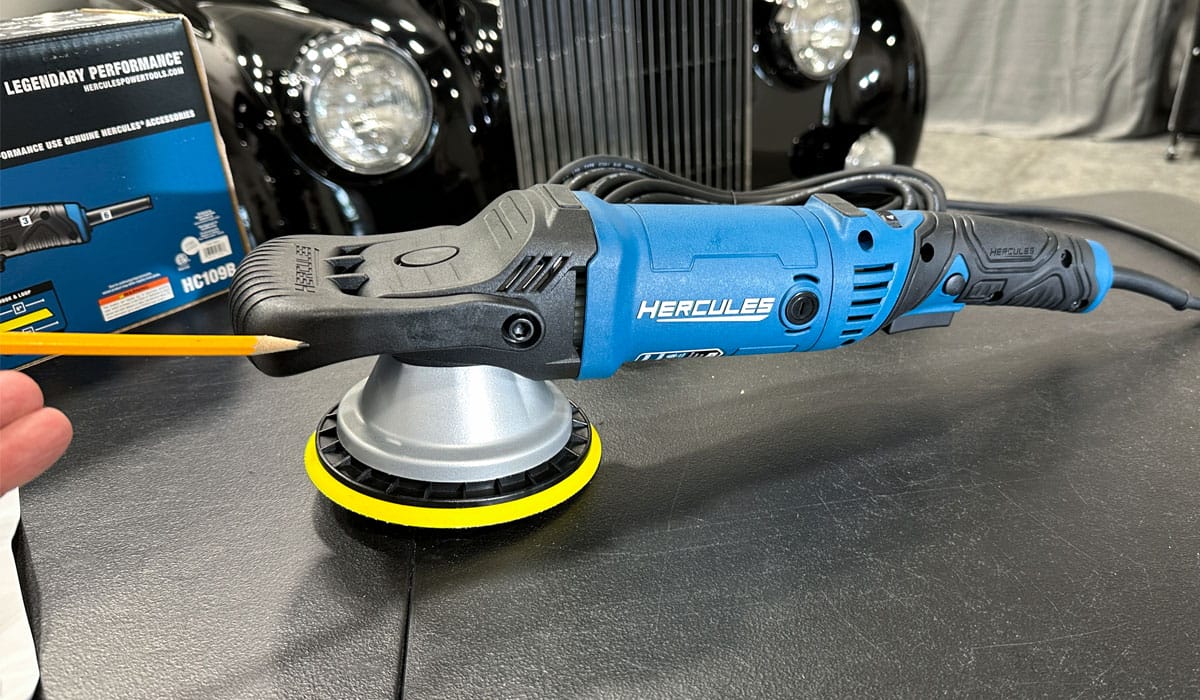
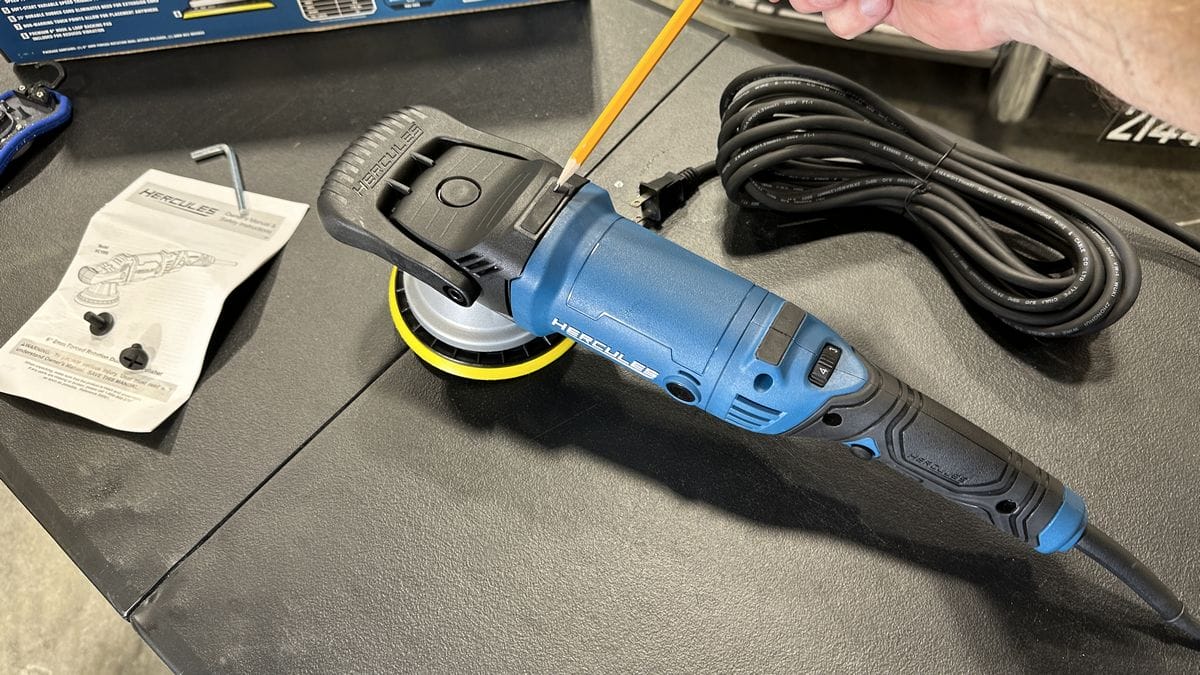
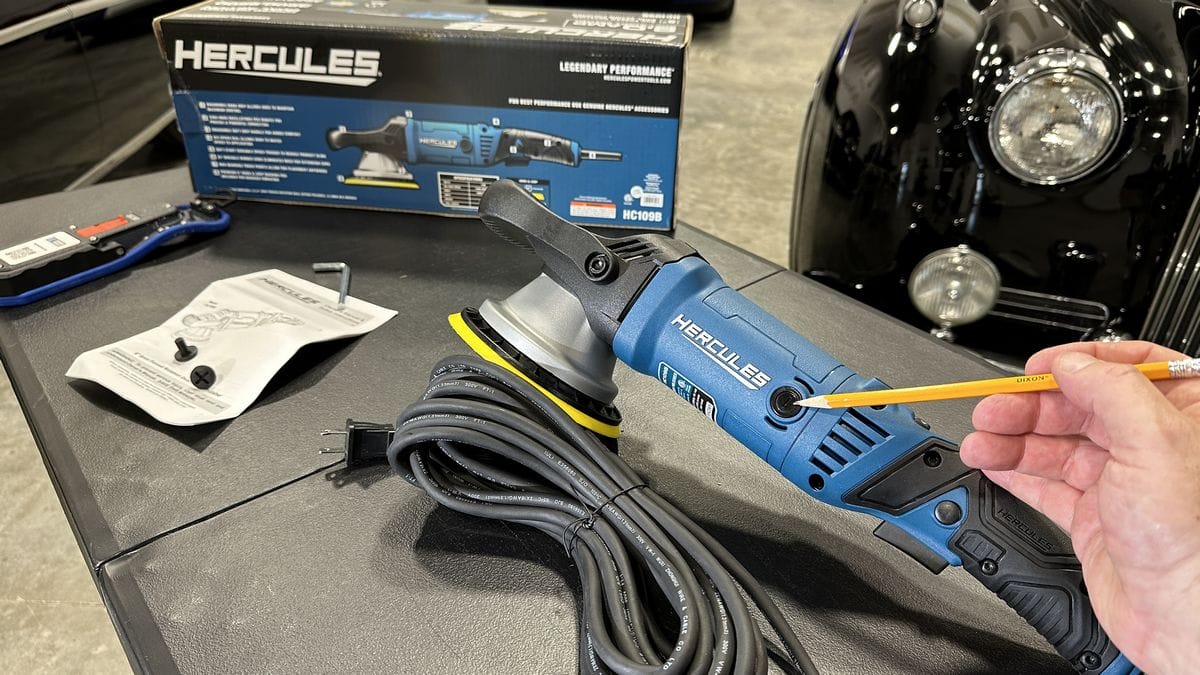
What’s in the box?
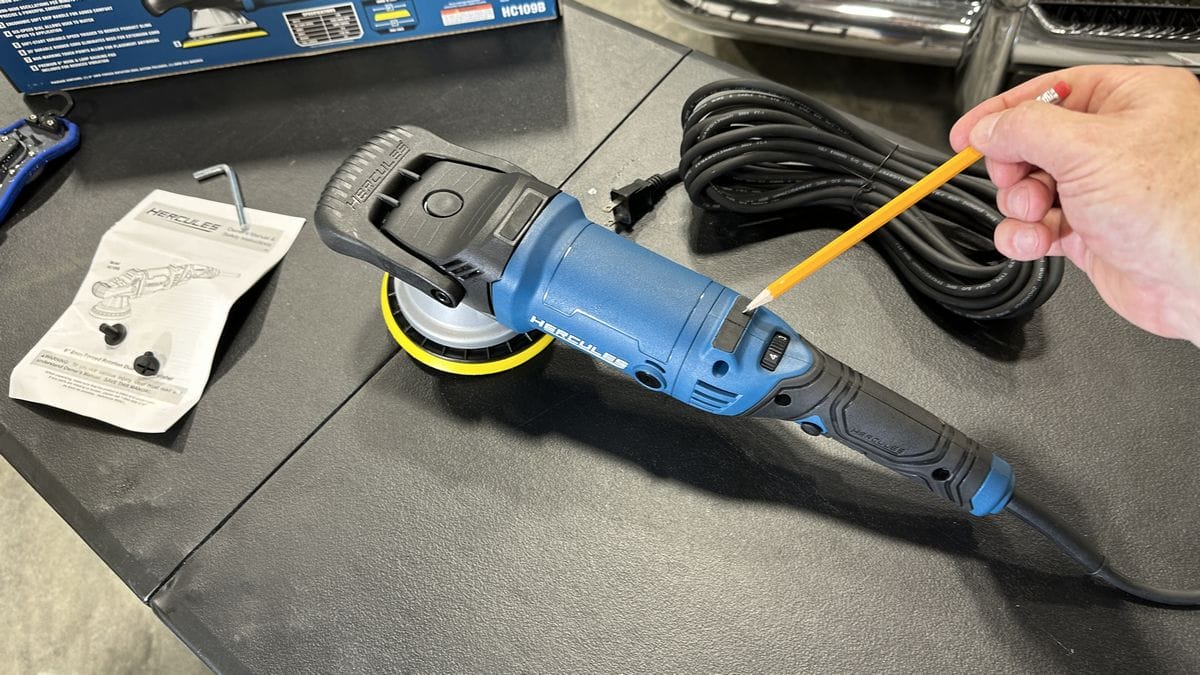
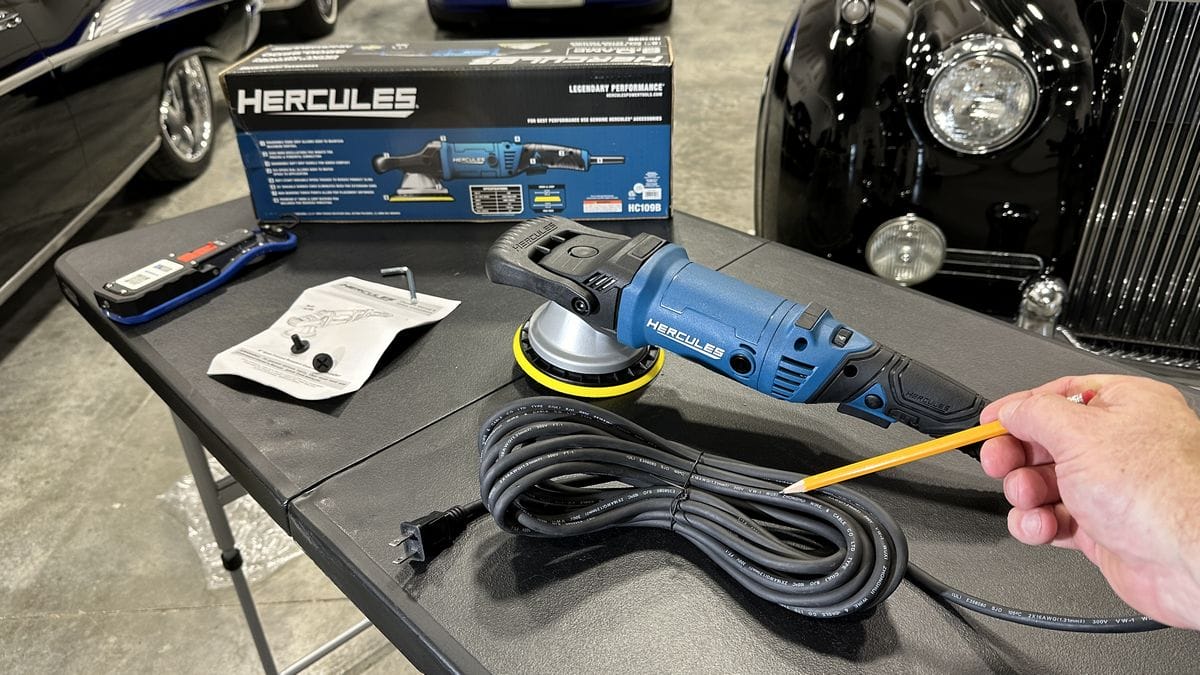
Upon opening the box, there’s basically the tool and two plastic screws for holding on the plastic cap on the head of the tool incase you choose to use the tool without the Bail Handle plus an owner’s manual.
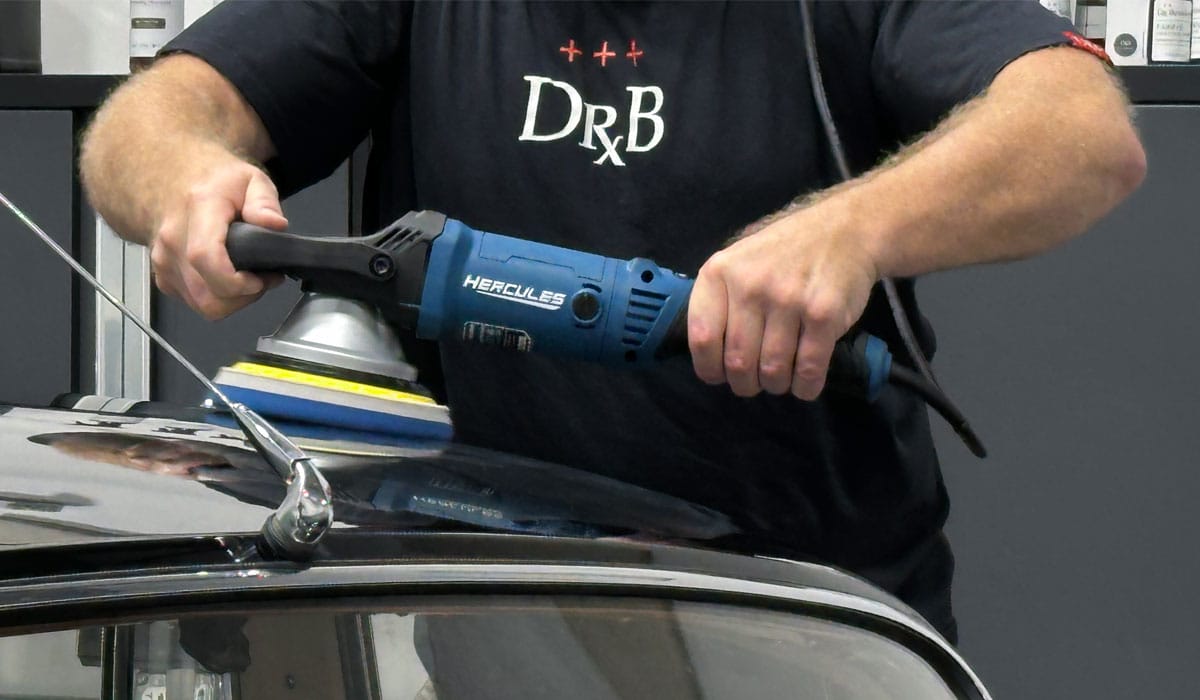
Forward Bail Handle
Like the tool this was modeled after, the FLEX XC 3401 VRG, the HF Forced Rotation Orbital Polisher has a forward bail handle. This is a hard plastic handle that offers a solid way to hold onto and guide the head of the polisher when polishing a panel.
Aluminum housing
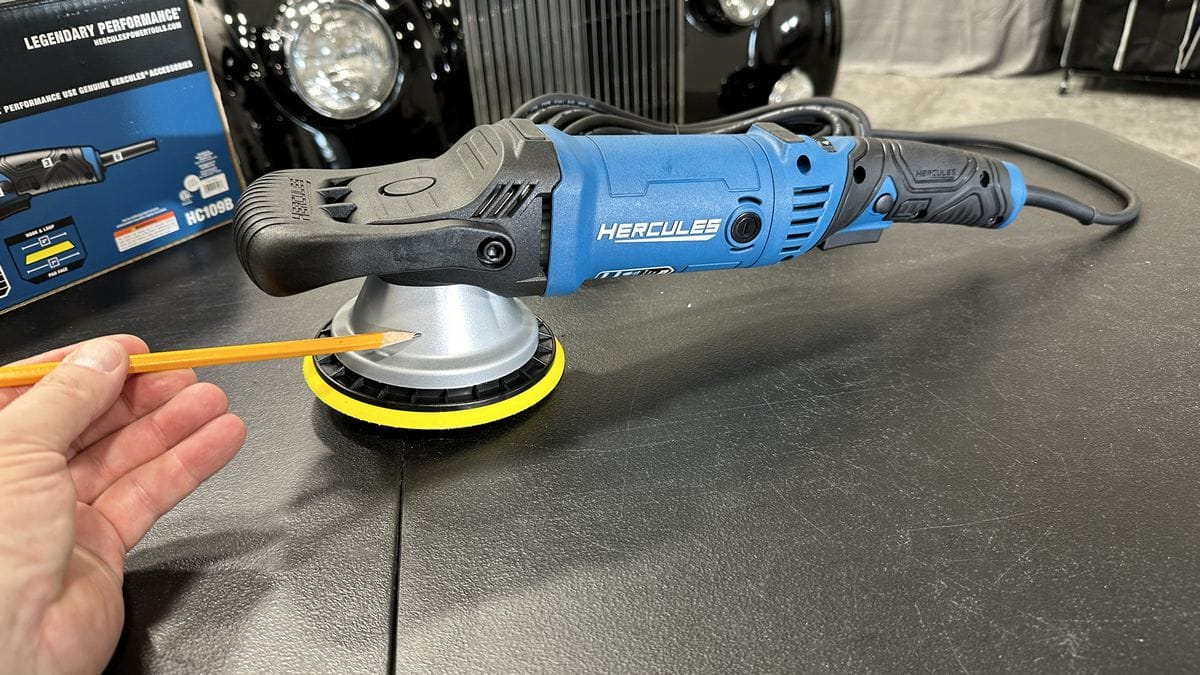
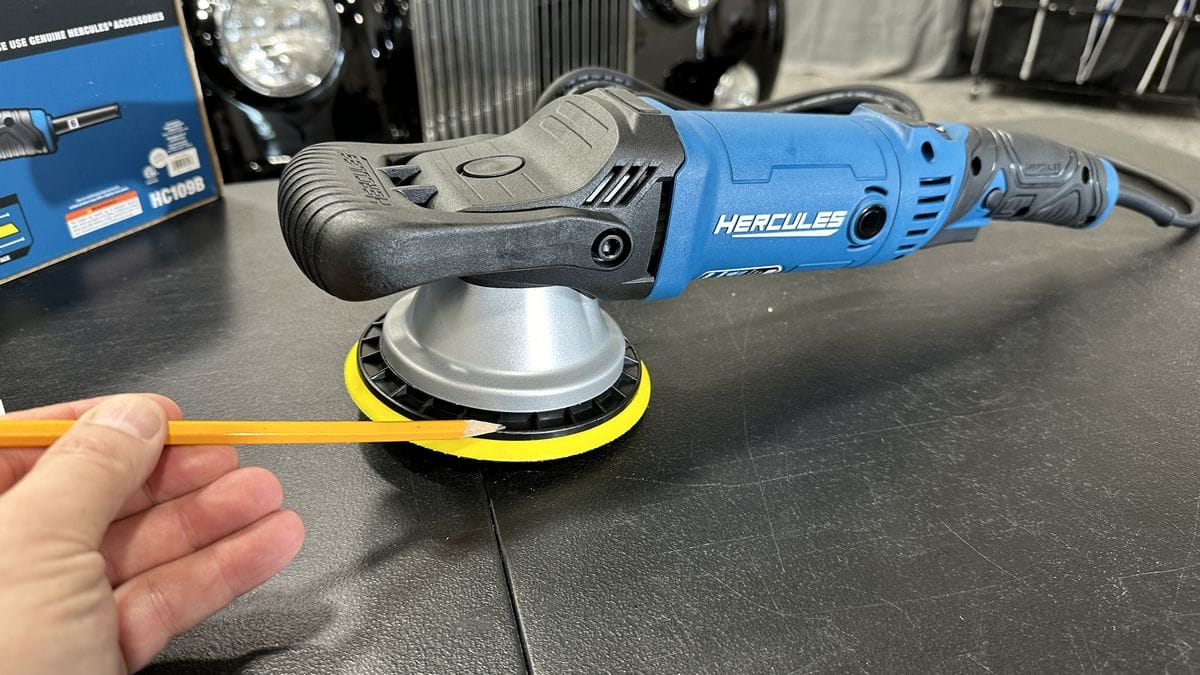
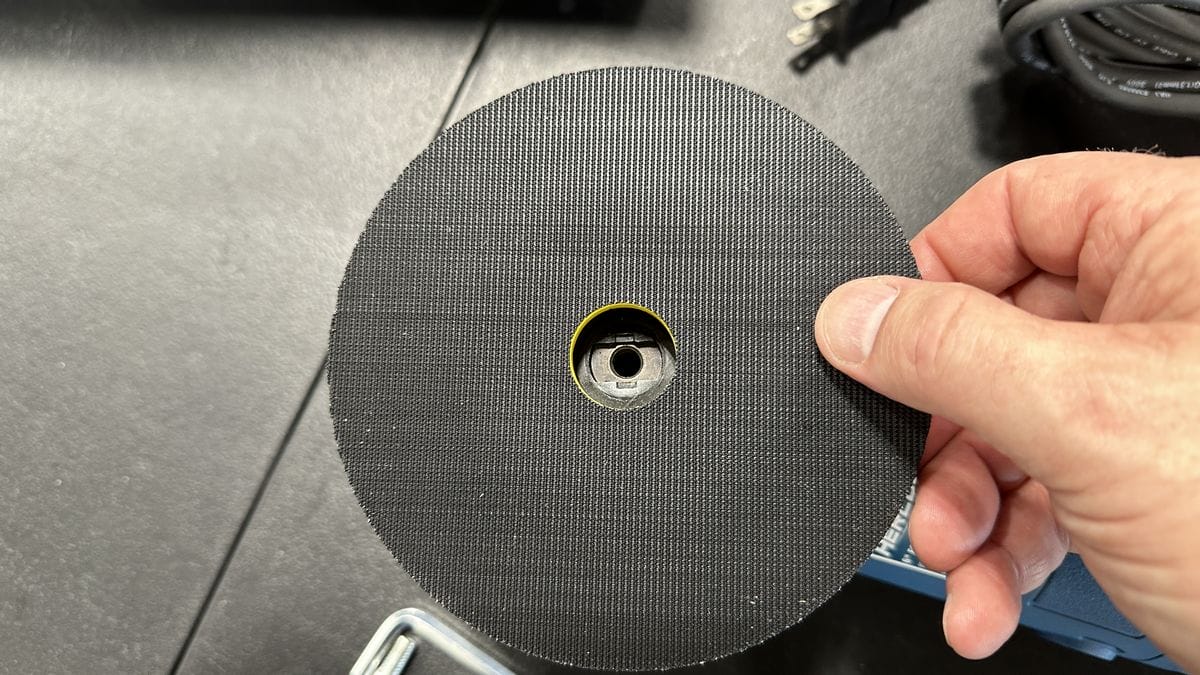
6″ backing plate
Soft start speed control trigger
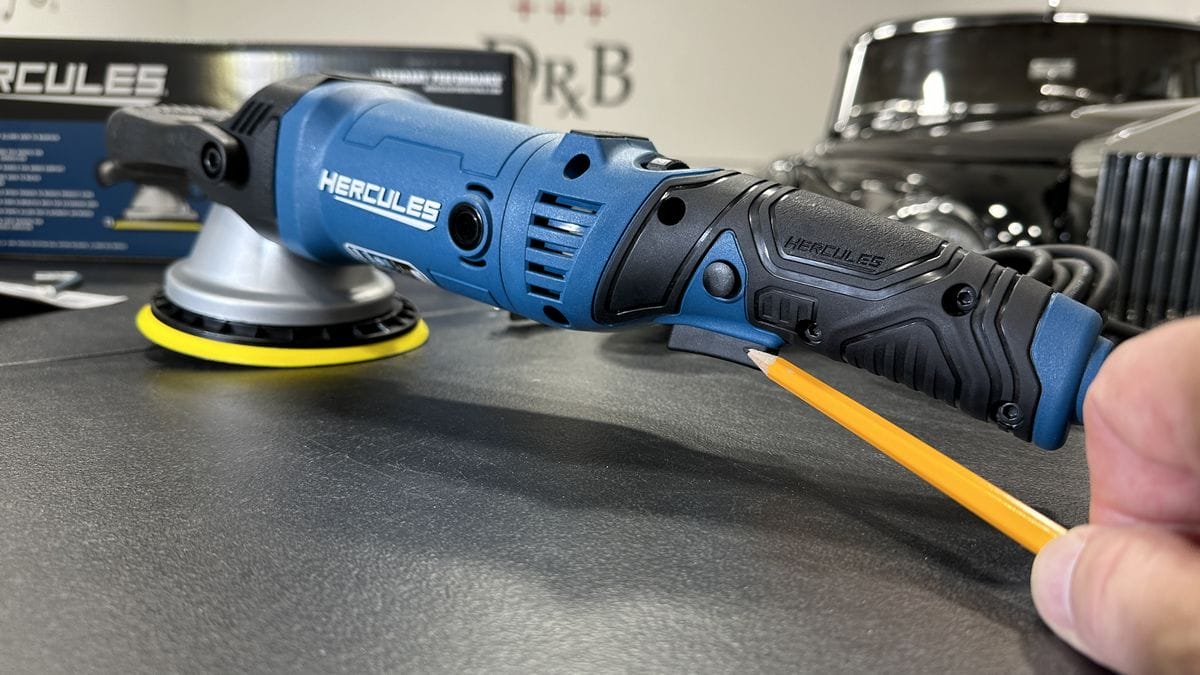
Speed lock button
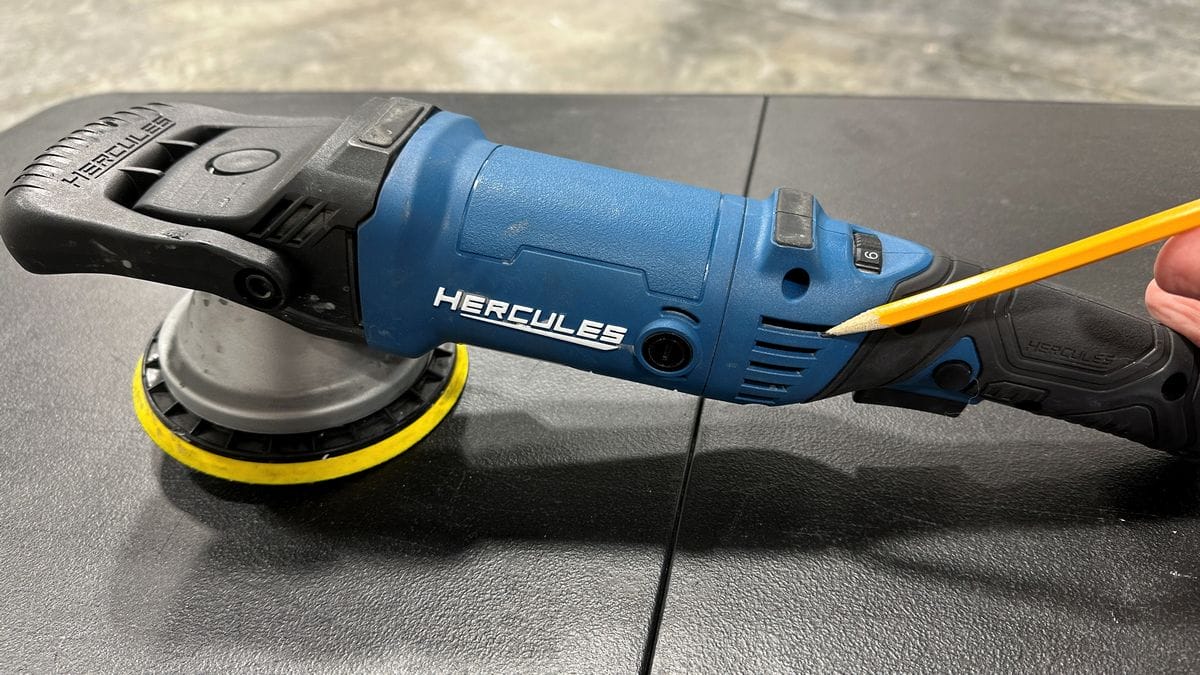
Variable 6-speed adjustment dial
Rear soft rubber tool rest
Forward soft rubber tool rest
Brush replacement port
Ergonomic soft grip handle
Fresh air intake grill
Exhaust air grill
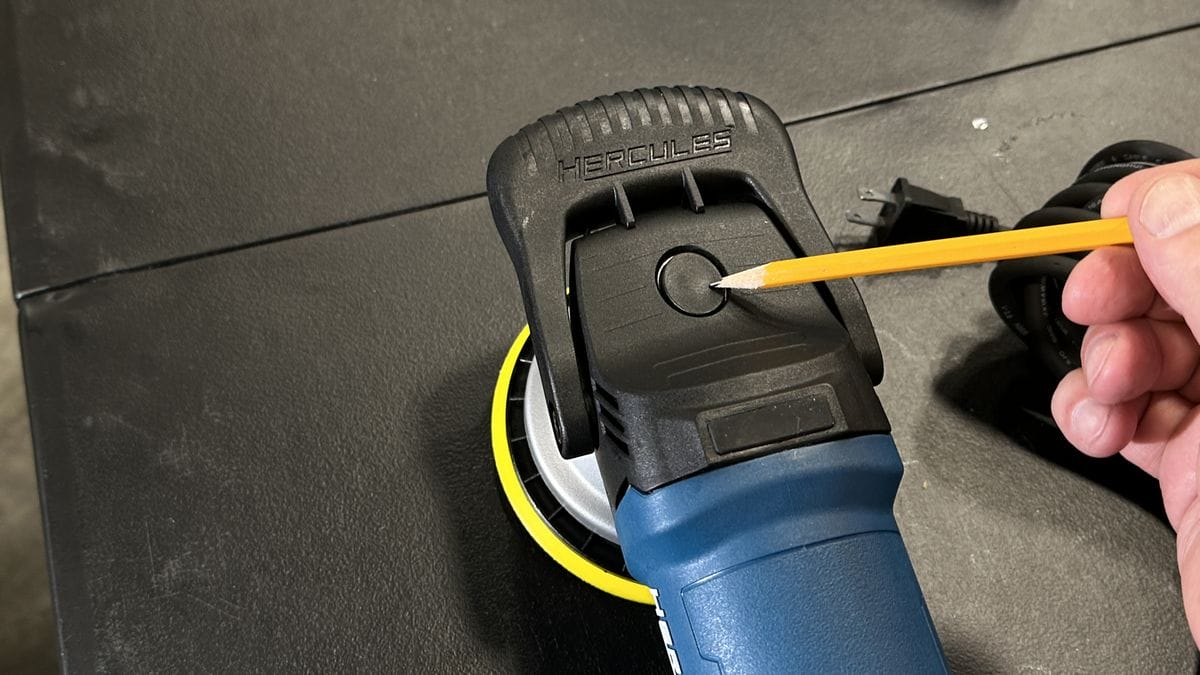
Gear lock-up button
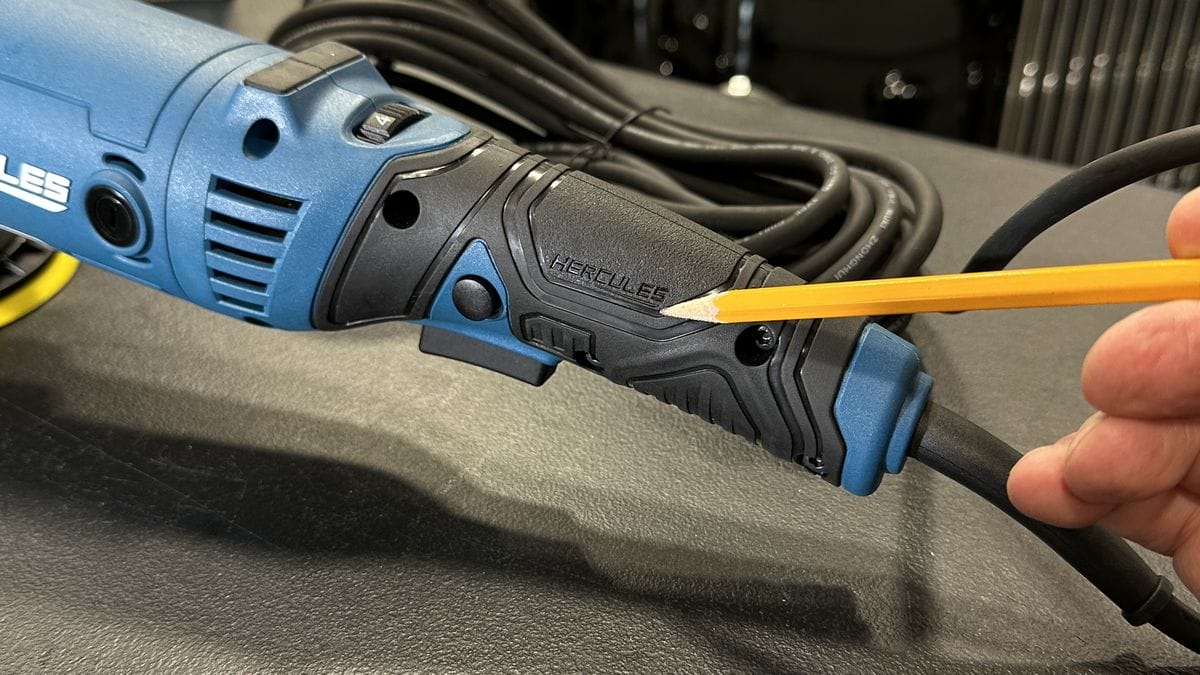
25’Rubber power cord
Just for fun, I used my 25′ tape measure to check, and the cord is in fact 25′ long.
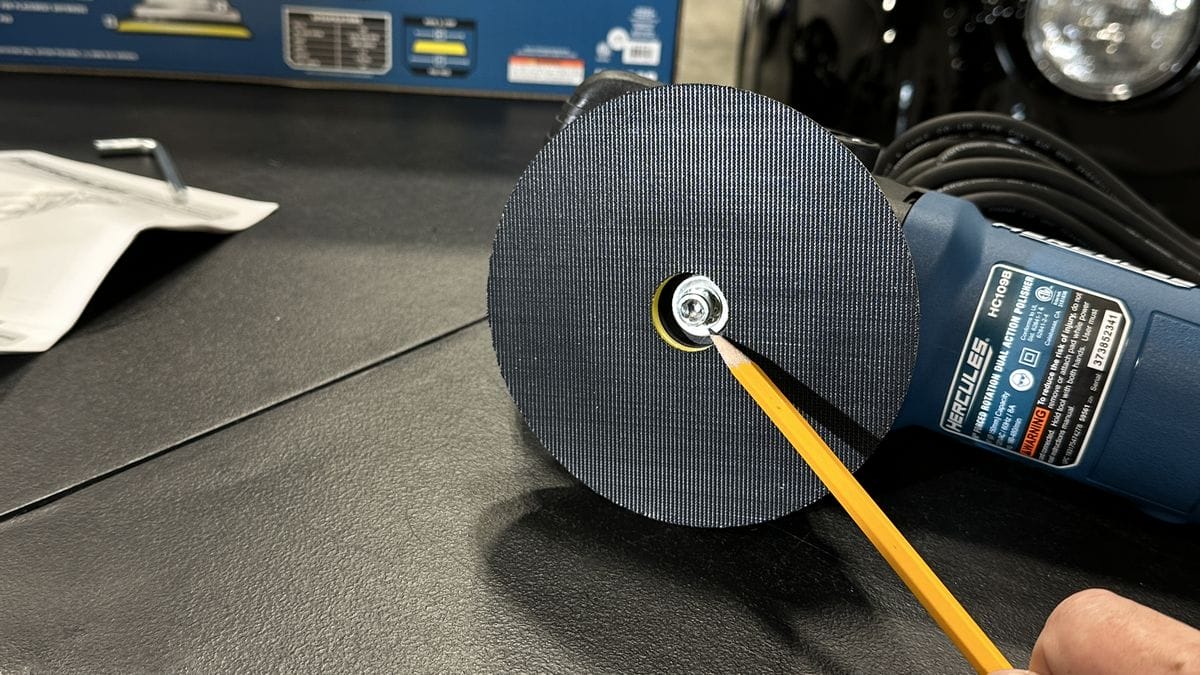
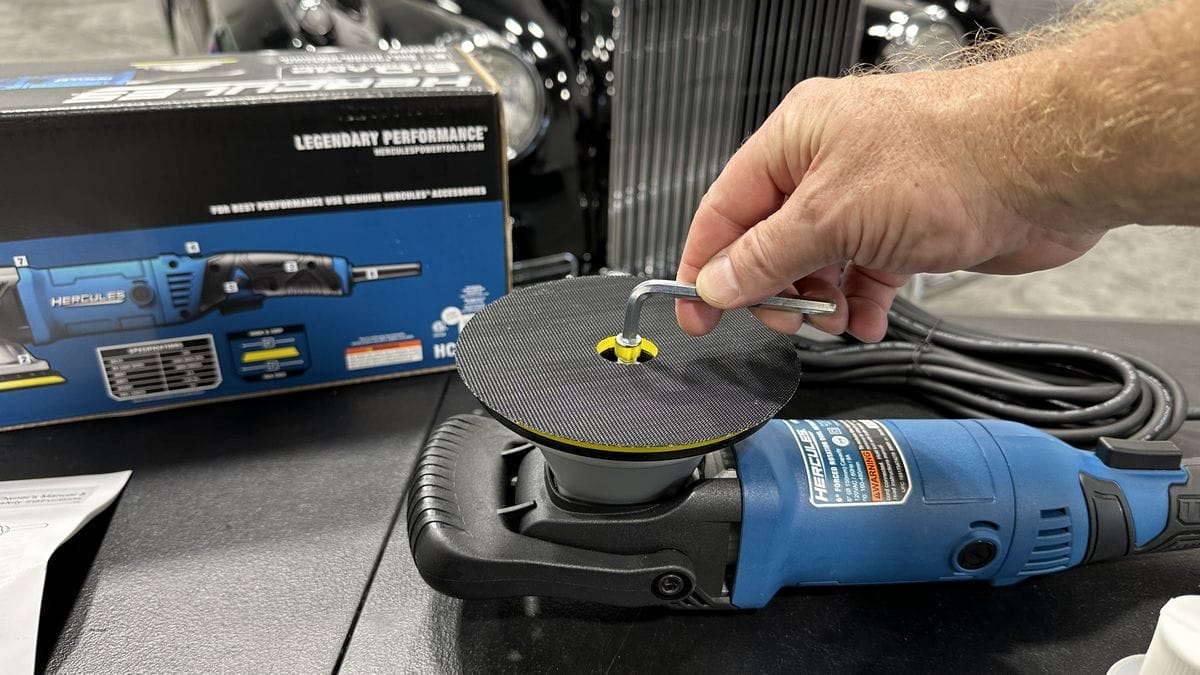
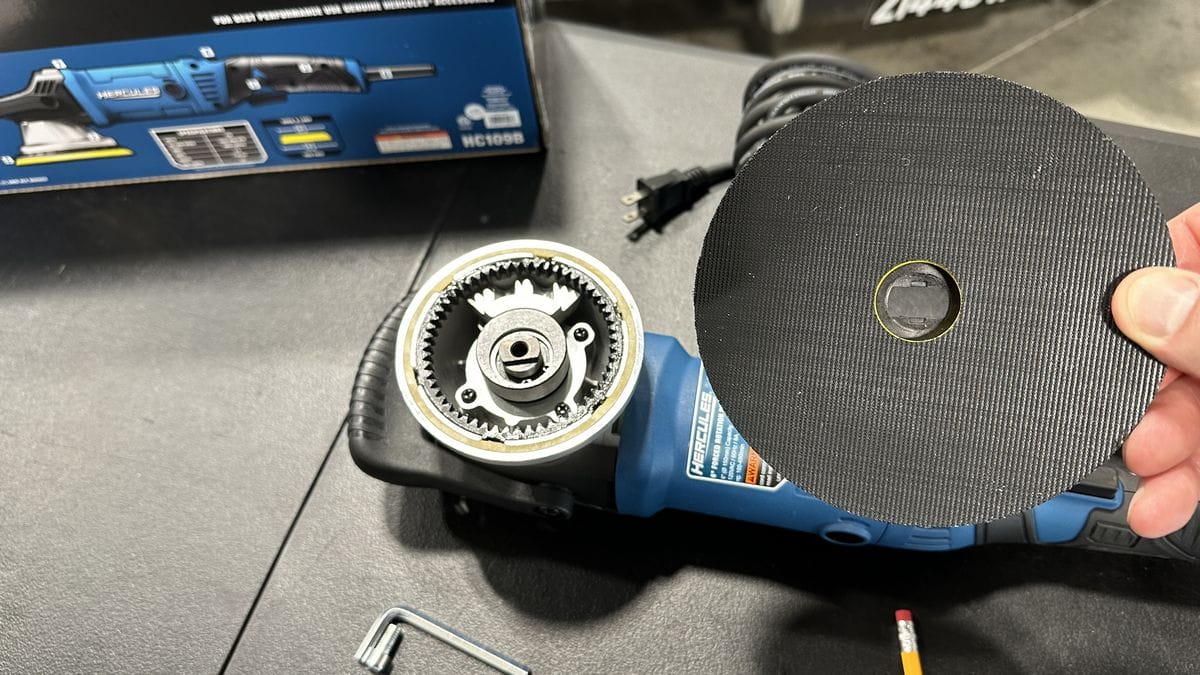
Backing plate attachment bolt
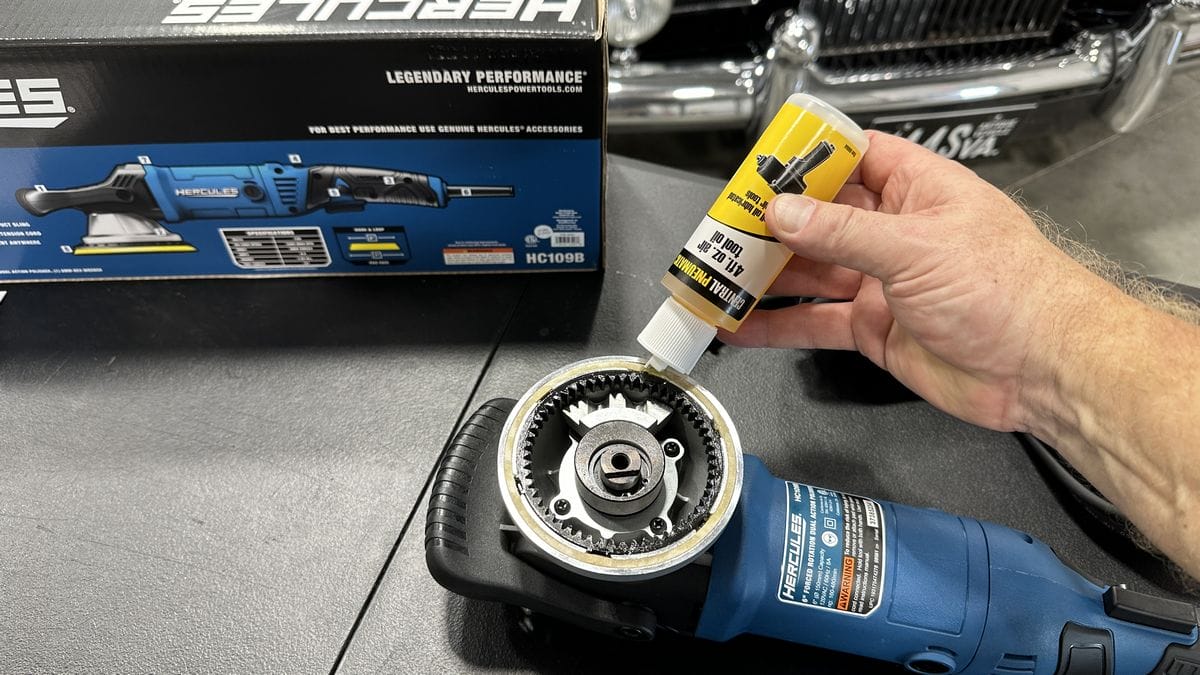
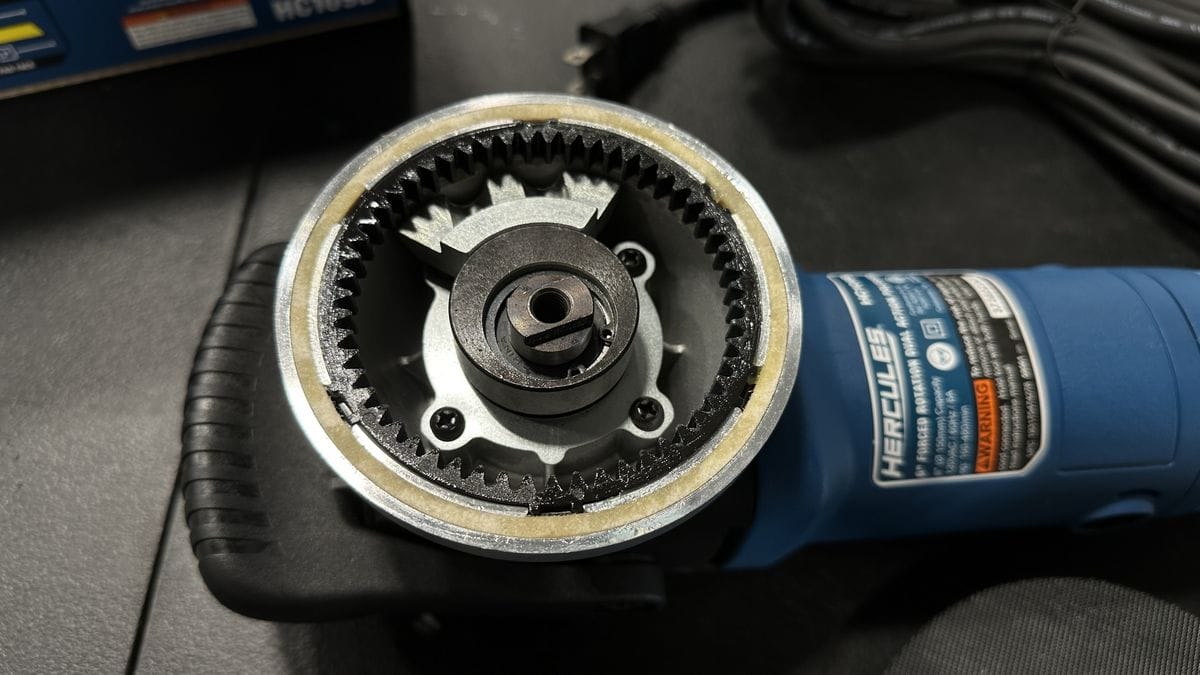
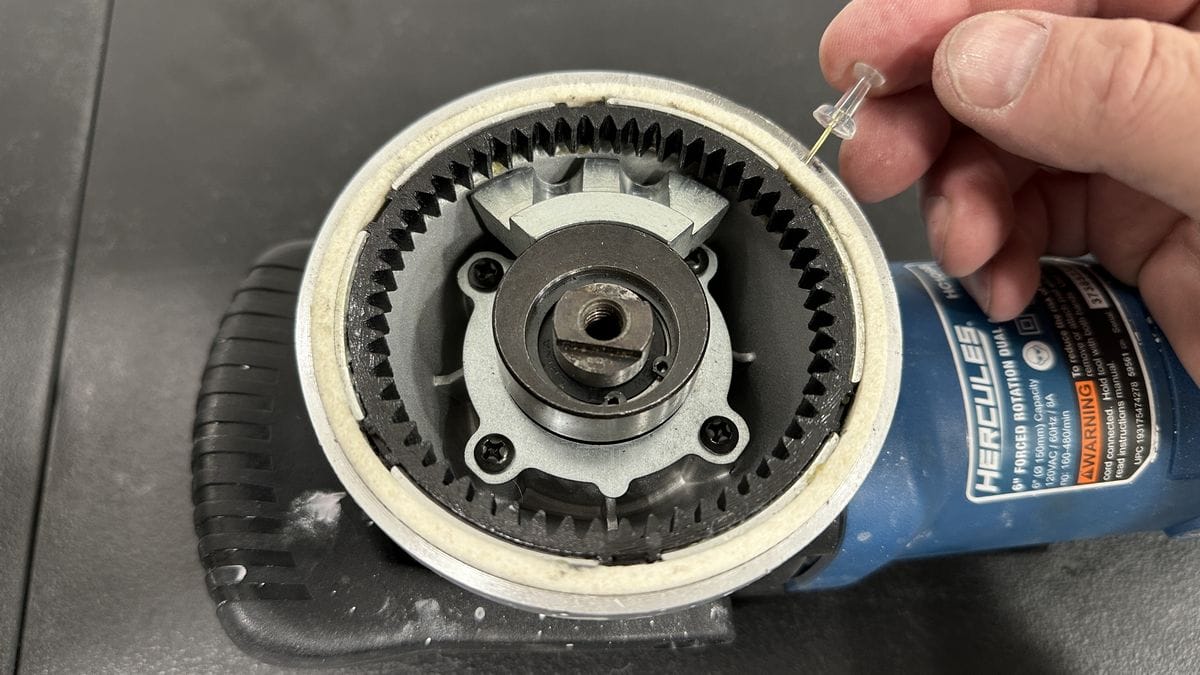
Lubricating the felt compression ring
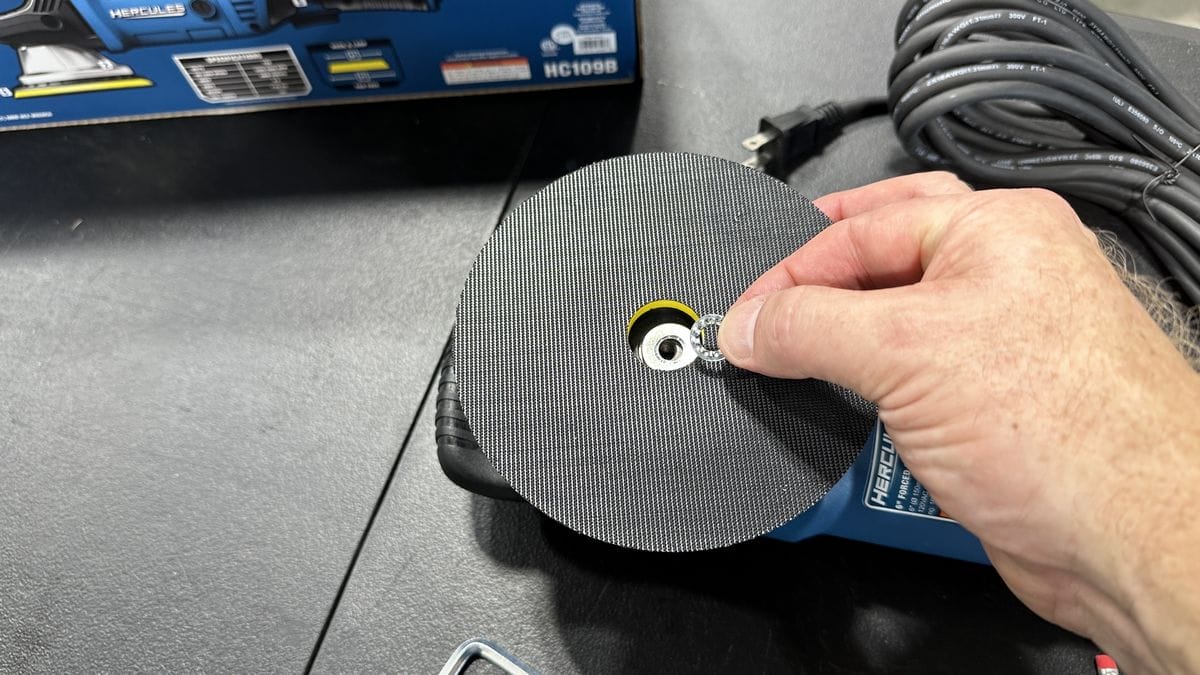
Being a copy of the original FLEX XC 3401 VRG, I figured it would have the felt compression ring behind the backing plate.
While Harbor Freight does not state or recommend this felt compression ring needs to be lubricated, my experience is, it does in fact need to be lubricated. The reason why is to reduce friction and create slippage for anytime you’re pressing hard against the head of the polisher when doing heavy paint correction.
To access the felt compression ring, press the gear lockup button on the top head of the polisher to lockup the gears and then loosen the backing plate bolt using the included hex head wrench.
Use a light oil, in this example I’m using Air Tool Oil, but any quality lubricating oil will work, and apply the oil directly onto the felt ring.
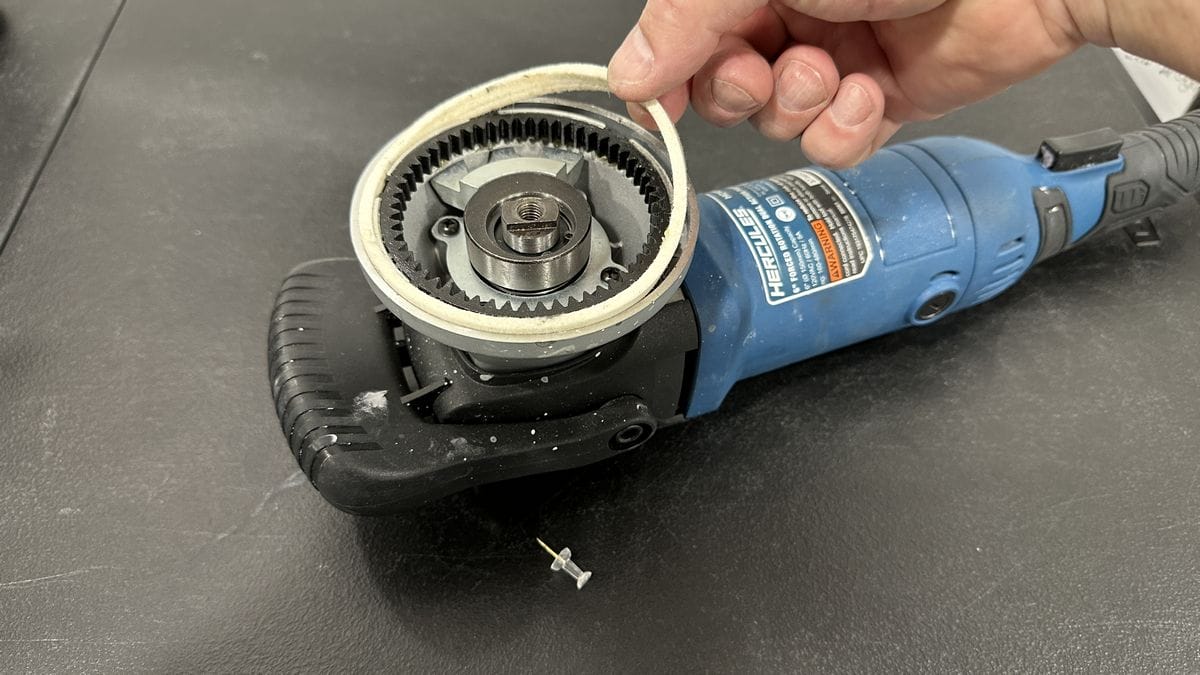
Periodically, flip the felt compression ring over to the other side and relubricate.
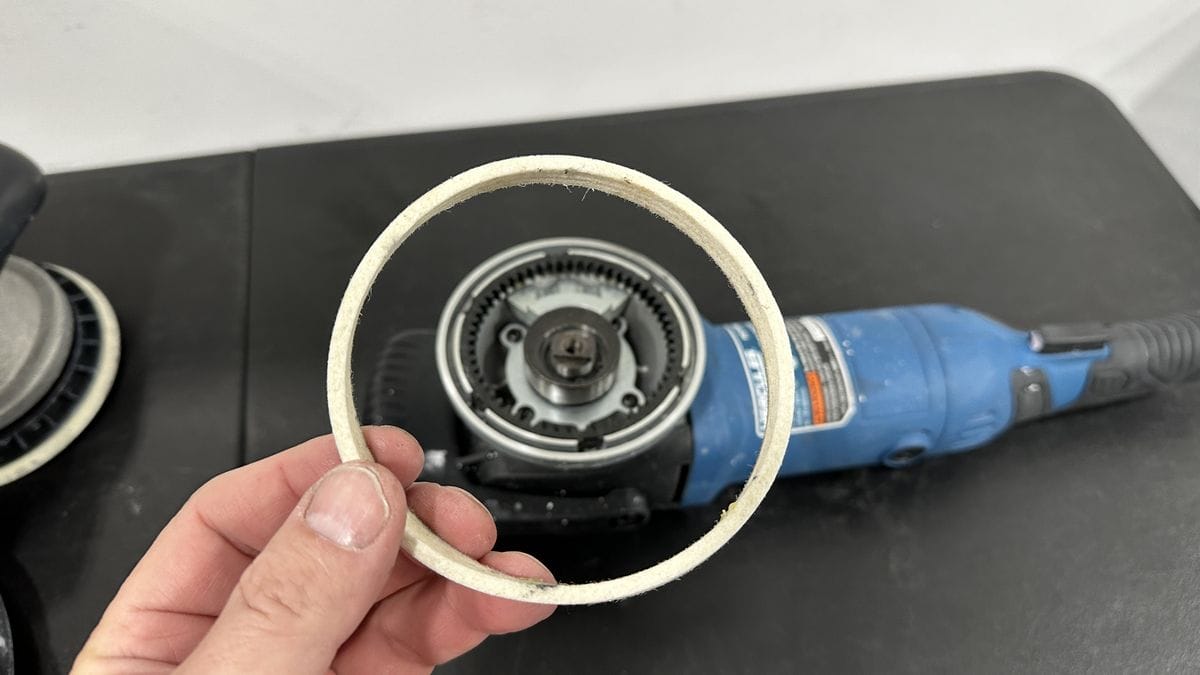
The felt ring is a wear part, I’m not sure where you can get a replacement. One thing you can do however, is periodically remove the felt compression ring and flip it over and then reinstall and lubricate the felt compression ring.
To remove the felt ring, use a pointy instrument, I normally use a ordinary thumbtack. Be careful not to STRETCH the felt ring as this will make re-inserting it into the channel in the head of the polisher difficult.
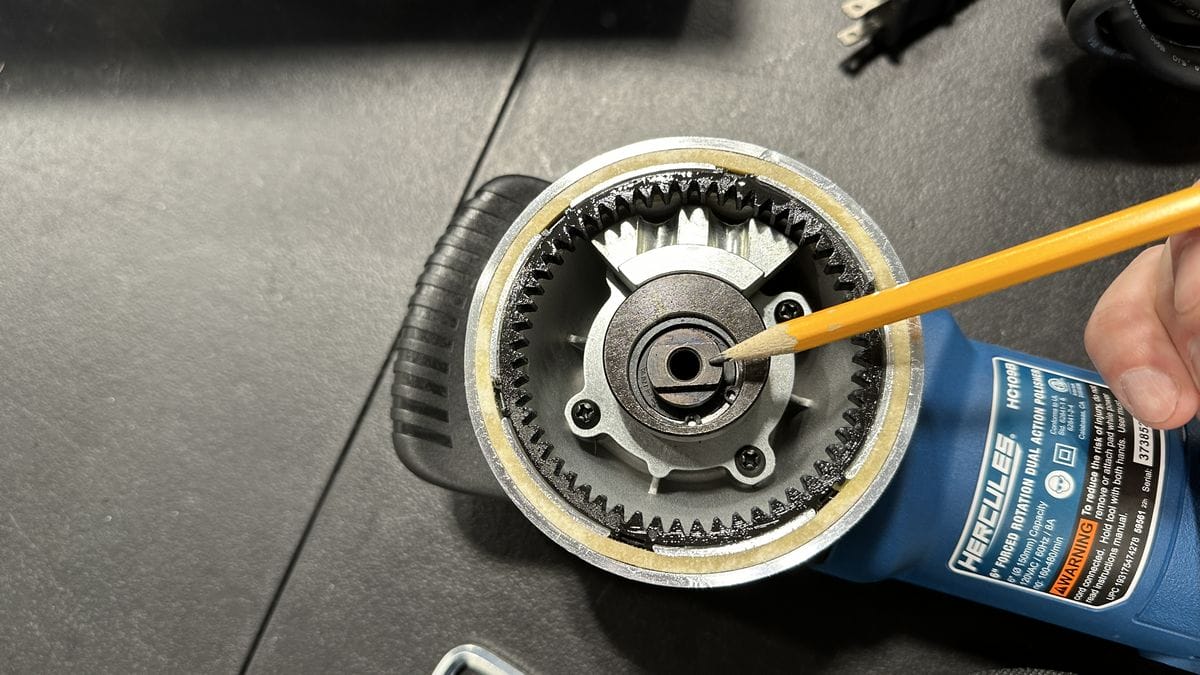
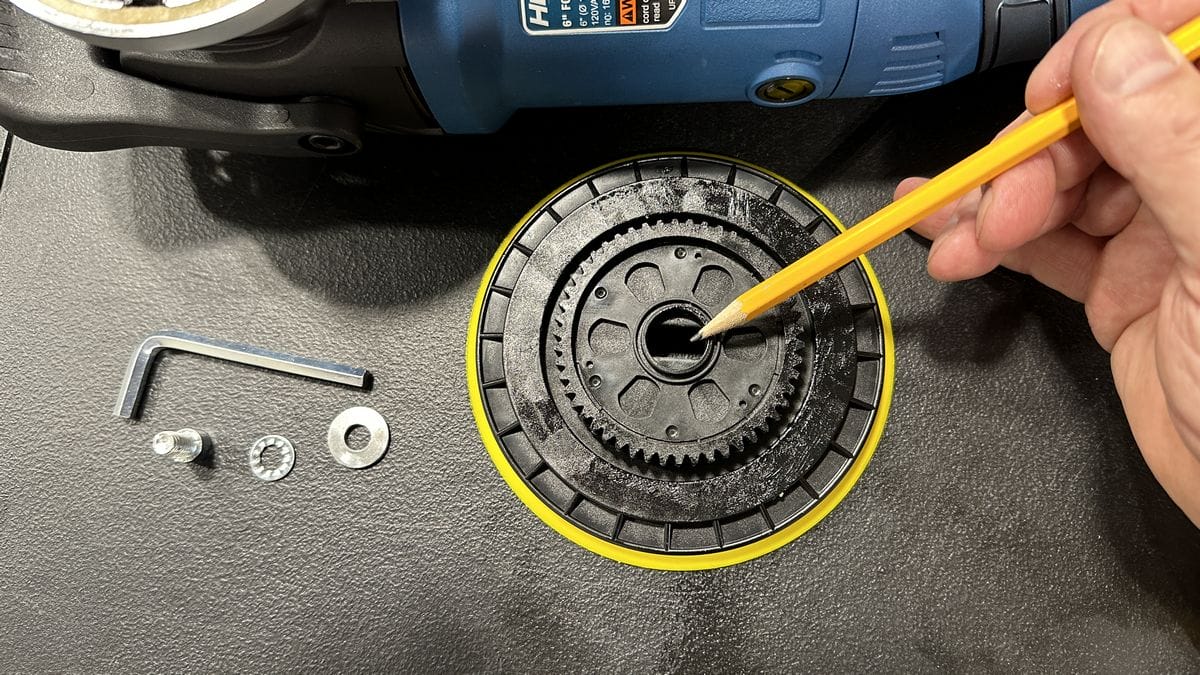
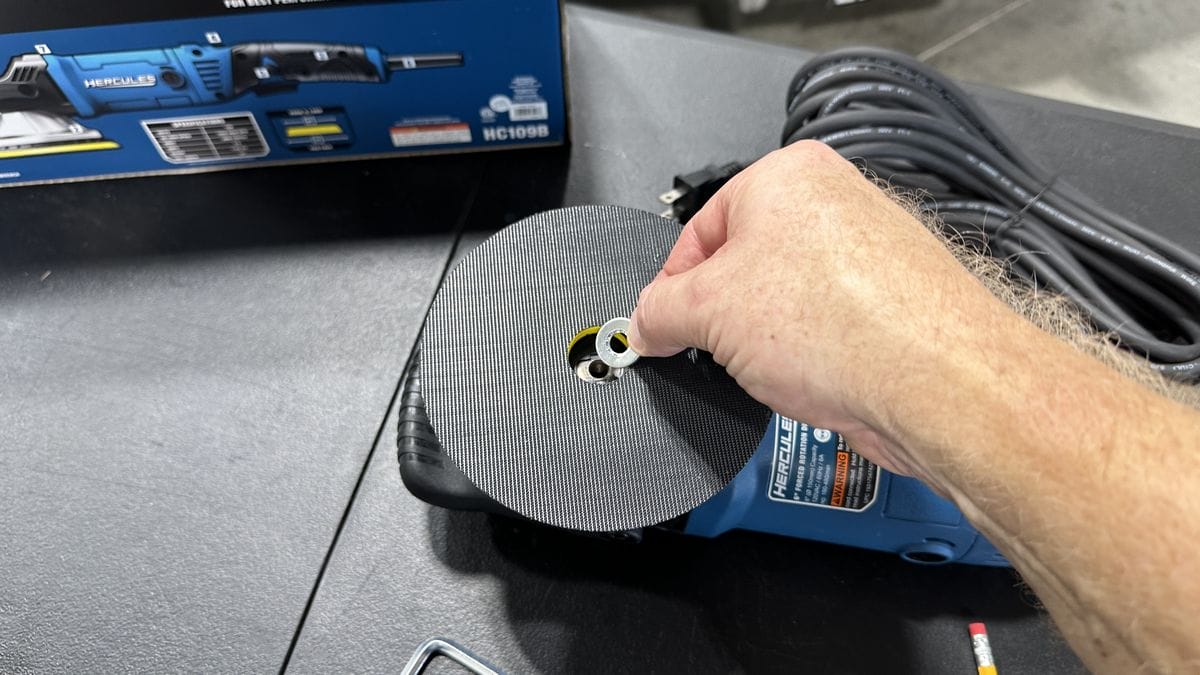
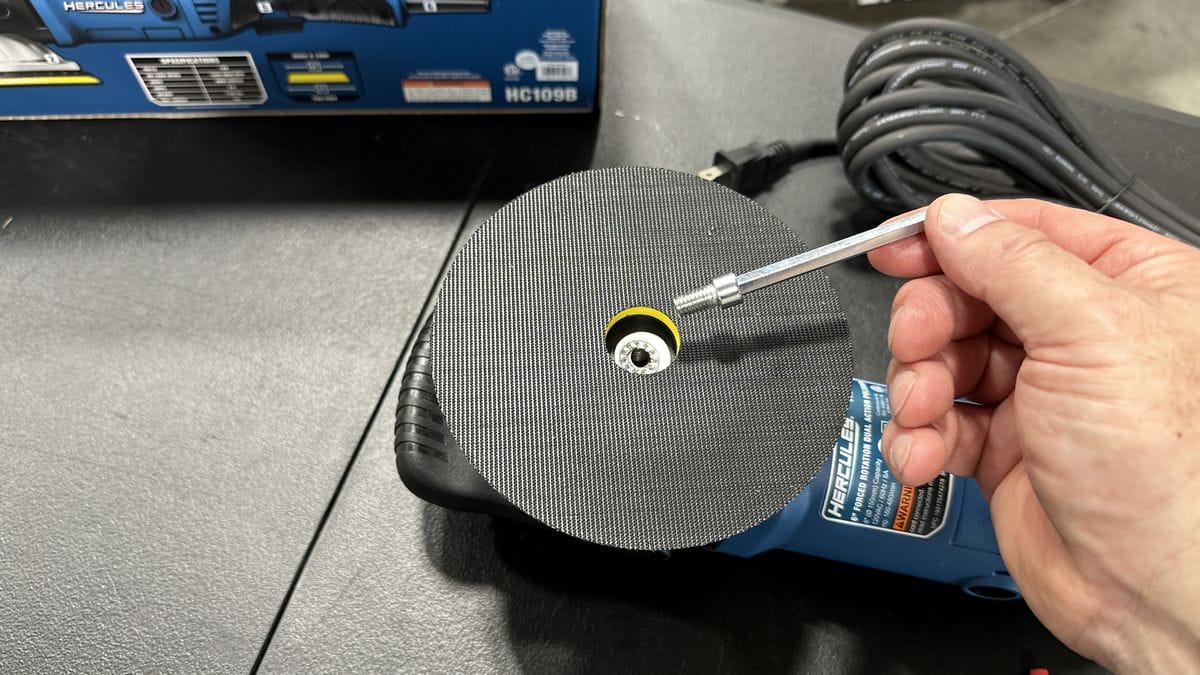
Reinstalling the backing plate
When reinstalling the backing plate, it’s vitally important that you align the slotted hole in the backing plate with the slotted drive spindle. If you don’t properly align the slotted backing plate to the slotted spindle, and tighten the bolt down, you will damage the gear set inside the head of the tool as well as the gears on the backing plate.
If you look closely, you can see the slot in the backing plate is correctly aligned and the backing plate bolt can now be installed and tightened.
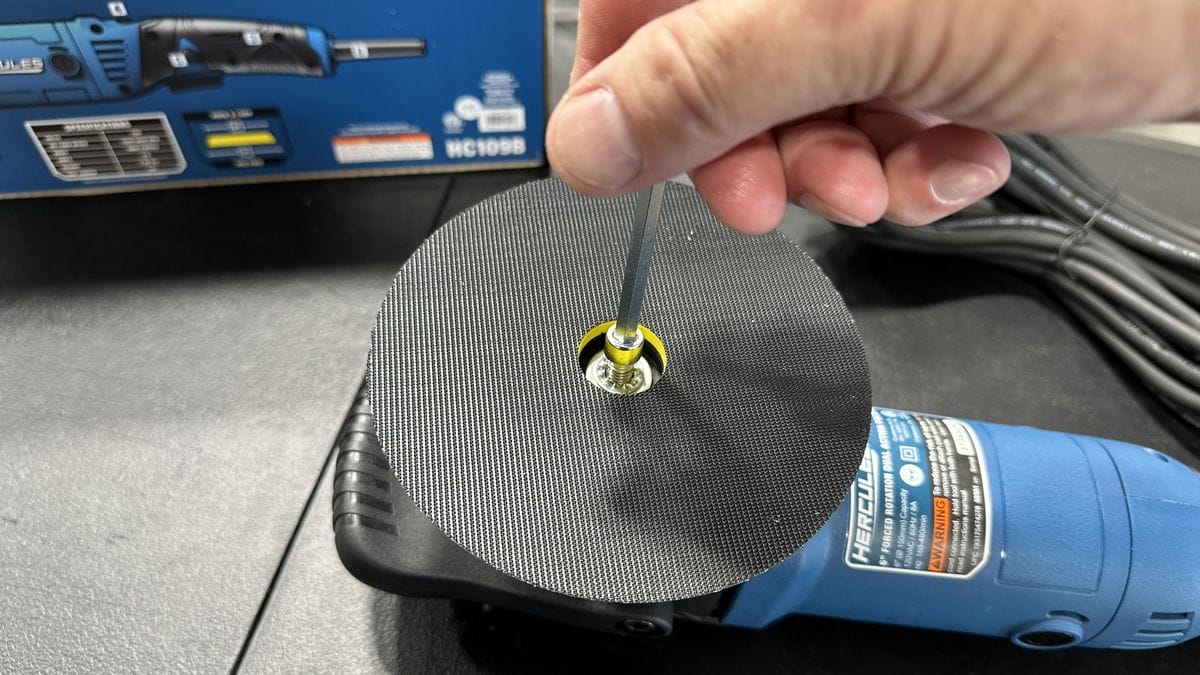
IMPORTANT: Always re-install the flat washer first, followed by the lock washer.
Using the included hex head wrench, tighten the backing plate to the tool until snug.
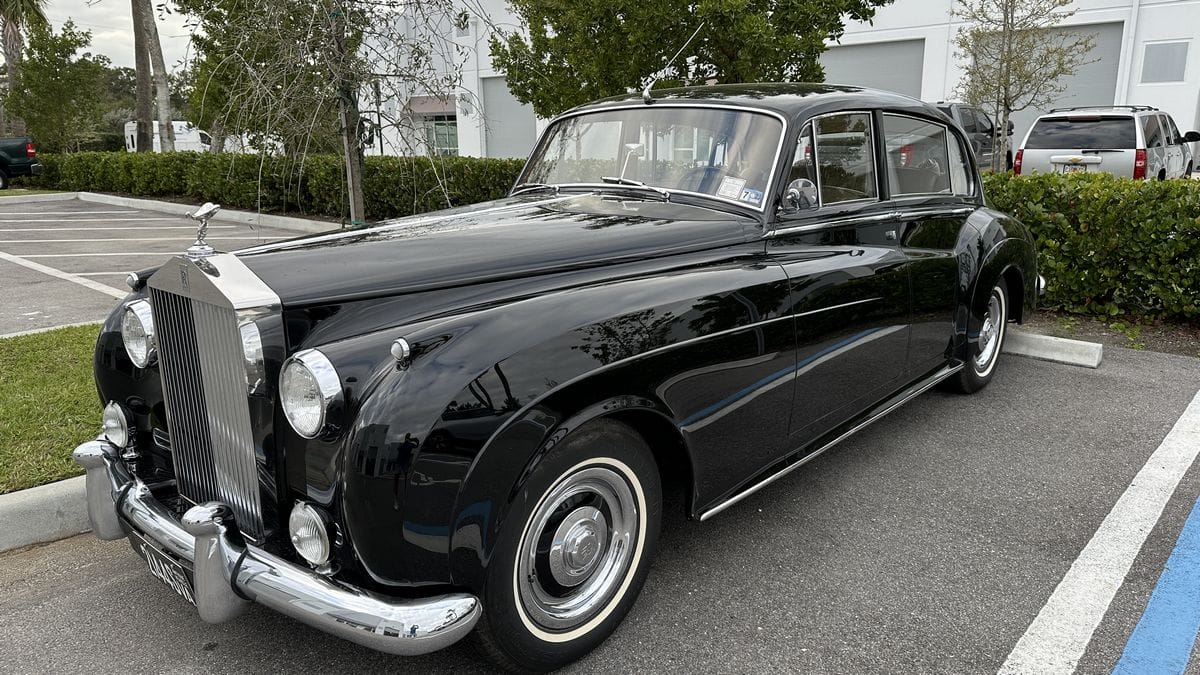
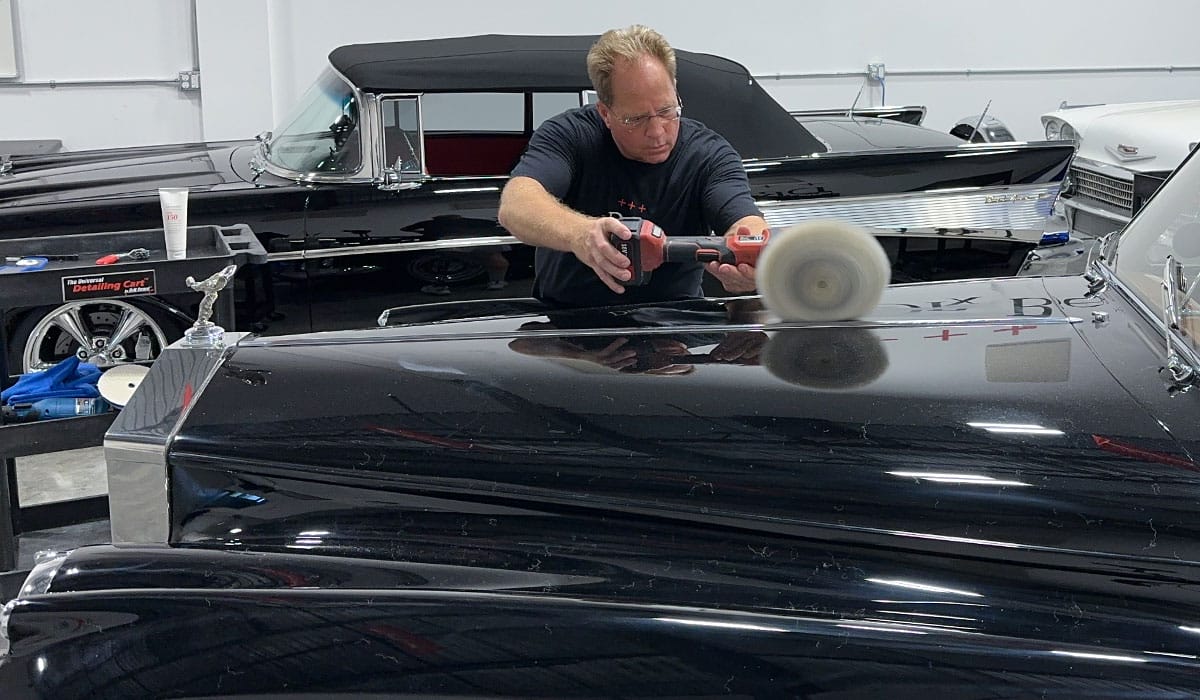
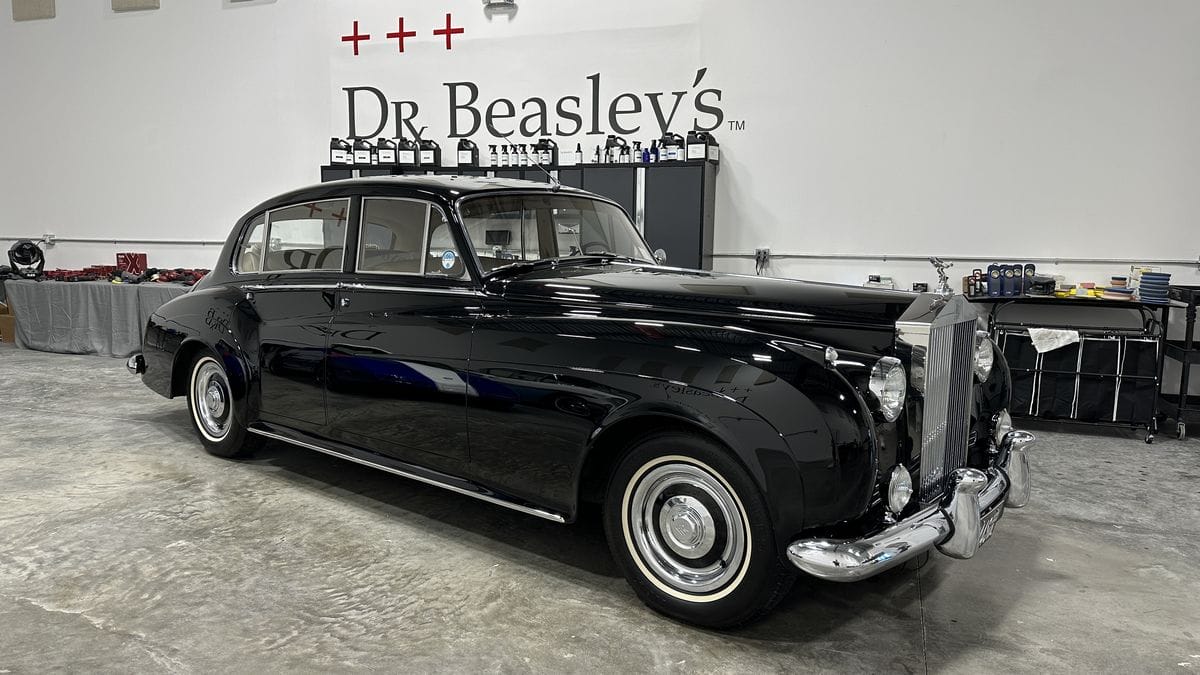
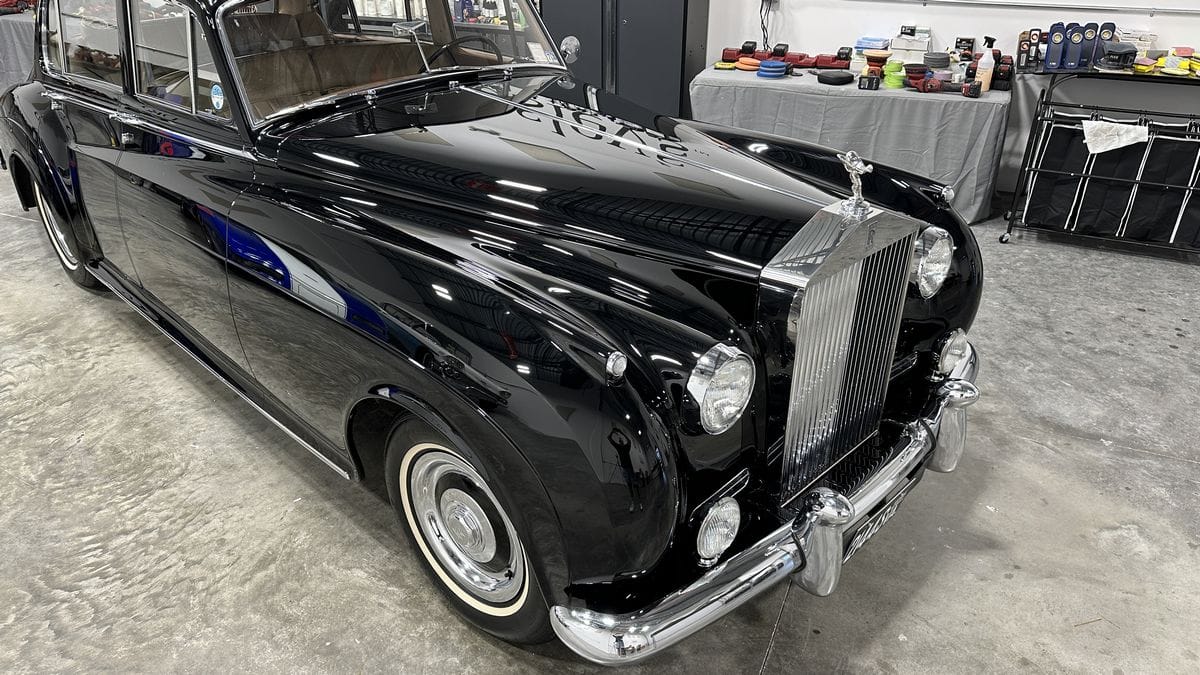
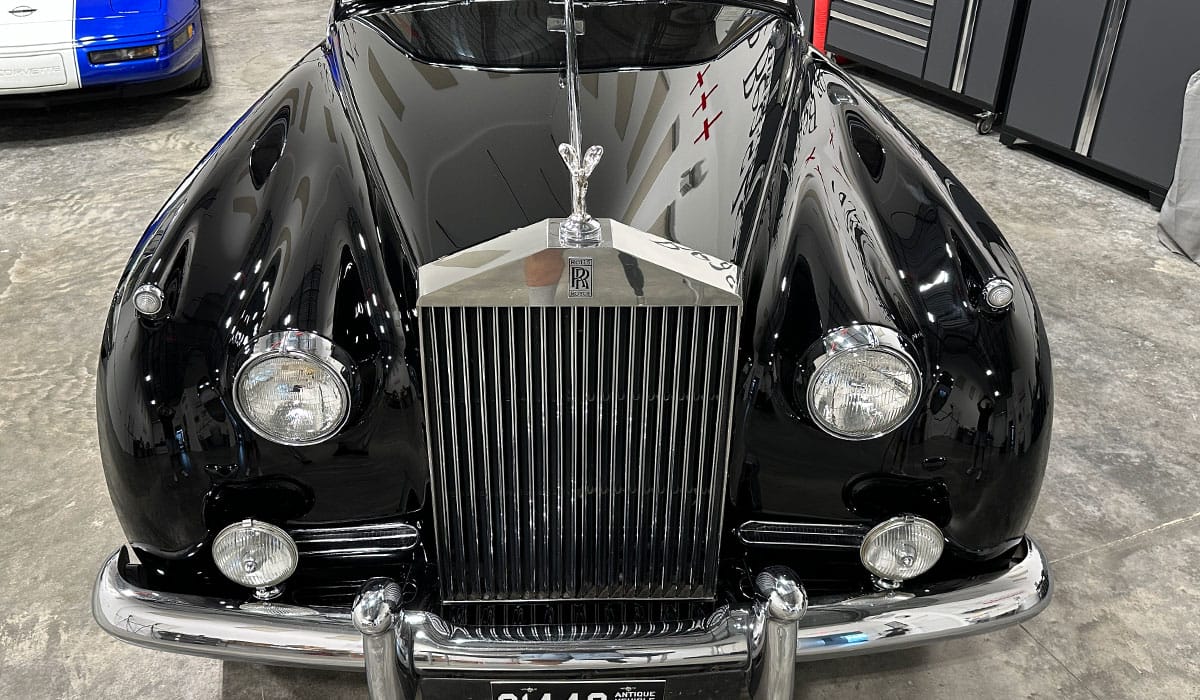
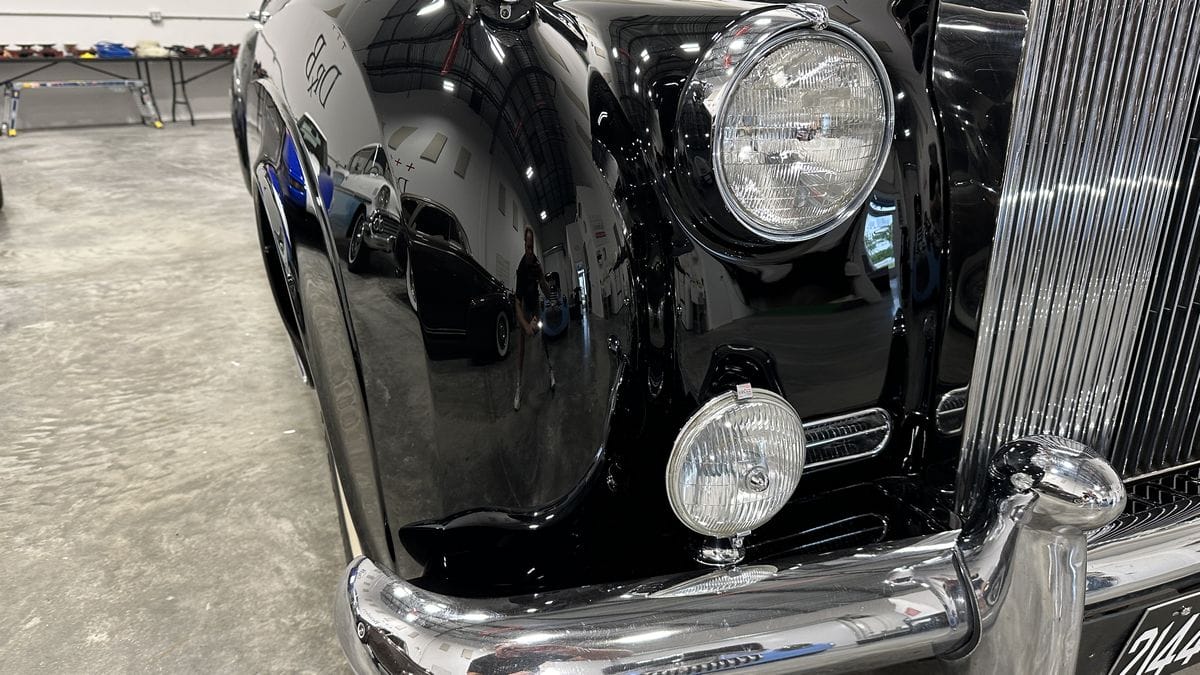
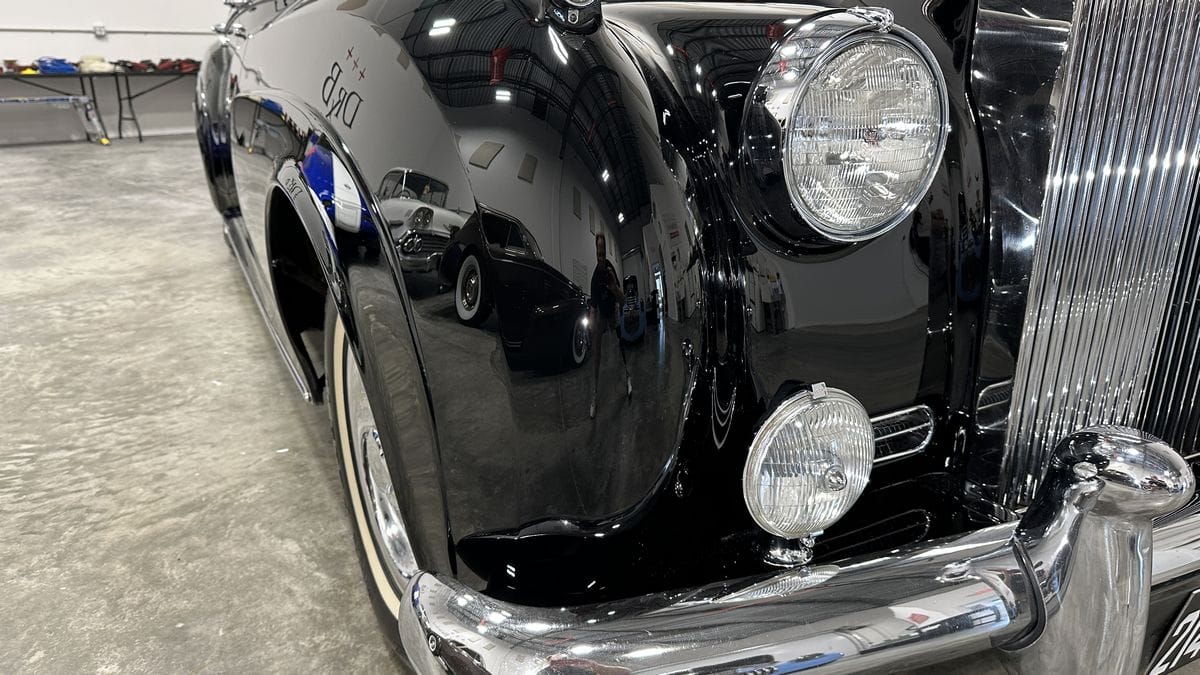
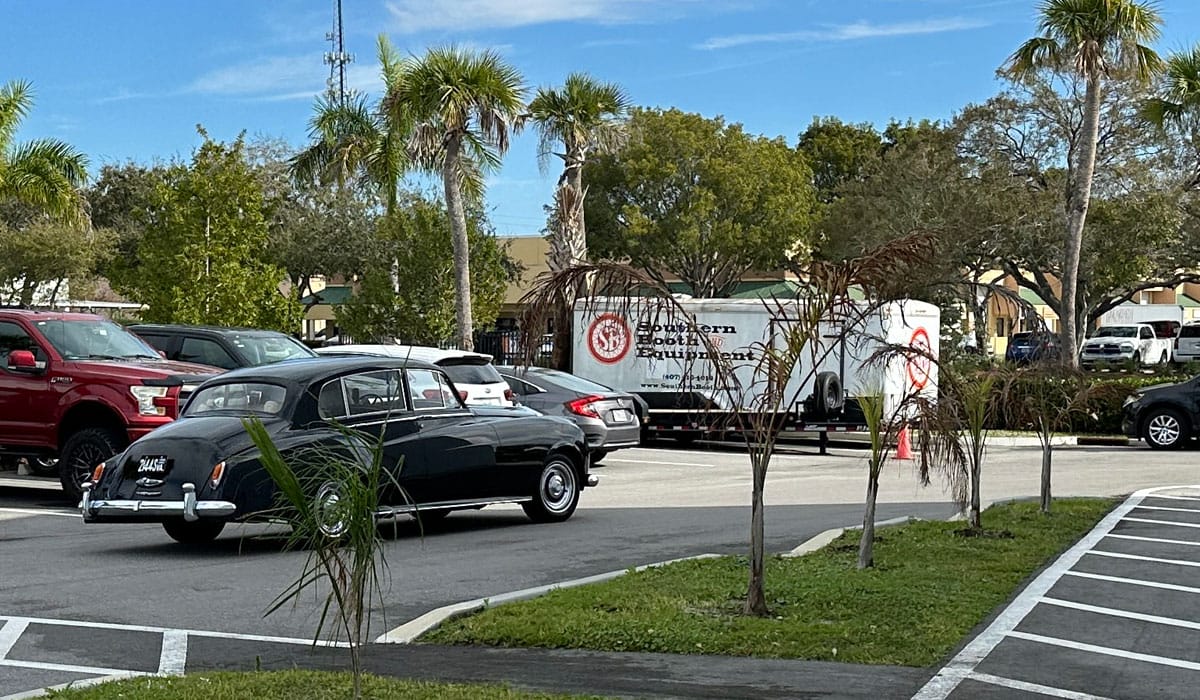
1959 Rolls-Royce Silver Cloud – Test Drive Car
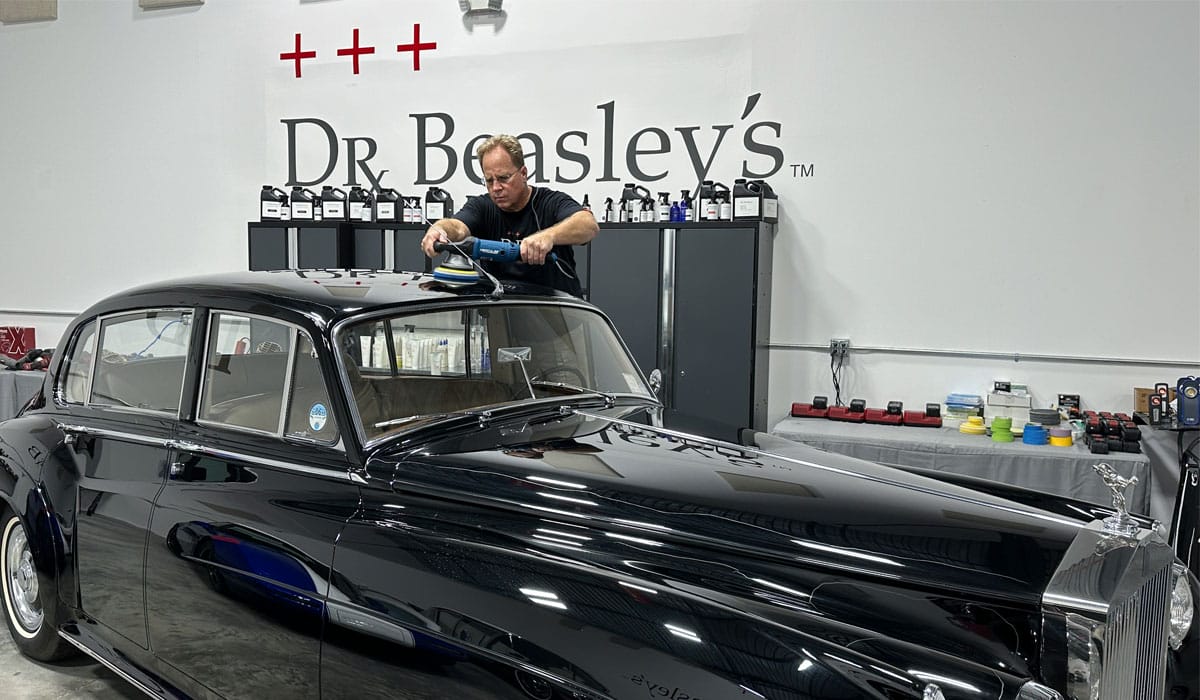
Now that I’ve lubricated the felt ring, it’s time to take the HF Forced Rotation Orbital Polisher for a test drive. To punish and torture this tool, I’m going to use it for the polishing step on this 1959 Rolls-Royce Silver Cloud. This is a HUGE car with plenty of real-estate in the way of body panels.
Using a large car like this will provide me with plenty of hands-on time behind this tool so I can share my real-world experience in this review.
This should be fun, a $100.00 tool to detail a $100,000.00 car!
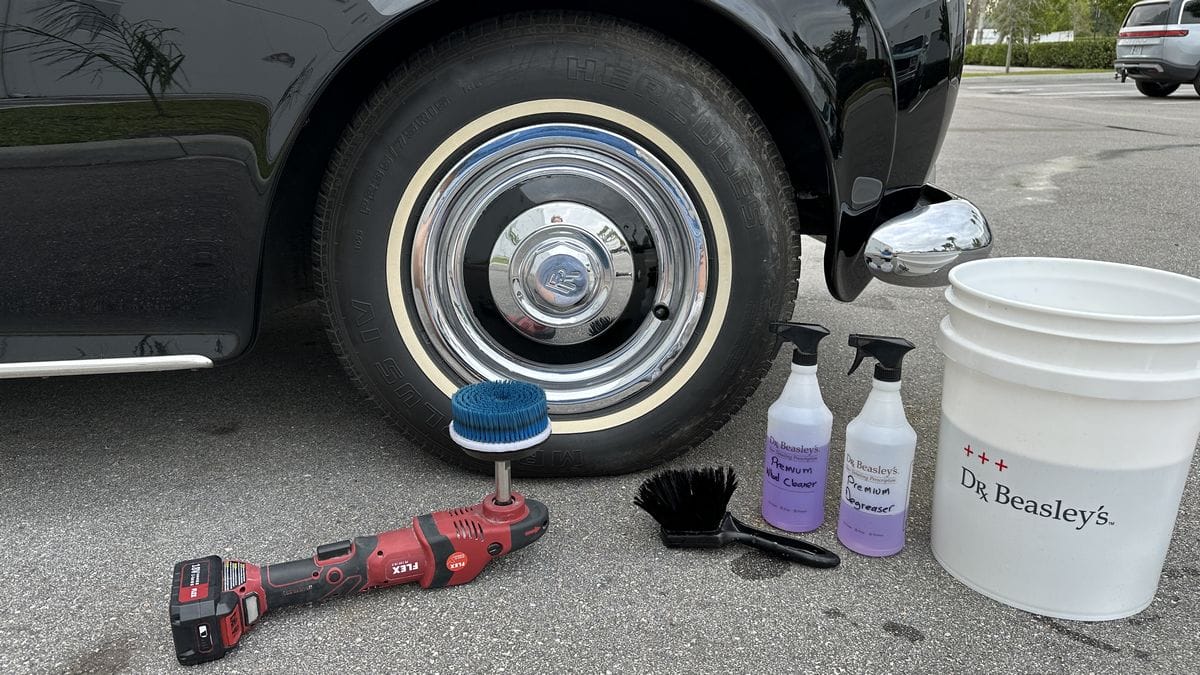
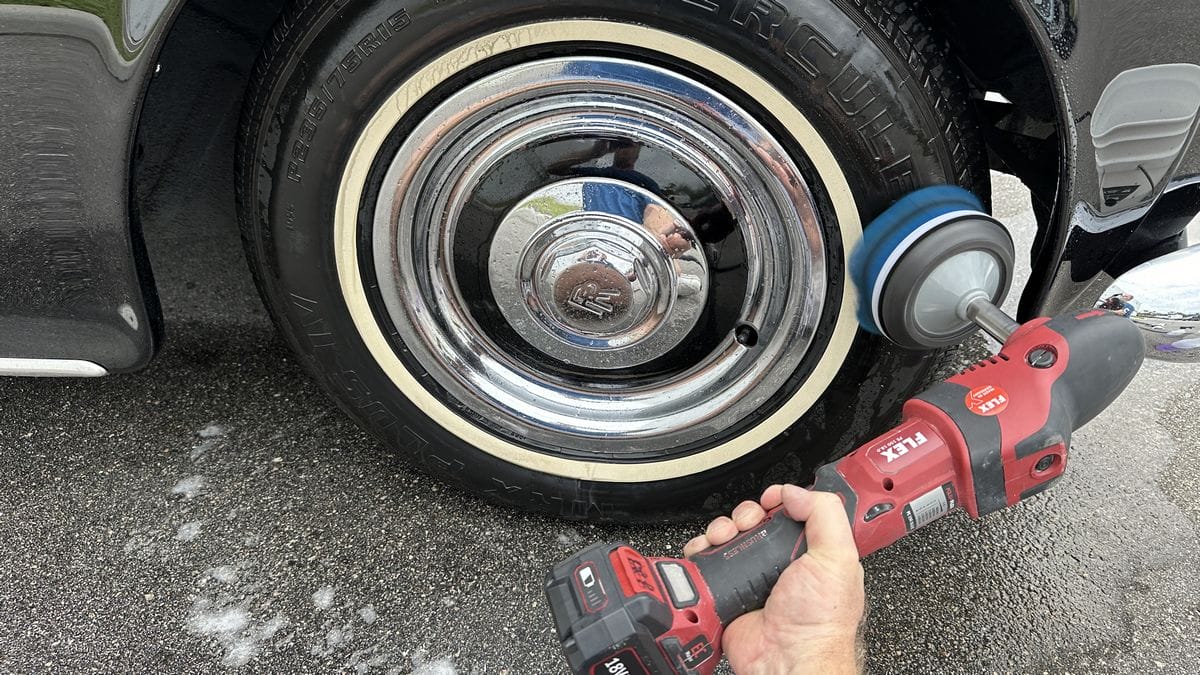
Wheels and tires first
In our detailing classes that include an Extreme Prep wash as a part of the class, we teach our class when washing a car to start with the wheels and tires first to avoid any standing rinse water on the painted body panels where you risk water spots while cleaning the wheels and tires.
For our Extreme Prep Wash portion of our classes, we teach how to machine clean tires and it gets the tires so much cleaner than working by hand with a tire brush.
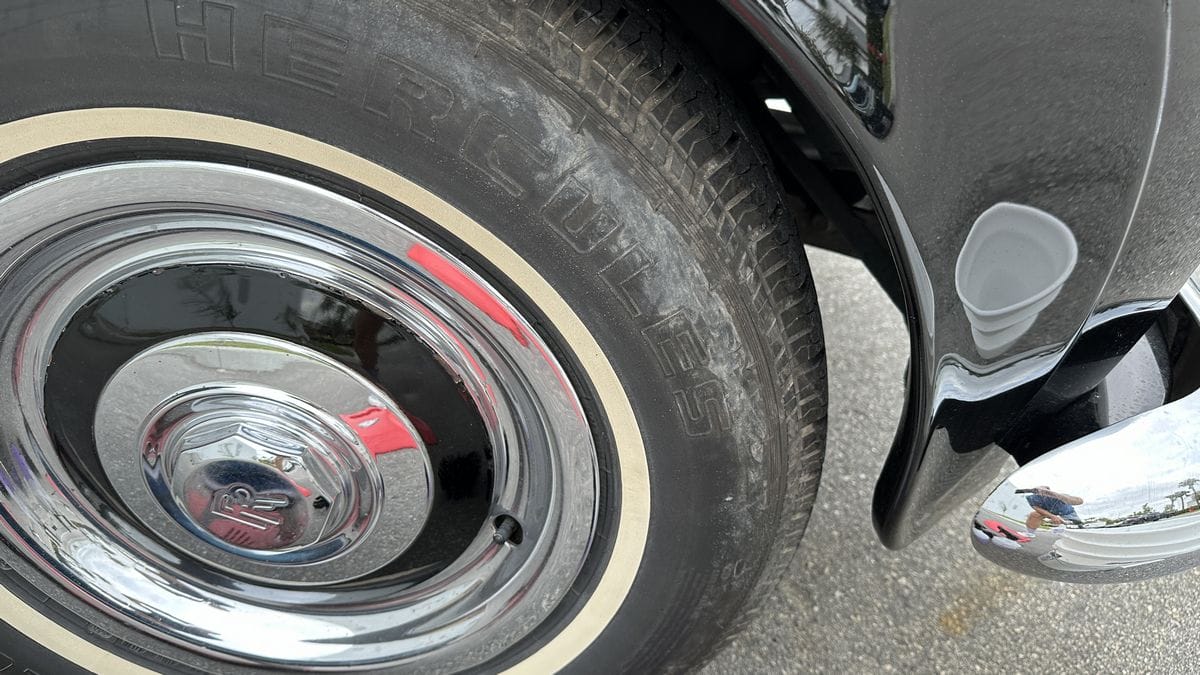
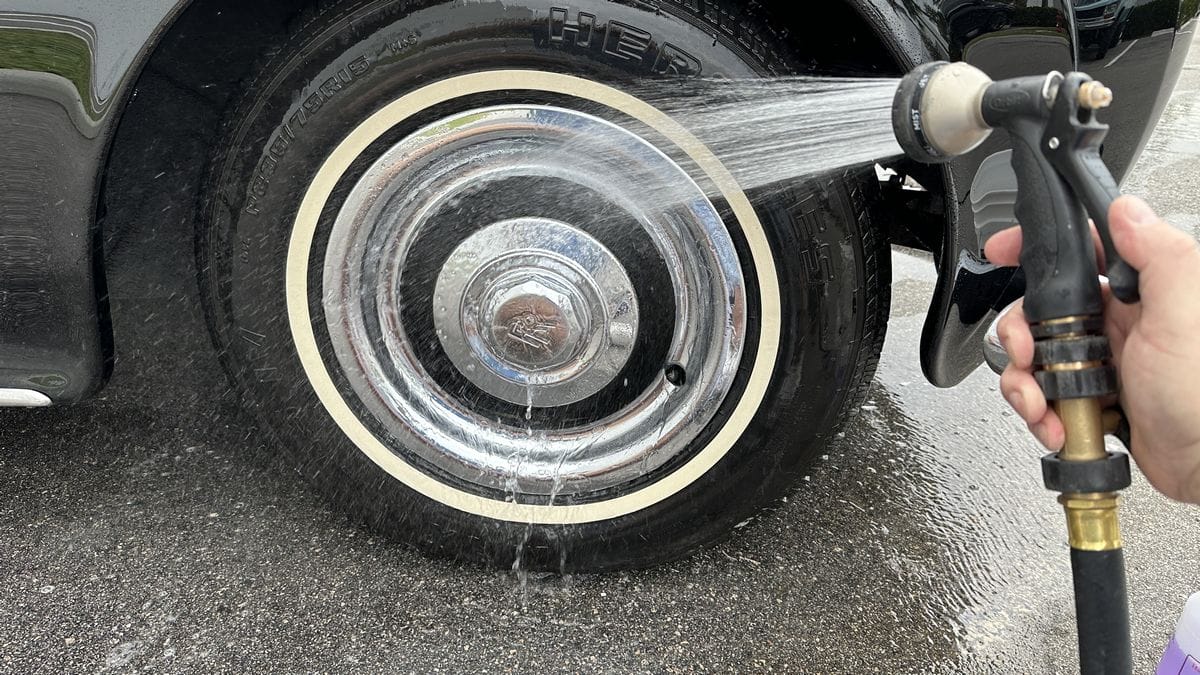
Full body wash
After cleaning all 4 wheel and tires, I give the Rolls-Royce a thorough washing using Dr. Beasley’s Premium Body Wash with a Dr. Beasley’s Wash Mitt.
Paint inspection
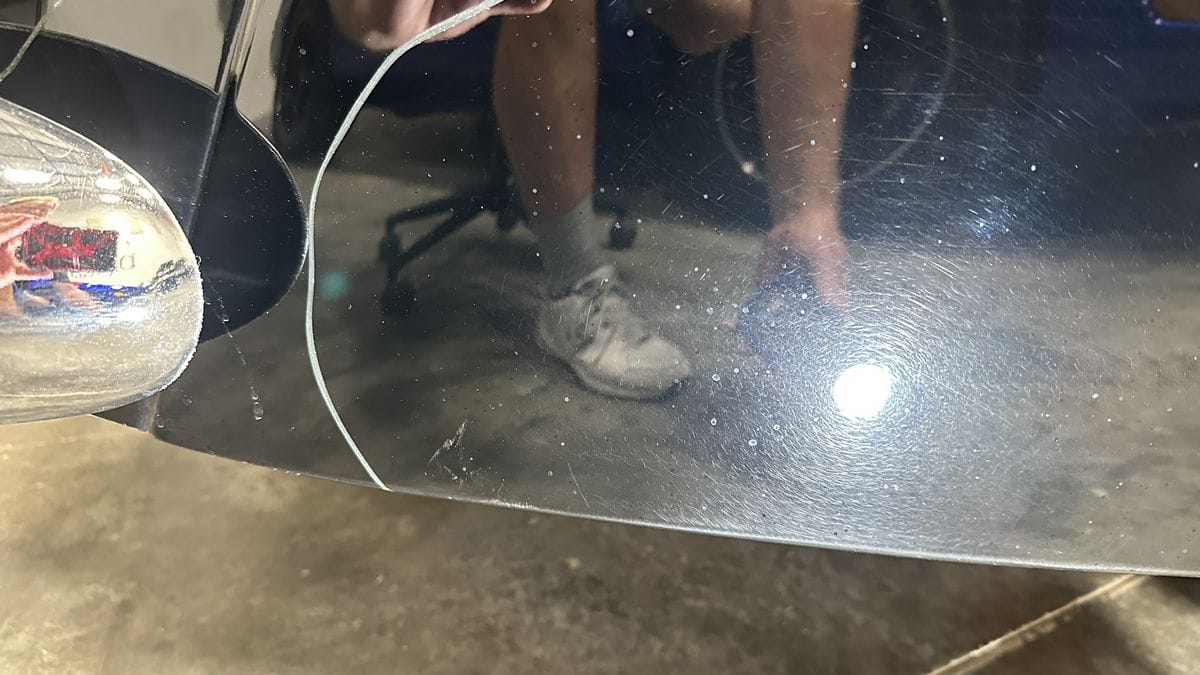
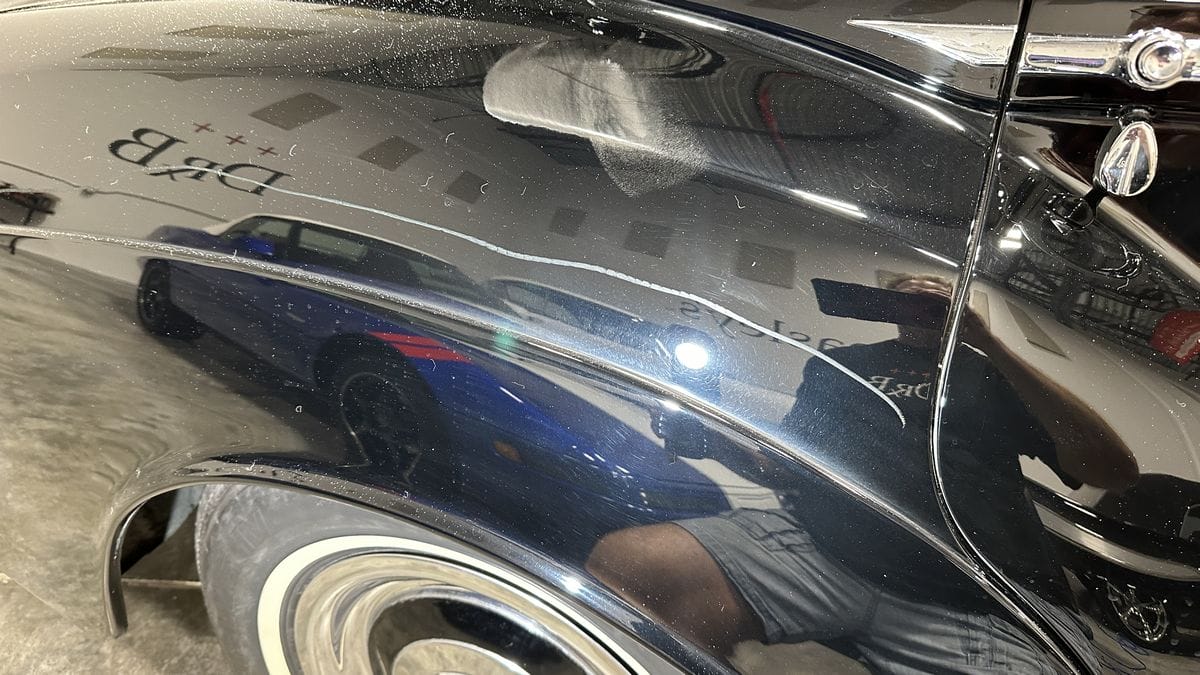
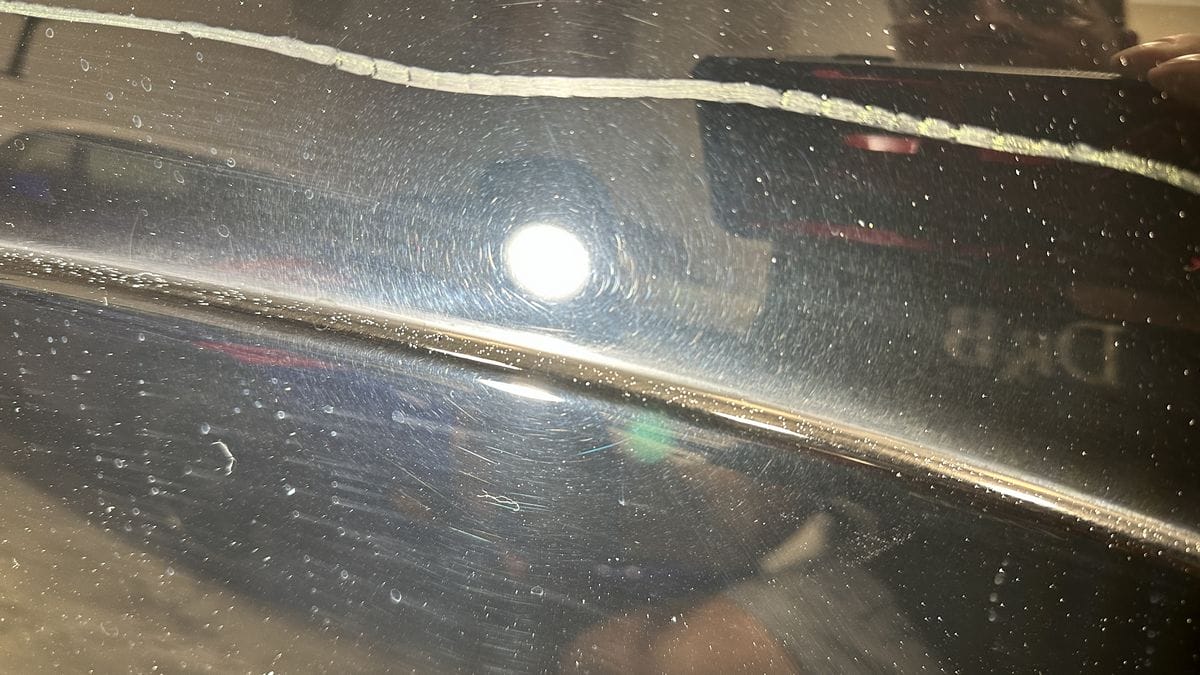
Now that the car is clean and moved into the Dr. Beasley’s O.R. (operating room), using overhead lights and a hand-held inspection light, I mark all of the worst defects I’ll need to remove. I call this the Crayon Hack as I use a Jumbo Crayon to mark all the areas with deep or serious paint defects that I’ll need to remover.
As you can see by the pictures below, there are a lot of swirls, scratches and sanding marks that need to be removed in order to restore a true showcar finish.
Multiple-step or Showcar detailing
To get the paint on this Rolls-Royce right, I’m going to start with Dr. Beasley’s NSP 150 with a wool pad on a rotary polisher. The defects in the paint are too many and too deep to attempt to remove with an orbital polisher in a time-efficient manner.
Test drive time!
After removing all the paint defects, it’s time to remove any hologram scratches left by the wool fiber pad and perfect the paint to maximize gloss and clarity.
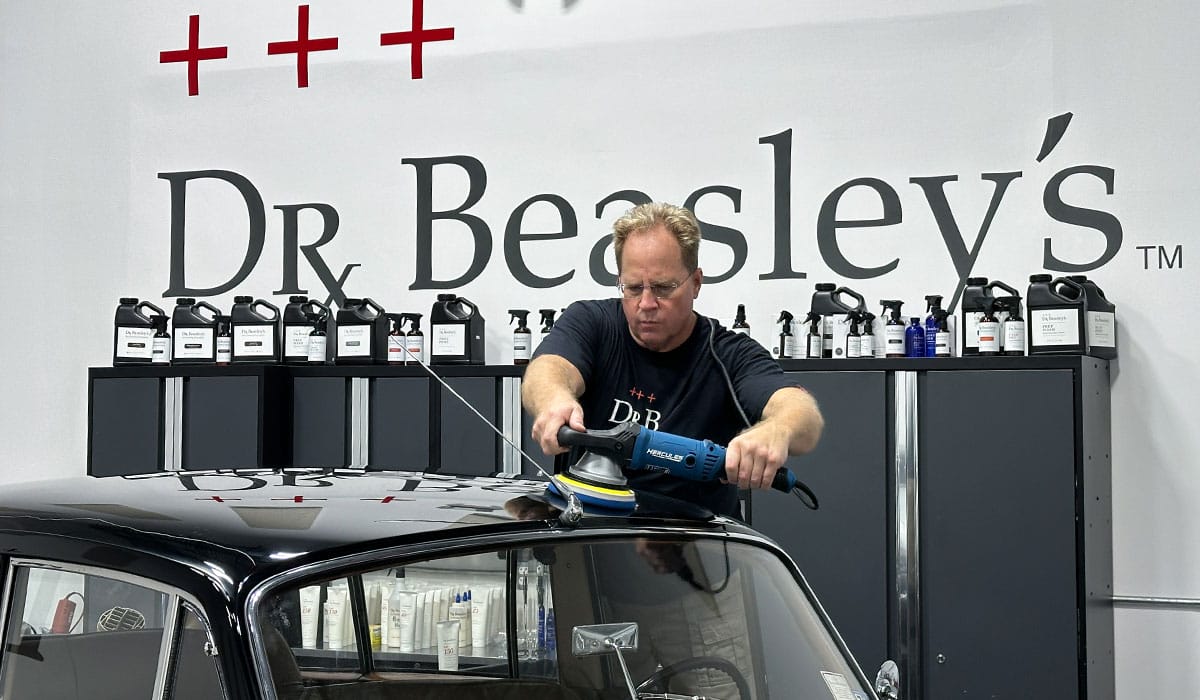
When doing a multiple-step paint polishing process, it’s normal to start at the highest point, the roof, and then work your way down and around tackling all of the various body panels.
Zero pad stalling
In the below picture, I’m using only the edge of the buffing pad to polish the panel between the windshield and the hood. The major benefit to using a gear-driven orbital polisher is there is zero pad stalling.
If I were using a free spinning random orbital polisher, I would not be able to maintain pad rotation when using just the outer portion of the buffing pad. Being able to adjust how I hold this tool to tackle all of the body panels, no matter what the shape or size, is a real time-saver.
With free spinning random orbital polishers, I would have to use multiple tools that range in size and thus range in pad size, to perform all the paint correction on this car.
Smooth and low to no vibration
I was both surprised and impressed with how smooth this tool felt even when buffing on the highest speed setting.
Time saving
Here’s another example where I take advantage of the gear-driven aspect of this polisher. You can see how I’m tipping the polisher to do focused, intense polishing work on the paint next to the chrome grill.
You cannot do this easily or efficiently with free spinning random orbital polishers as the pads on free spinning random orbital polishers will tend to simply stall or stop rotating and oscillating.
Being able to use a single tool and tackle any body panel saves a lot of time since I don’t have to stop buffing with one tool, grab a different tool and start up again.
Last machine polishing step
The paint on this car was on the medium side, meaning it wasn’t hard and it wasn’t soft, it was right in that sweet spot detailers love to work on.Because this was a true showcar detailing process, after the gear-driven polishing step, I switched over to one of my favorite free spinning random orbital polishers, the RUPES BigFoot 21, to perfect the paint with Dr. Beasley’s NSP 45 and prepare the paint for the installation of the Dr. Beasley’s Nano-Resin MX Ceramic Coating.
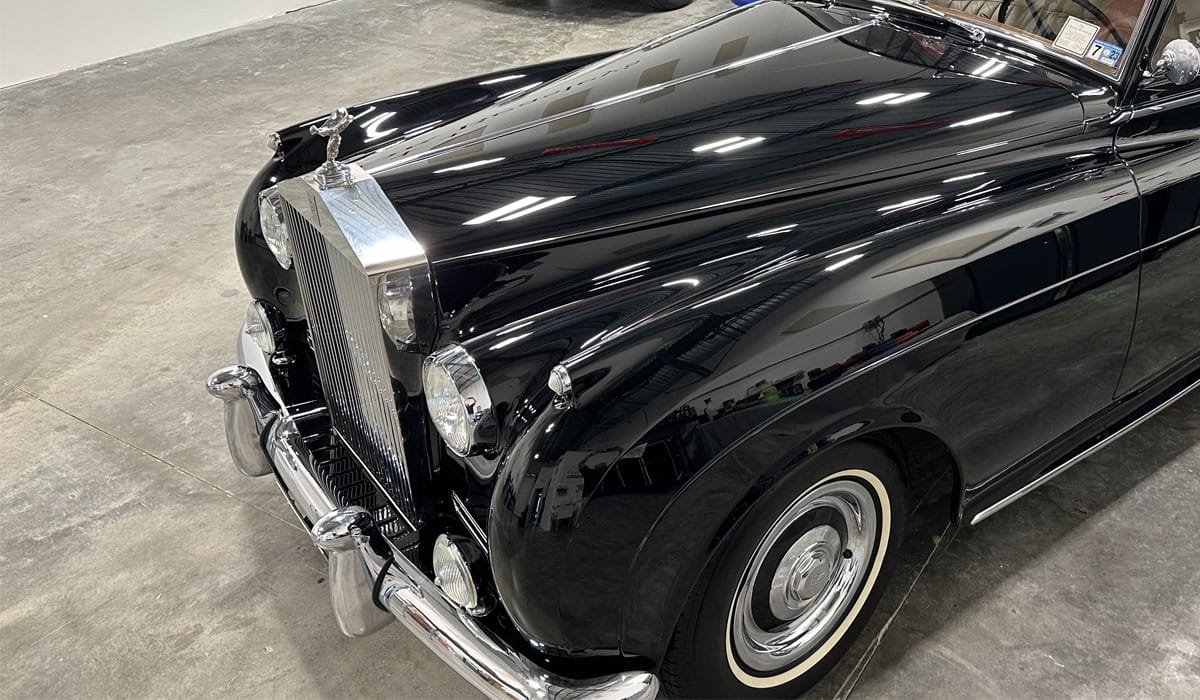
Final results
After around 9 hours of rotary cutting and 10 hours of orbital polishing with the Harbor Freight Forced Rotation Dual Action Orbital Polisher, the work is completed.
If you look closely, you can see me using the same swirl finder light for these after shots that I used to show the swirls in the before pictures. The paint is now swirl-free and has a black mirror finish.
Been there, done that…
A few years back I detailed this same model Rolls Royce, only it was painted white. The quirky thing about the white Rolls-Royce Silver Cloud was that for some reason, the trunk lid was painted with single stage paint while all the other body panels were painted using a modern basecoat/clearcoat paint system.
I noticed the difference when after buffing on the trunk lid I saw white pigmented paint coming off the trunk lid and building-up on the face of my buffing pad.
If look closely at the picture below, you can see a slight color difference between the single stage paint on the trunk lid and the basecoat/clearcoat paint on the rest of the car.
Products used…
This was a complex paint correction project and I hope I’m never asked to work on such a large car like this 1959 Rolls-Royce again. Picture below are all of the primary products used to go from neglected to respected. Including,Dr. Beasley’s Prep Wash
Dr. Beasley’s Glass Cleanser
Dr. Beasley’s NSP 150
Dr. Beasley’s NSP 95
Dr. Beasley’s NSP 45
Dr. Beasley’s Nano-Resin MX Ceramic Coating Kit
Dr. Beasley’s Tire Conditioner
And of course, lots of buffing pads and microfiber towels.
Review
Being a long-time user of other gear-driven orbital polishers, I was impressed with the power and smooth operation for this new tool from Harbor Freight. The build-quality appears to be very good. I wouldn’t say this tool is as good as the tool it is copied after, but for enthusiast car detailers, that only need a tool like this once a year or so, it’s a great bang for your buck.
Time will tell if the internal components like the bearings, gears, motor and electronic components will hold up to the kind of rigorous use by professionals that use and abuse their tools 6 days a week.
If you’re new to machine polishing or ready to move up from a free spinning random orbital polisher to a gear-driven orbital polisher, then at a suggested retail price of $129.99 the Hercules brand, Forced Rotation Dual-Action Polisher is a great option to consider.
Plus, with Harbor Freight warranty, they guarantee this tool to be free from defects in materials and workmanship 90 days from the date of purchase. You also have the option to purchase an extended warranty, which is what I did as we will be using this tool in our detailing classes where it will be used and abused by students learning paint correction.
Homeward bound
I have to admit, I was happy to see this behemoth of a car leave. While I love a challenge… I think I love a challenge on much smaller cars.
Final thoughts…
Doing the paint correction on a luxurious car like this stately 1959 Rolls-Royce Silver Cloud is a huge undertaking. Possessing the experience and skill level to use a rotary polisher was essential to getting the job done in a timely manner. That said, I could have done the entire job using only the Harbor Freight Forced Rotation Dual Action Polisher. The primary difference would be it would take more time and a lot more pads.If you’re reading this and tackling a project like this or any detailing project and you have questions, feel free to reach out and contact me, I’m happy to help see you through to success in your garage.
Here at Dr. Beasley’s we are strongly pro-education, and our detailing classes cover all the tools, pads and products necessary to tackle projects like this. If you would like to take your detailing skills and knowledge to a higher level, you can get more information about our classes like dates, locations, topics and pricing by clicking the link below.
Click here to for more information on Dr. Beasley’s Future of Detailing Classes
Mike Phillips
Cell: 760-515-0444
mike@drbeasleys.com
Hope to see you at a future class!
Last edited: