Safest methods for removing sap/pollen(/bird droppings) from paint?

Strive

Member
Joined
Sep 23, 2021
Messages
55
Reaction score
18
Points
8
Location
San Diego
First, sorry for the general title. I have two pictures in this post showing what I am talking about, and basically I am looking for opinions on how people would go about cleaning them off (mostly how to clean the second picture)

Here is the first picture:
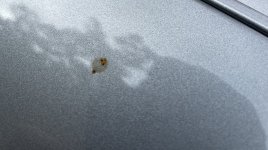
IMG_9690.jpg
Here are my thoughts on this:
  • Presoak with something
  • This is dry but not bonded to the paint, so...
  • Safest way to clean off of paint? Pressure wash should do it
  • Safe way to clean without a pressure washer?
    • Normal wash or rinseless wash or waterless wash should work. I prefer waterless for spot cleaning & something like this usually comes off with one pass with the towel (with normal waterless washing hand pressure, no extra hand pressure needed), so I think it is acceptably safe.
Here is the second picture:
IMG_9692.jpg
Here are my thoughts on this:
  • Presoak
  • Safest way to remove: ? (probably pressure wash + something)
  • Safe way to remove without pressure washer: ?
The reason for the two question marks above is that in my experience things like the second picture don't get 100% removed with a pressure washer. They are just too "stuck"
  • Since it is stuck, I usually need to agitate to get it off completely. But I have not figured out a way to agitate that I am happy with.
    • Note that when I say "agitate" I don't mean scrubbing with heavy pressure. I mean multiple passes with slightly more than the usual waterless wash pressure
    • Multiple passess or extra pressure means more likely to marr the paint. 🤬
Maybe someone has a way to clean off something like in the second picture without marring?
  • Maybe using more soap or using APC or using tree sap(or bird bomb) remover or something else?
  • Maybe spot claying? (I have seen people claim they can clay very small areas with ultra-fine clay without marring...)
  • Maybe I need a stronger pressure washer?
  • Maybe I'm worrying too much and multiple passes with slightly extra pressure is a super safe approach...?

Thanks. I hope this post isn't too hard to follow
 
Last edited:
Start with simple approach.

Get a clean microfiber towel dripping wet, fold it 4 ways and lay it on top of spots. Pour some more water onto the towel so it's completely wet. Let water do it's thing for about 10 to 15 minutes.

Then gently wipe with this wet microfiber towel and see how much of the contaminants you can remove simply by softening them with water.

Dwell time and patience.

:)
 
Get a clean microfiber towel dripping wet, fold it 4 ways and lay it on top of spots. Pour some more water onto the towel so it's completely wet. Let water do it's thing for about 10 to 15 minutes.

When I soak it's a lot less than 10 minutes 😅 I will try 10 to 15 minutes next time!

The thing I forgot to mention is that there can be more than 1 spot like this, so 10-15 minutes a spot = a lot of time.
  • But I think the simplest solution here would be to use multiple towels & soak multiple spots at once. I definitely have plenty of towels.
  • Or... maybe some day I will try to do this with large towels to soak at larger area at once.
Thank you for the response and advice.
 
There's also a slew of products for removing tar and tree sap.

3D Gum & Tar Remover

3D Orange Degreaser

3D Bug Remover


With all the above and any similar type product - the key is to dab the contaminant with the product and give it some dwell time so the solvents/cleaners etc., can do thier job of softening and loosening. Then wipe.

What most people do is just apply product to towel and then SCRUB. This leads to scratching. --> No patience.


:)
 
There's also a slew of products for removing tar and tree sap.
I tried some such products a very long time ago (not from 3D though) and did not have a great experience with them. The ones I tried either seemed too strong for my liking, or too hard to wipe off or get the right dwell time.

But that was a long time ago and maybe I wasn't doing things exactly right, or maybe I wasn't using the best chemicals... I might try getting those 3D ones and trying again, although I try to always use the least aggressive method for the job so first I'll try leaving a wet towel for 10-15 minutes.

Thanks again for the advice.

I have a 5 hour meeting with the head chemist yesterday, learned a lot on how and why his products are so SAFE.

Stay tuned...


:)
 
3D gum and Tar remover is awesome. I would try that if it was me. It has many difficult situations such as yours a breeze.

Just can’t find it anywhere anymore. AG was carrying the gallons but discontinued it.
Maybe Mike can let us know if it has been discontinued in gallons or if not where we can purchase it. My gallon is running dangerous low.
 
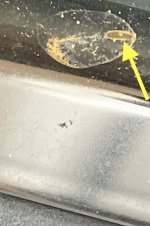
There was a tiny bird dropping on some plastic trim that I wanted to get rid of (sorry poor picture, there is tiny bird bomb bonded on plastic trim trust me)

pic1.jpg

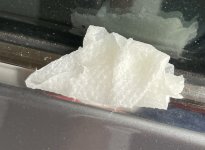
This spot on the trim is hard for me to leave a towel on though (full mf towel just falls off the spot), so I though why not use a small paper towel to soak the bird bomb instead. Since I would not be moving the paper towel I figure it should not cause marring.
pic2.jpg
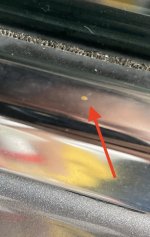
I left the paper towel about 5 minutes and then cleaned the spot with a mf and waterless wash. Some of the bird bomb was still stuck.
pic3.jpg
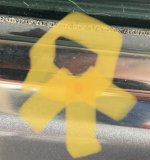
So then I held a damp mf on what was left of the bird bomb for a minute, then waterless washed the spot again. This time the bird bomb came off easy, but some etching is left in the spot.
pic4.jpg
Things to try next time:
  • let soak longer than 5 minutes
  • use cut-up mf towels instead of paper towel
  • use specific product
Incase the point of this post got lost in all the typing above: maybe can use a paper towel instead of microfiber for soaking in spots where it is hard to leave a microfiber
  • (but a cut up microfiber might be the better way to go)
 
There was a tiny bird dropping on some plastic trim that I wanted to get rid of (sorry poor picture, there is tiny bird bomb bonded on plastic trim trust me)

Maybe can use a paper towel instead of microfiber for soaking in spots where it is hard to leave a microfiber towel.
(but a cut up microfiber might be the better way to go)

I think you did good.

for small areas like that, fold a paper towel into a tiny square, dunk it in water so it's fully saturated, place on the bird dropping and then carefully - add a little more water onto the top of the towel until it's completely full of water to the point it's draining/dripping out of the the towel but not so much that the water is causing the paper towel to slide off the trim.

:)
 
I was looking at the orange degreaser product and I have read all the info on the site, including the directions.

I have a tree sap spot on two places of my wife's minivan and the rear glass of my car. I don't have any product that can tackle that. So I'm interested to buy some of this and use it, but there's no info about possibly chasing this with wax after application - I imagine that's always a good idea when using any type of solvent on the paint?

Does one use this product (patiently, as you've indicated above), wipe clean, *wash the car* and then wax, or is the paint "clean" after wiping off such that one can simply wax over? Or maybe plan to do all this directly after a wash?

Thank you!

Here's the link to the Dr. Beasley's Adhesive Remover

They you use these types of products is too dampen a small piece or the corner of a microfiber towel with the product. Next hold the dampened material ONTO the spot of tree sap, tar or whatever else is stuck on there. The idea is to allow a few seconds, like 45 seconds, to go by before you wiping or rubbing. This dwell time gives the solvents time to soften and loosen the sap (or tar), so it can gently be rubbed off the paint.

What I see most people do is this,

They dampen a small section of a towel and then rub like a wile man. There is no dwelling time. Yes, this approach will remove the sap but it tends to leave scratches in the clearcoat needlessly.


Mike
 
Thank you I will try that out. So, not the degreaser, but the adhesive remover instead? I imagine given it is a solvent that waxing that spot afterward is in order?
 
Thank you I will try that out. So, not the degreaser, but the adhesive remover instead?

Yes. A degreaser "might" work, but the right product is a tar/gum/adhesive remover.


I imagine given it is a solvent that waxing that spot afterward is in order?

Yes. Anytime you're "rubbing" on paint, ask yourself this question?

Is what I'm doing adding more wax? (in your situation, the answer is obviously "no")

What's is the opposite of ADDING WAX?

Subtracting.


-Mike
 
I've used Poor Boys Bird S##t Remover with great success. A small bottle will last for years.
 
I did not get pre and post pictures, but suffice to say, Dr. Beasley's Adhesive Remover worked remarkably well when following @Mike Phillips advice. I was patient and it took a while as I kept finding more of the stuff I hadn't noticed stuck to the paint, but it was worth the patience. I used it after a good wash and dry, and then did an entire coat of wax on the whole car because it was kind of due anyway.

On the other thread, will update next time I wash as I didn't have time to try the black plastic mold restoration product that I also ordered and now have.

Thanks again!
 
Back
Top