

- Admin
- #1
- Joined
- May 21, 2021
- Messages
- 2,824
- Reaction score
- 1,695
- Points
- 113
- Location
- Stuart, Florida
- Website
- themikephillipsforum.com
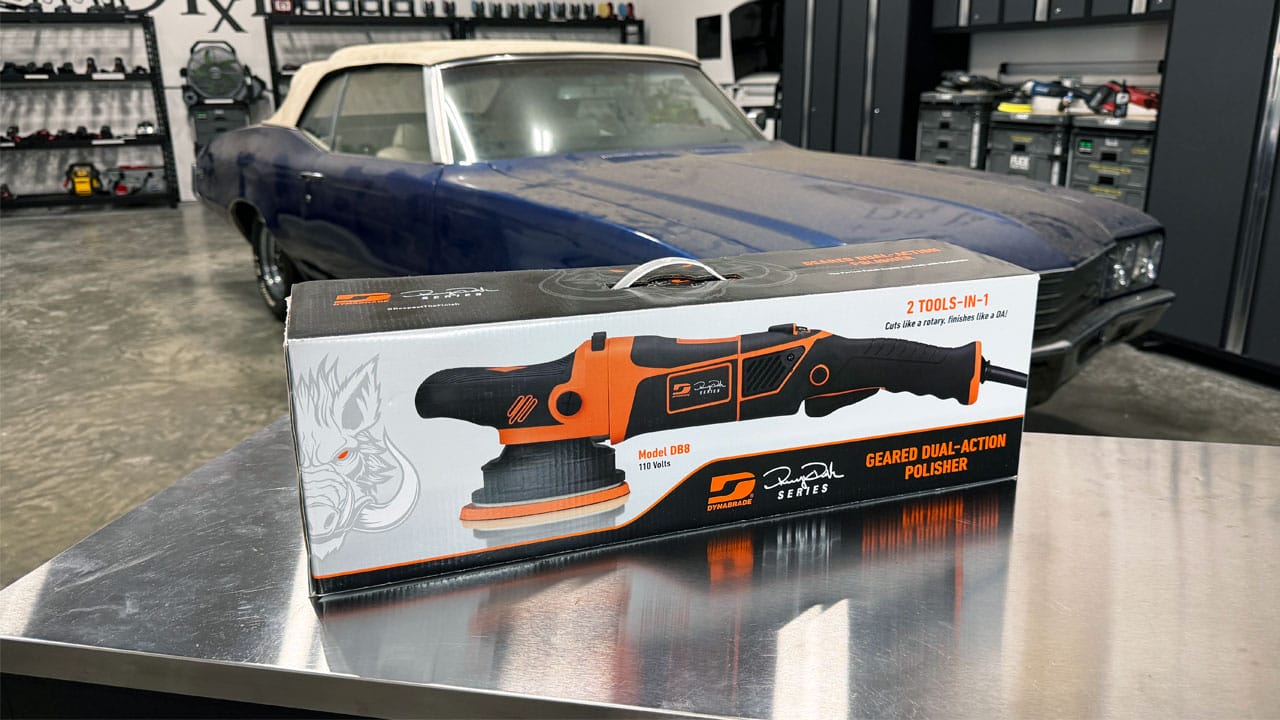
Video Review
In the video below, we'll take a look at what's in the box, go over all the unique features and then I'll share my thoughts after torture testing this polisher on a barn find 1971 Buick Skylark Custom Convertible.What's in the Box?
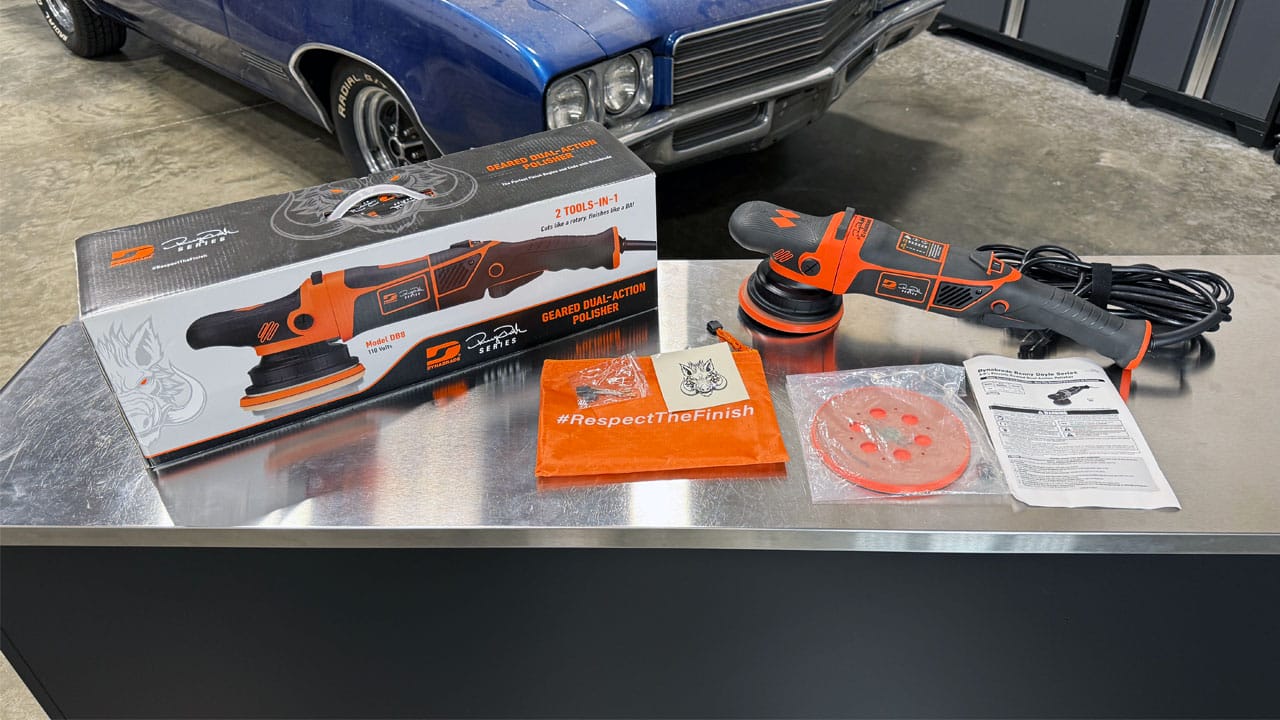
Inside the box you get the DB8 gear-driven polisher, which comes from the factory with a 5" backing plate already attached.
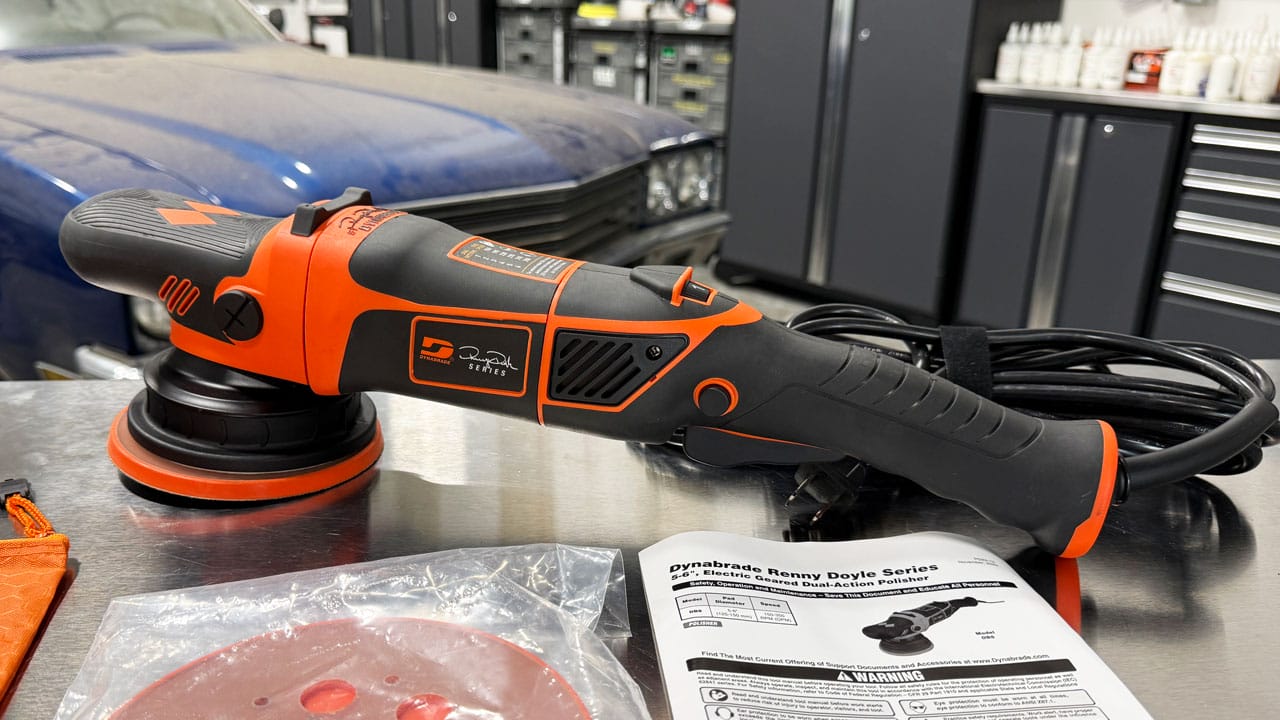
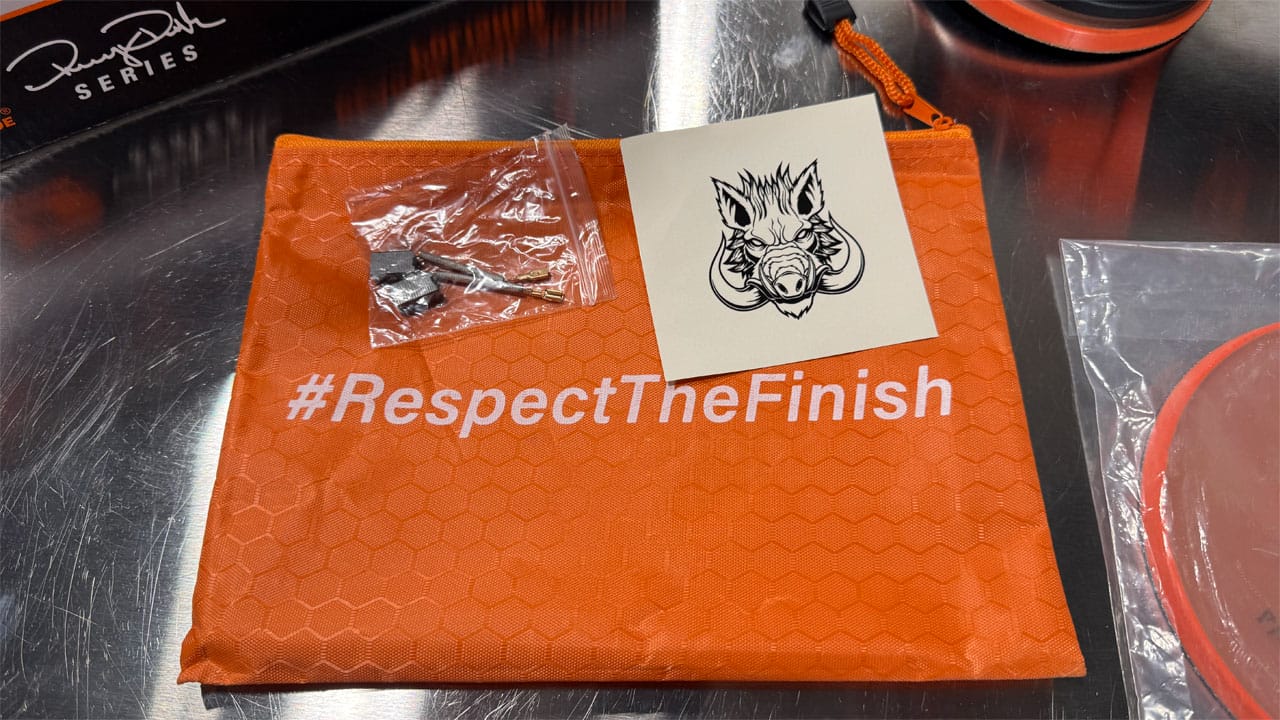
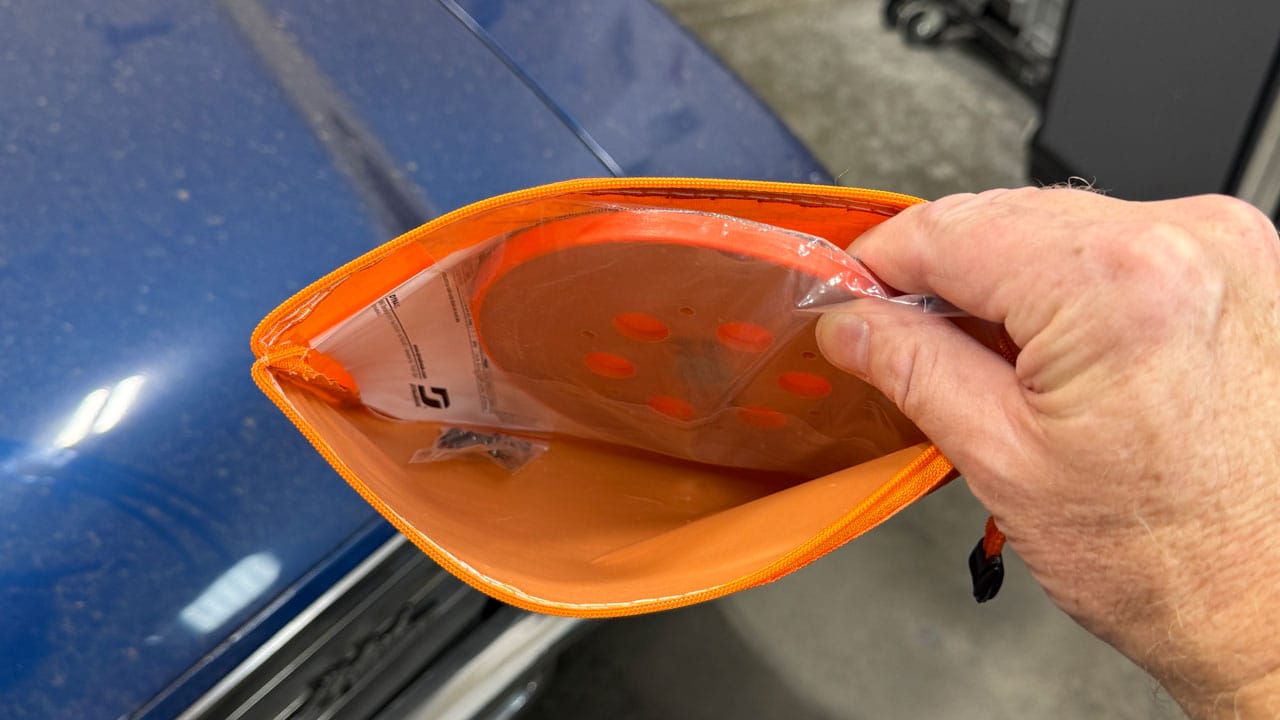
Also inside the box is a zippered pouch with a set of replacement motor brushes, a sticker and the warranty.
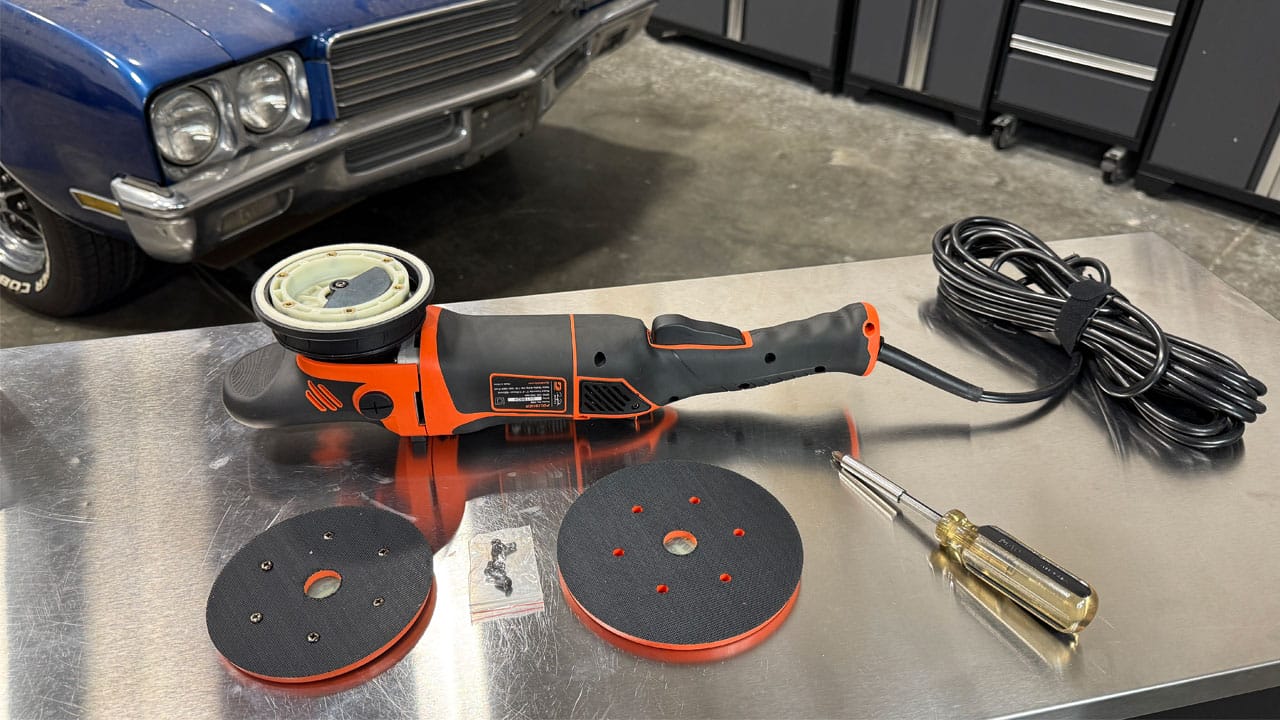
There's also an included, optional 6" backing plate with an extra set of replacement machine screws to attach the backing plate to the polisher.
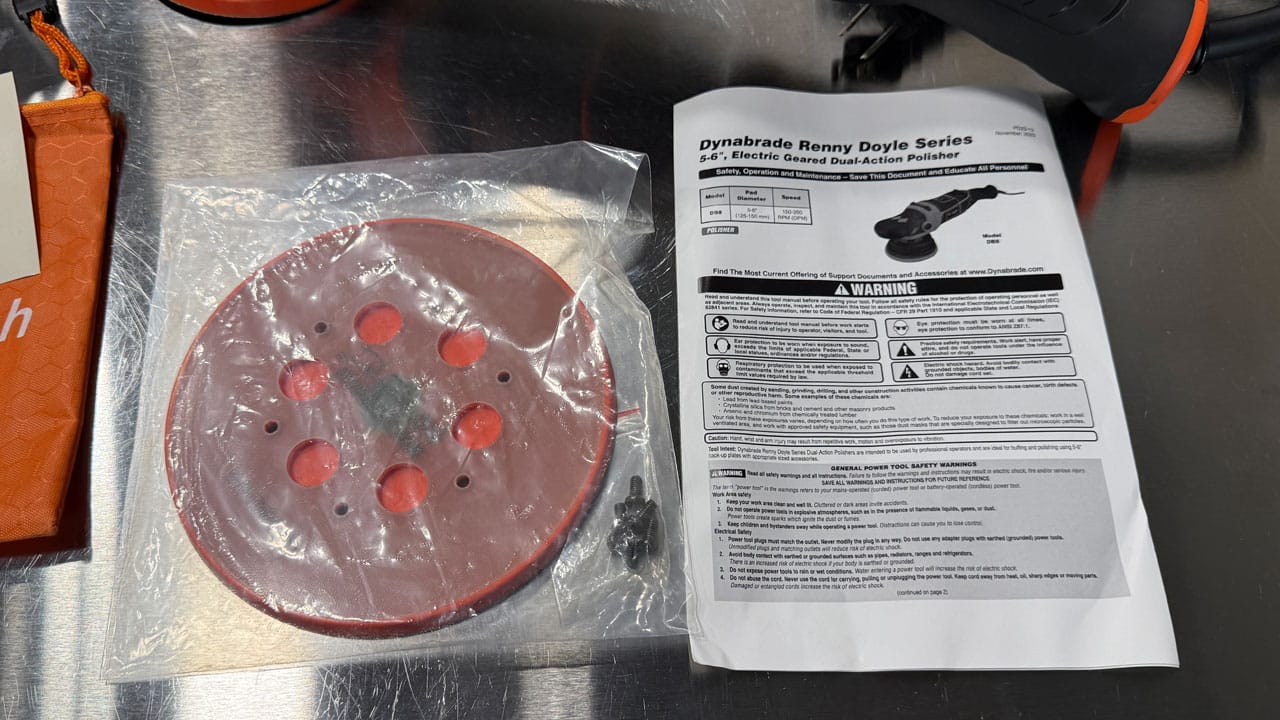
NOTE: The replacement machine screws are the same as the installed machine screws. There are no differences and you can use any of these to attach either the 5" or the 6" backing plate. I think it was a good, proactive measure taken by Dynabrade so that if you drop and lose a machine screw, you have backups. If you strip-out the head of the machine screw, you again have factory replacements and this is important as the machine screws take the brunt of the force transferred from the electric motor to the backing plate.
Unique Tool Features
Before I torture test this polisher and get it dirty, while it's still clean and purty, let's take a look at all the features.
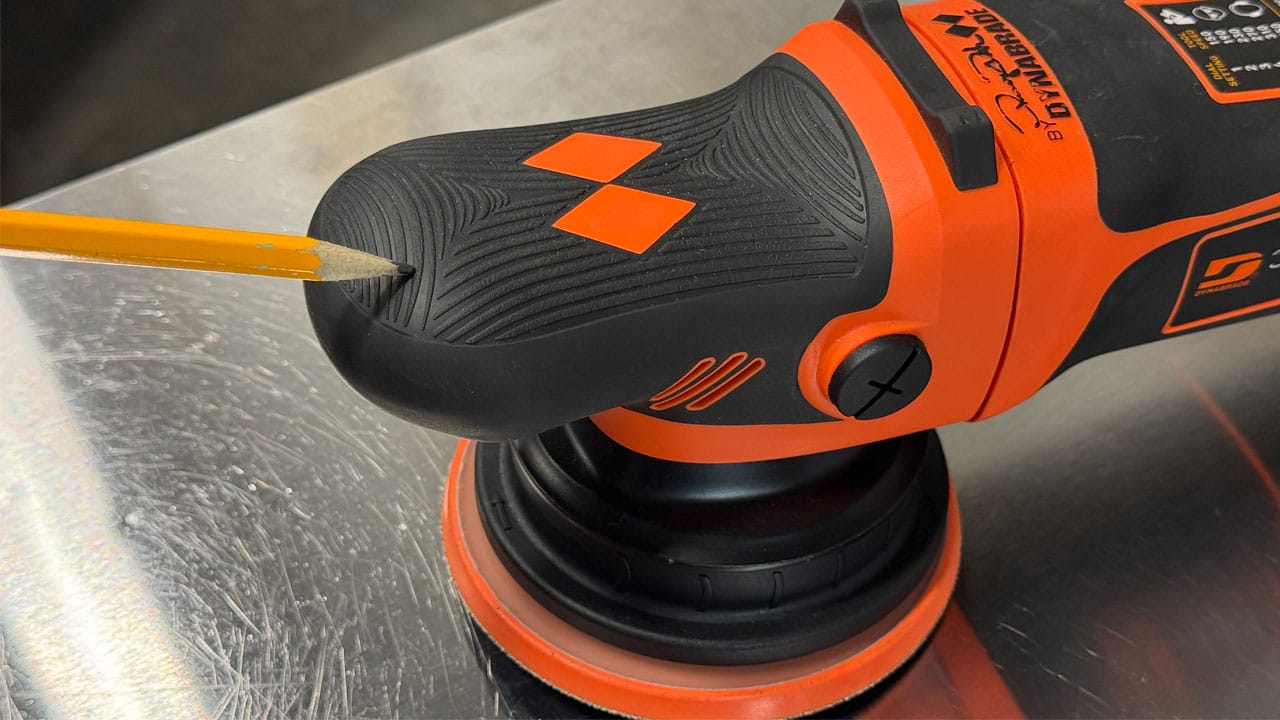
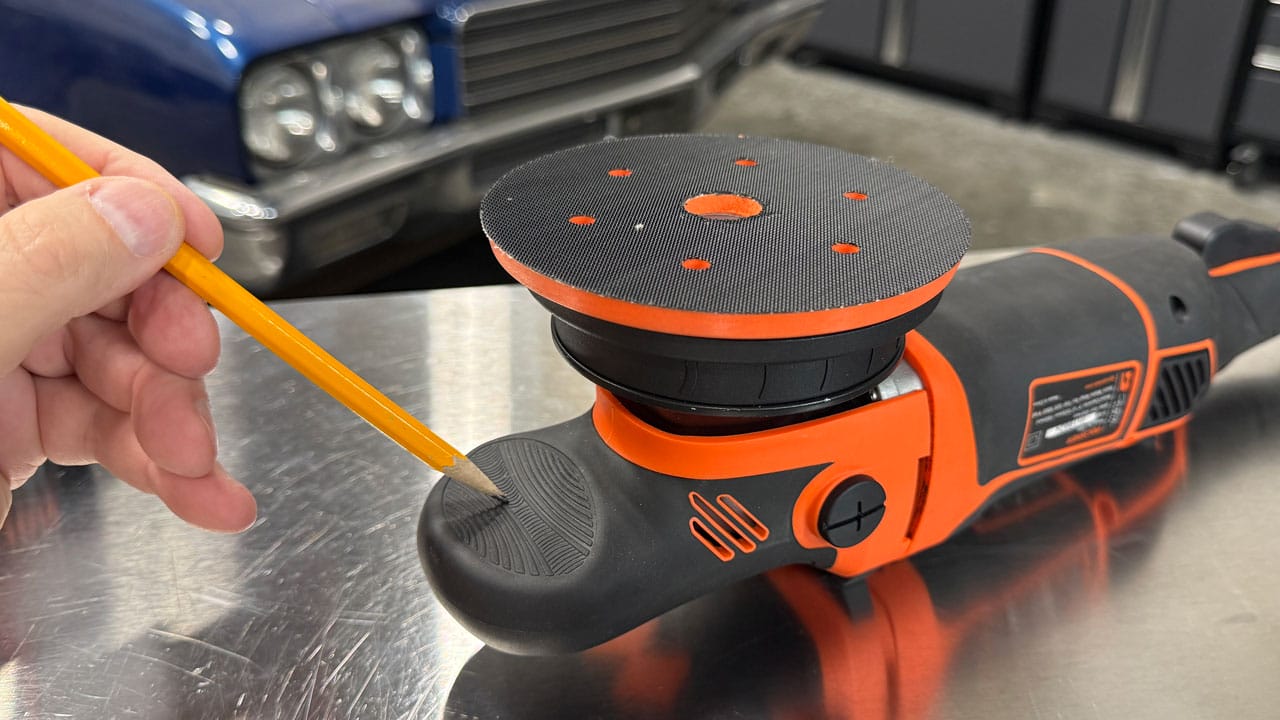
Ergonomic Textured Forward Platypus Grip
The deep grooves running in multiple directions over the entire rubber overmold grip, (bottom and top), help you to securely grip the head of the tool giving you excellent grip strength using your hand as well as excellent control over the business end of the polisher. This rubber overmold also helps to absorb any vibrations for reduced griping fatigue.
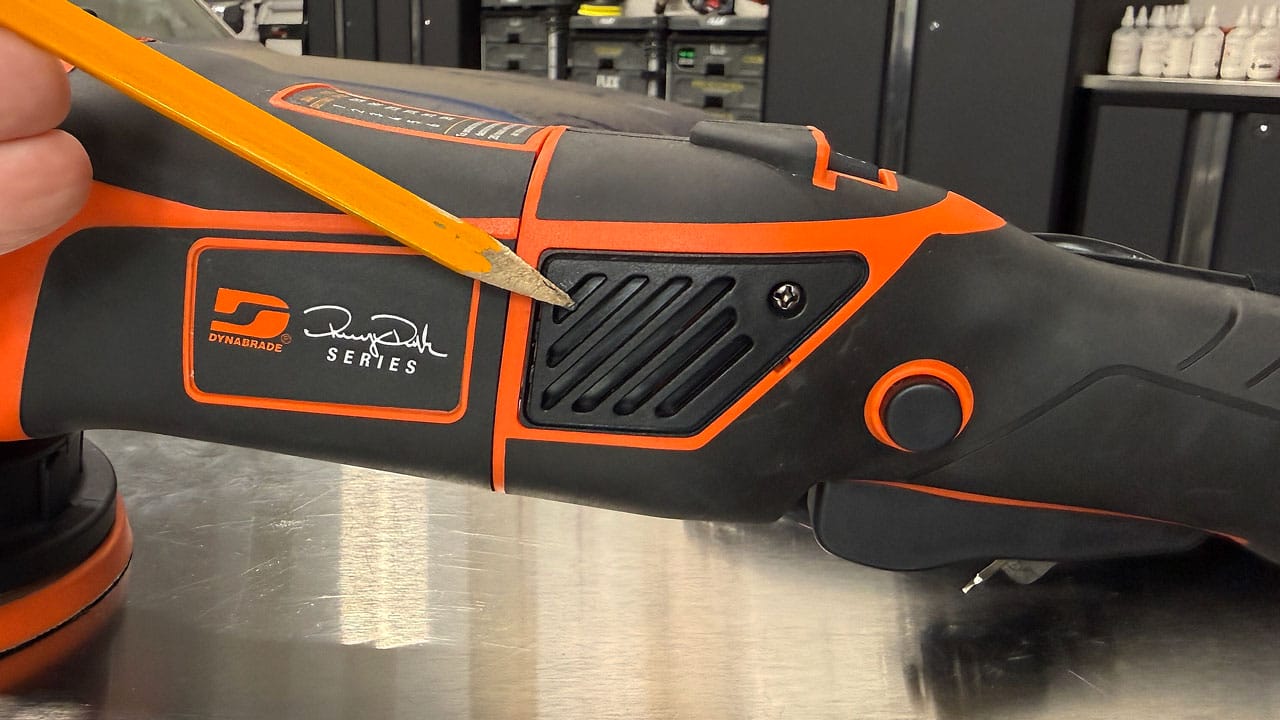
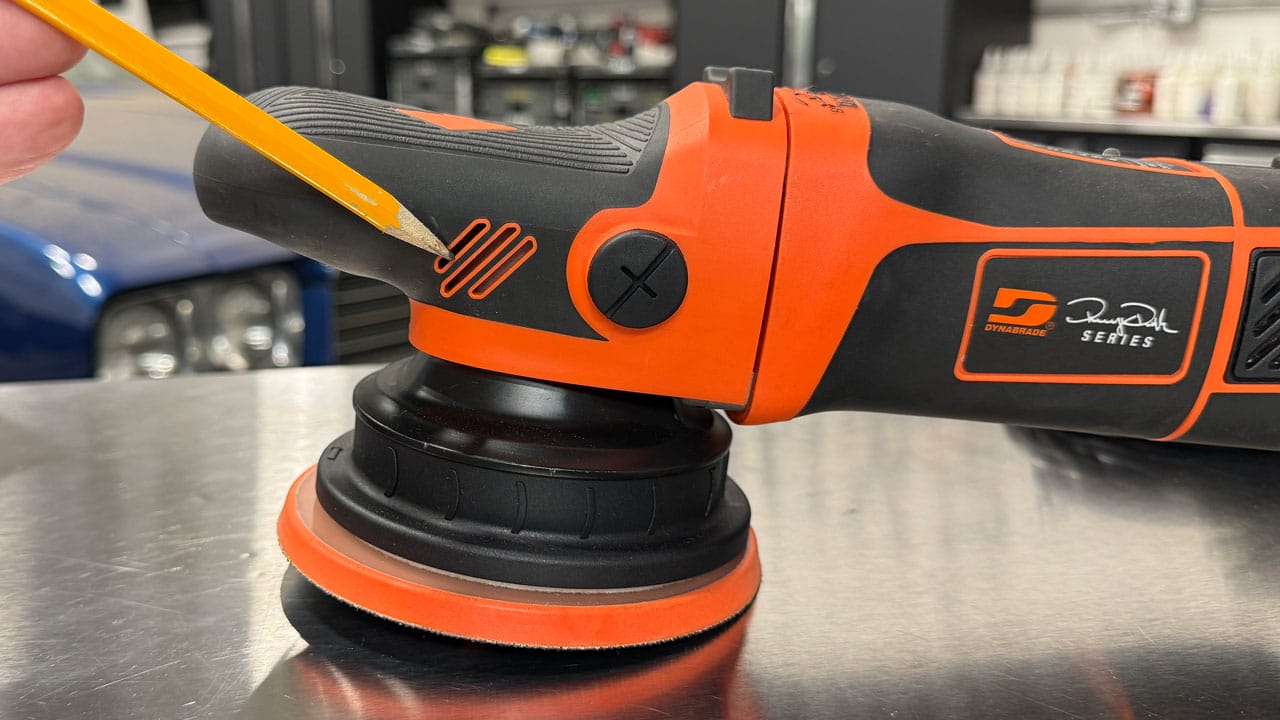
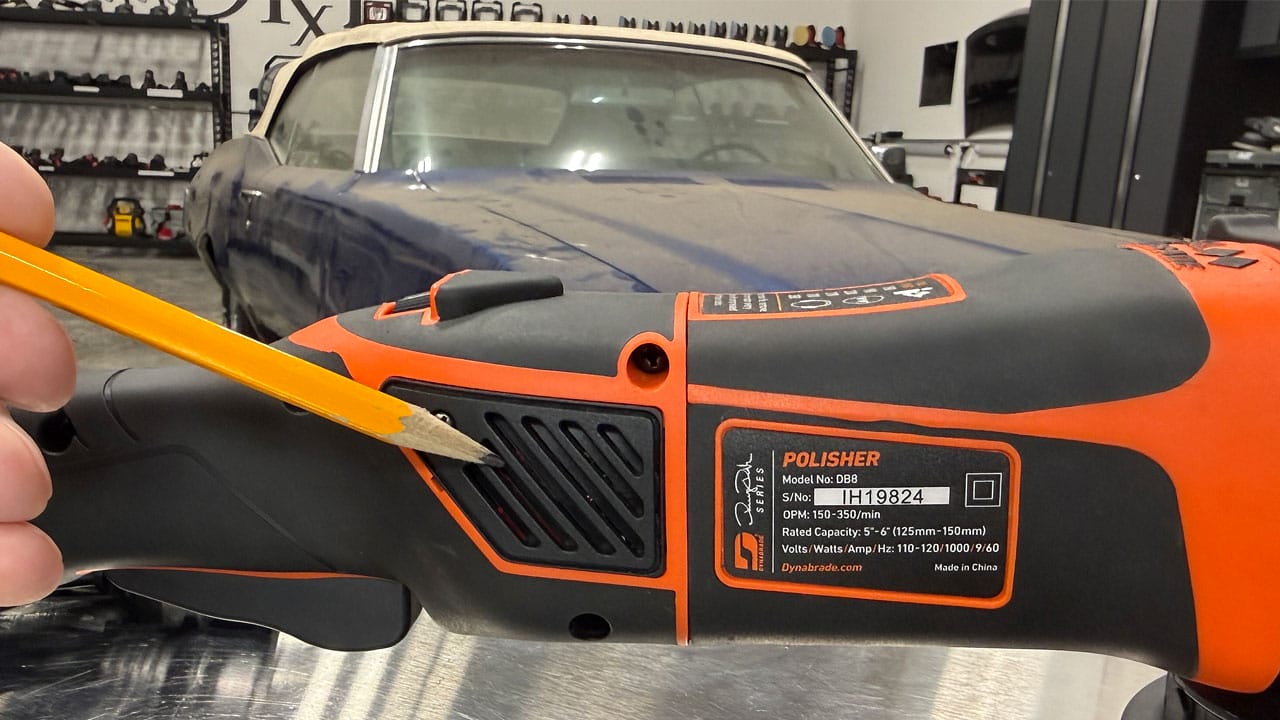
Cooling Exhaust Ports
All power tools create a lot of internal heat, especially under heavy and prolonged use, (like buffing out a car, boat or airplane), the DB8 is designed in a way that the cooling fan, (on the electric motor), pulls air from the exhaust ports at the back of the tool, through the tool body and then flushes the warmed air out through the forward exhaust parts.
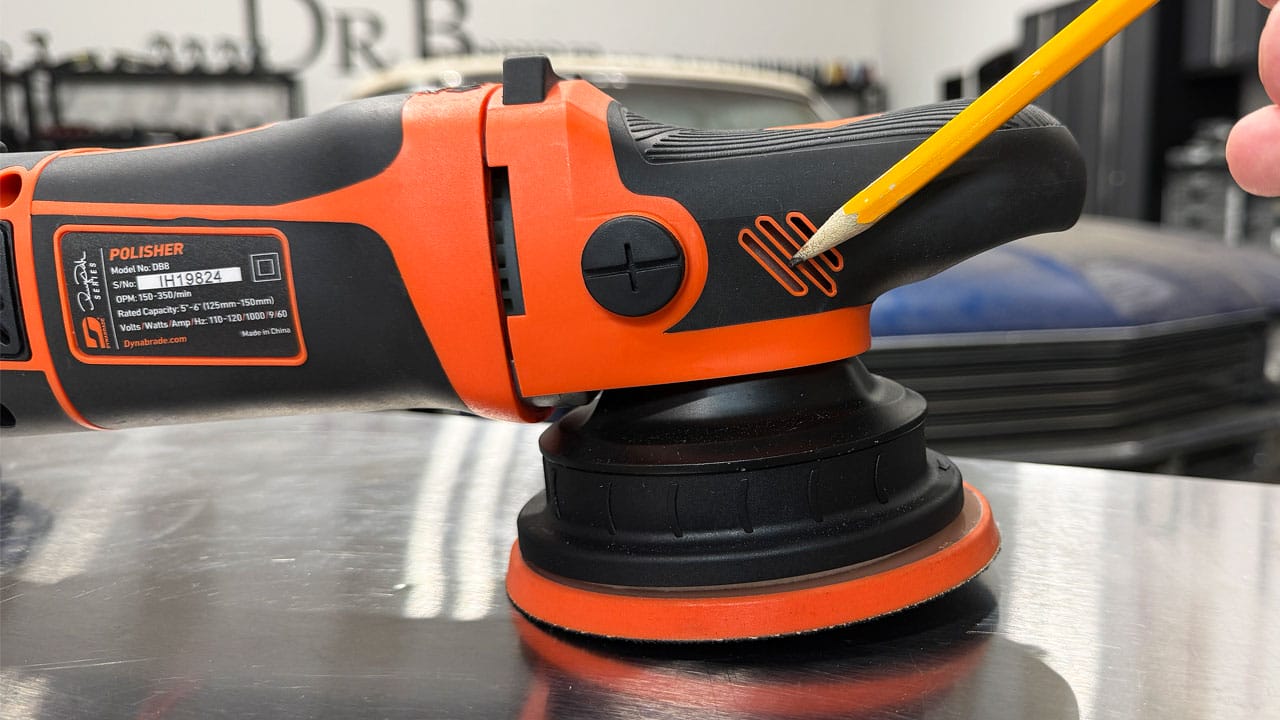
Plastic Screw
These plastic screws or bolts simply hold the head of the polisher onto the tool body.
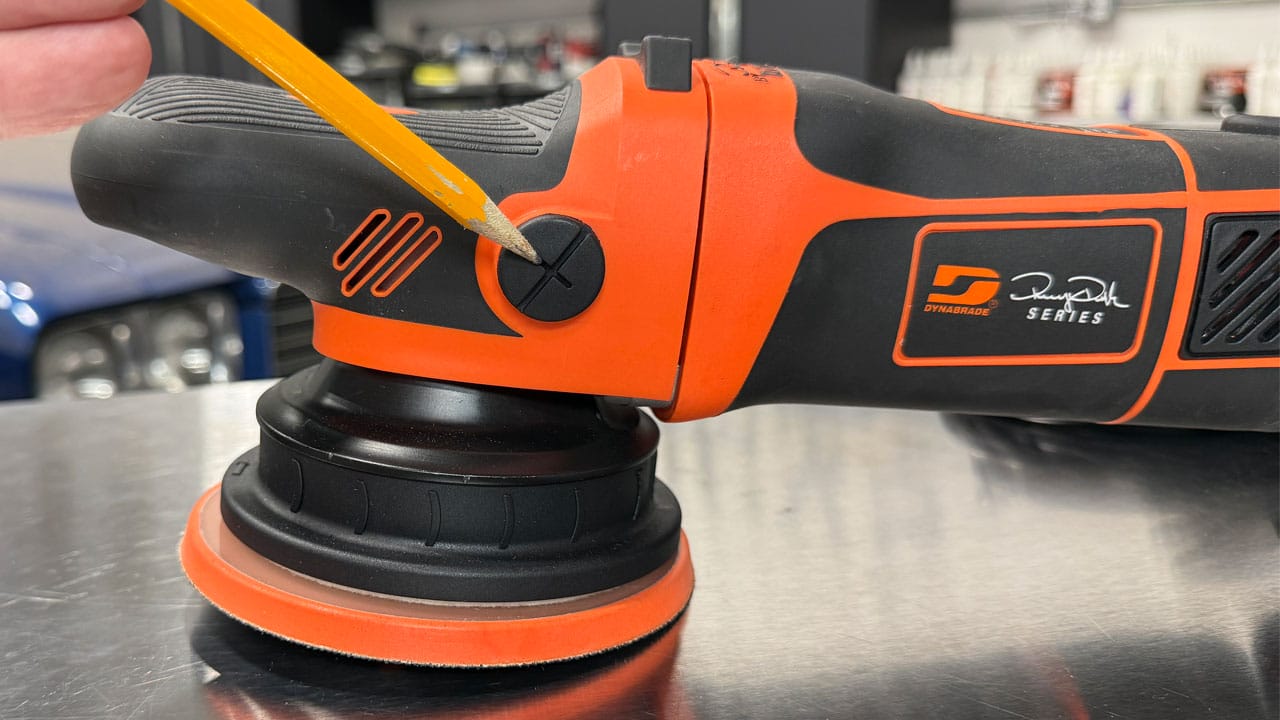
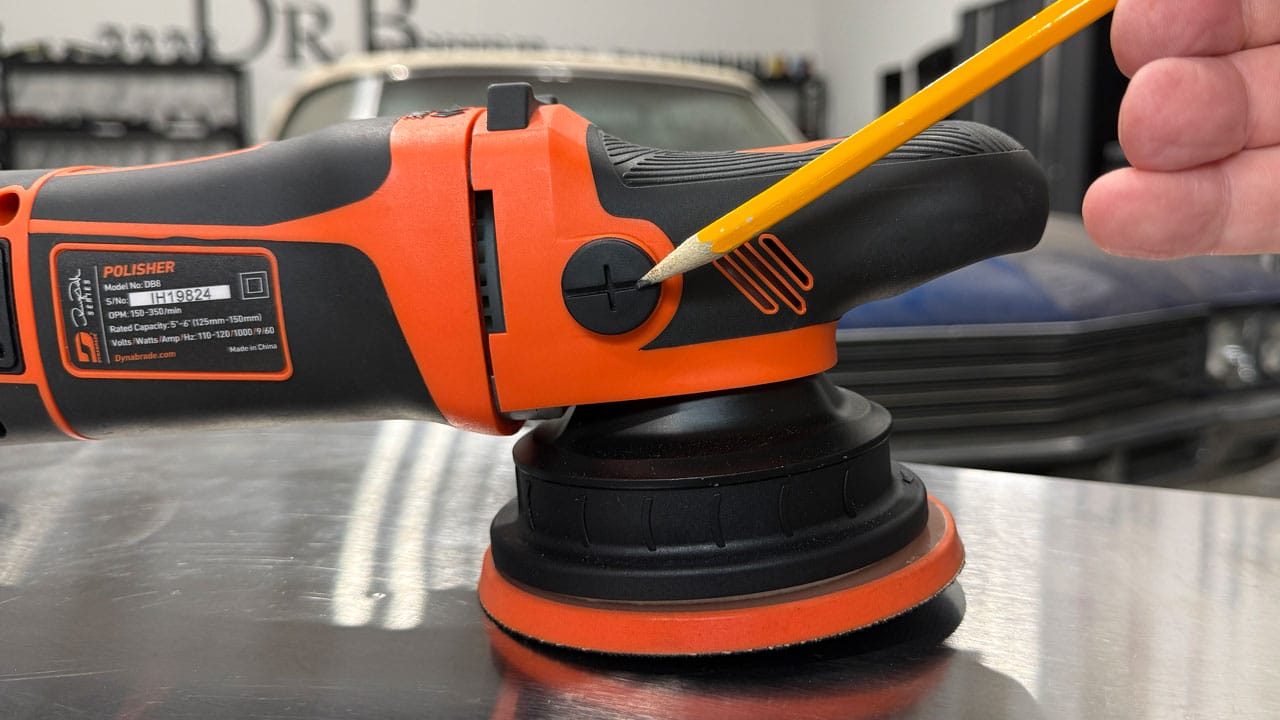
Shroud
The shroud encases the moving parts of the polisher to prevent any physical harm when operating the polisher.
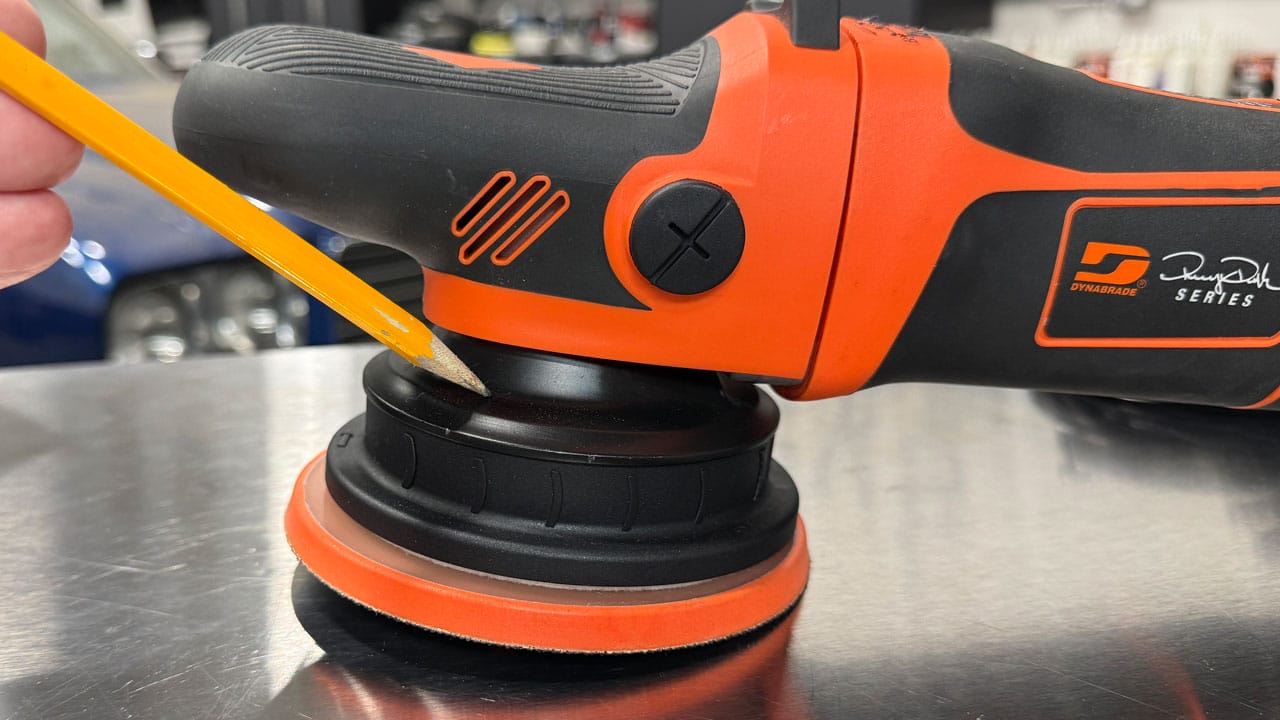
Backing Plate
The polisher comes from the factory with a 5" backing plate already installed. Like most tools, if just learning to use a gear-driven orbital polisher, it's easier when using smaller size buffing pads. Once you get some time behind the tool and your comfort level increases, you can swap to the larger 6" backing plate and then as I like to say, turn and churn larger buffing pads. The benefit to larger buffing pads with powerful tools like this is you can tackle larger sections to buff while still maintaining efficient defect removal.
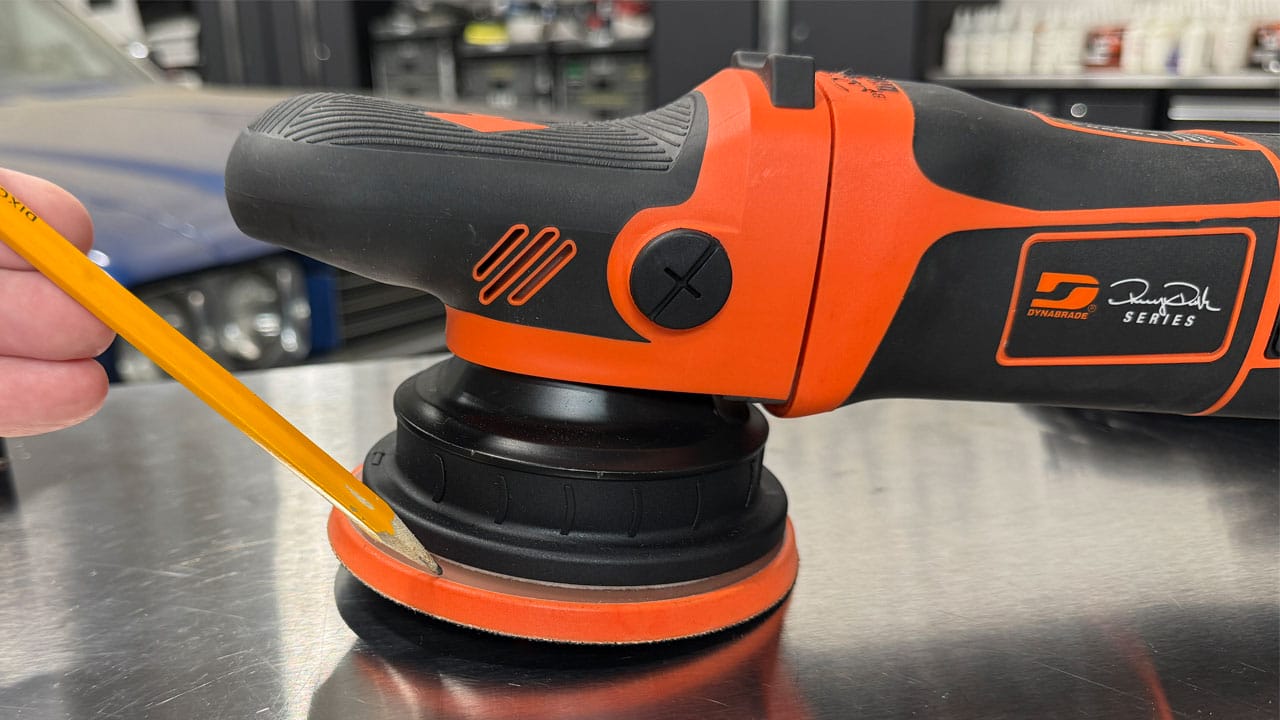
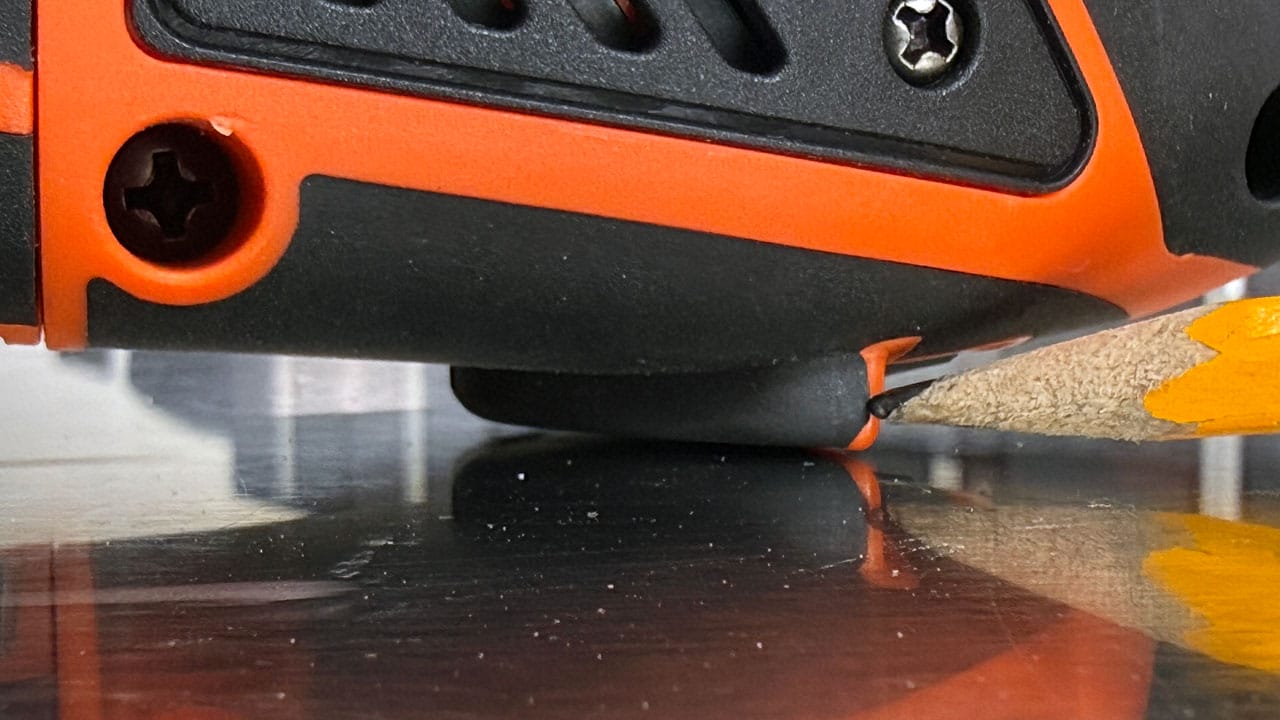
Soft Rubber Tool Rests
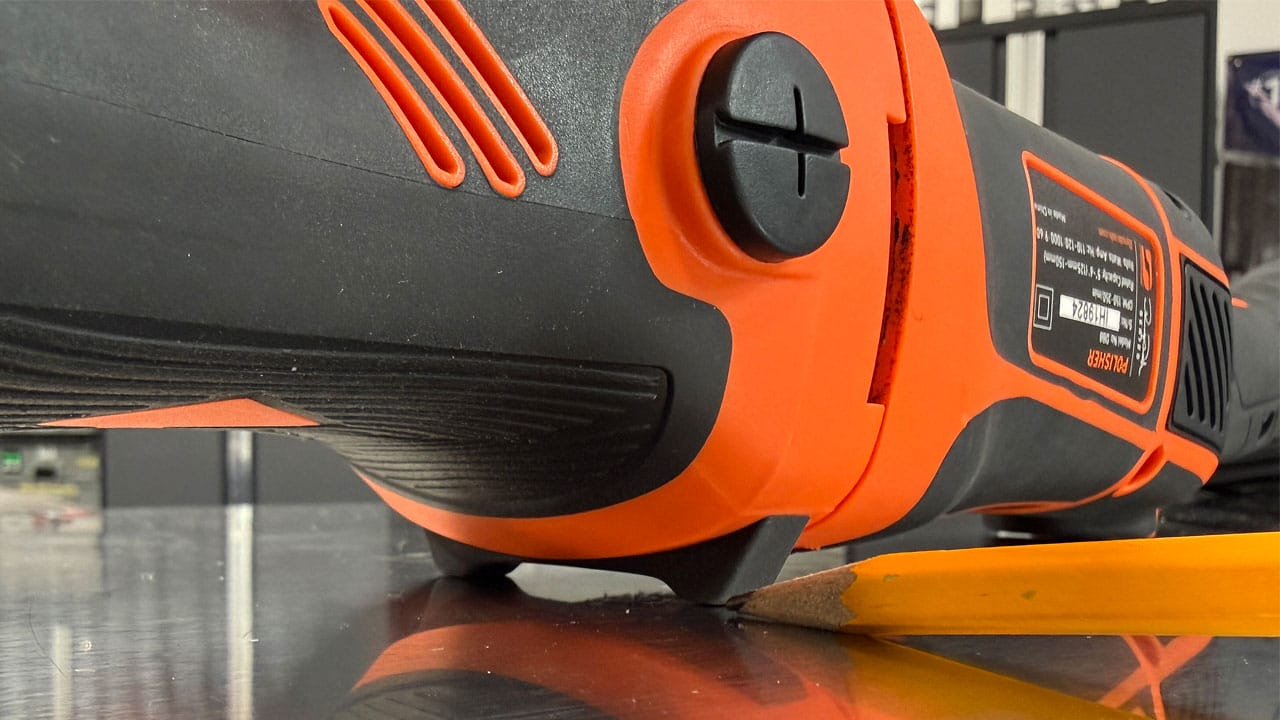
A well designed tool rest is a really nice feature. It enables you to set the tool down UPSIDE down and have the tool be STABLE so it doesn't fall to either side. This prevents the sides of your buffing pads from becoming contaminated, which is kind of important.
There are two tool rests built-into the design and in my opinion - possibly the best designed tool rest of any tool I've ever used and I set my polishers down upside down a lot. All you have to do is use a polisher WITHOUT a tool rest or with a poorly designed tool rest and you'll appreciate the tool rest on this polisher.
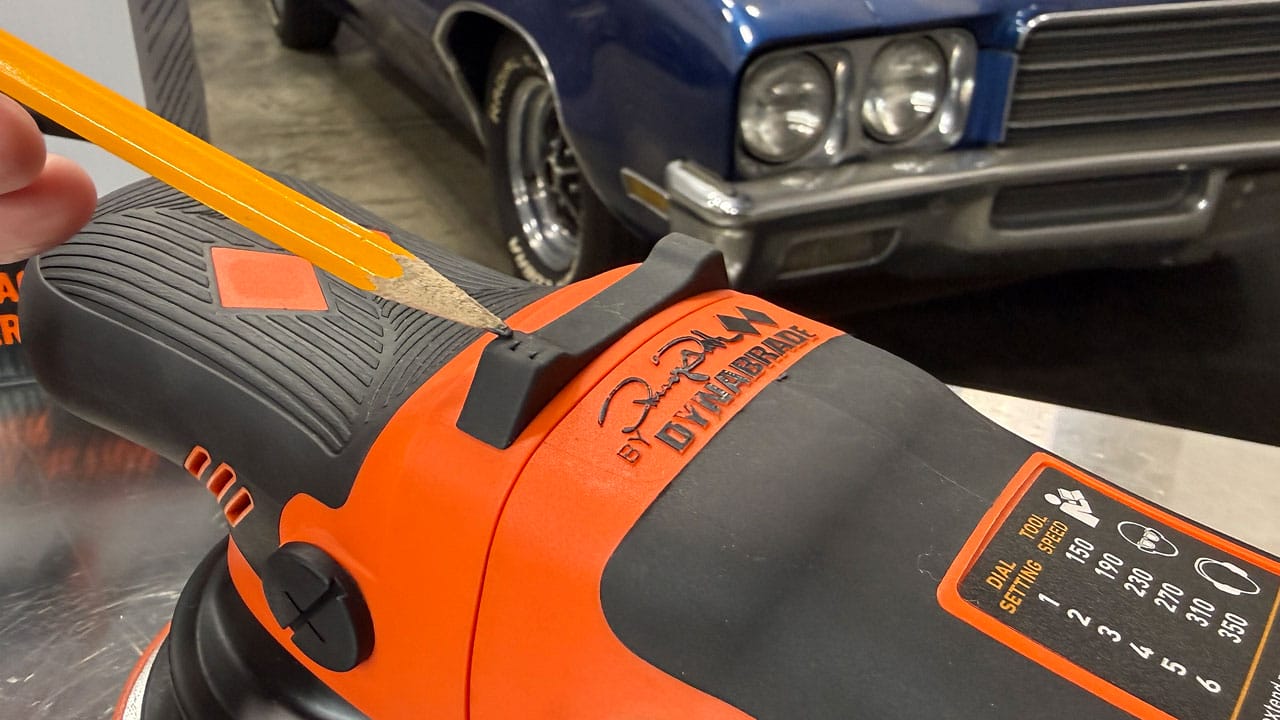
Here's what it looks like with the polisher upside down resting on the tool rests.
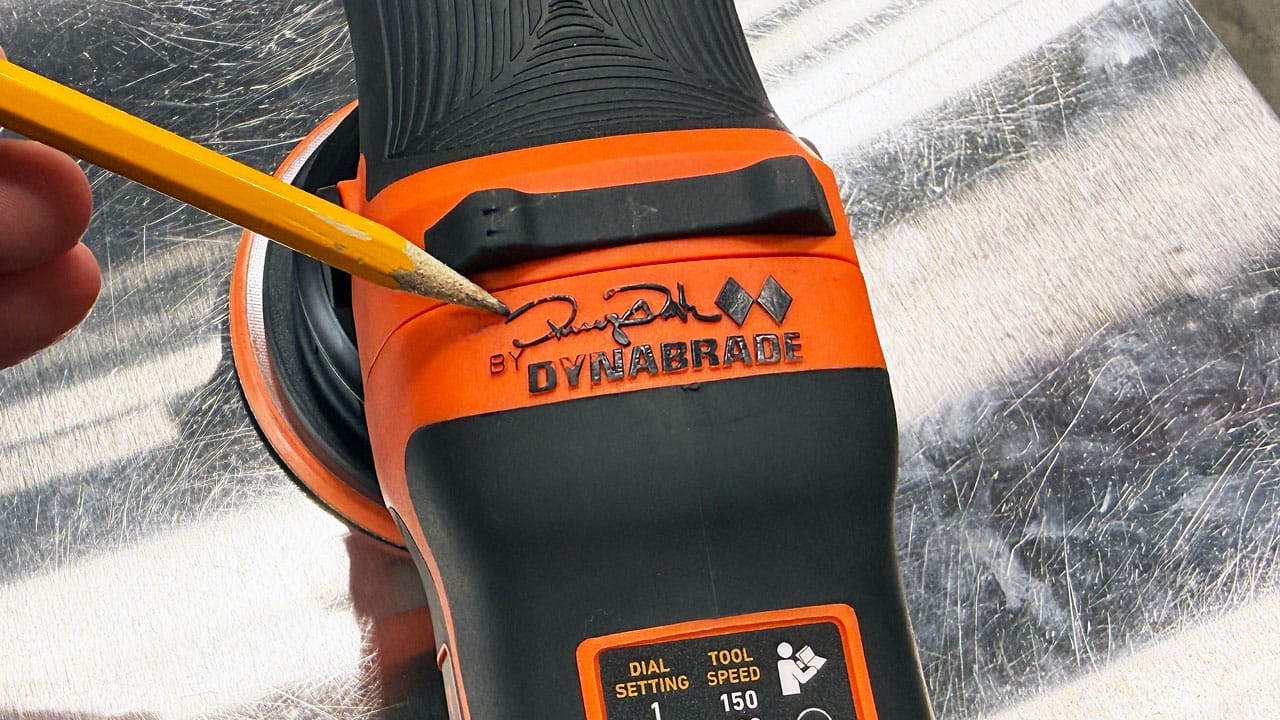
Nice touch - the Renny Doyle Signature
Renny Doyle, a long-time friend of mine, has helped literally thousands of people start and success in the detailing industry including automotive, marine and aircraft divisions. He worked with the team at Dynabrade to develop a pro-grade polisher and it's a nice touch that Dynabrade appreciates all Renny has done for the detailing industry to include his famous, and beautifully written signature on the top of the tool.
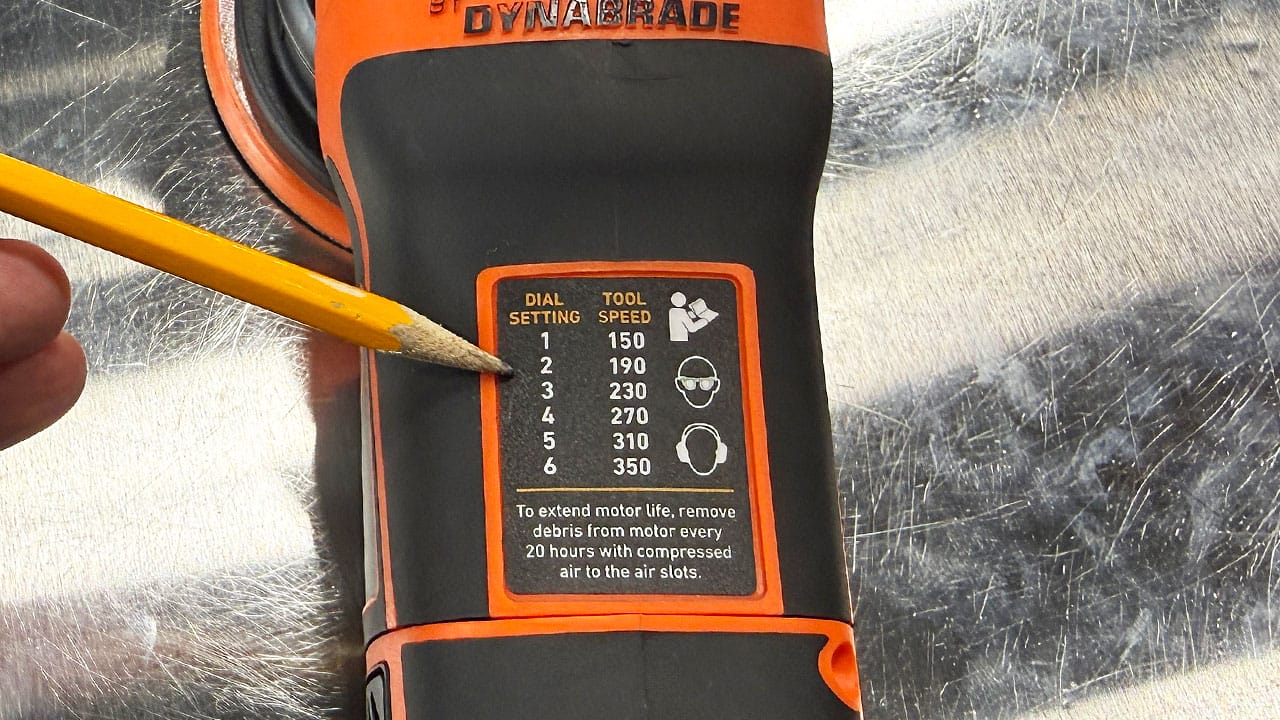
Quick Reference
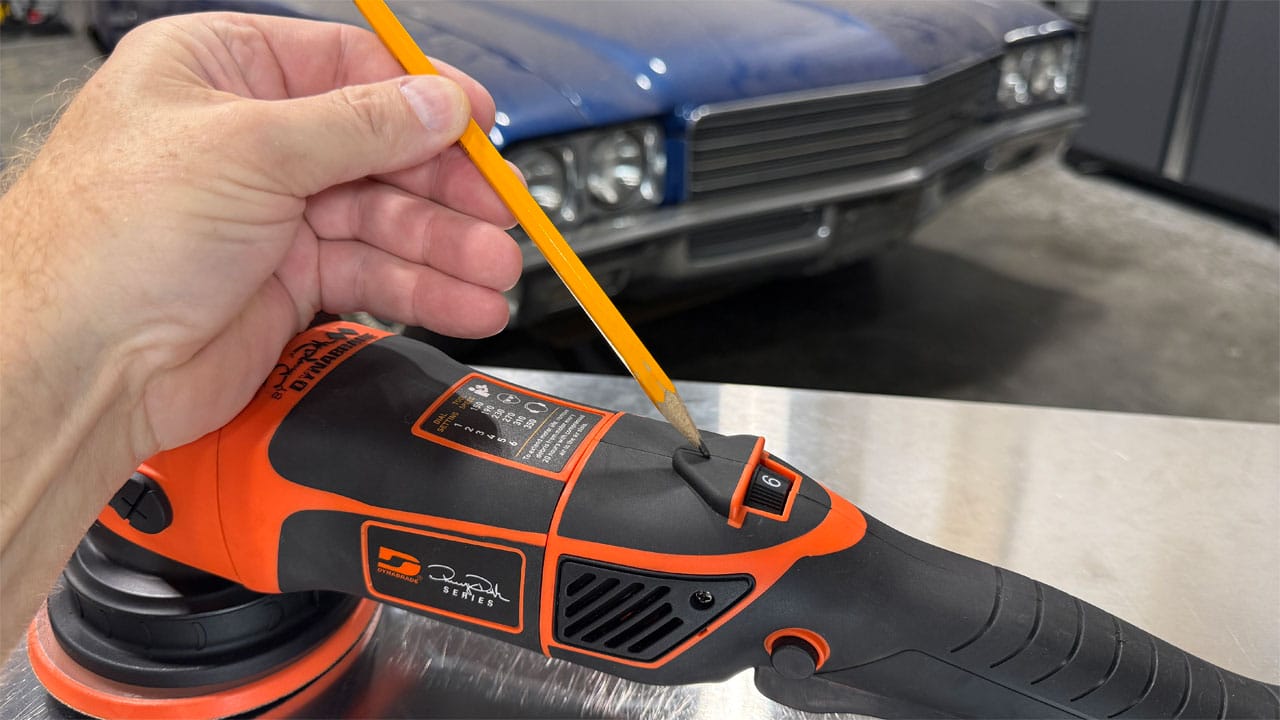
Another handy feature is there's a quick reference chart placed right on the top of the tool to show you the tool speed that correlates with the number on the speed dial.
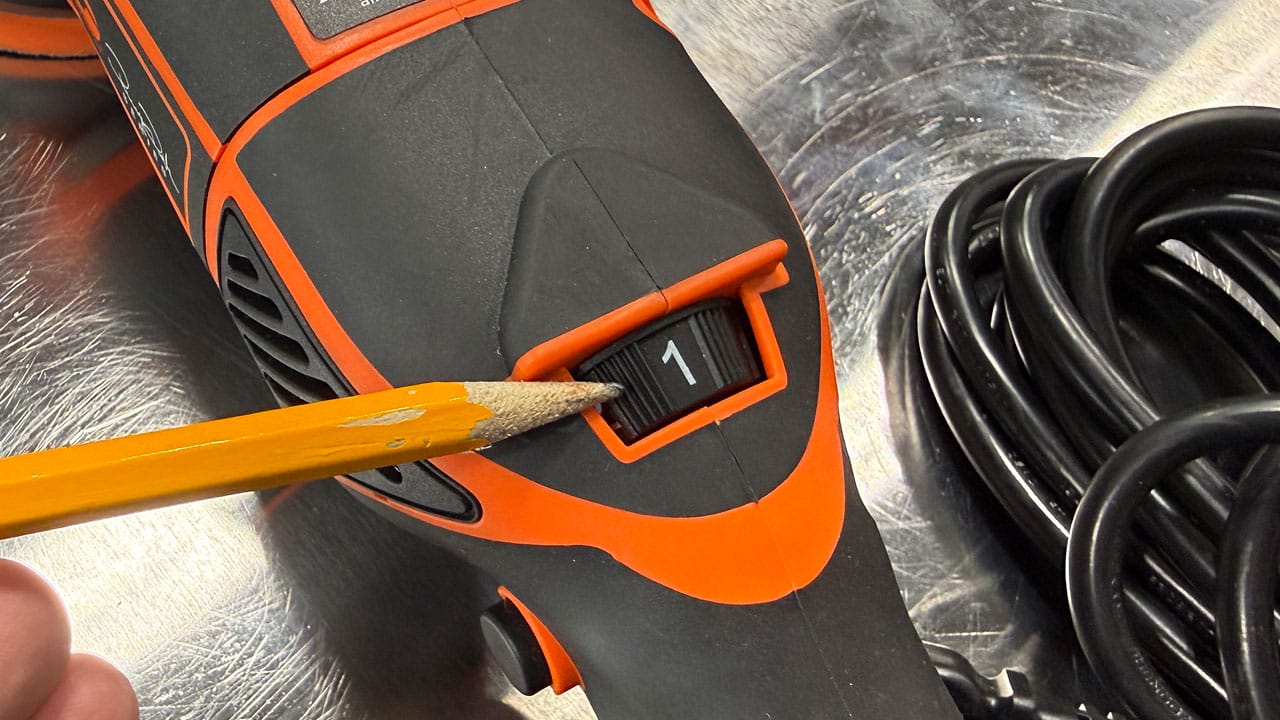
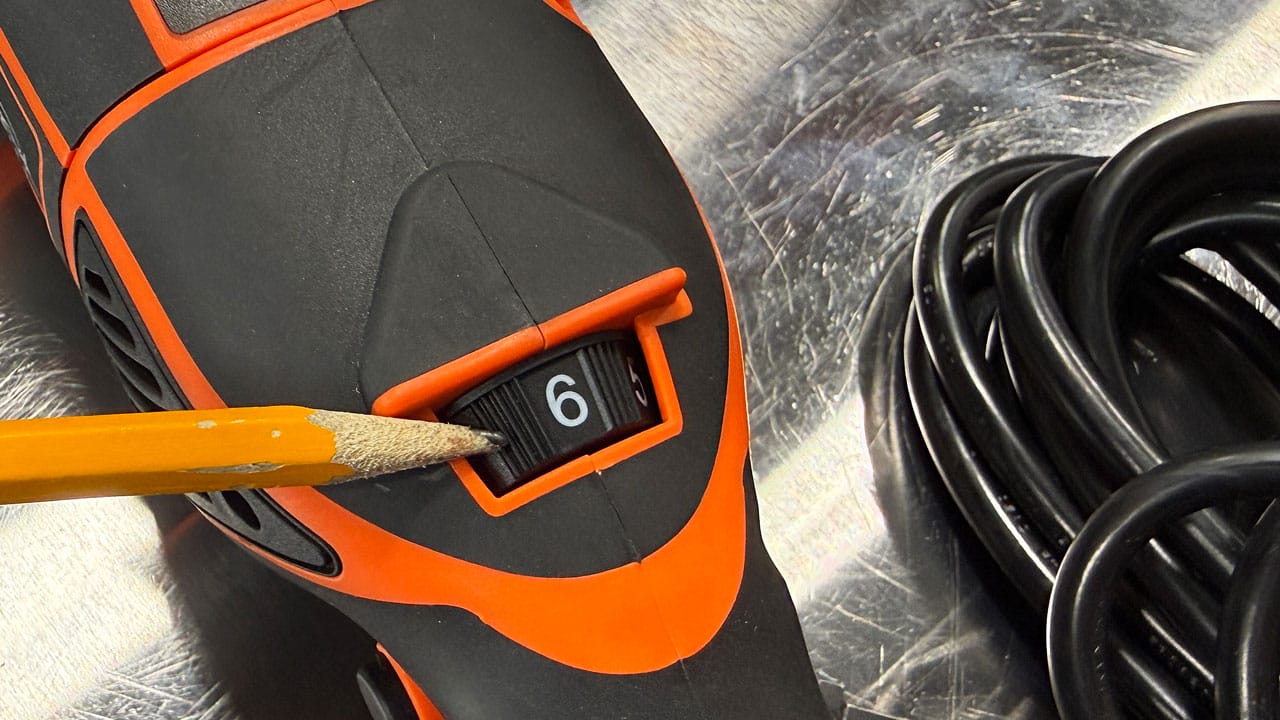
Variable Speed Dial
The variable speed dial, which goes from 1 to 6 is large, with deep serrations and larger size numbering to make it easy to see and select your choice of speed setting while operating the polisher.
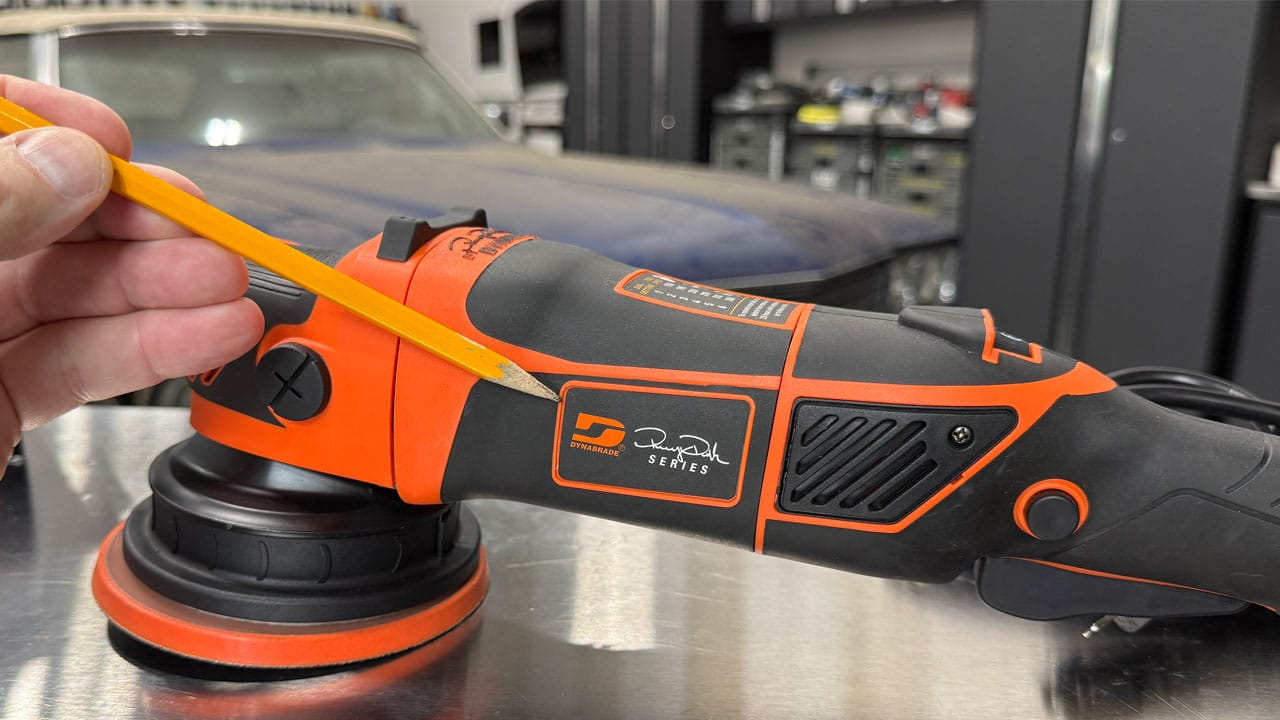
Dynabrade Badging
Yeah, this is not a vital operational feature, but an important marketing feature that shows the brand so everyone can see the tool you're using. It's also a nice feature anytime you need to showcase the tool in videos or pictures.
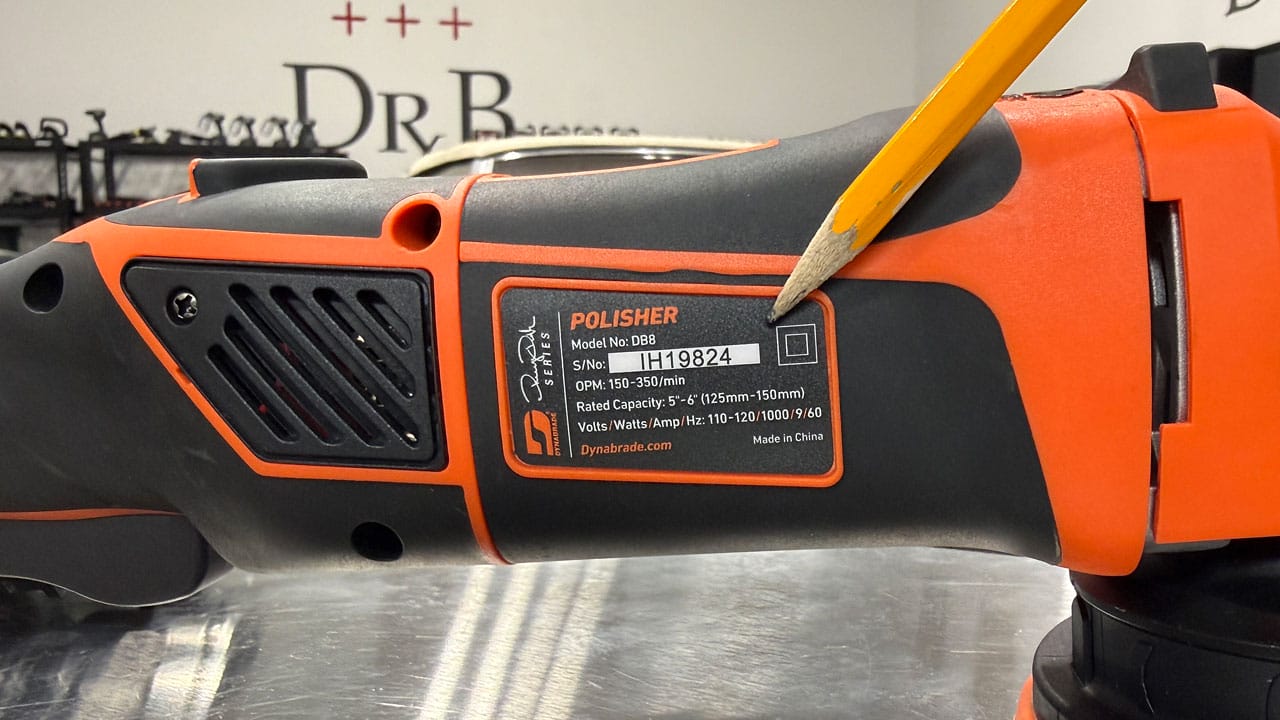
Model and Serial Number
For inventory and warranty work and documentation, on the other side of the tool there's a badge that includes all the pertinent information about the polisher. Many tools have poorly located or difficult to read information but no so with the Dynabrade DB8 - the badge is large, easy to find and easy to read.
Trigger Lock
When looking down on the polisher, the Trigger Lock is located on the left had side. The trigger lock enables you to LOCK-IN the desired speed setting selected using the variable speed dial. With the speed of the tool locked in - this frees you up to only have to grip the handle of the polisher, not grip the handle AND squeeze the speed trigger. A super handy feature especially for extended buffing projects.
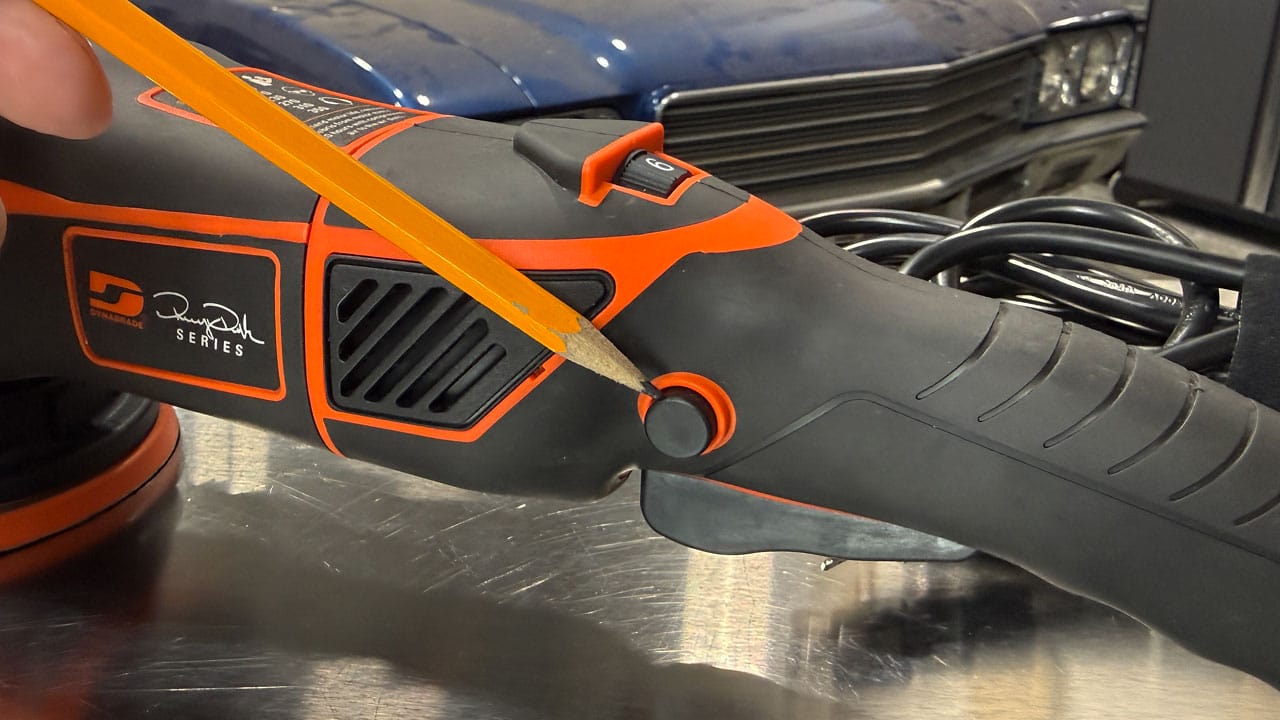
Single Action Speed Trigger
The speed trigger is like an on/off switch - it turns the polisher on so you can start buffing. This is a single action speed trigger, which means it only turns the polisher on or off. Some tools come with a variable speed trigger which enables you to pull lightly on the trigger for a low speed or vary how far you pull the trigger for either a low speed or the highest speed or somewhere inbetween.
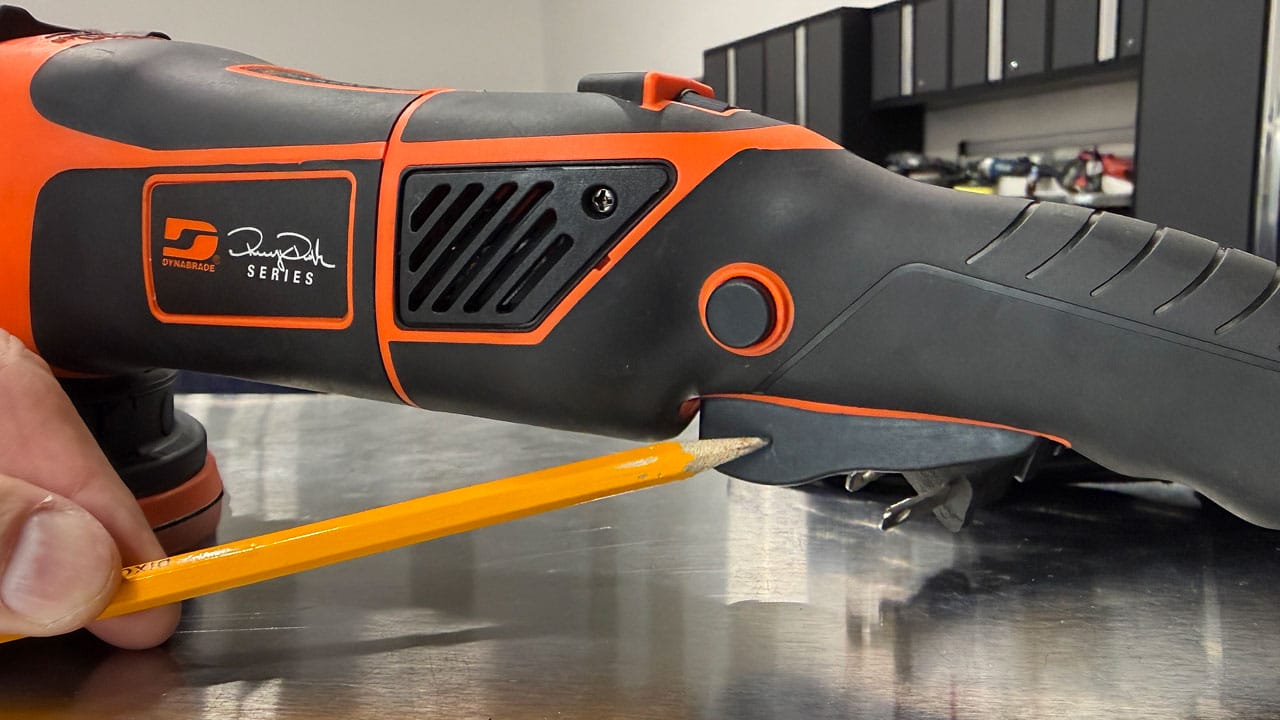
Rear Grip Handle
At the back of the tool you'll find the same ergonomically designed rubber overmold with deep grooves for easy gripping. The handle is designed with the human hand in mind and makes it easy to grip, hold and maneuver the tool while also absorbing vibrations for reduced risk over time.
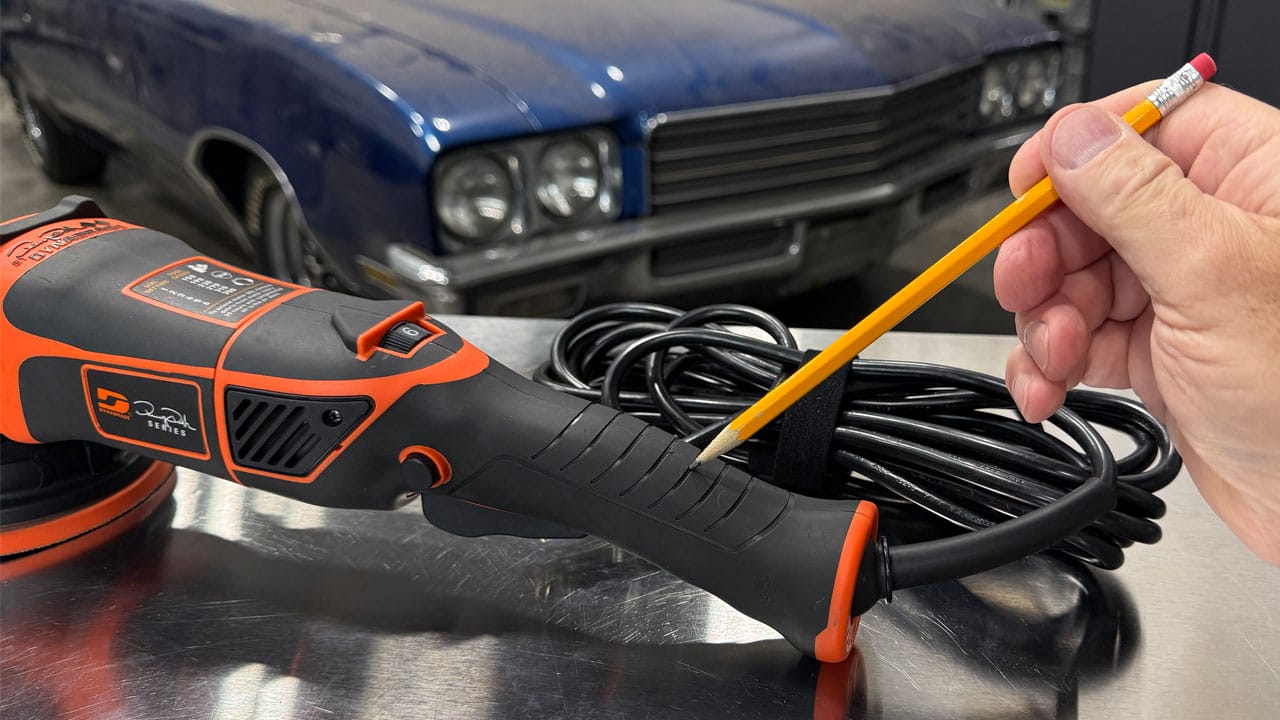
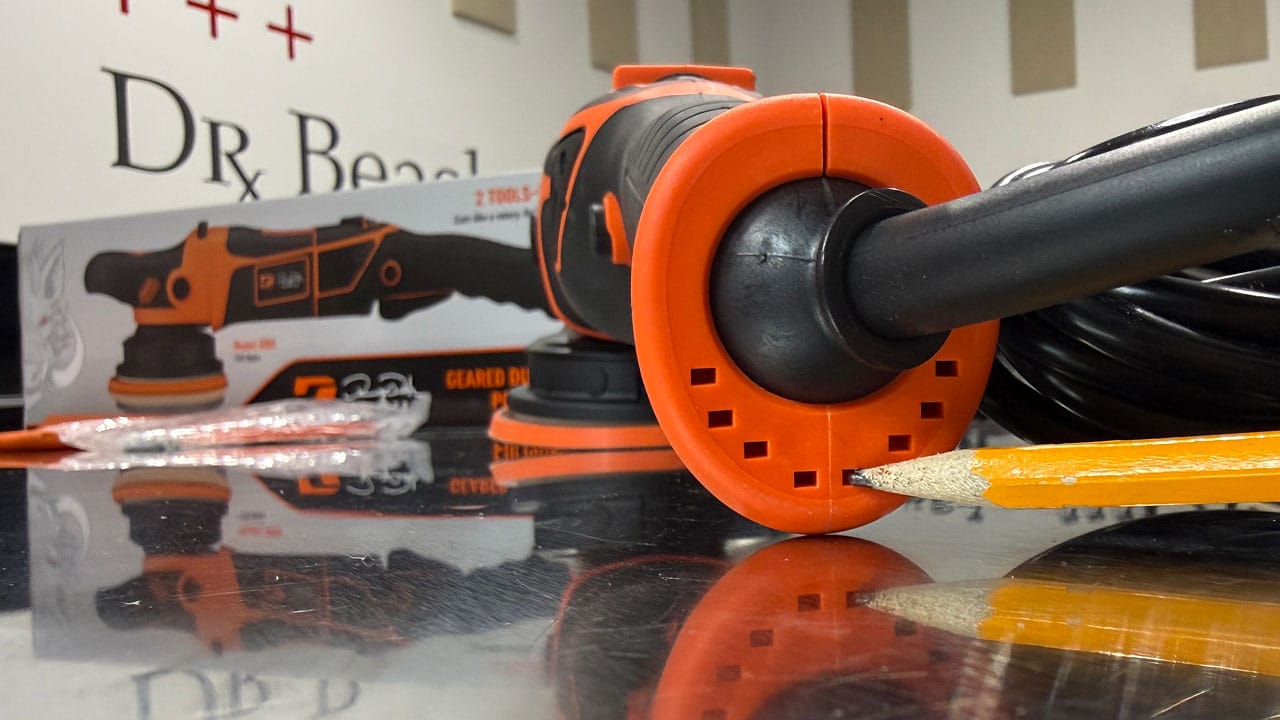
Swivel Ball Power Cord Attachment
This is a really cool features. Pro-grade, quality tools will run for a long time without ever breaking. Often times, the weak link is where the power cord enters the tool. With a standard design tool, the power cord simply attaches to the inside of the tool body through a hole in the back of the polisher. What happens with this design is over time, the power cord wears out from all the flexing and tweaking - normal when using a polisher.
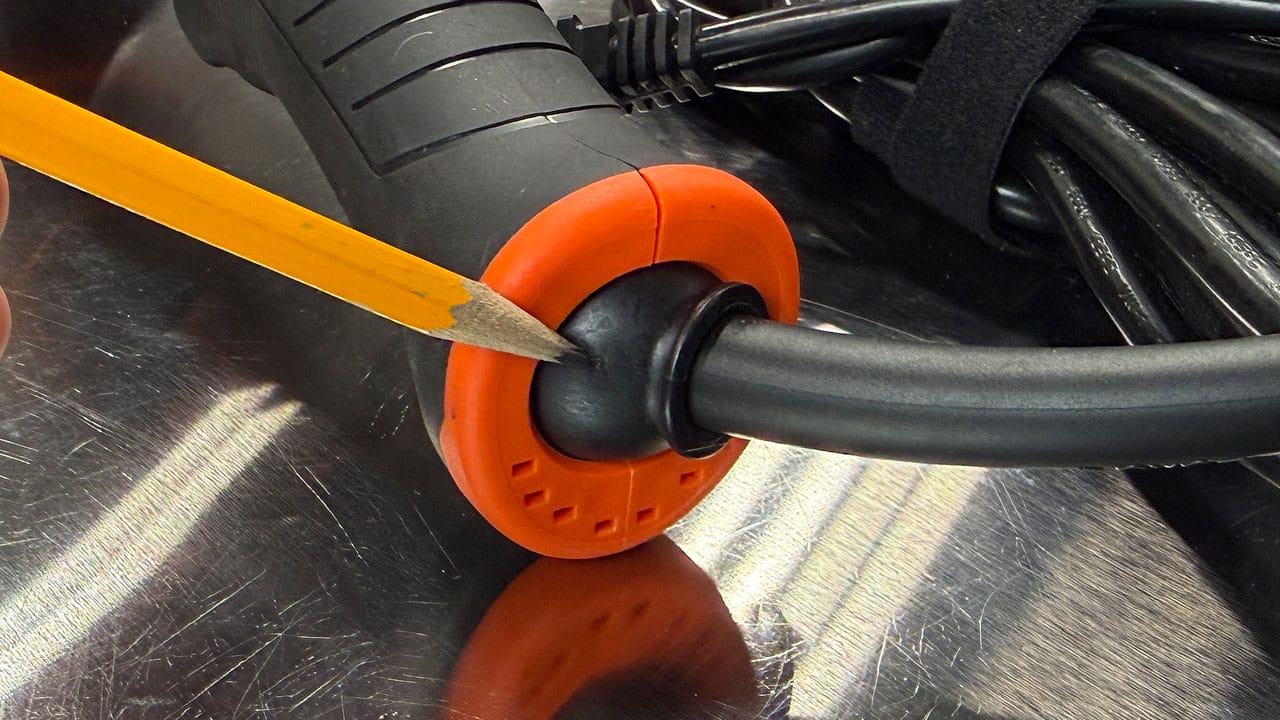
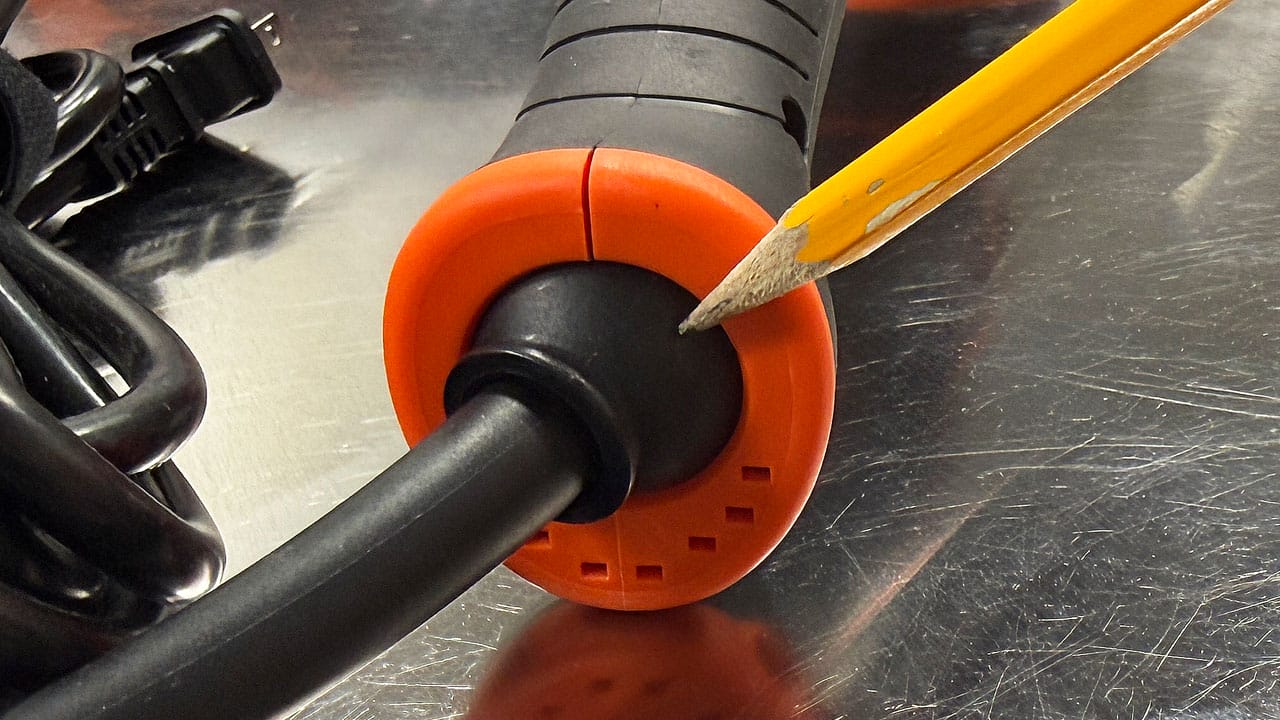
The DB8 design uses a unique swivel ball that allows the power cord to move freely depending upon the use of the tool. This is a great and even innovative design that should in theory, remove and/or reduce the chance for failure due to repeated stress to the cord and how it attaches to the back of the tool.
To demonstrate this feature, in the pictures below I pulled the cord to one side and then the other side so you can see how the swivel ball can move to match the direction or pull of the cord.
Fresh Air Intake Ports - Fluid Drainage Ports - Tooling Holes
Besides allowing fresh air to enter the rear portion of the tool, these ports or holes also work to let any water or other fluids drain out just incase the tool gets wet or worst case scenarios - falls into the water when doing marine craft detailing on the water.
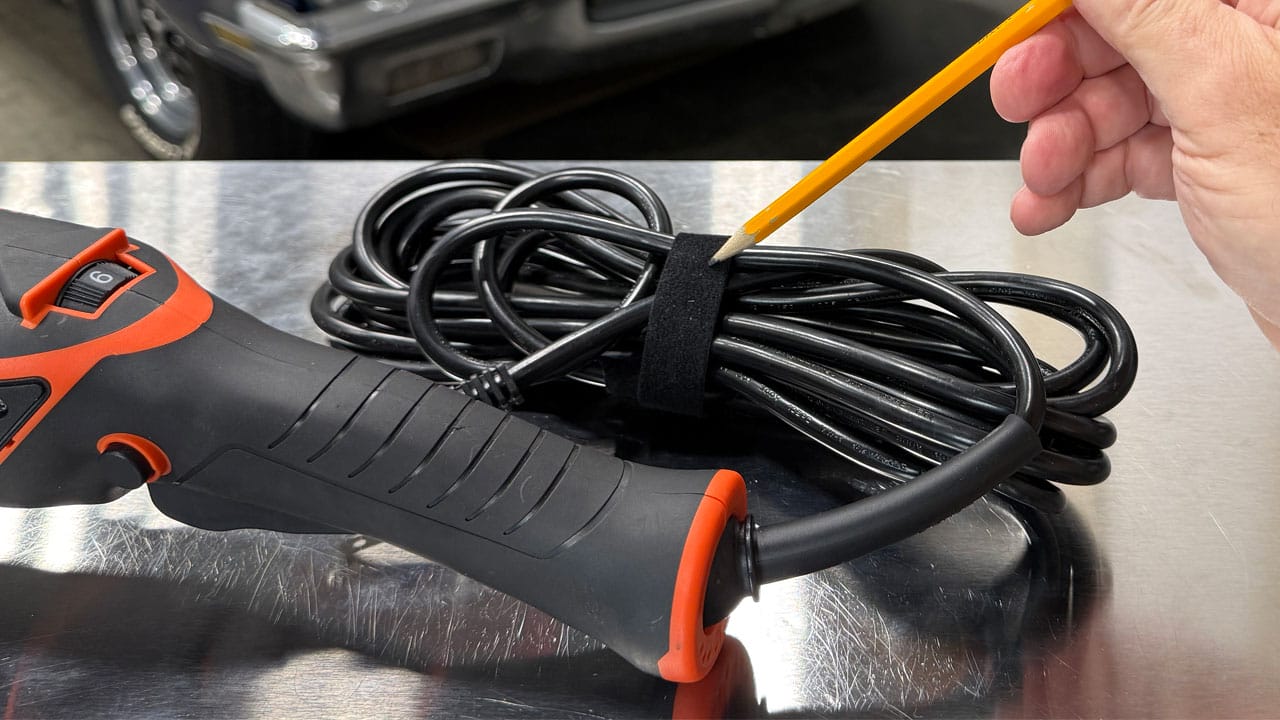
20' Power Cord
Another nice feature is the long, 20' power cord. Depending upon the layout of your garage or shop, and where the electrical plug-ins are located, with a 20' power cord, in most case you'll be able to buff out all 4-sides of a car by simply plugging into the nearest electrical plug-in so you won't need to use an extension cord.
Plus, the tool manufacture knows what gauge copper electrical wire, (inside power cords), and you can trust the factory cord will flow enough electrical current in the form of AMPS to safely and efficiently supply the necessary electricity to the tool motor.
NOTE: If you do need to use an extension power cord, be sure to choose a 12 gauge cord, (heavy duty), and you should try to always avoid using any extension cord longer than 25'. Its better to locate and use a closer source of power than to use a 50' or longer extension cord.
Let's Take a Look at the Drive Mechanism and Backing Plates
A huge part of what separates this gear-driven polisher from free spinning, random orbital polishers are the actual GEARS that oscillate and rotate the backing plate and thus the buffing pad. And because this tool comes with an optional 6" backing plate, we'll take a look at how the backing plate attaches to the drive unit.
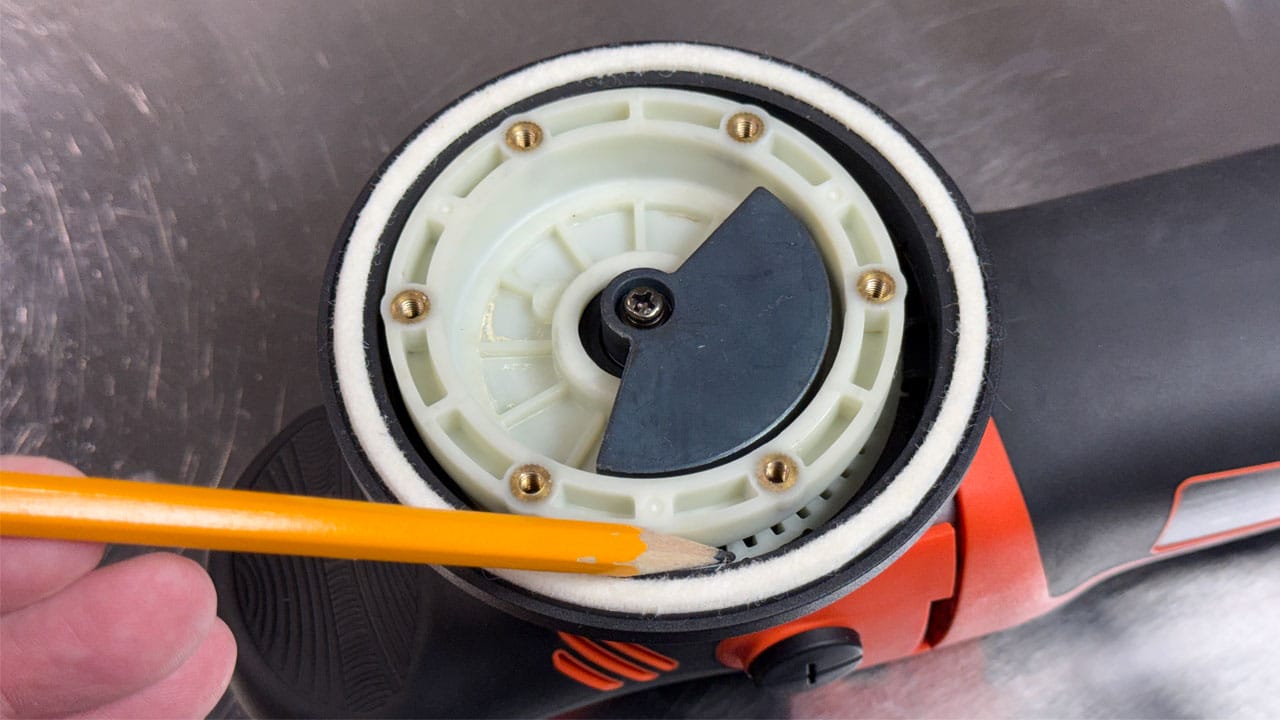
The Inner and Outer Gear Ring Set
With the backing plate removed, you can just barely get a glimpse of the outer gear ring. , which is hidden by the drive plate. What you can't see in the inner gear ring, but you trust it's there - otherwise the tool would not operate.
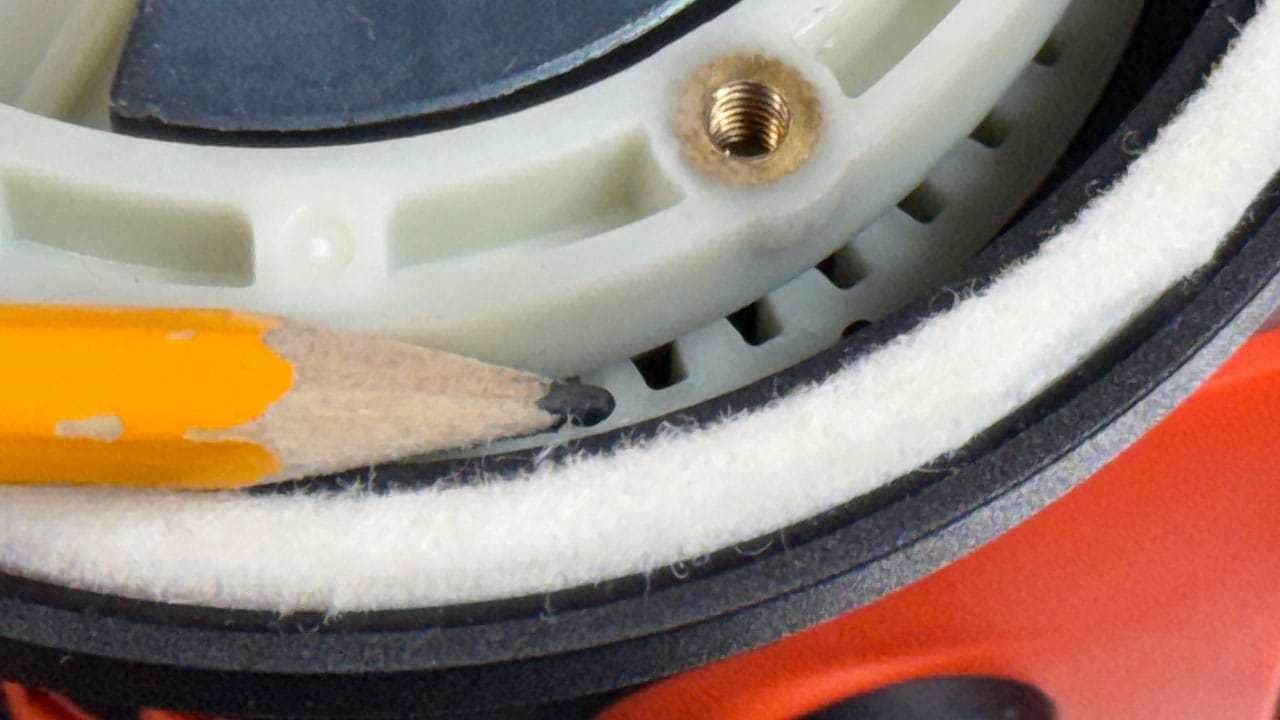
And of course, it's this GEAR-DRIVEN aspect for tools like this that make them what they are. Because of the gear-driven design - the buffing pad will ALWAYS rotate and oscillate - there's nothing you can do to stop these to movements or actions.
This isn't true for the other primary type of orbital polisher and that's the free spinning, random orbital polishers, which suffer from what is called pad stalling. With a free spinning, random orbital polisher, there are a number of things that will slow or stop pad rotation and pad, things like,
• Using too low of a speed setting.
• Not holding the body of the tool in a way that keeps the pad flat to the surface.
• Buffing crooked – buffing with only a portion of the pad in contact with the surface.
• Wet, saturated soggy foam pads – the increase weight will stop pad rotation/oscillation.
• Buffing over uneven surfaces like concave and convex body panel curves.
• Using too much downward pressure on the head of the tool.
With a gear-driven orbital polisher, (notice I left out the word RANDOM), there's ZERO pad stalling. Or as I like to say, all brawl, zero stall.
Orbital Cover
This is the component that is fitted to the external gear and provides the interface that holds the felt ring and the interface for which you can attach the backing plate using 6 machine screws.
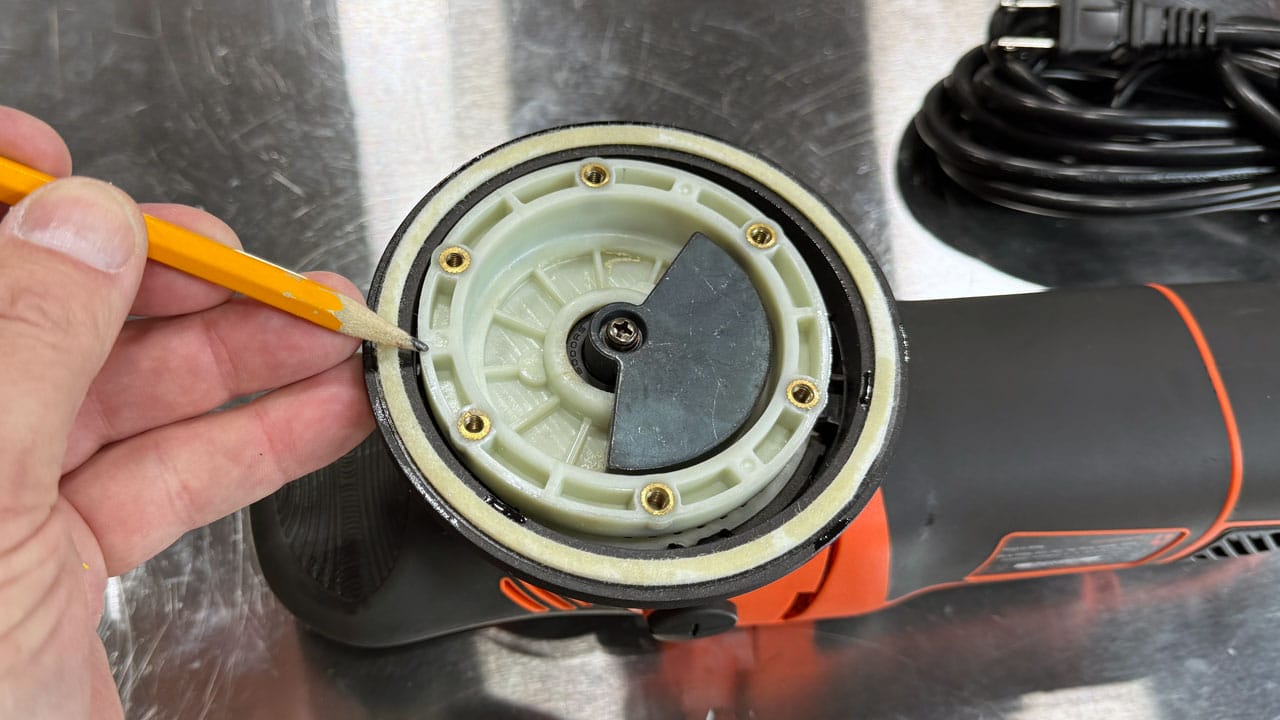
Premium Threaded Brass Inserts
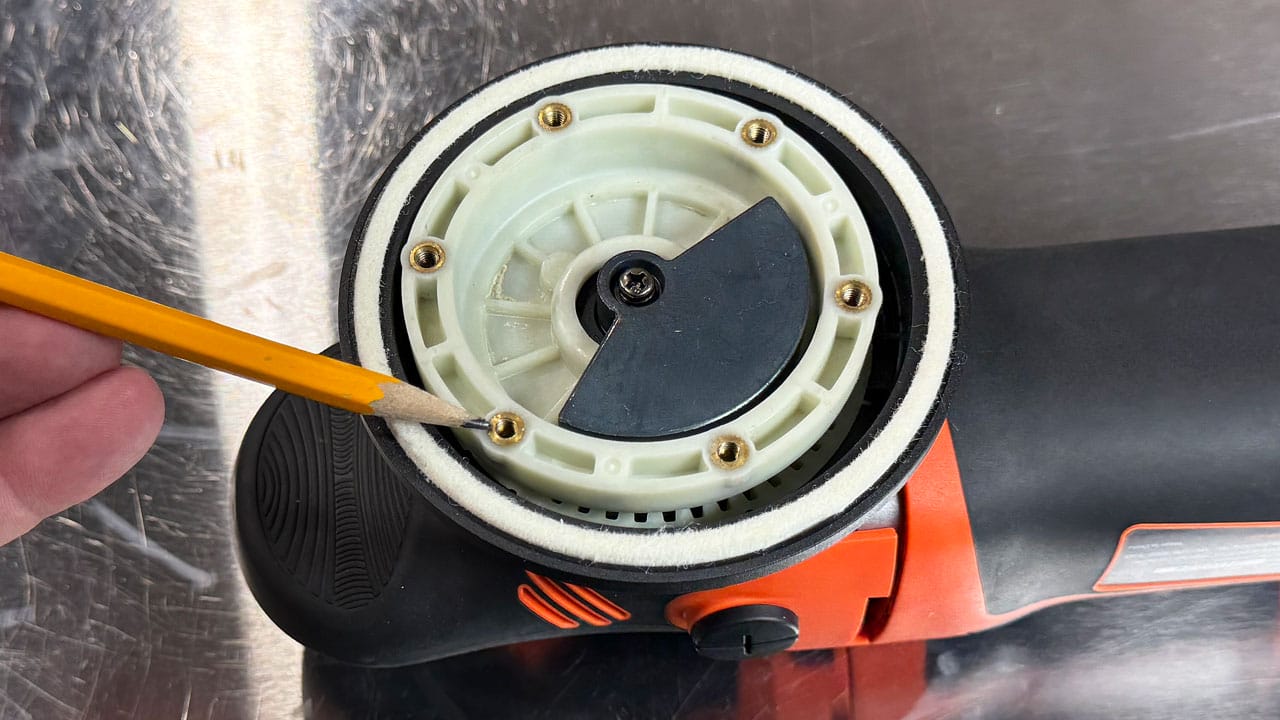
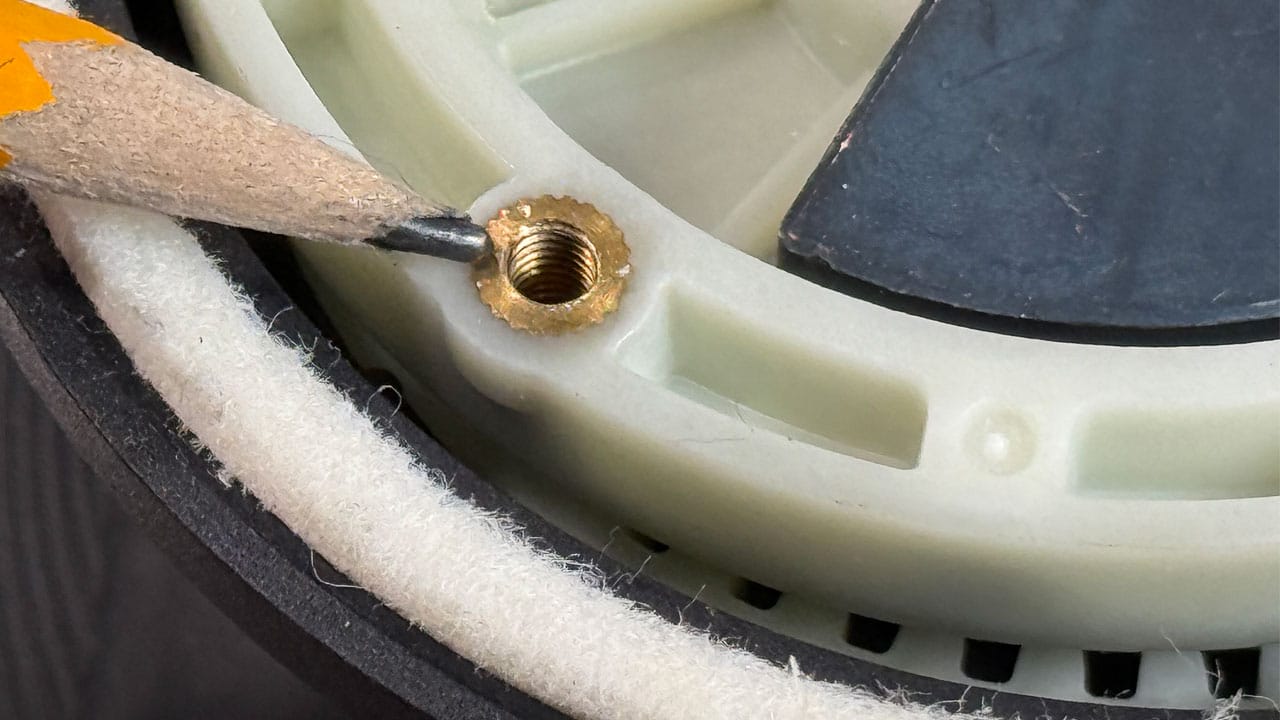
The Orbital Cover uses brass insets for threading in the machine screws. This is actually an important part of this tool as each time you turn the polisher on - torque is applied to the shaft of the machine screws and if they were not solidly attached to the Orbital Cover, you could break the tool.
Balance Weight
Other tools refer to this is the counter weight, and this offset rotating weight helps to remove vibration and smooth out the action of the tool.
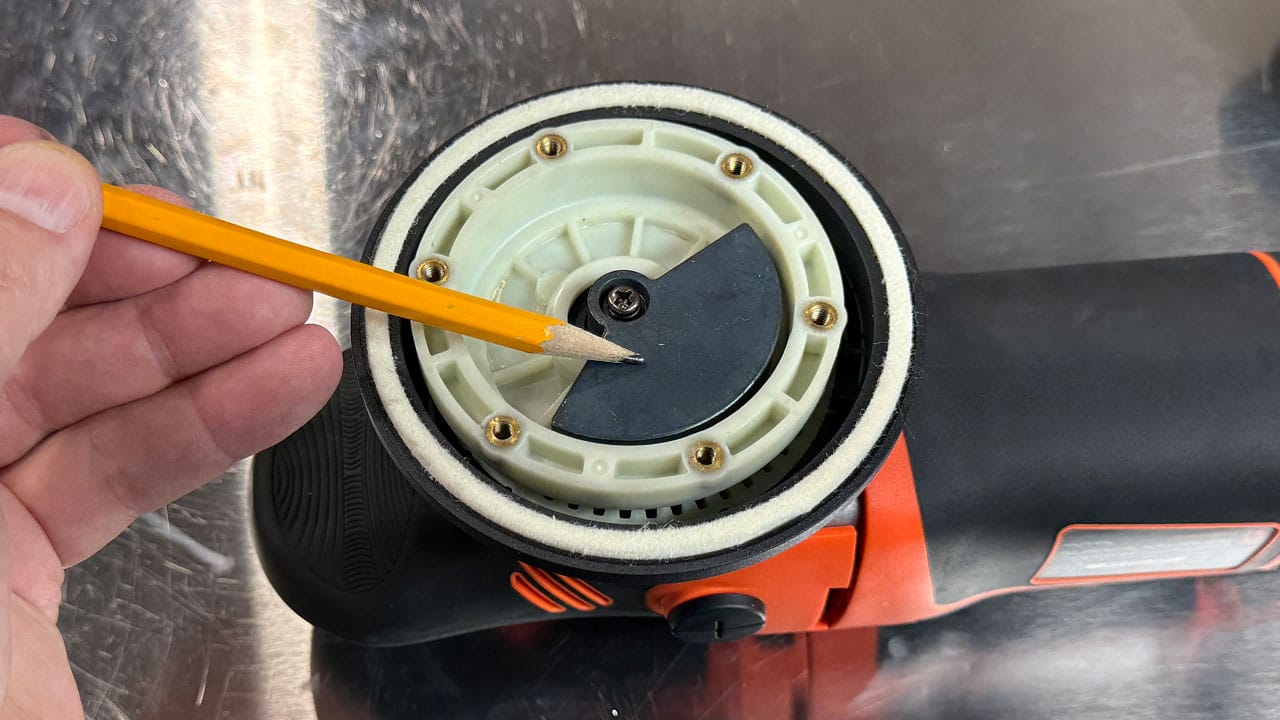
Felt Ring
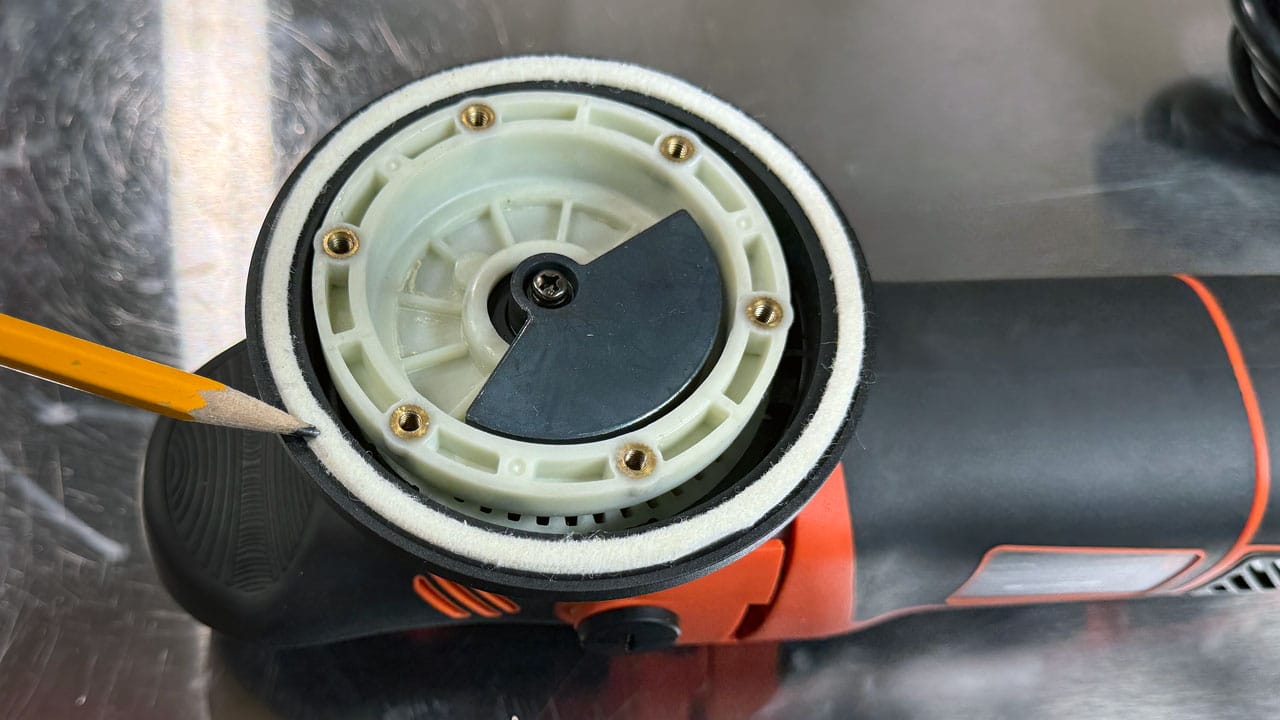
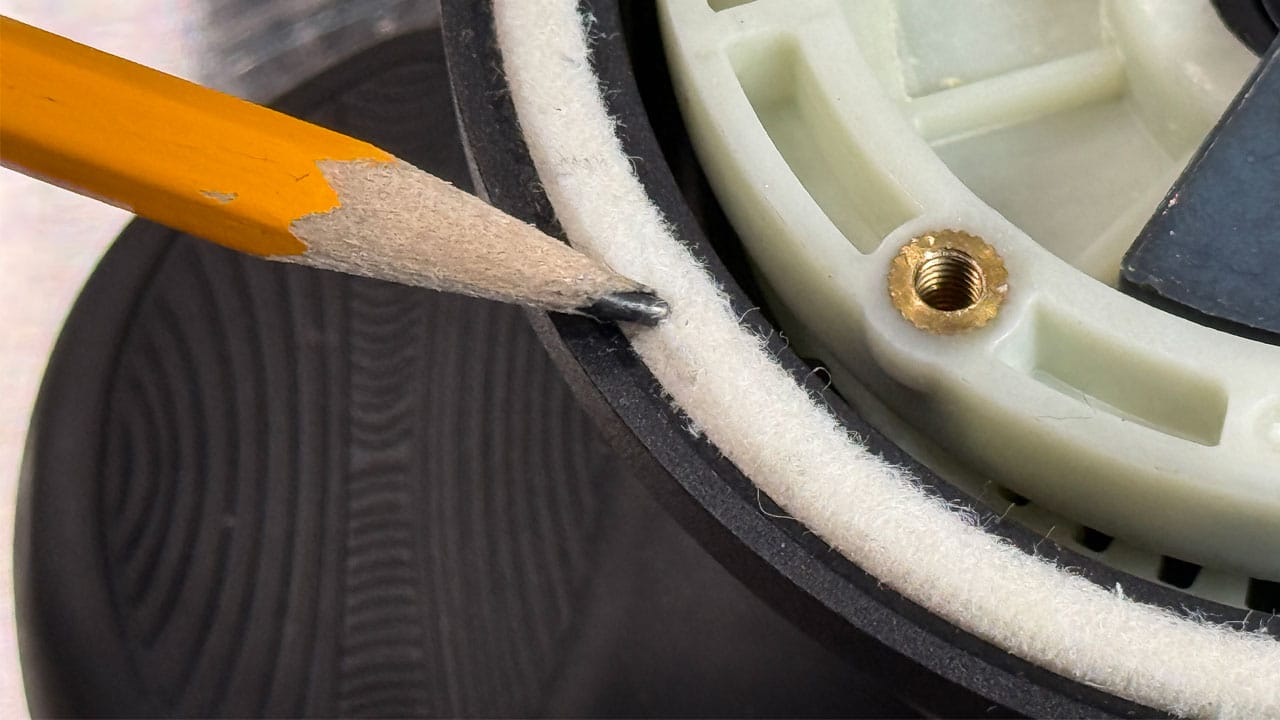
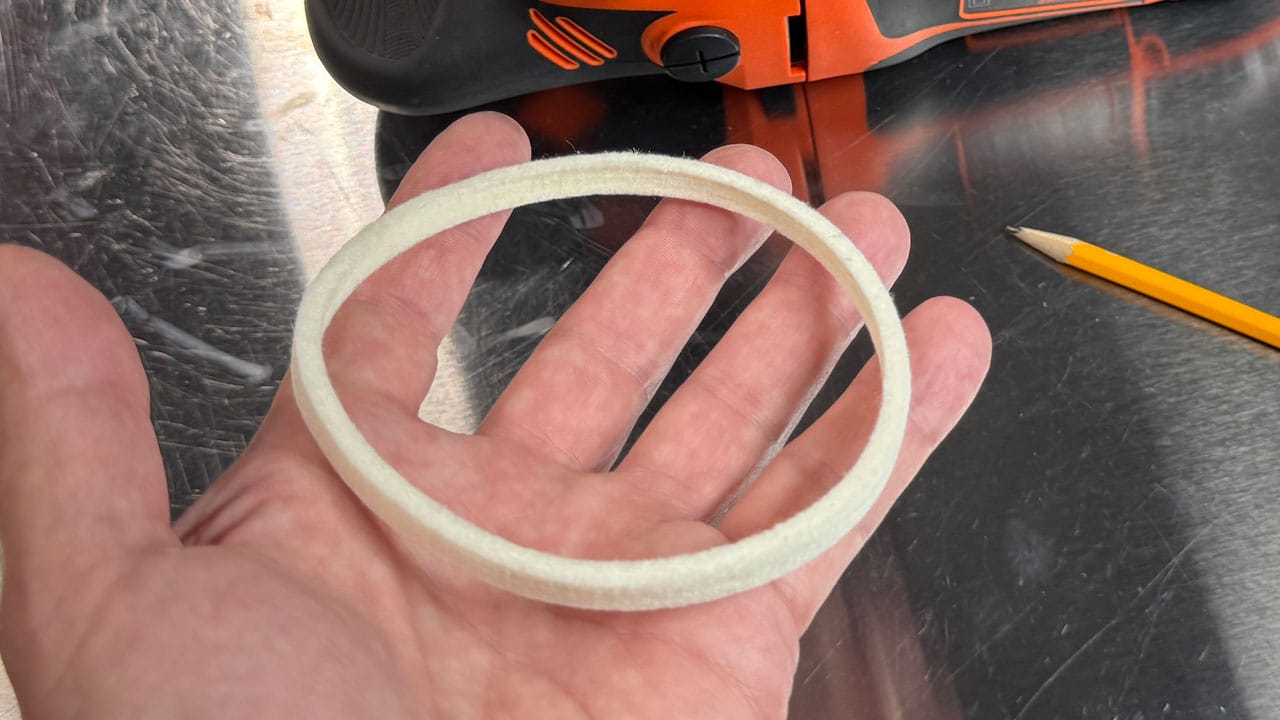
The felt ring is a crushable interface that provides both slip and cushion between the hard surface of the backing plate and the hard surface of the orbital cover. The felt ring is a wear item and should be removed and turned over and periodically replaced as needed.
Mike's comment
I wrote a book for FLEX Power Tools a few years ago and also wrote a popular article on the topic of lubricating the felt ring. In the book and the how-to article, I recommended using a light machine oil to lubricate the felt ring inside the FLEX XC 3401 VRG gear-driven orbital polisher. Here's a picture from that article and section in the how-to book.
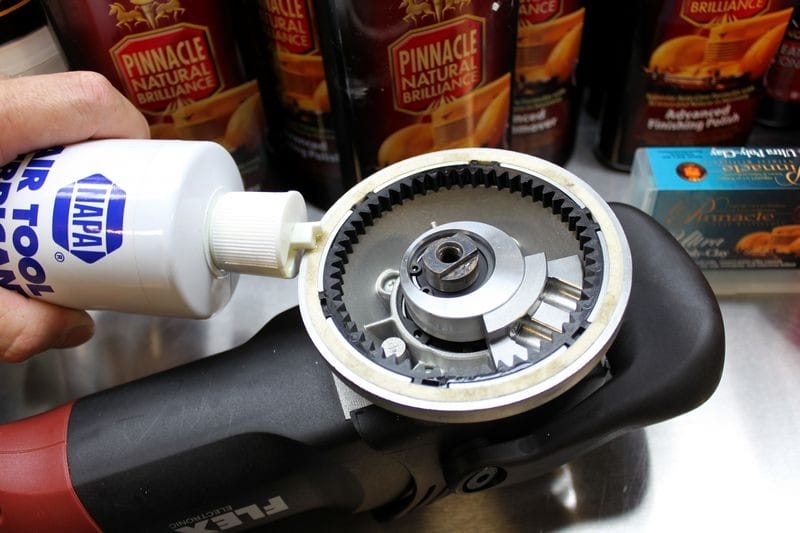
FLEX never stated to or recommended to lubricate the felt ring, this was my recommendation after learning via thousands of hours behind this tool. Here's why I lubricate the felt ring. Because you cannot stop pad rotation or pad oscillation no matter what - this means you can press down hard on the head of the tool for situations where you need to remove major defects. When you press hard, the backing plate flexes or bends and makes contact with the felt ring and also the aluminum housing and damages the backing plate. I found by adding a few drops of a light oil - this prevented any damage. It also prevented tiny black shards of plastic coming off the backing plate and flying outward where you could potentially trap these tiny hard, plastic shards between the paint and the face of the buffing pad - potentially causing damage to the paint.
For me? I'm going to lubricate the felt ring in this brand new tool whether it needs it or not or whether or not Dynabrade recommends it or not. The reason why is because,
- I buff a lot of severely neglected cars and as such, when using these types of tools I take advantage of all the power and this means I do press hard on the head of the polisher when I need to go after serious or deep defects.
- I don’t believe, and I could be wrong, but I don’t believe adding a little lubrication oil to the felt ring can hurt anything. It might not help, (but it might), but it certainly will not hurt anything as far as the performance of the tool. So, this is a proactive measure I take for gear-driven, orbital polishers with felt rings.
WARNING
When removing the felt ring be careful to NOT stretch it. Remove it carefully, slowly and gently to preserve the original diameter. If you yank it out of the housing and stretch it - you will find it very difficult and time-consuming to try to re-insert it. I kid you not. So be careful. I use a the pointy end of of thumb tack to gently pry the felt ring up and out of the housing and once I get a portion lifted out, I use my fingers to extract the entire felt ring.
Backing Plates
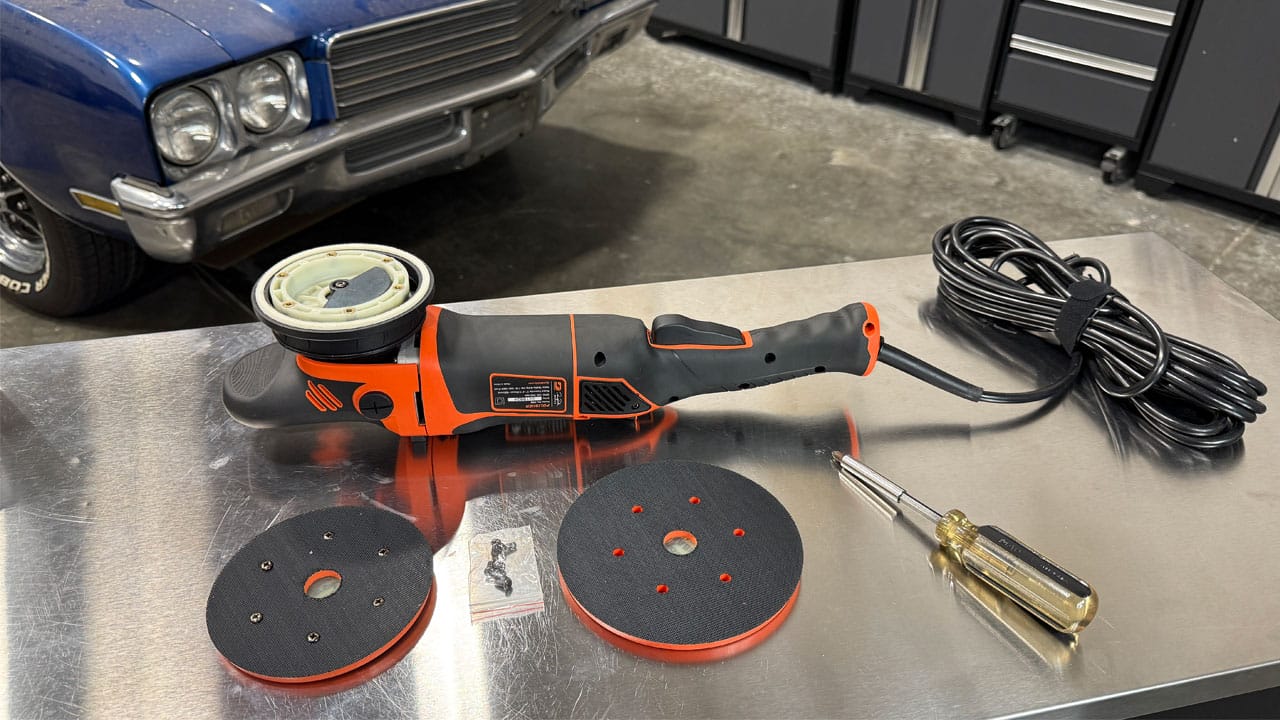
IMPORTANT: Backing plates wear out. Each time you REMOVE a buffing pad from the backing plate - you stretch the hooks that are a component of the hook-n-loop system used to attach buffing pads to backing plates. If you're an enthusiast and only detail your own cars - its much less of an issue.
However, if you're a professional, swapping pads on a daily basis, the hooks are going to stretch out and at some pint you may experience buffing pads flying off the polisher. Knowing this ahead of time, I practice, teach and preach to always have a back-up backing plate. Here's the links to get your backups.
• DB8P5 - 5" Backing Plate
• DB8P6 - 6" Backing Plate
5" and 6" Backing Plates
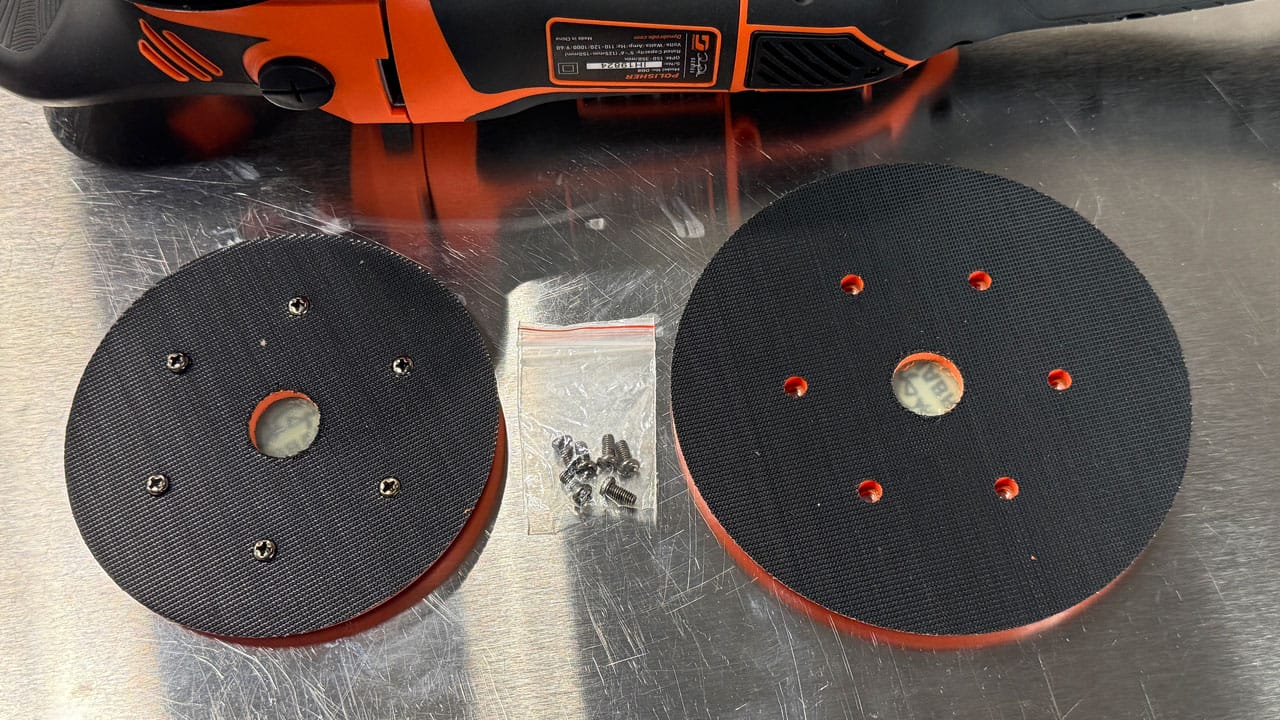
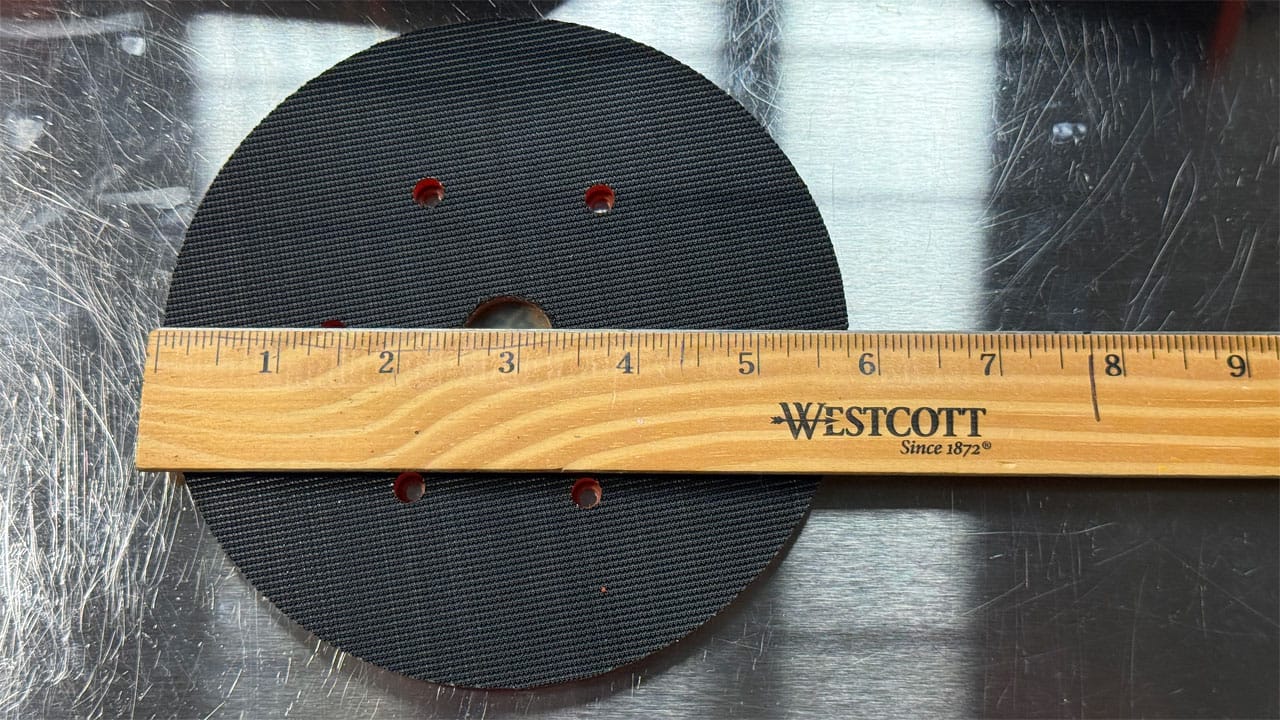
It's common in the tool industry to round-off numbers for simplicity. It's also normal for backing plates to be a tick undersize for the back of the appropriate size buffing pad otherwise it's difficult/impossible to center the pad to the backing plate. This hold true for Dynabrade backing plates. Below are pictures showing measurements for both the 5" and the 6" backing plates.
According to my ruler and my eyes - the 5" backing plate is approximately 4 3/4" - not a full 5 inches.
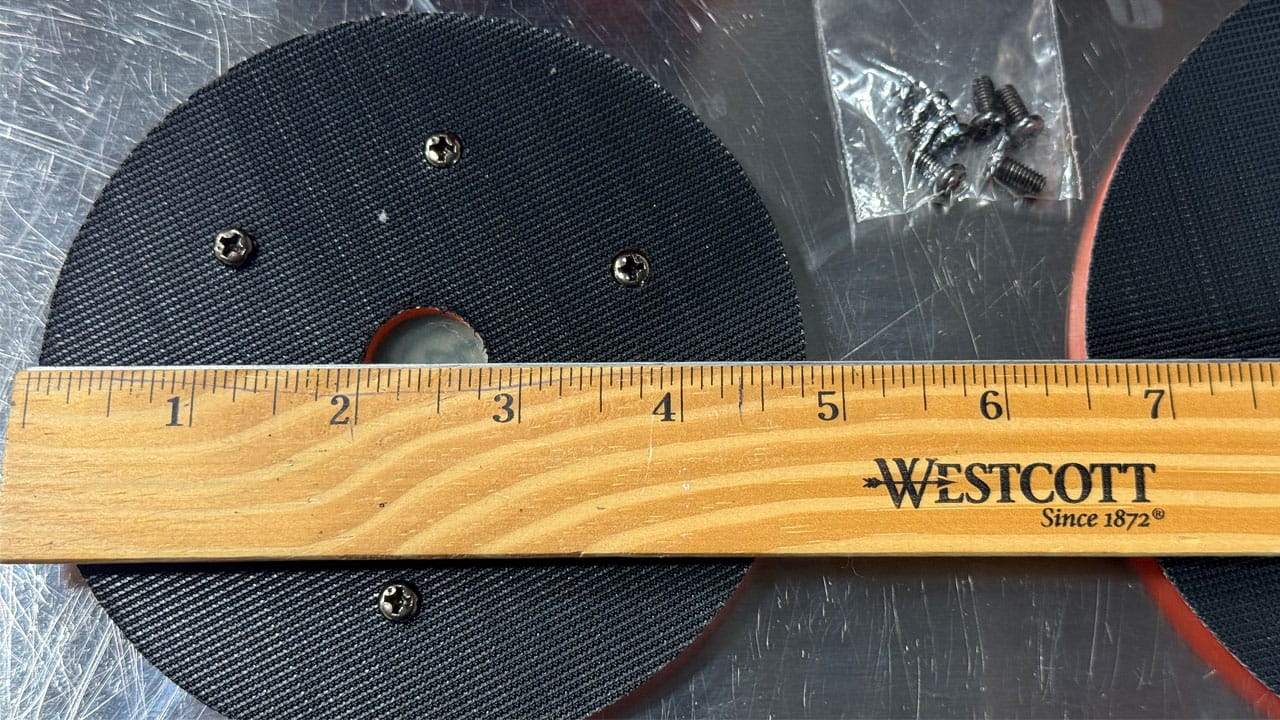
And when I measure the 6" backing plate I'm seeing 5 3/4" - not a full 6 inches.
Backing Plate Attachment - Tips
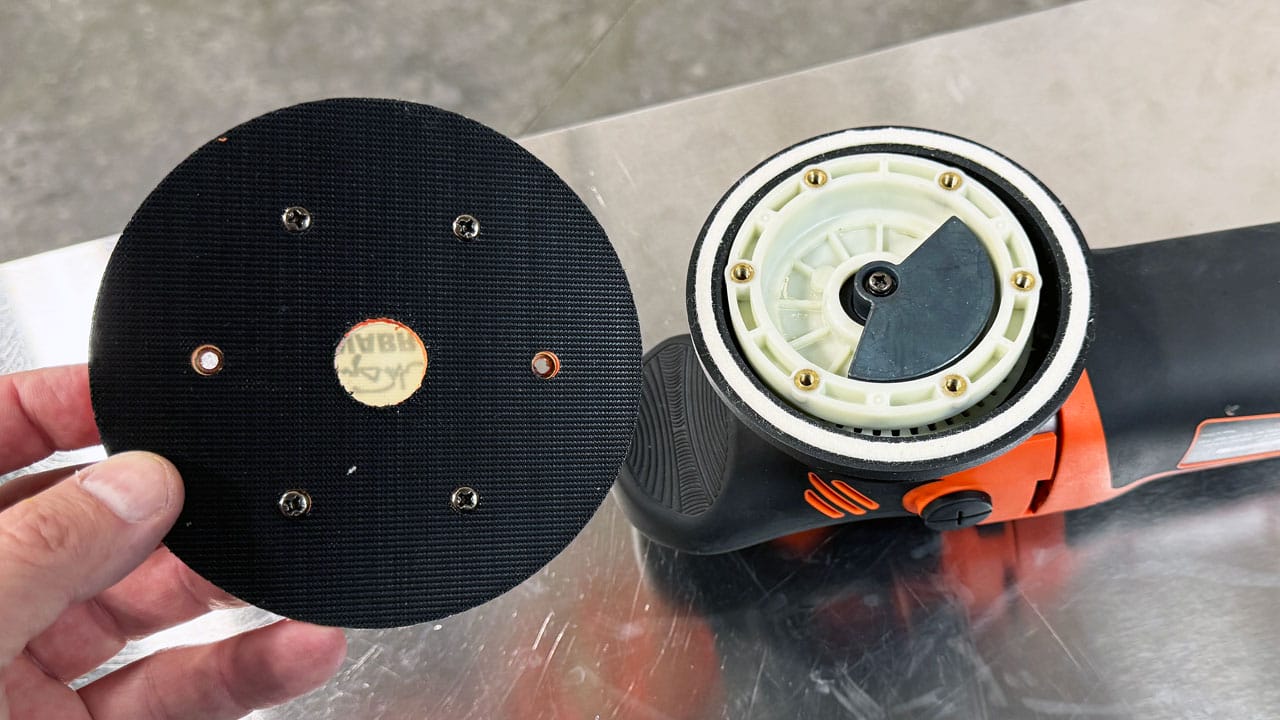
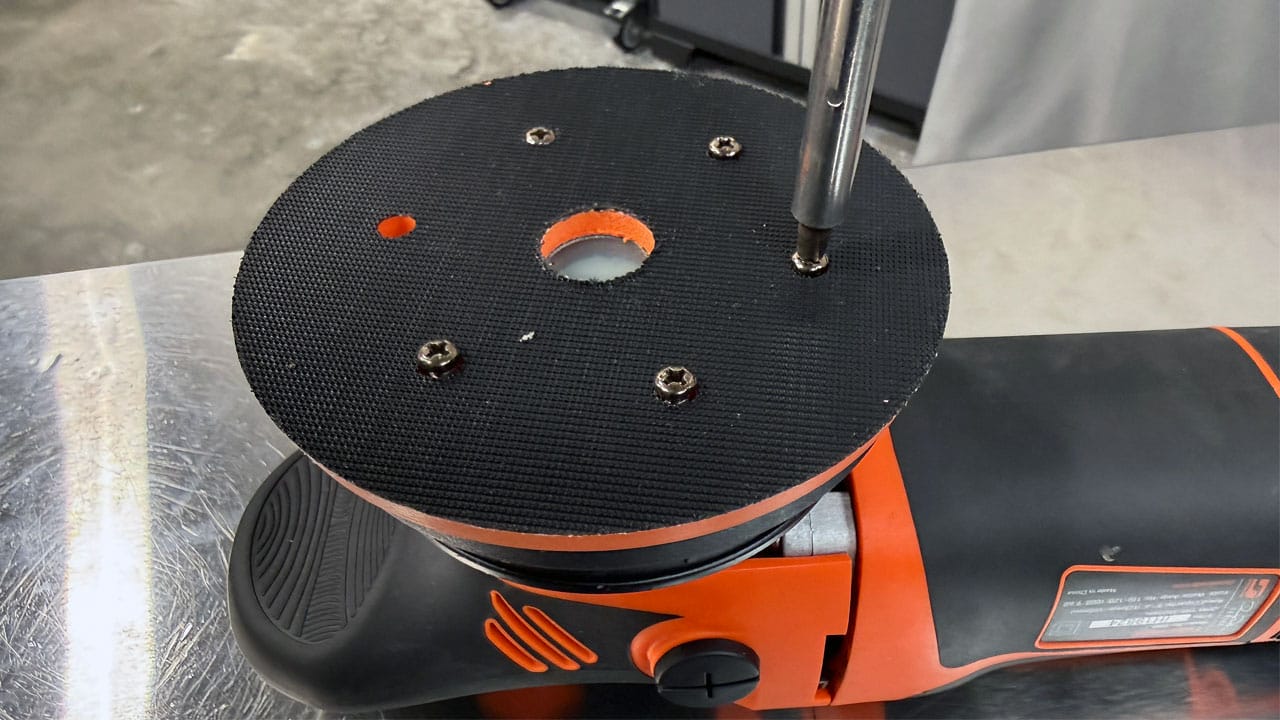
After removing the 5" backing plate from this brand new DB8 polisher, I just wanted to share a couple of tips to help you either re-install the 5" or to install the 6".
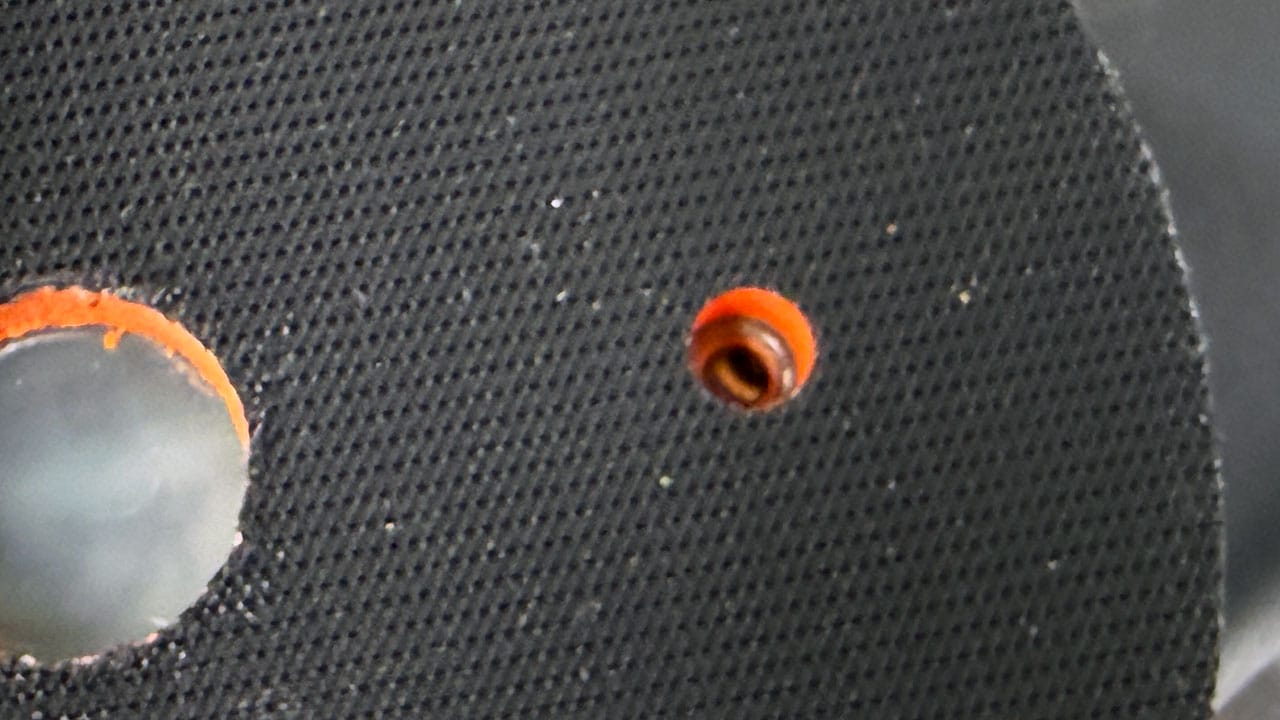
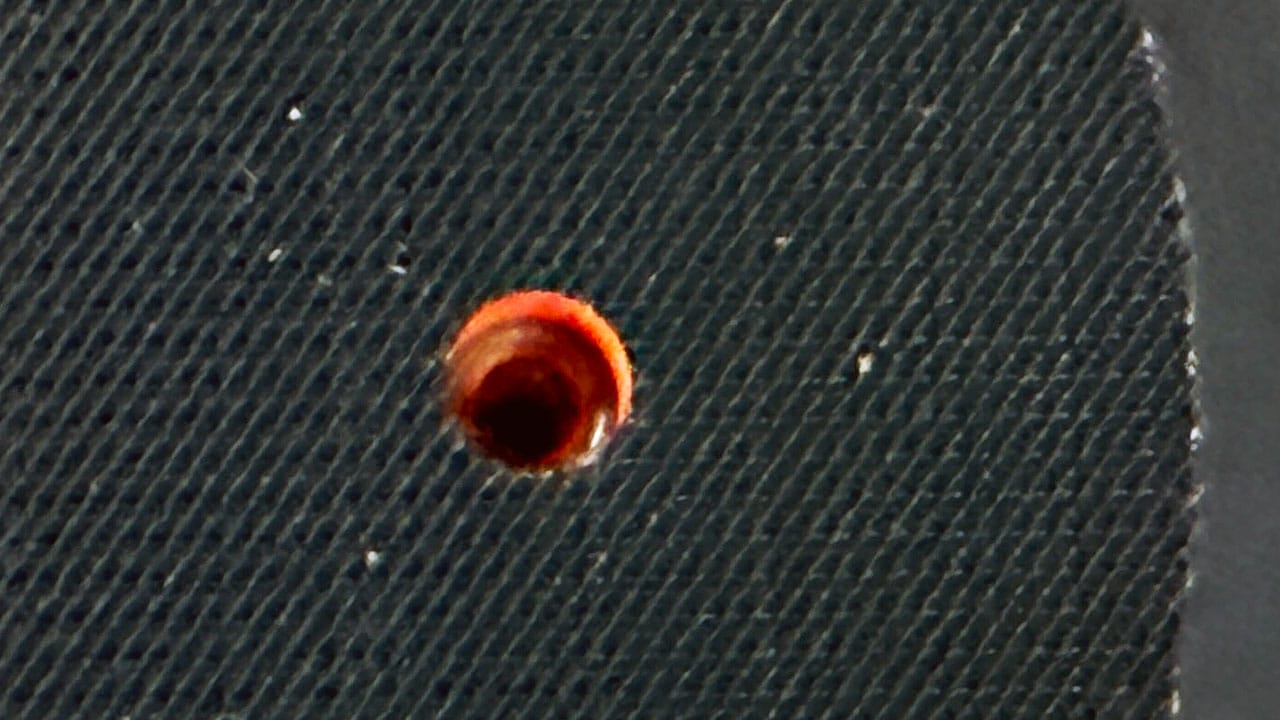
Simply make sure 2 of the machine screws are removed and then place the backing plate onto the orbital cover looking to make sure the holes in the backing plate are aligned with the holes in the orbital cover.
In the below picture - you can easily see the backing plate is NOT aligned correctly.
In the below picture you can see the hole IS aligned correctly
Once you've aligned the backing plate - next install and tighten the machine screws.
Be sure to store the brushes, replacement machine screws and the extra backing plate in the included zipper pouch so you don't lose these items. The bright orange color was a good idea too as most shops are fairly unorganized.

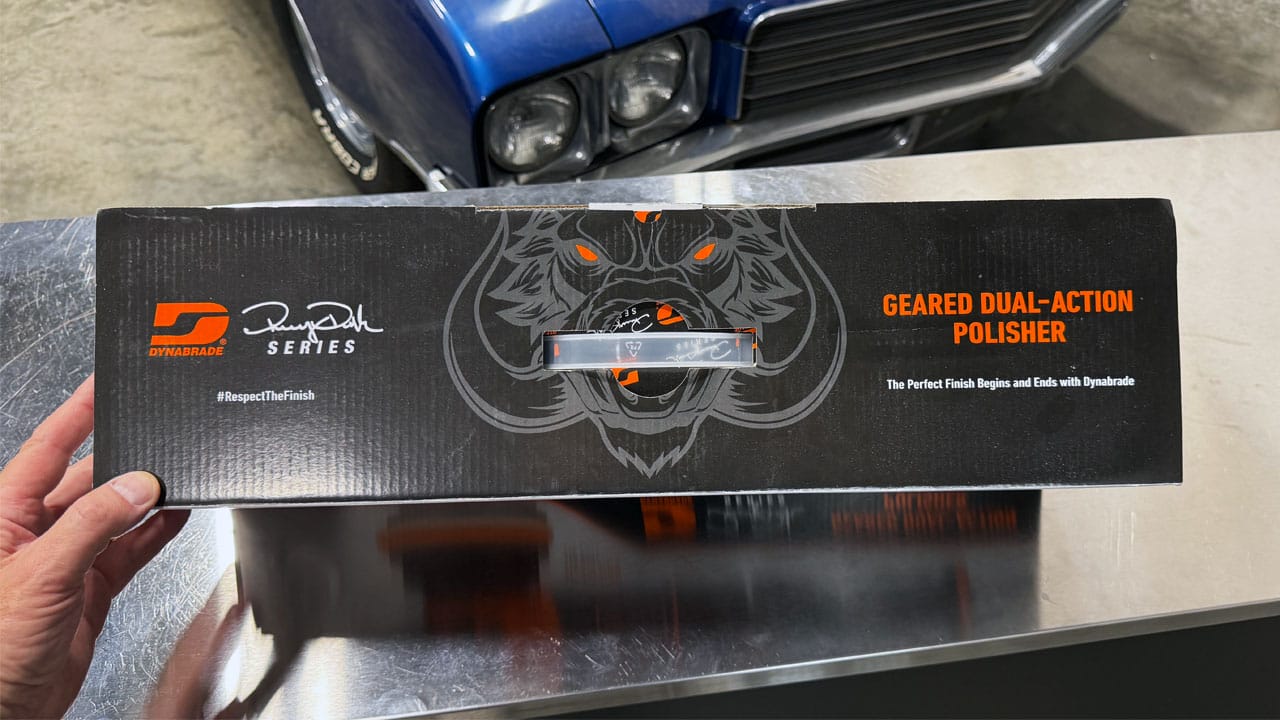
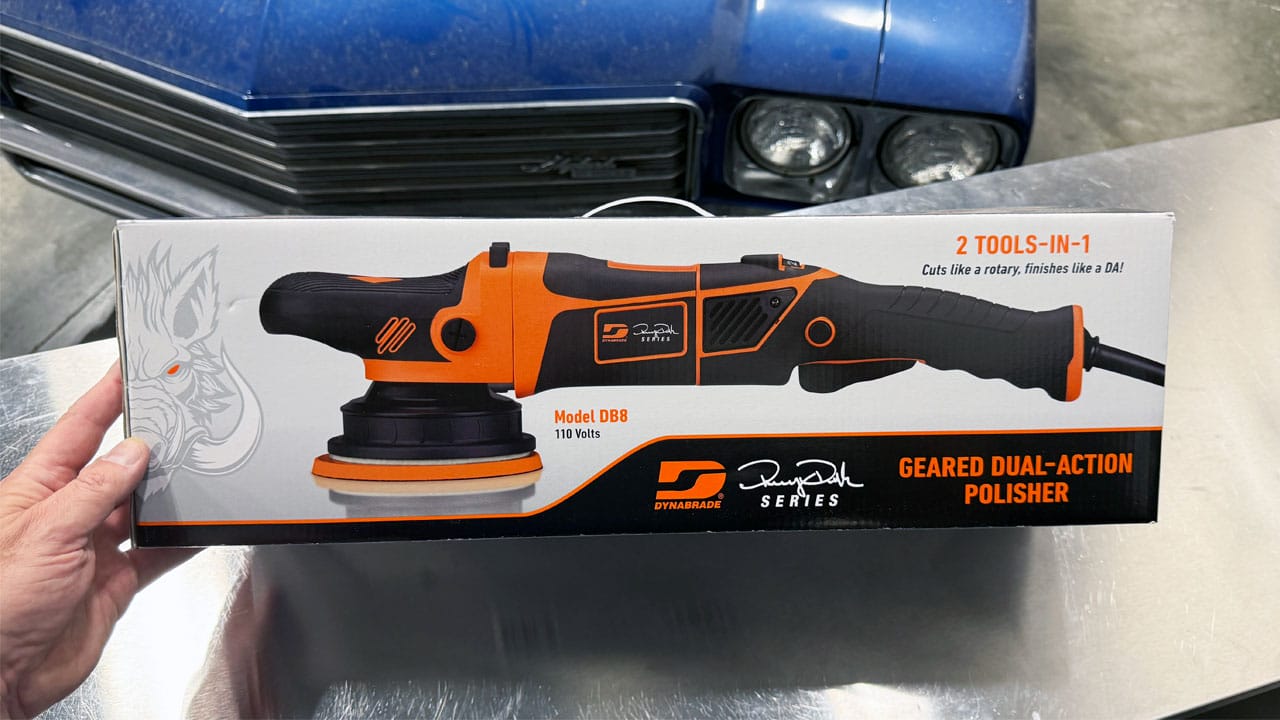
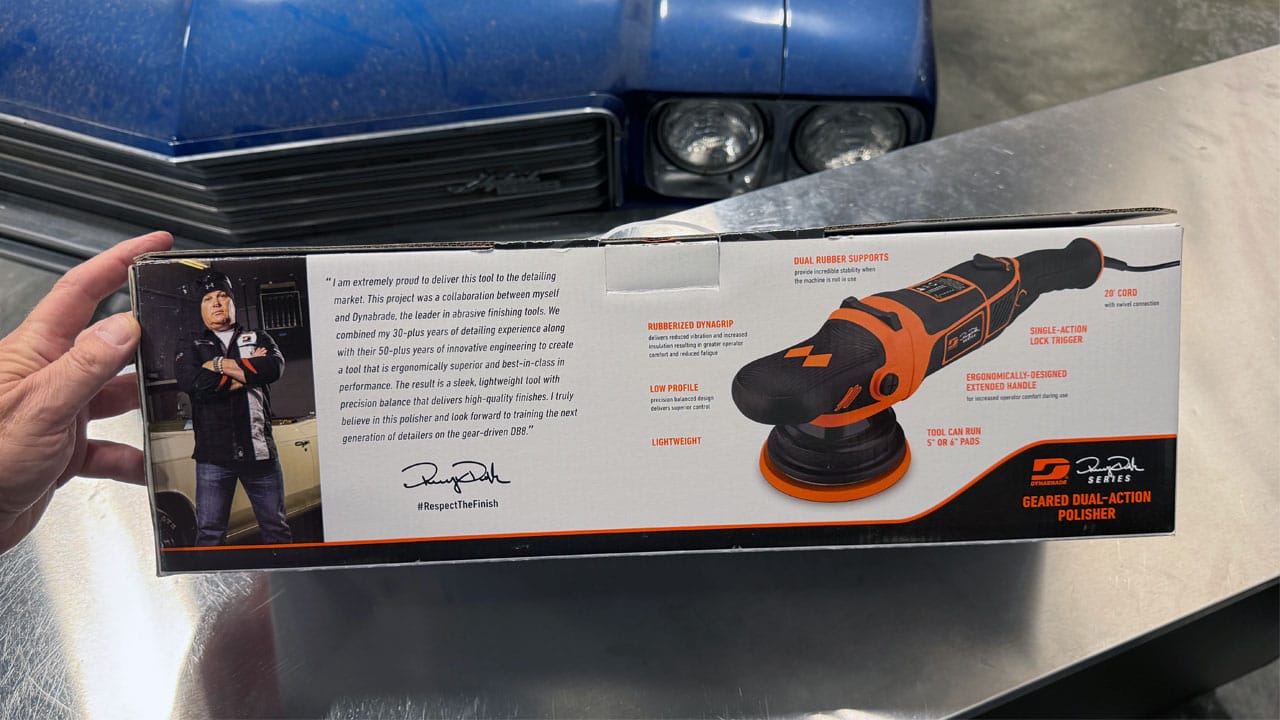
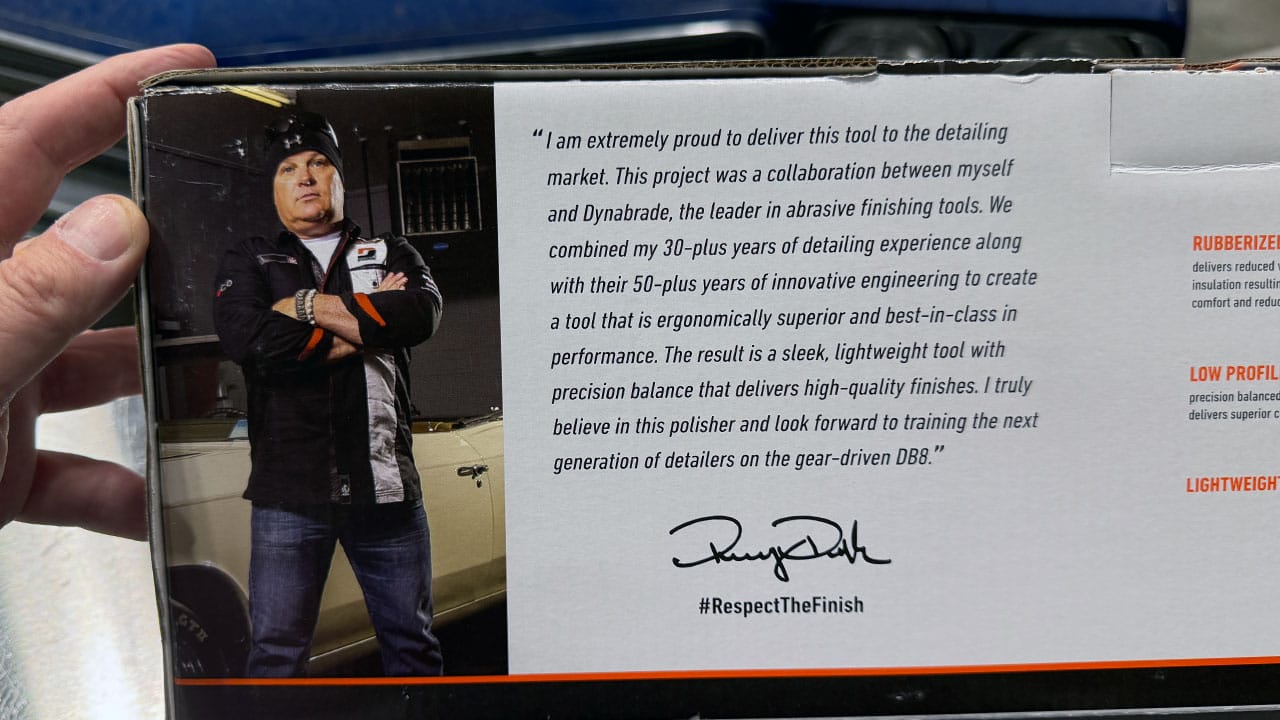
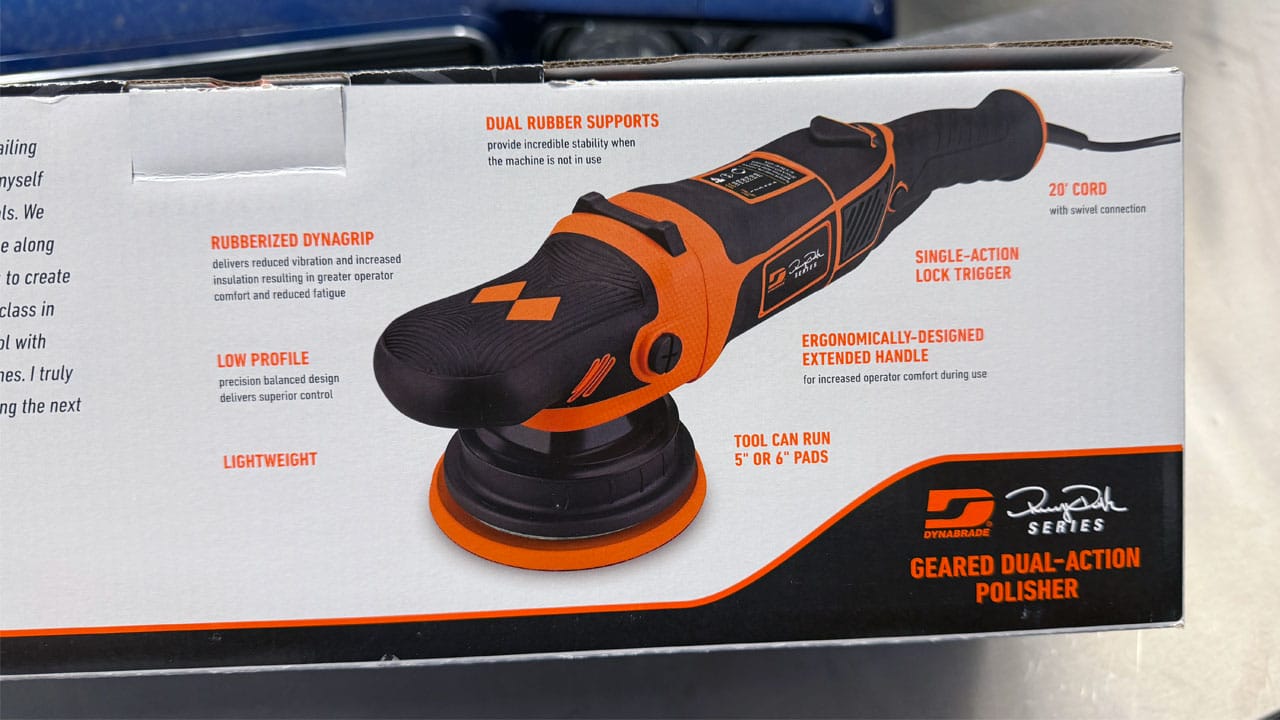
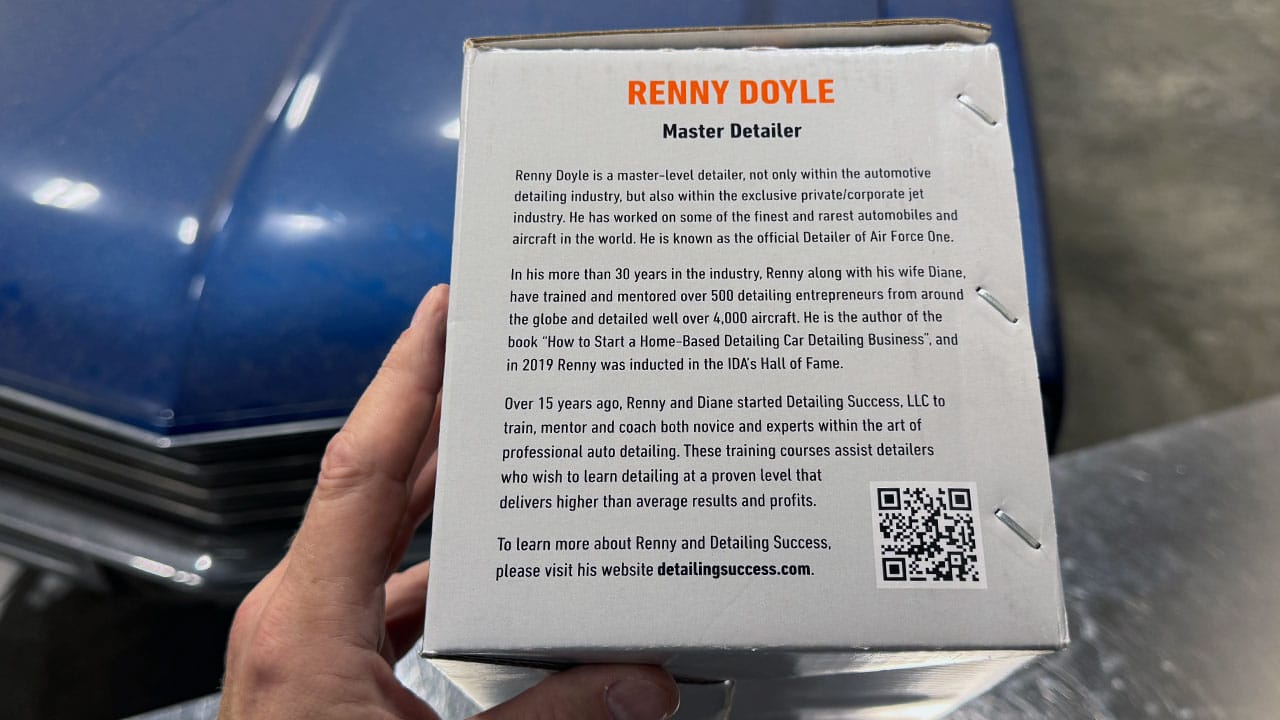
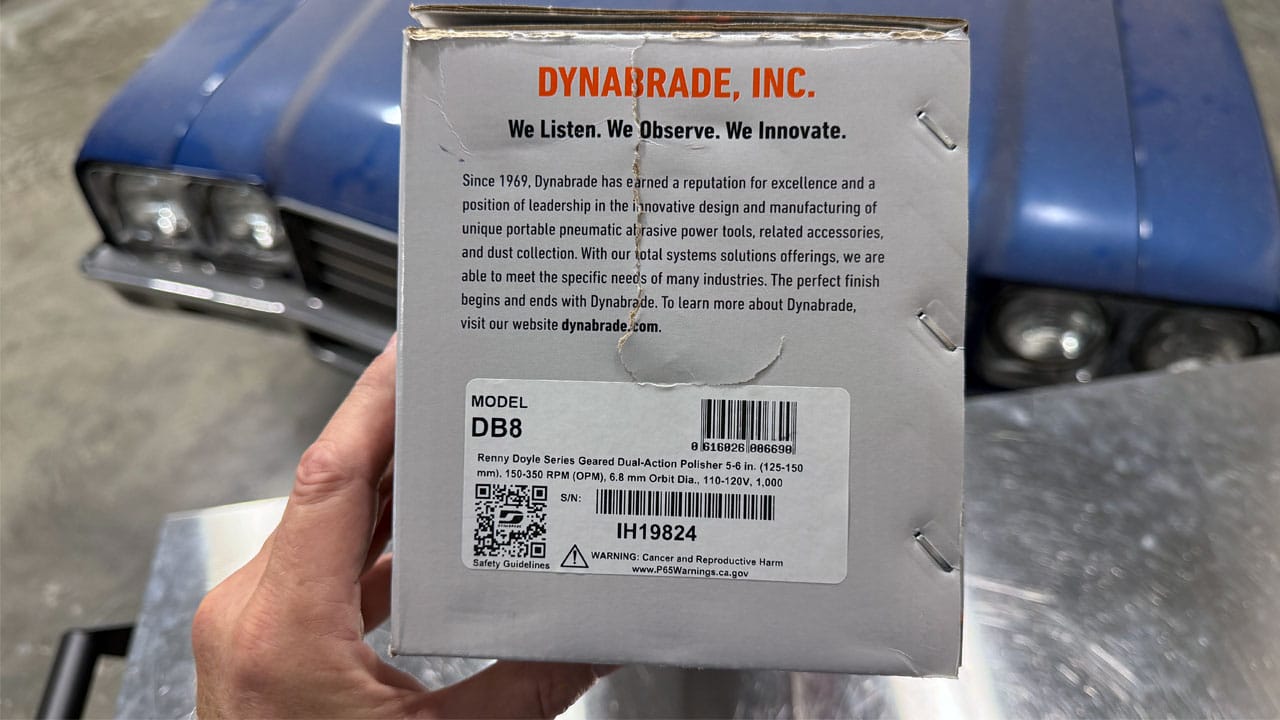
Best Box Design for a Tool Ever!
While this is of little importance, as a person that has unboxed a LOT of tools over the decades, the thing I noticed about the box the tool is sold in is how well thought-out the information and graphics are on the box.
Test Driving the DB8
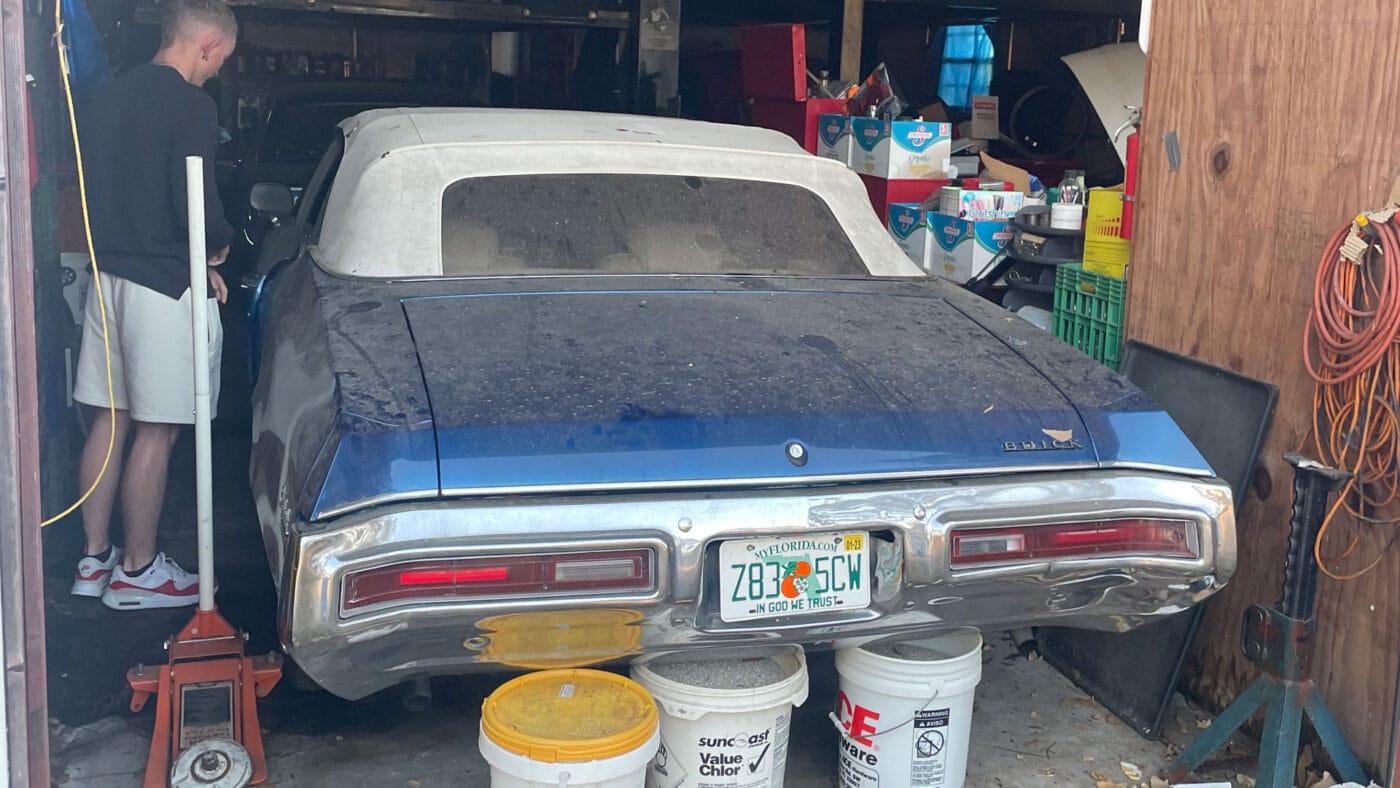
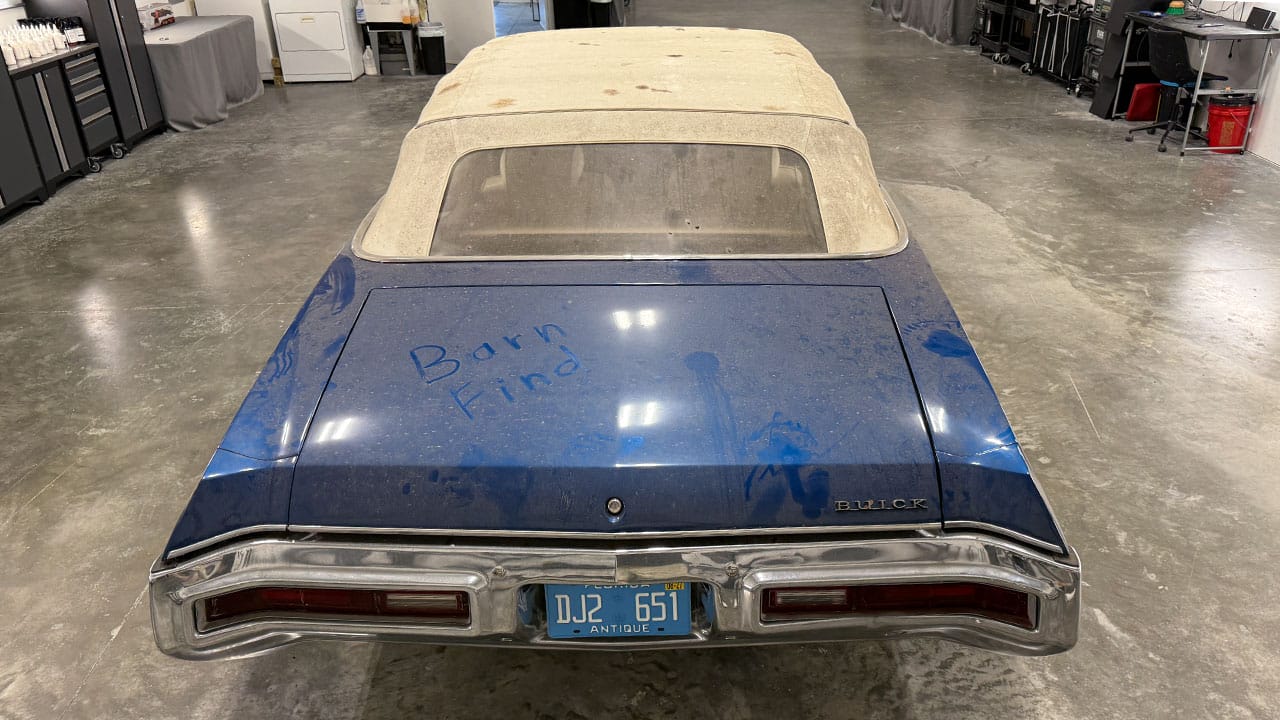
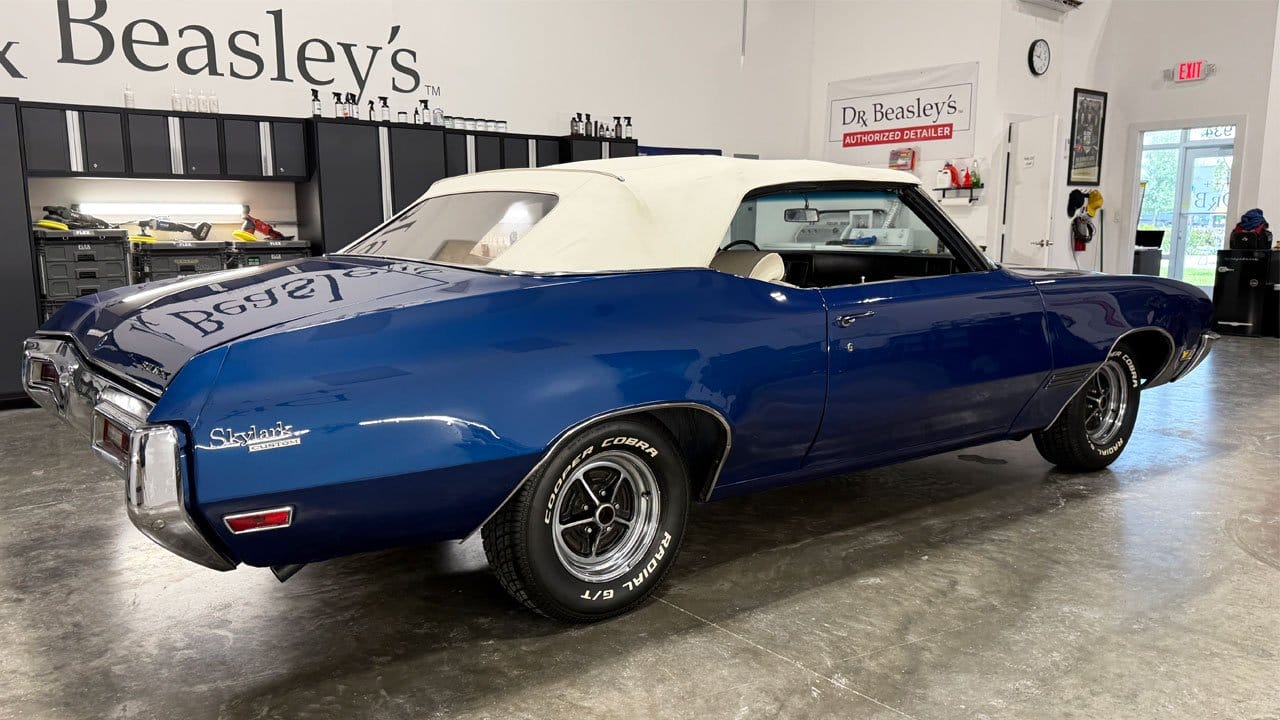
Anytime I do a review for a tool, pad, product or technique, I actually use a real detailing project for the review. In this example, this Barn Find 1971 Buick Skylark Custom Convertible was dropped off at the Dr. Beasley's Training Center in sunny, Stuart, Florida. This car has been sitting in a Pole Barn for around a decade or so just getting dirty and going cosmetically - downhill.
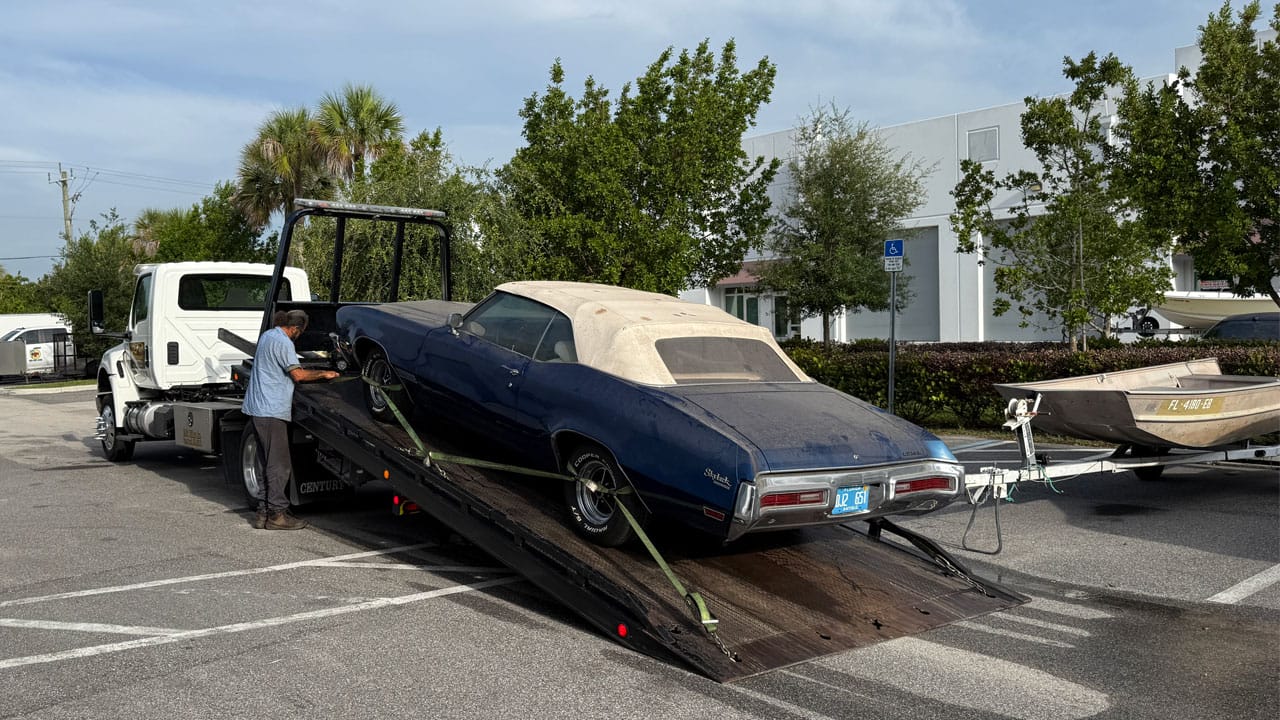
Here she is arriving to Dr. Beasley's in sunny, Stuart, Florida
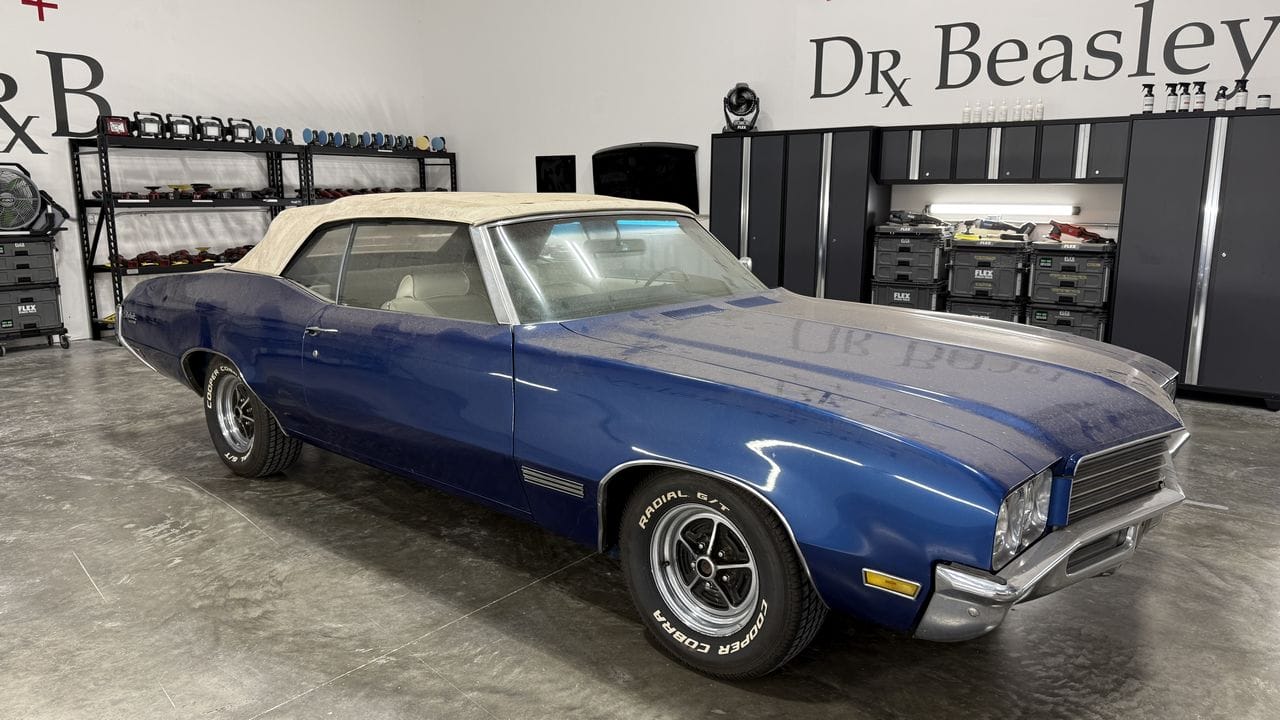
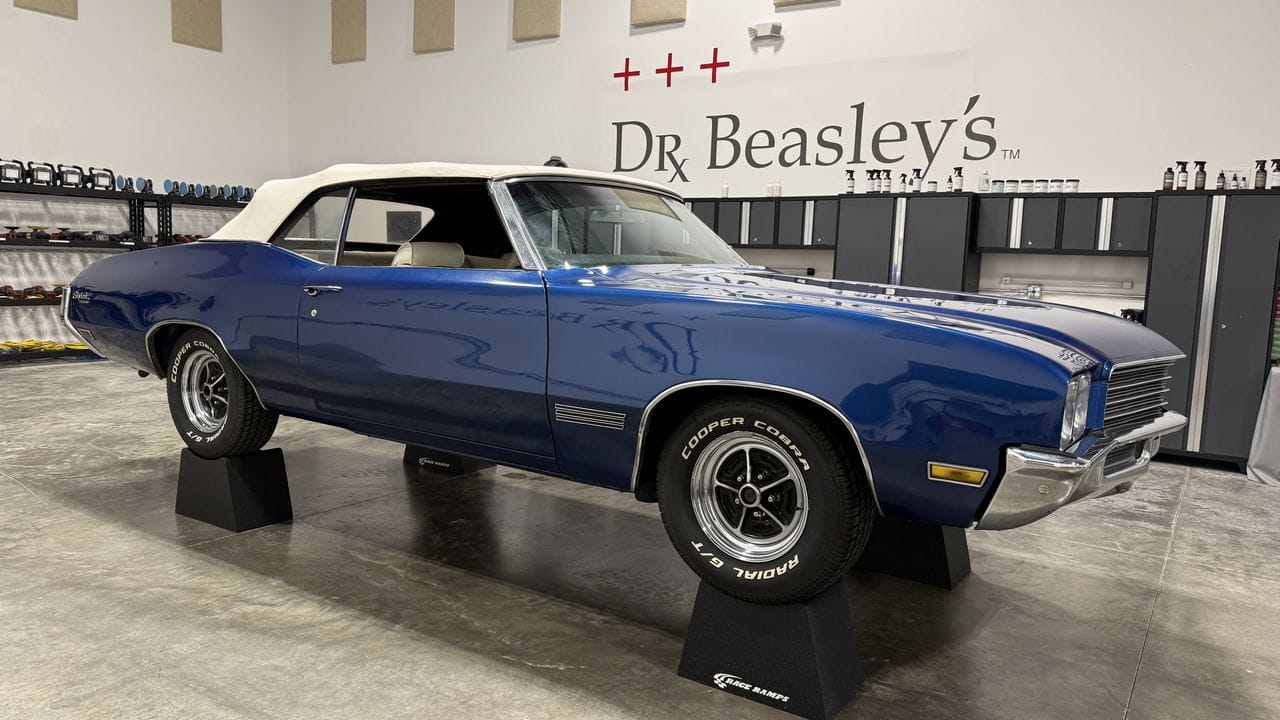
After an Extreme Prep Wash
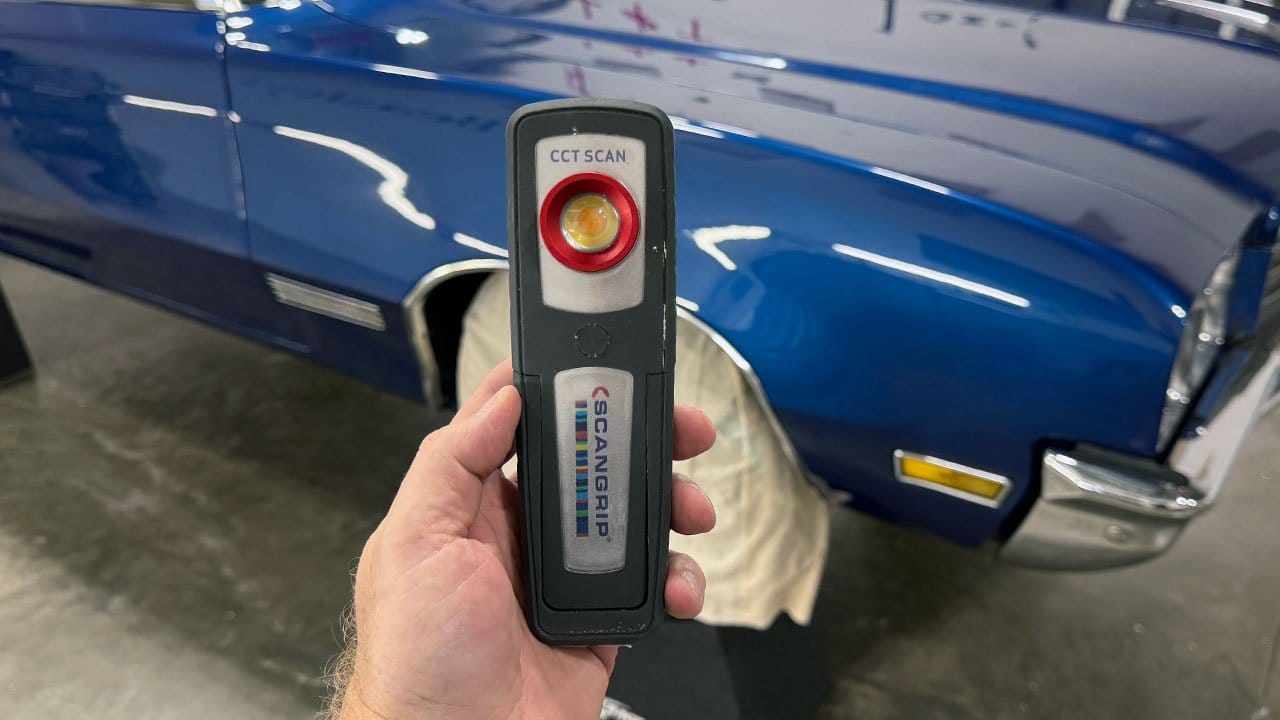
After an Extreme Prep Wash including machine scrubbing the vinyl, machine scrubbing the tires, mechanically decontaminate paint, glass and chrome followed by a total body wash. In the picture below, most people would think, Wow! She looks pretty good! But that's when you're standing 10 feet away. Check out the pictures below where I'll use a high intensity ScanGrip Swirl Finder Light to show the true condition of the paint.
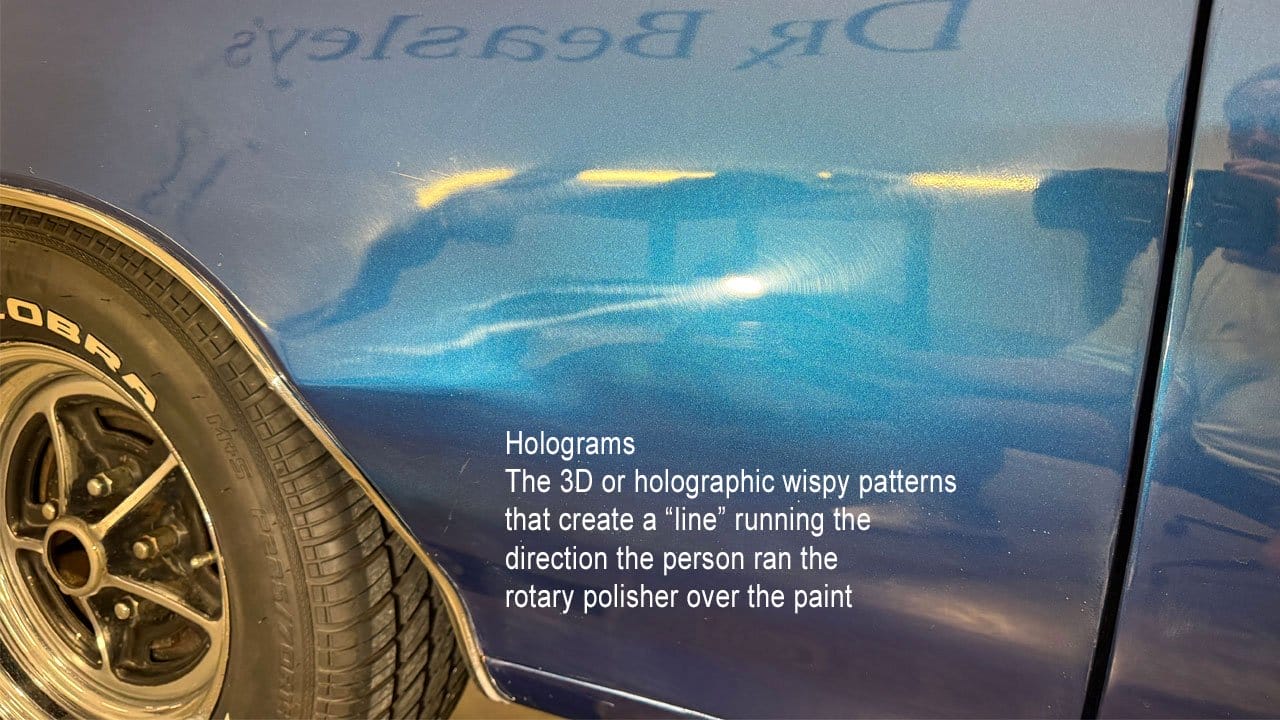
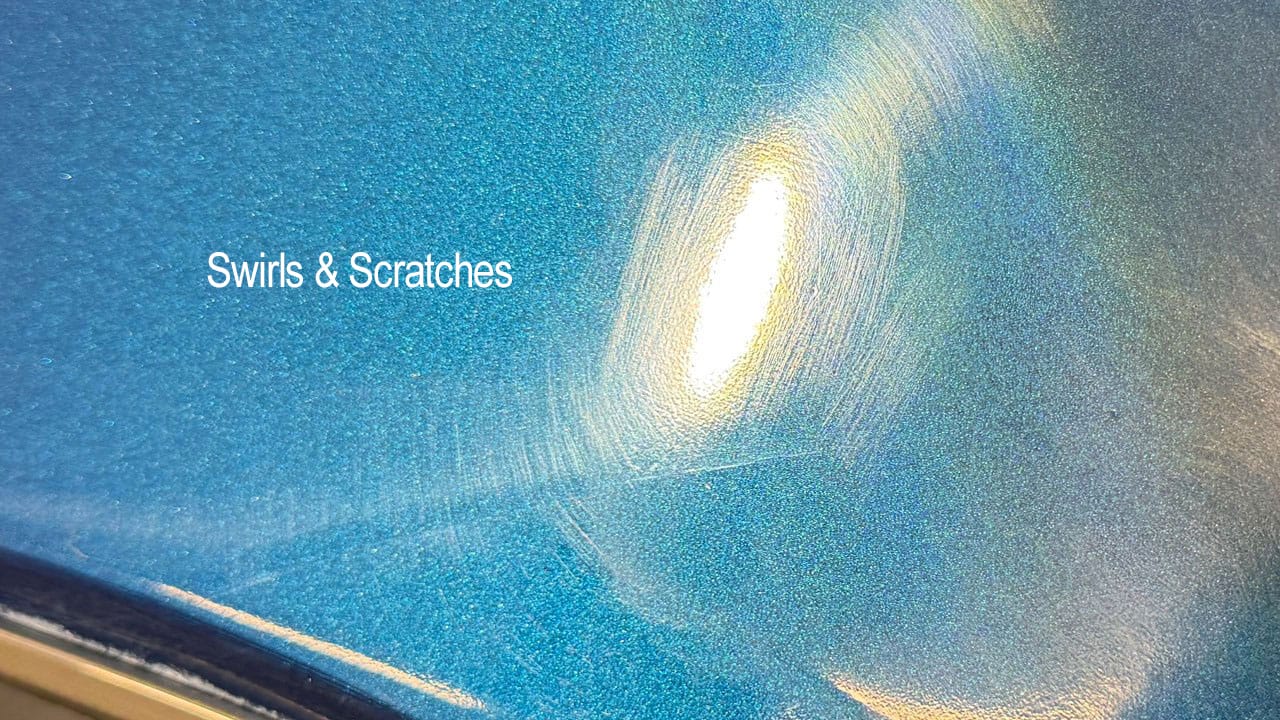
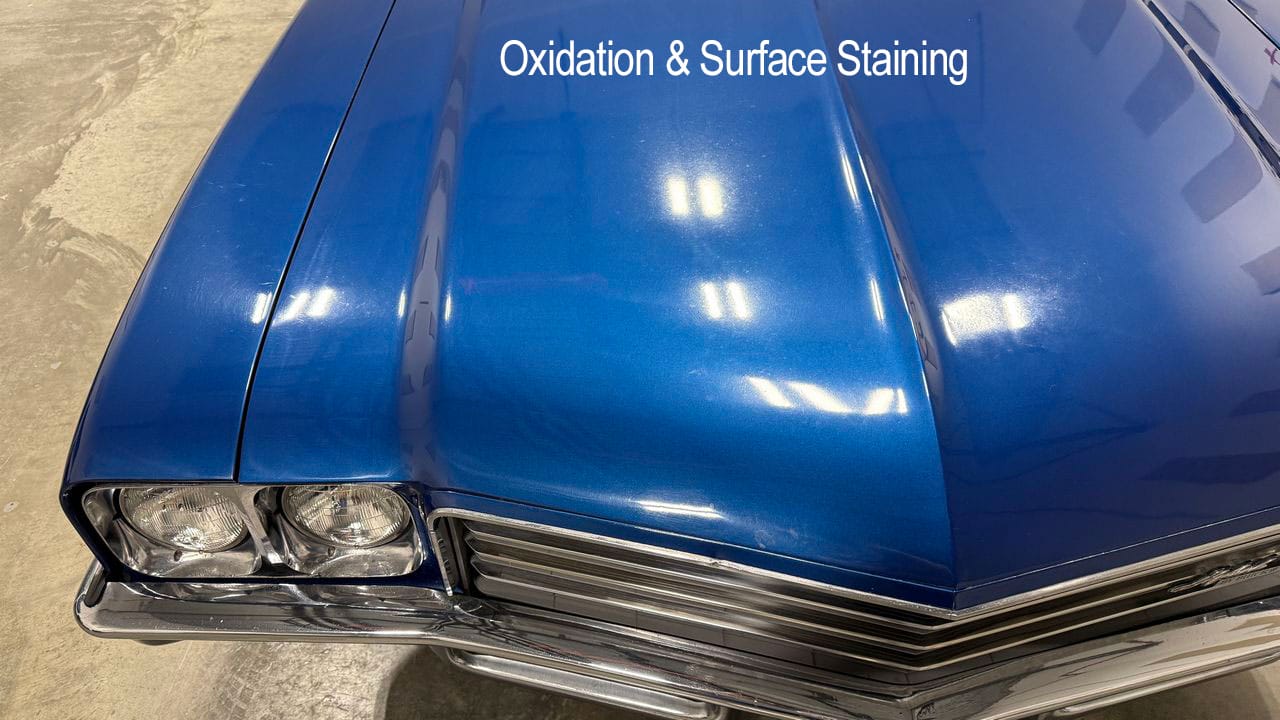
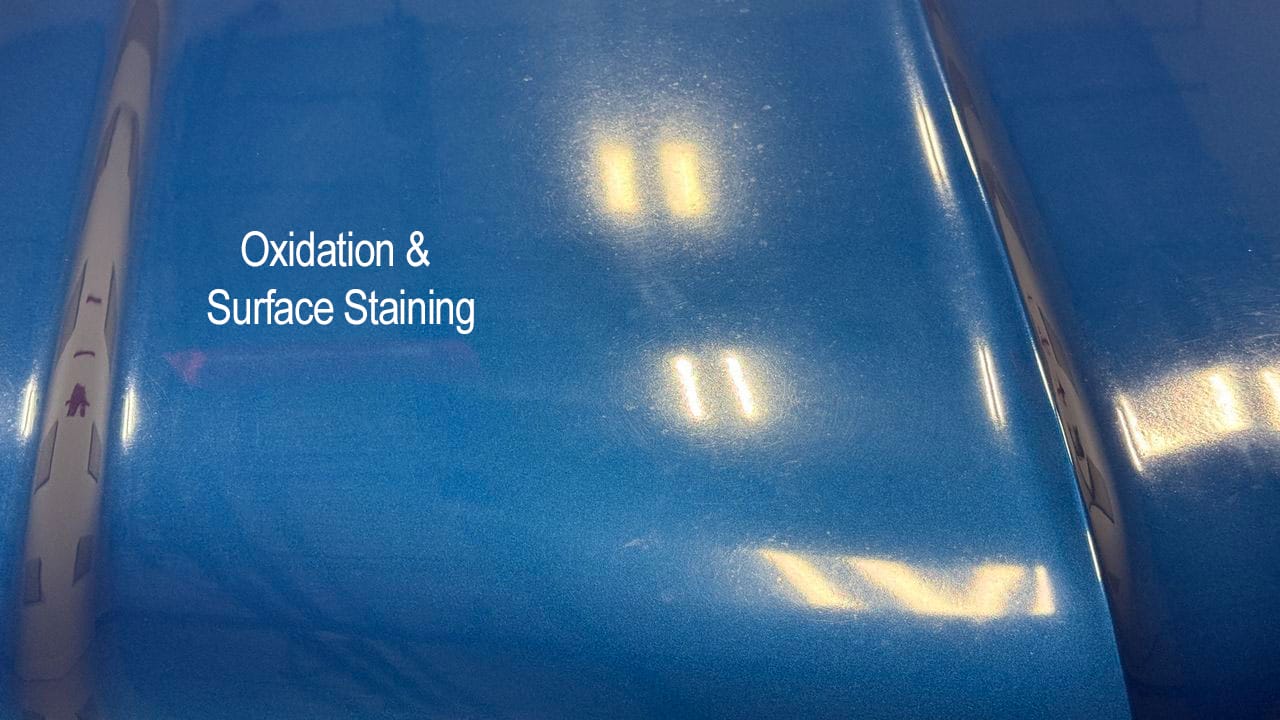
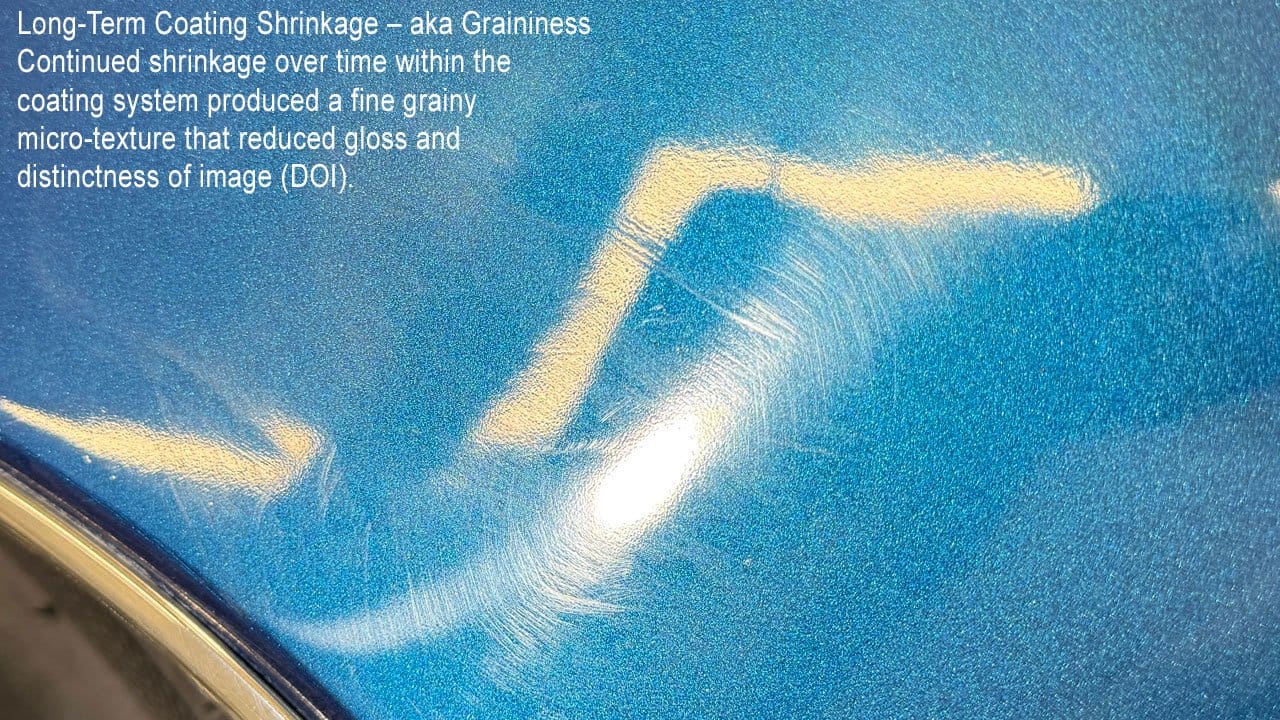
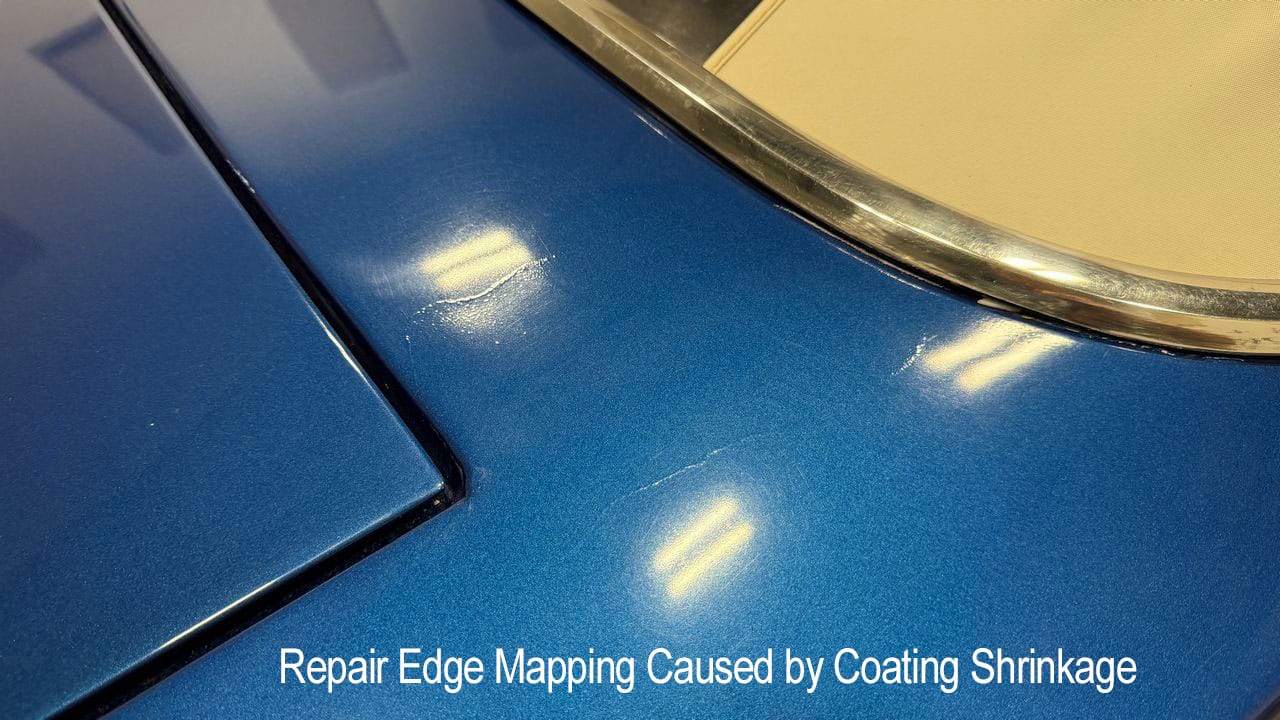
Holograms - Swirls - Scratches - Repair Edge Mapping Caused by Coating Shrinkage - Graininess - Oxidation - Surface Staining
The paint on this car has a lot of different types of paint defects to remove.
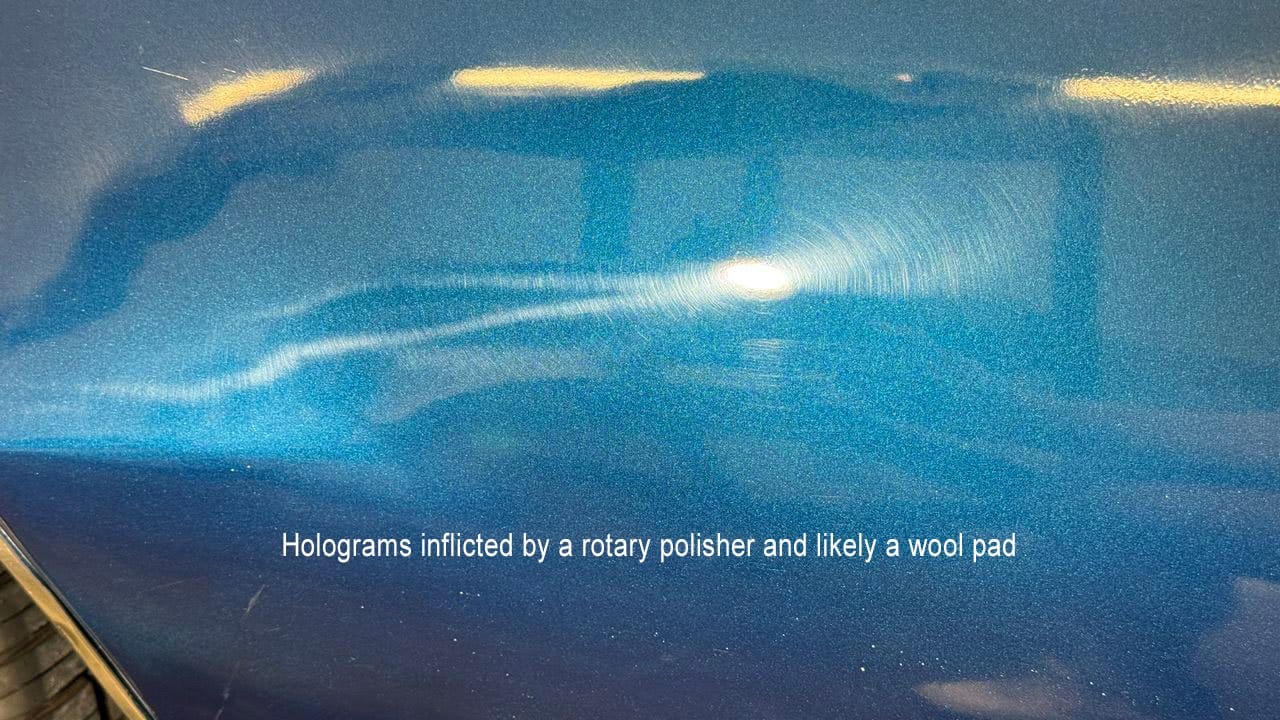
Holograms
Swirls & Scratches
Oxidation & Surface Staining
Long Term Coating Shrinkage aka Graininess
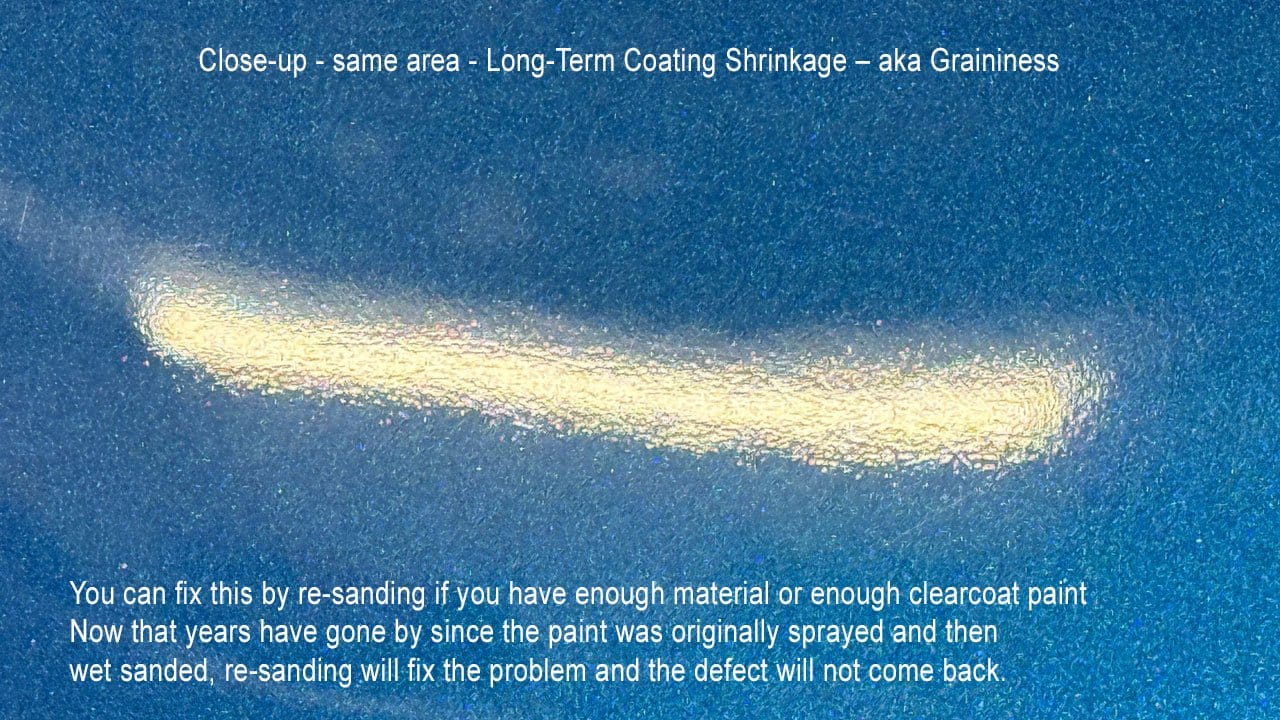
Repair Edge Mapping Caused by Coating Shrinkage & Graininess
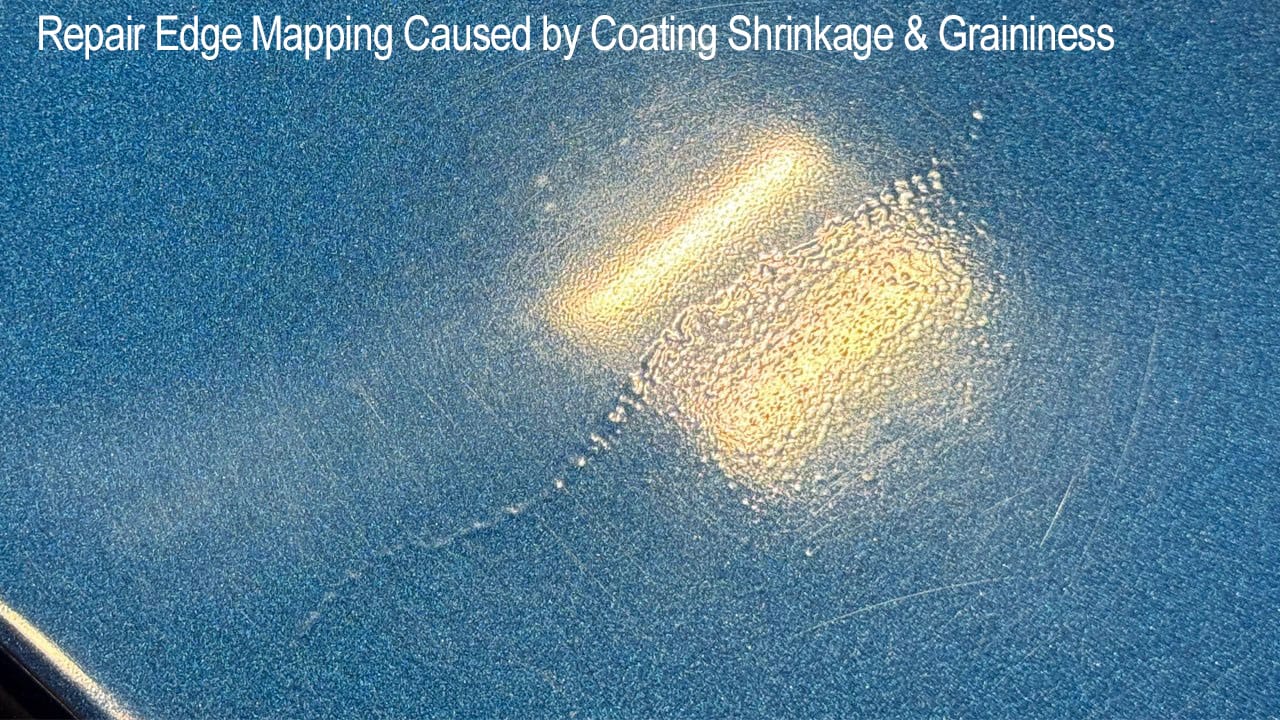
Hand Wet Sanding Scratches - Not Removed

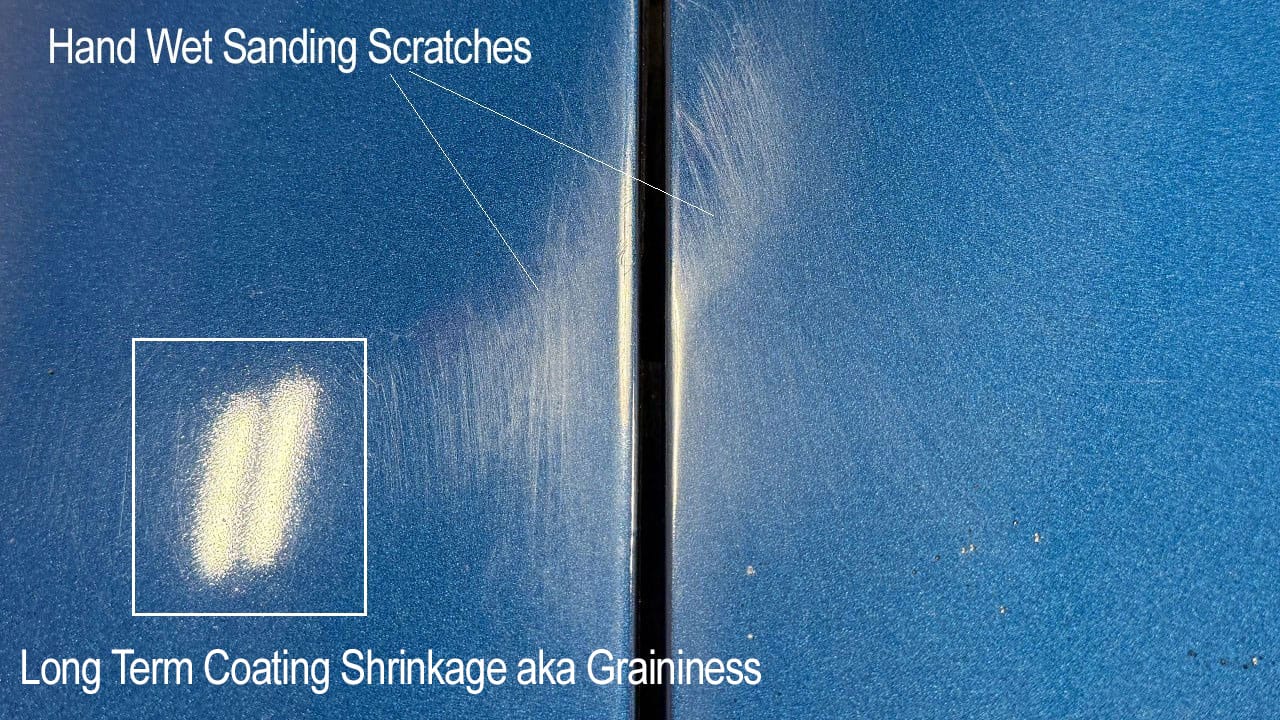
So, yeah, she looks good if you stand back about 10 to 20 feet but up close with a quality inspection light, the light tells a different story.
Detailometer Readings - BEFORE
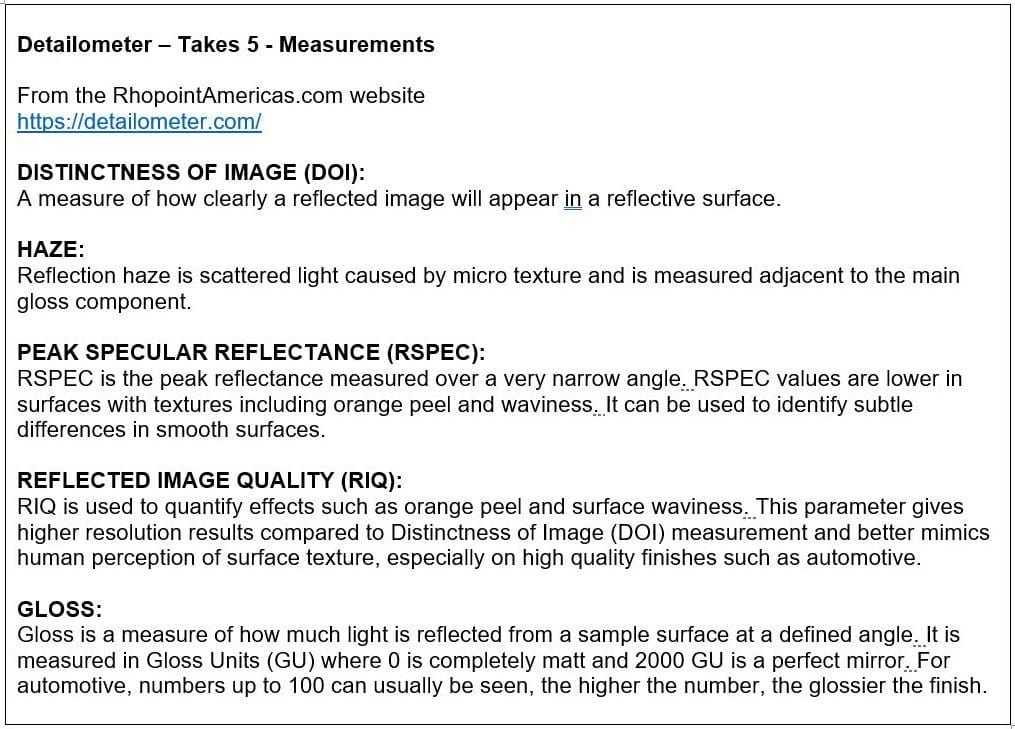
This is a very accurate surface measuring instrument that can measure and document in an objective way that doesn't replace the human eyes, but instead simply validates the human eyes.
In simple terms, you want the top number and the two numbers on the sides of the bottom row to be as close to 100 as possible and the Haze reading, in the middle of the bottom row to be as close to zero as possible.
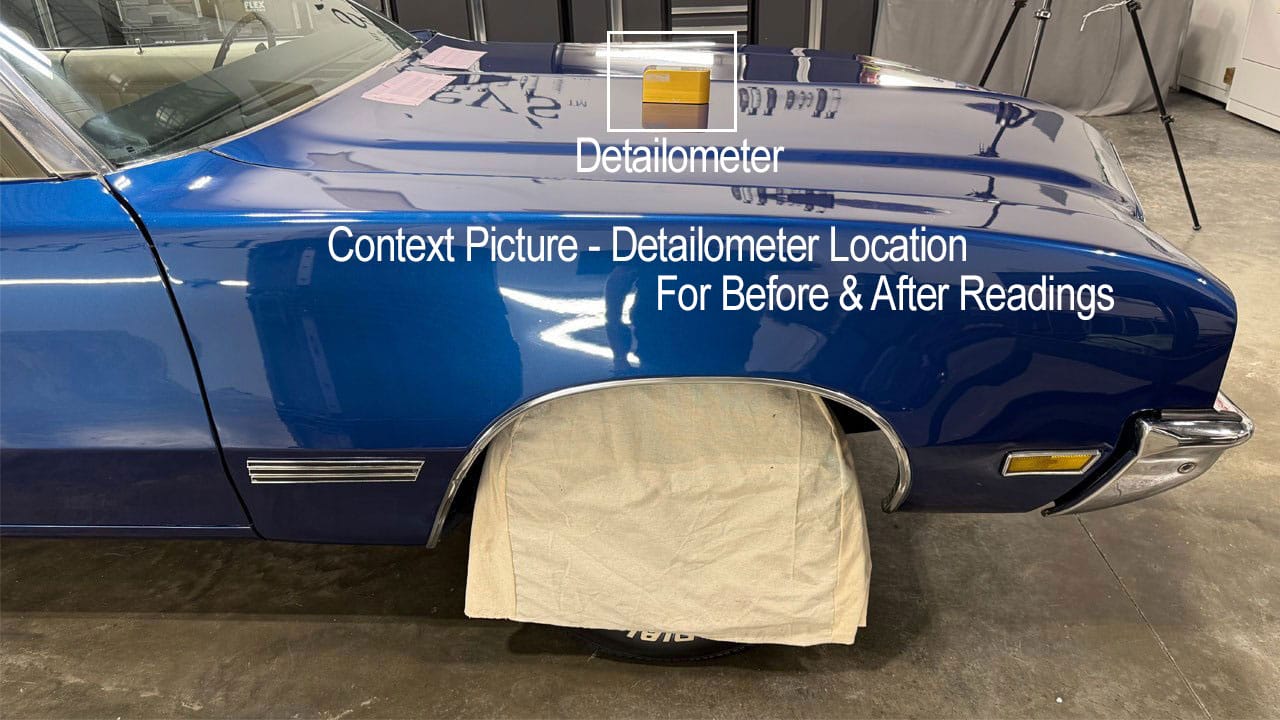
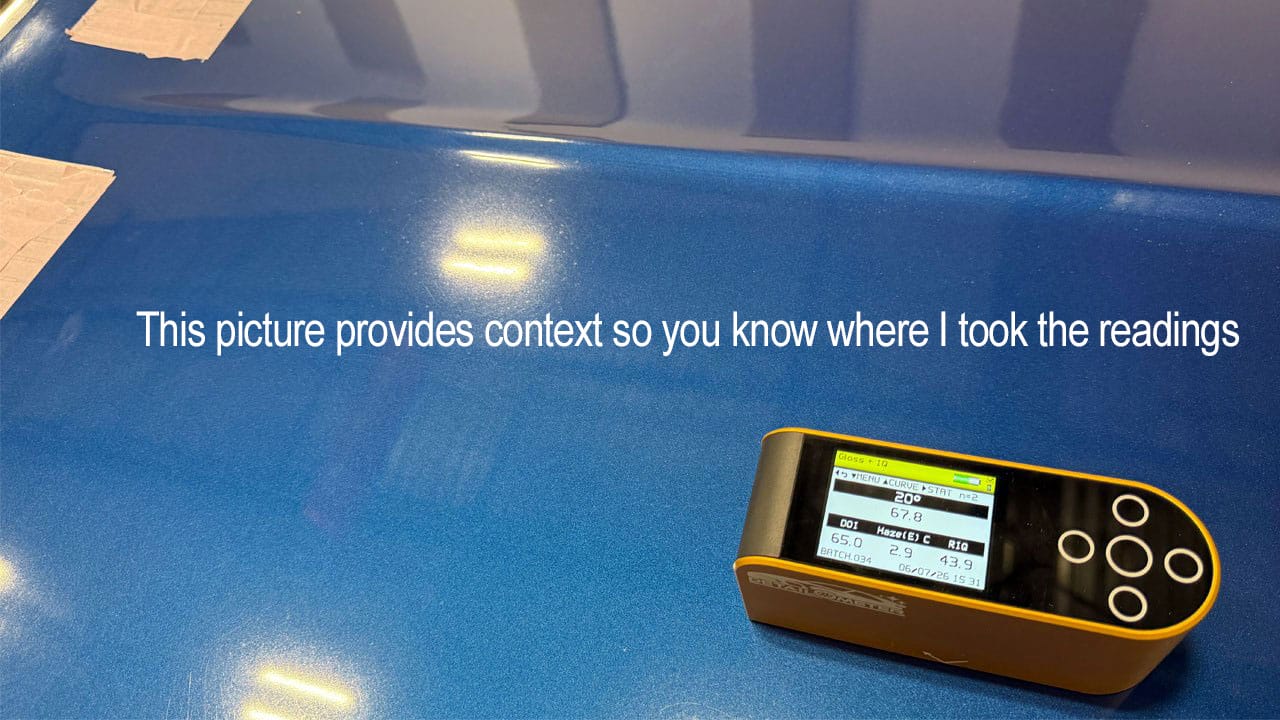
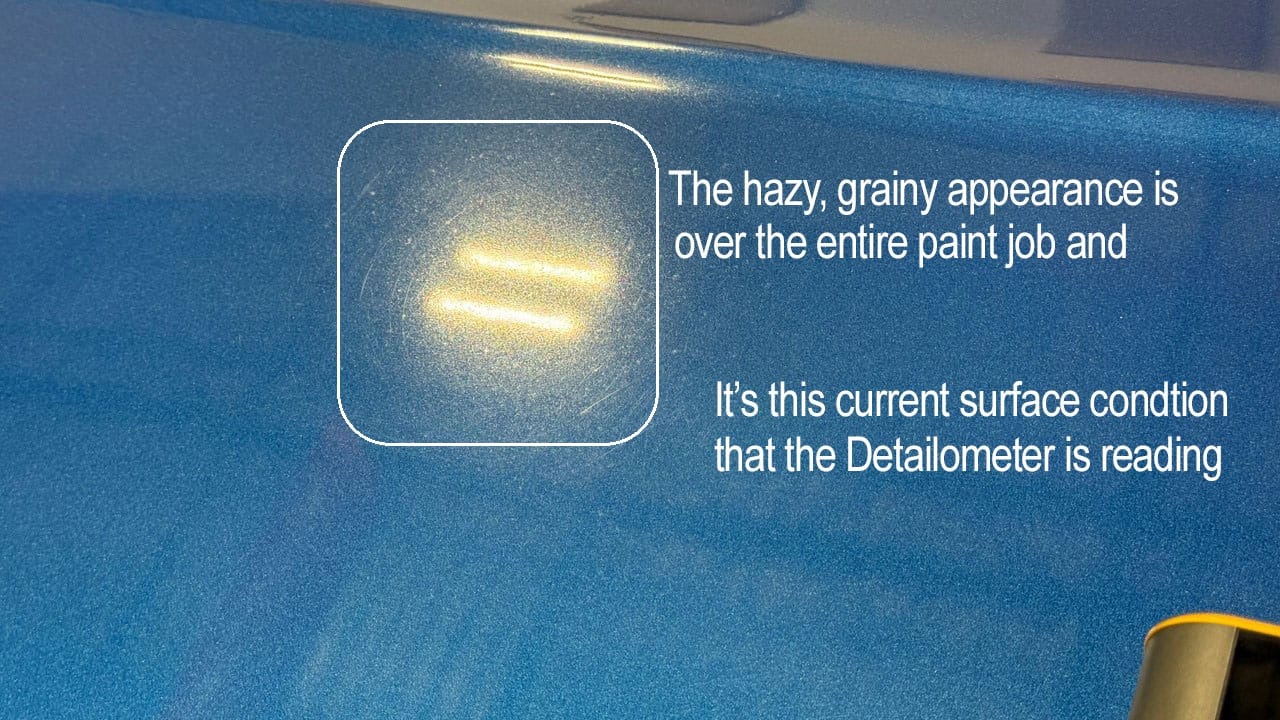
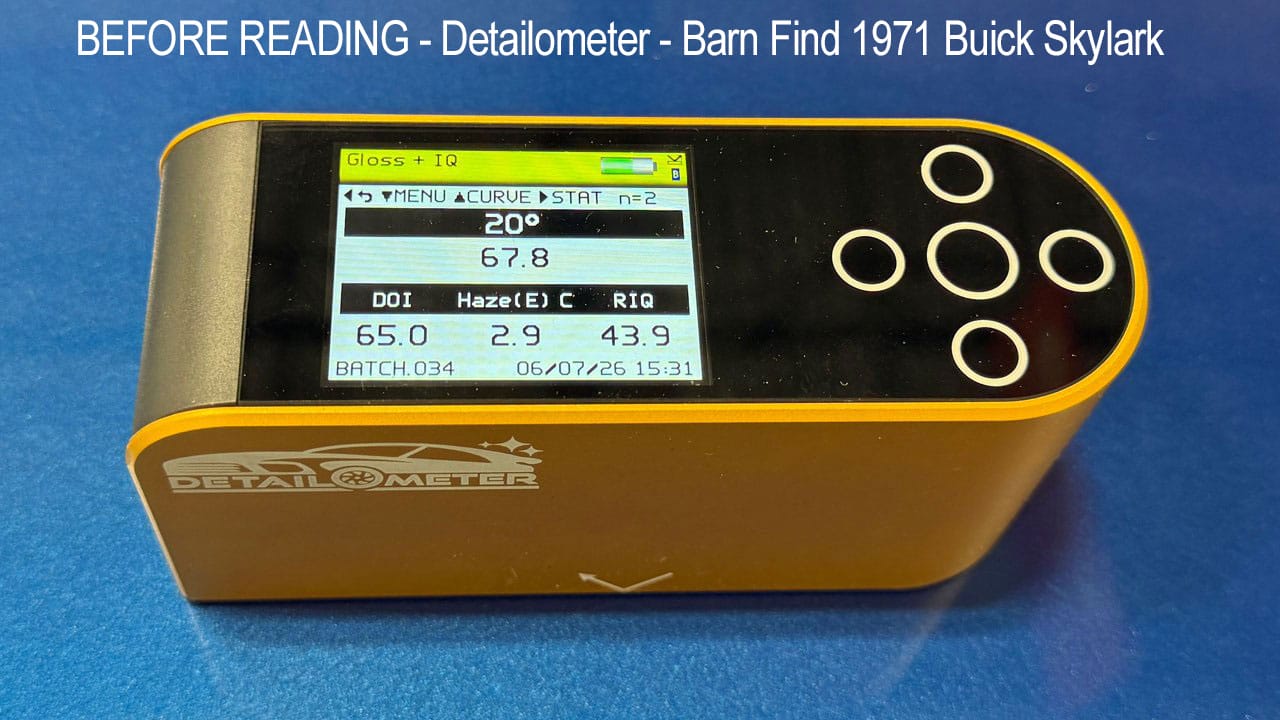
Gloss = 67.8 - Gloss is a measure of how much light is reflected from a sample surface at a defined angle.
D.O.I. = 65.0 - D.O.I. means Distinction of Image - a Mirror is 100% D.O.I.
Haze = 2.9 - Haze is scattered light caused by micro texture
RIQ – 43.9 - Reflective Image Quality - A measurement of surface defects like, orange peel & graininess
Machine Dry Sanding
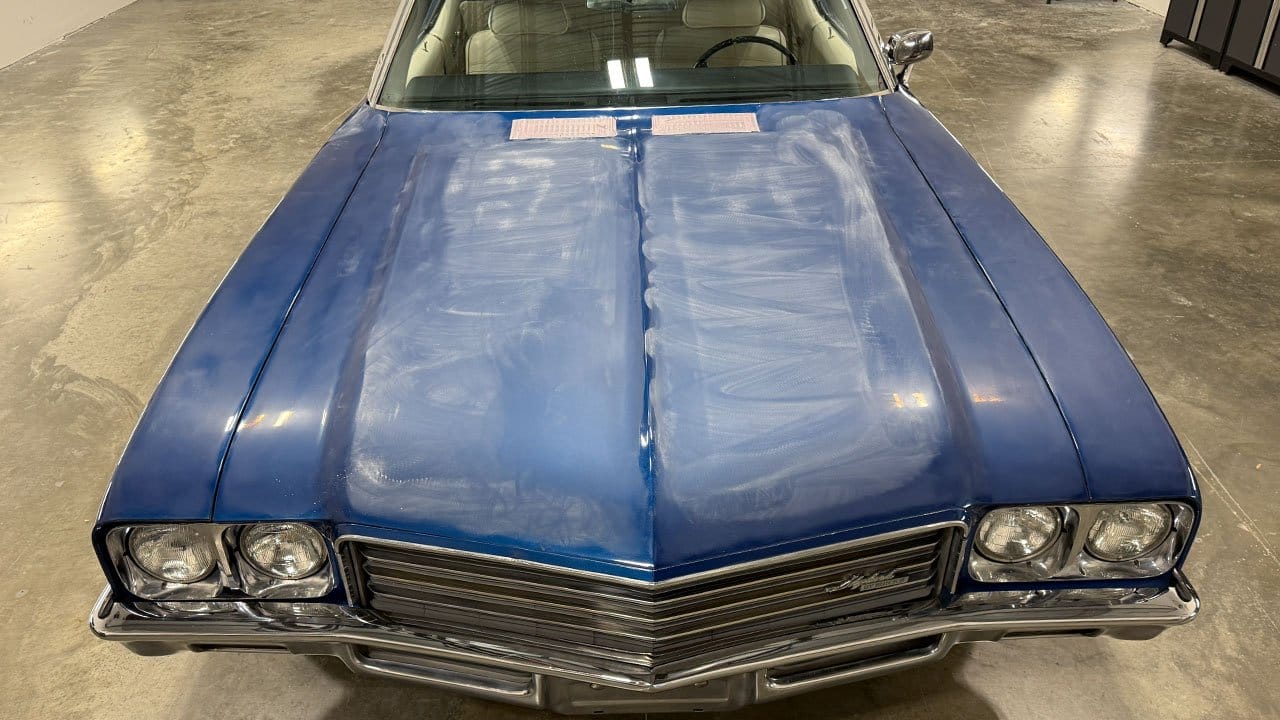
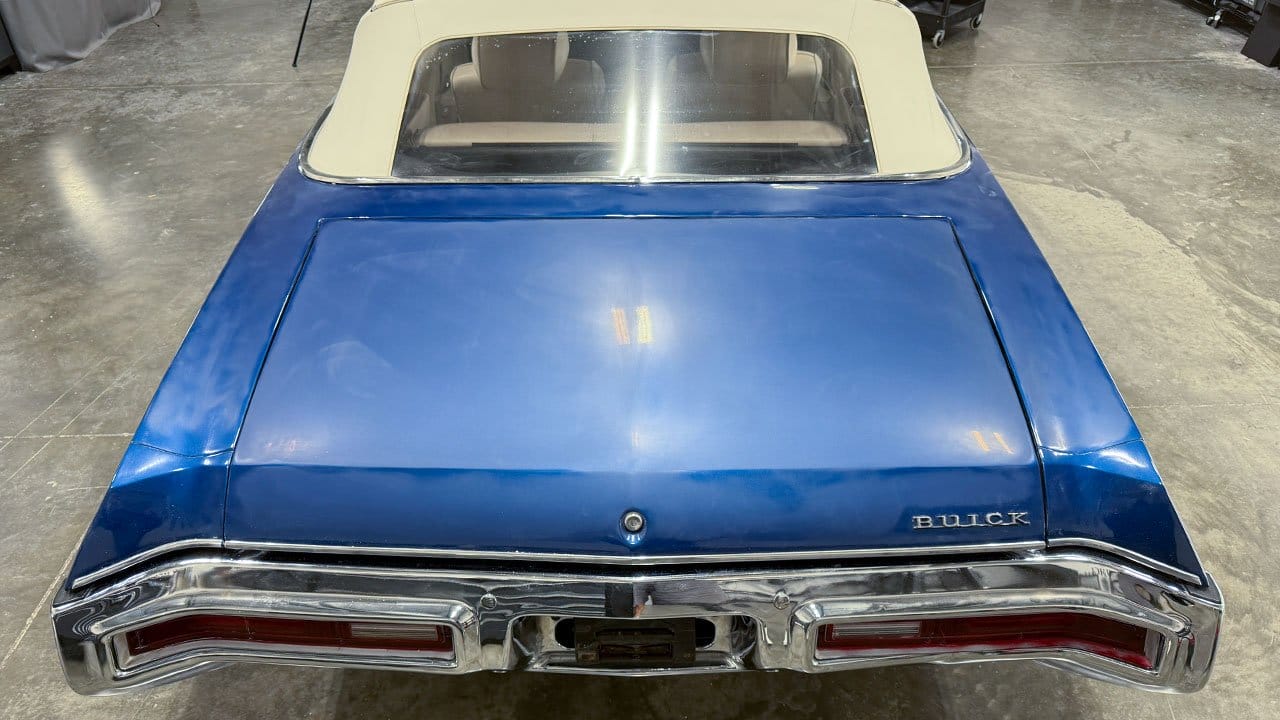
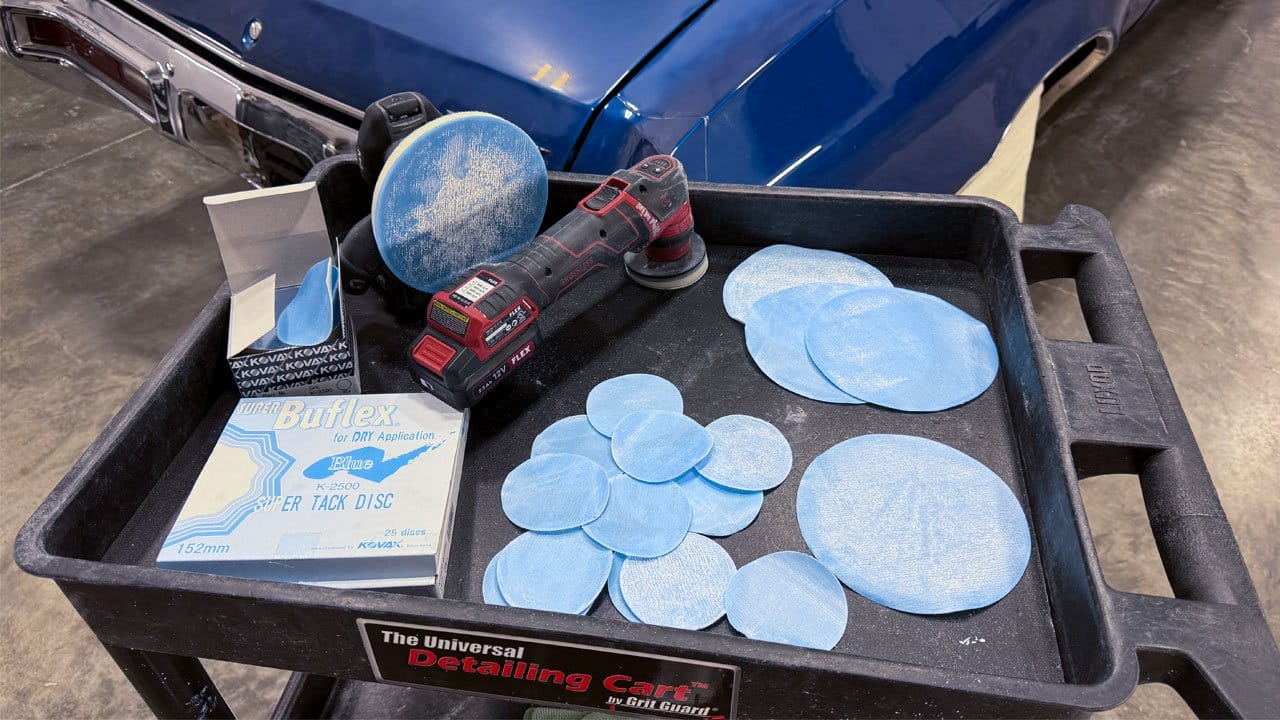
In order to improve the major gloss panels, the hood and trunk lid, I did some light machine dry sanding, which will flatten the surface which will dramatically make the gloss, shine and reflections look better. For this I used the Eagle Abrasives by KOVAX Buflex #2500 Sanding Discs. After sanding, I removed the sanding scratches using a rotary polisher with a wool pad and the NSP CoreCut. And then after removng the sanding marks, I used the DB8 to remove the holograms left by the wool pad on the rotary polisher using the DB8.
2-Step Paint Correction Process
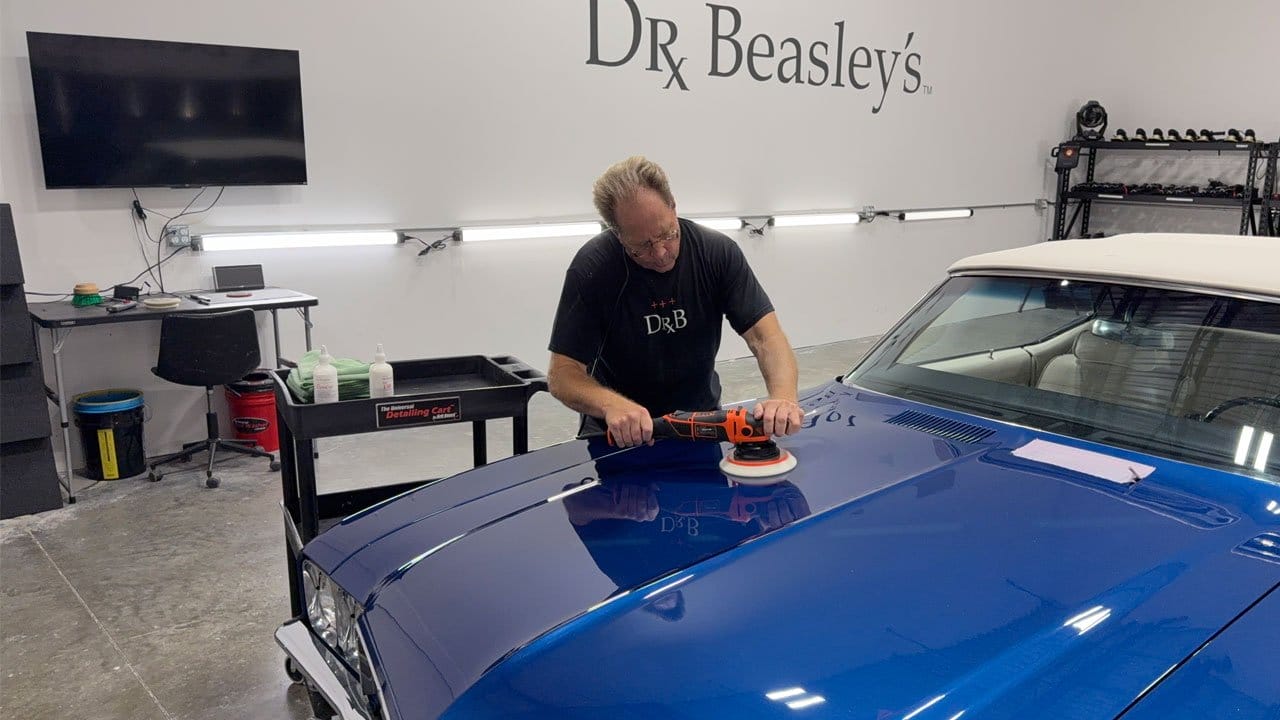
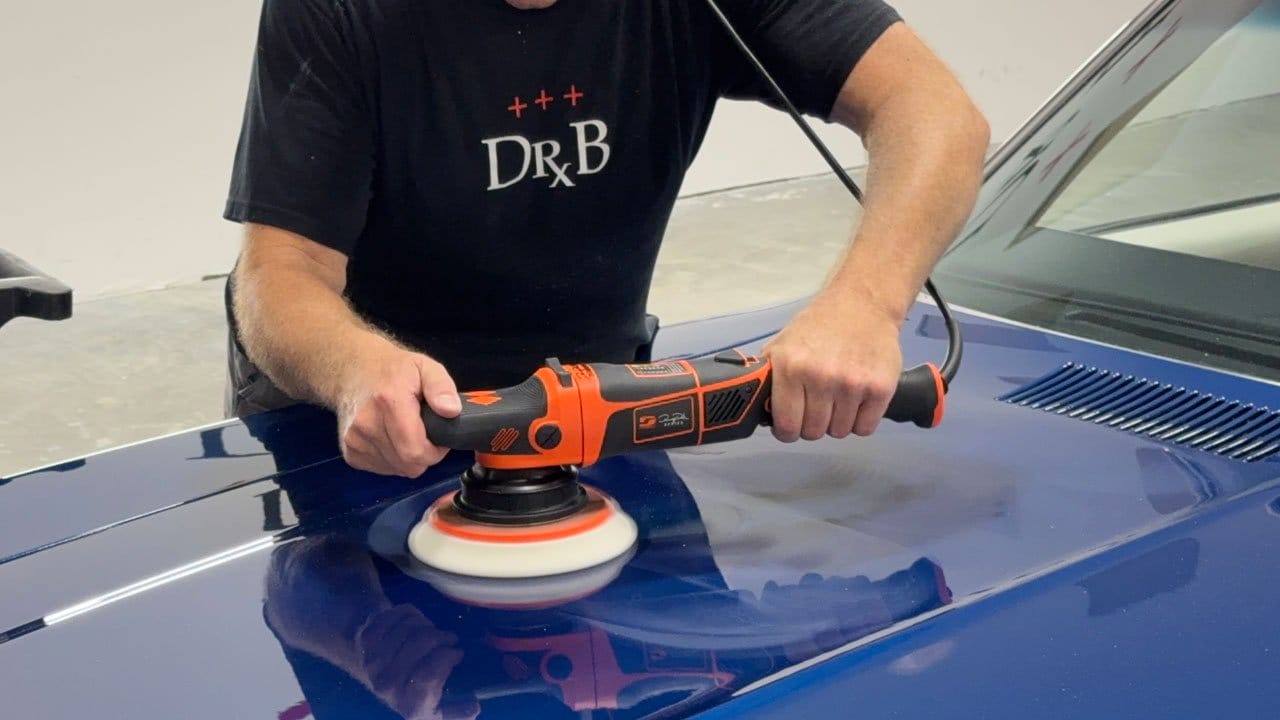
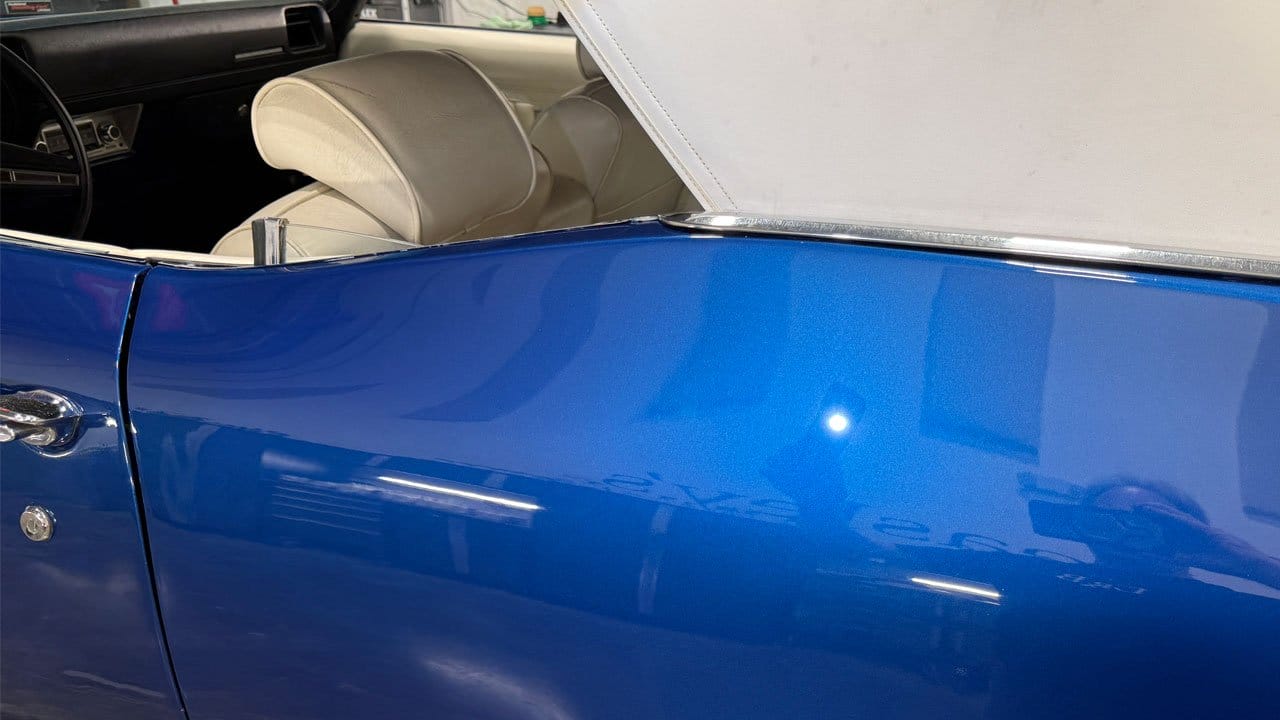
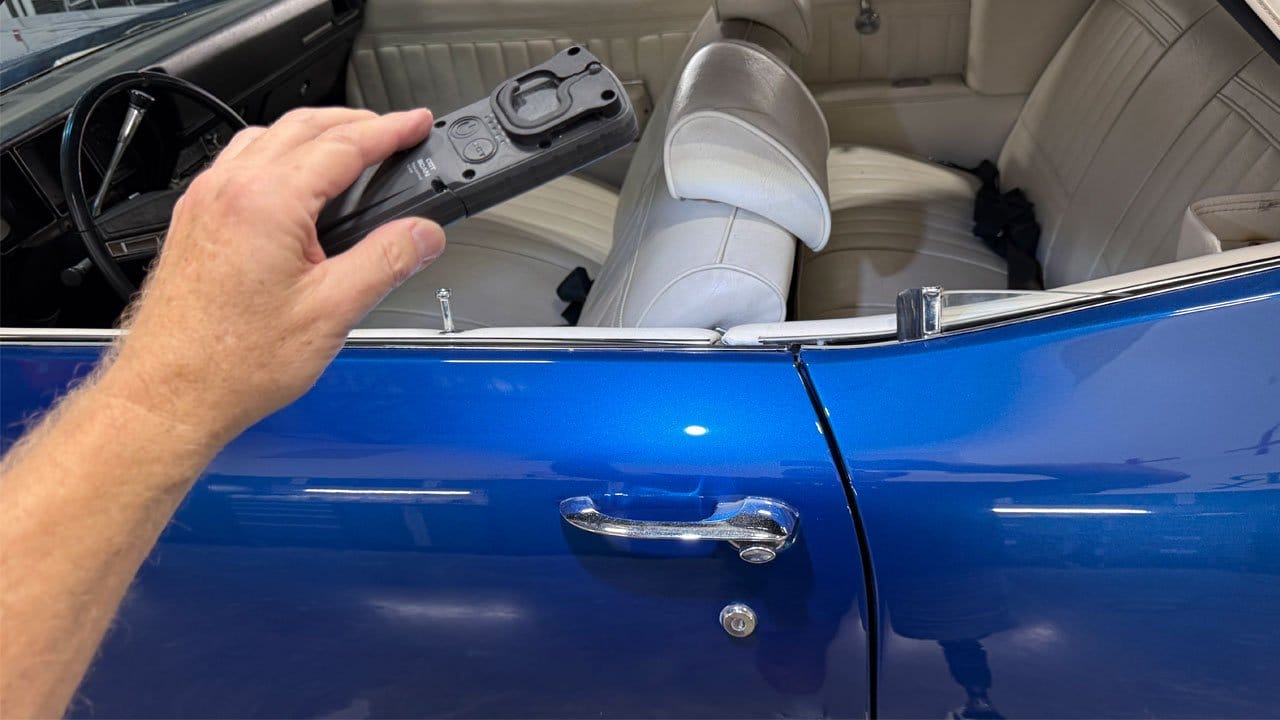
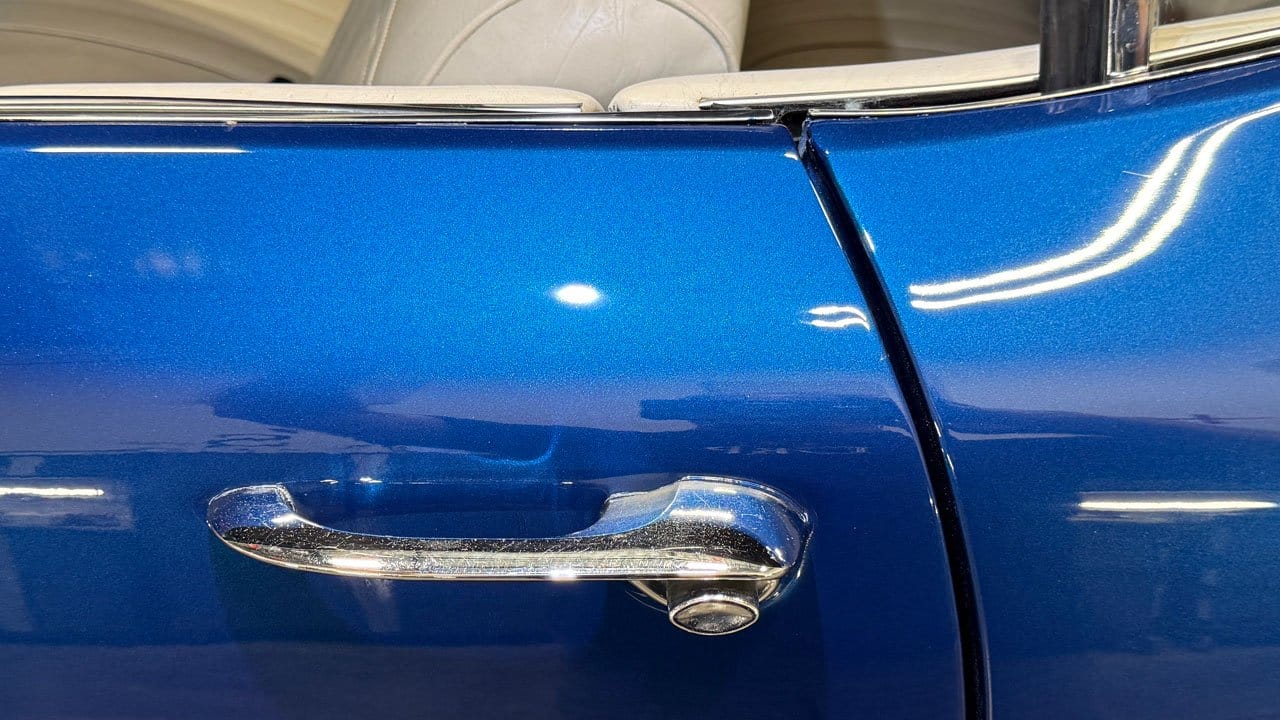
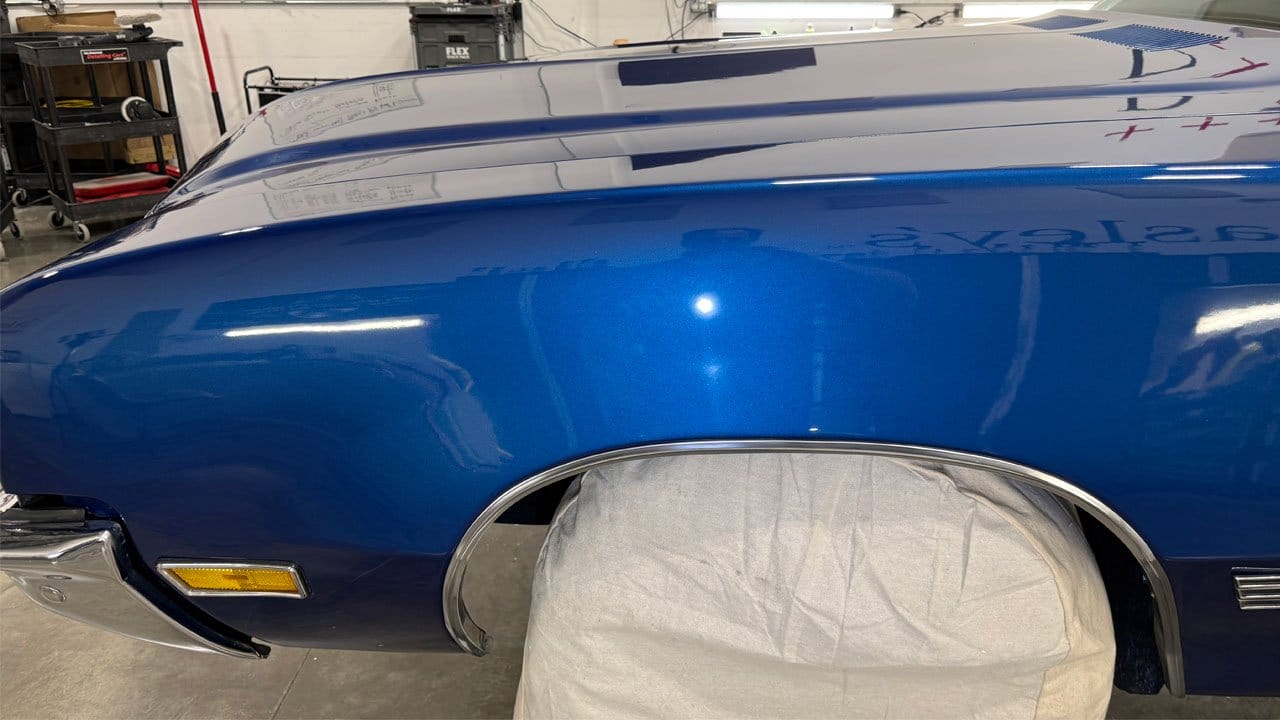
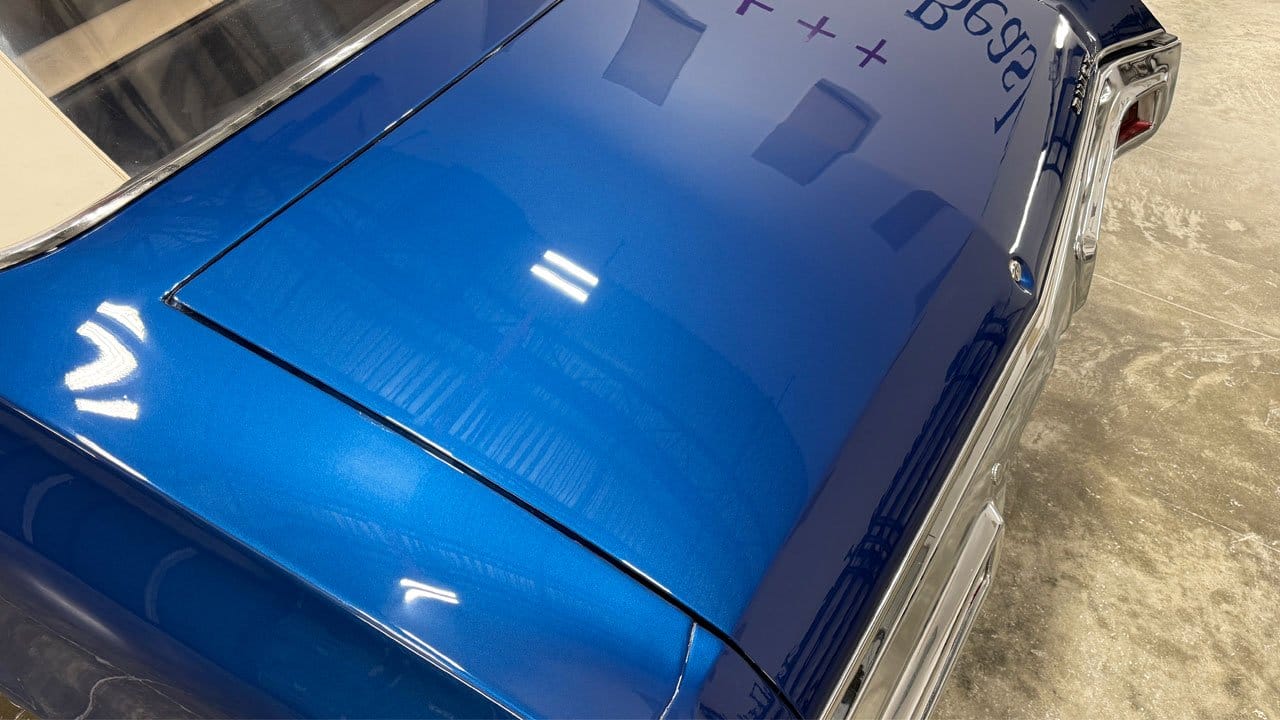
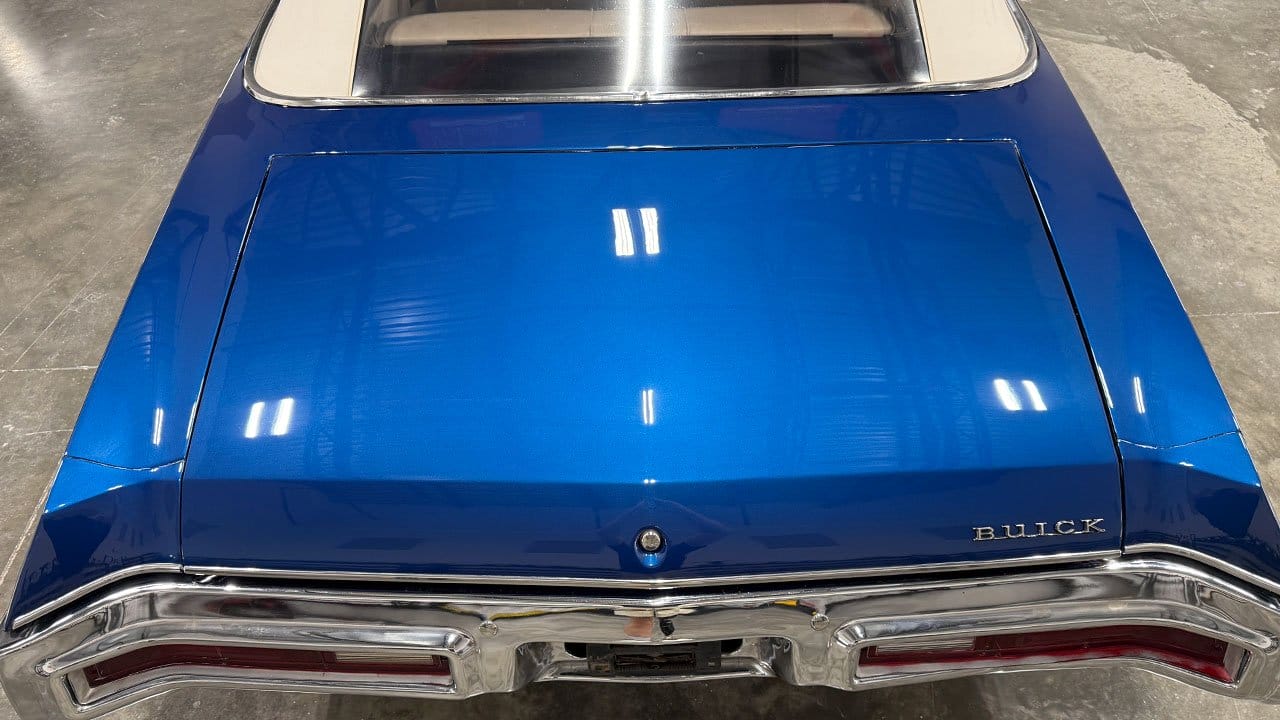
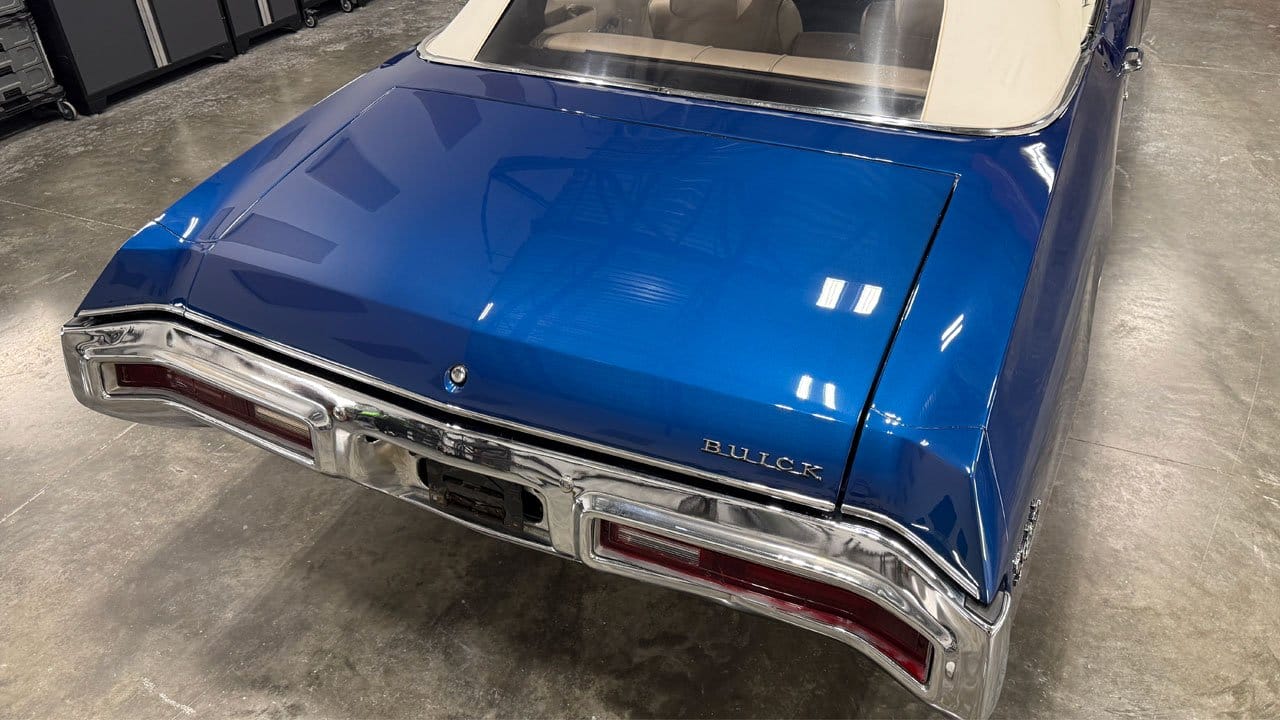
To undo years of neglect and damage, I did a 2-step paint correction process using the DB8 with a Buff and Shine Maroon Foam Cutting Pad with Dr. Beasley's NSP CoreCut and a Buff and Shine White Foam Polishing/Finishing Pad with Dr. Beasley's NSP 150. Afterwards I sealed the paint using Dr. Beasley's Nano-Resin 2.0 Ceramic Coating.
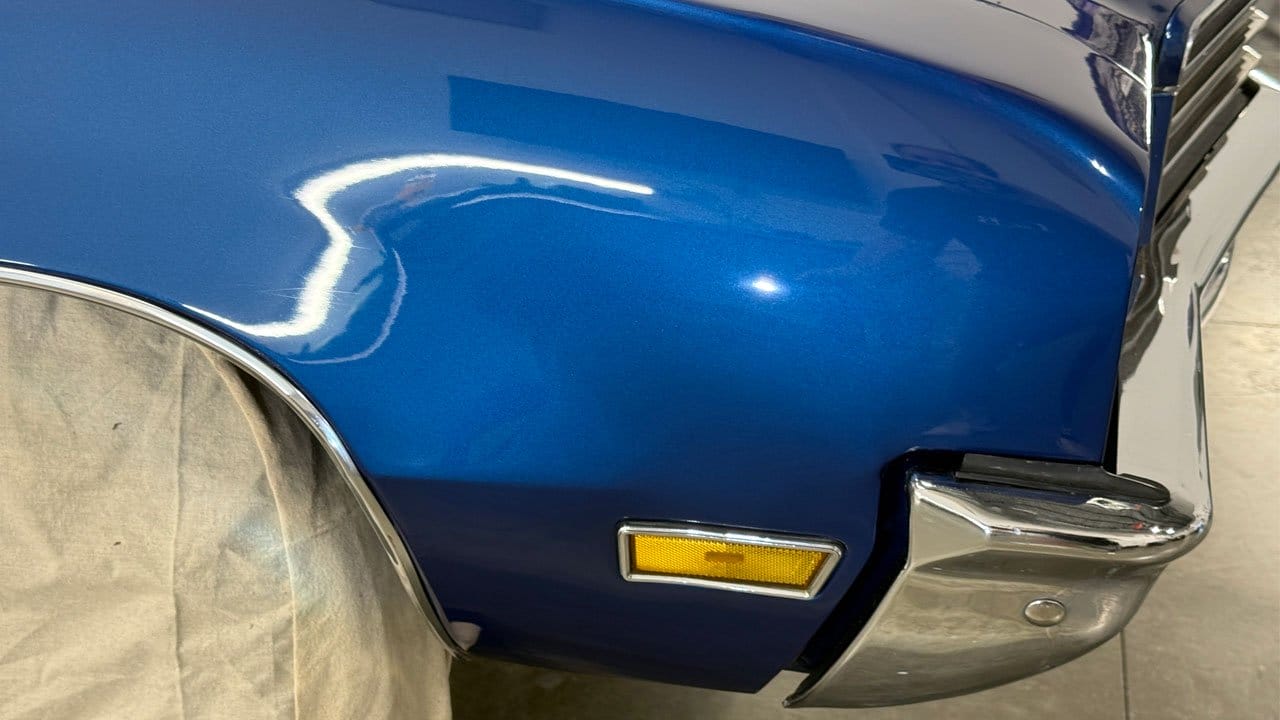
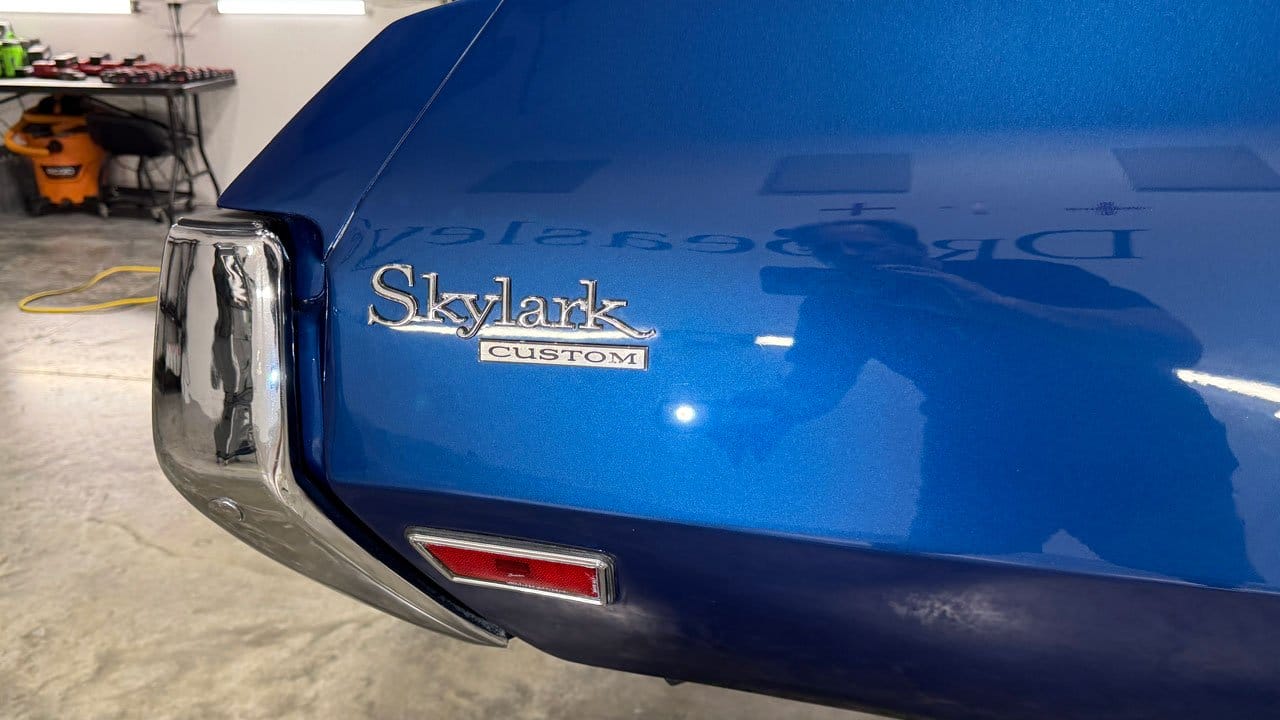
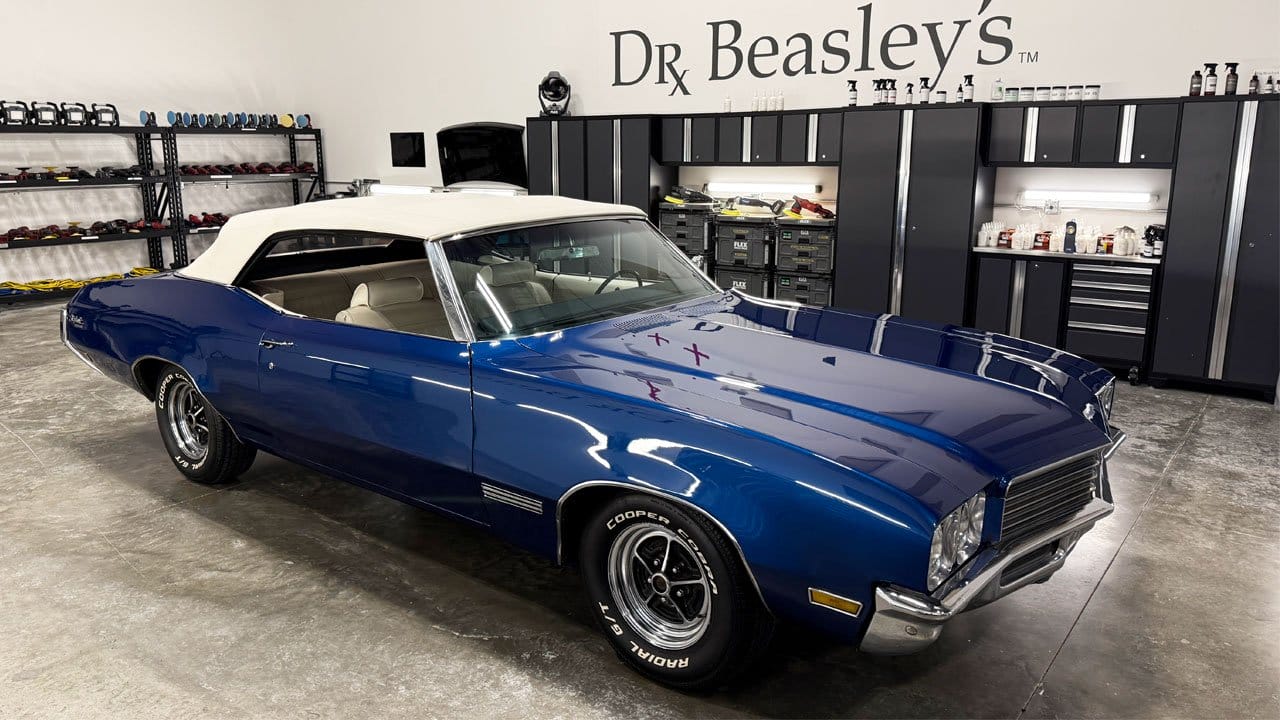
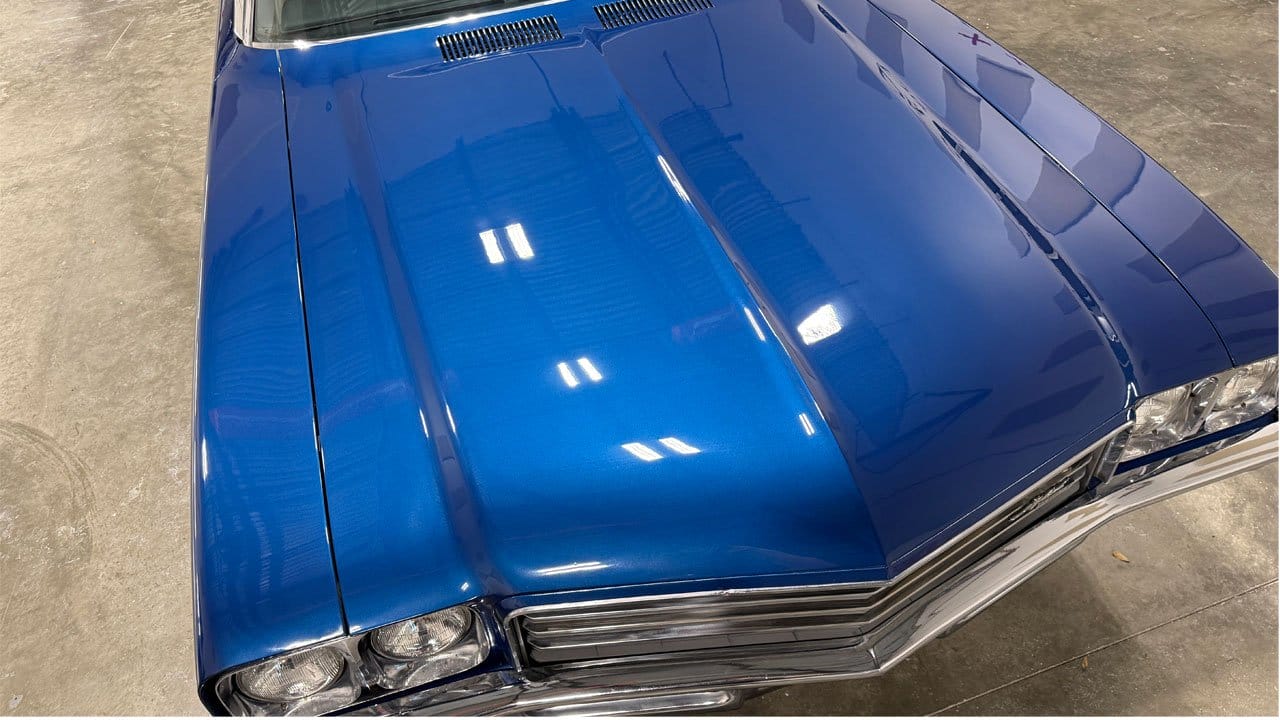
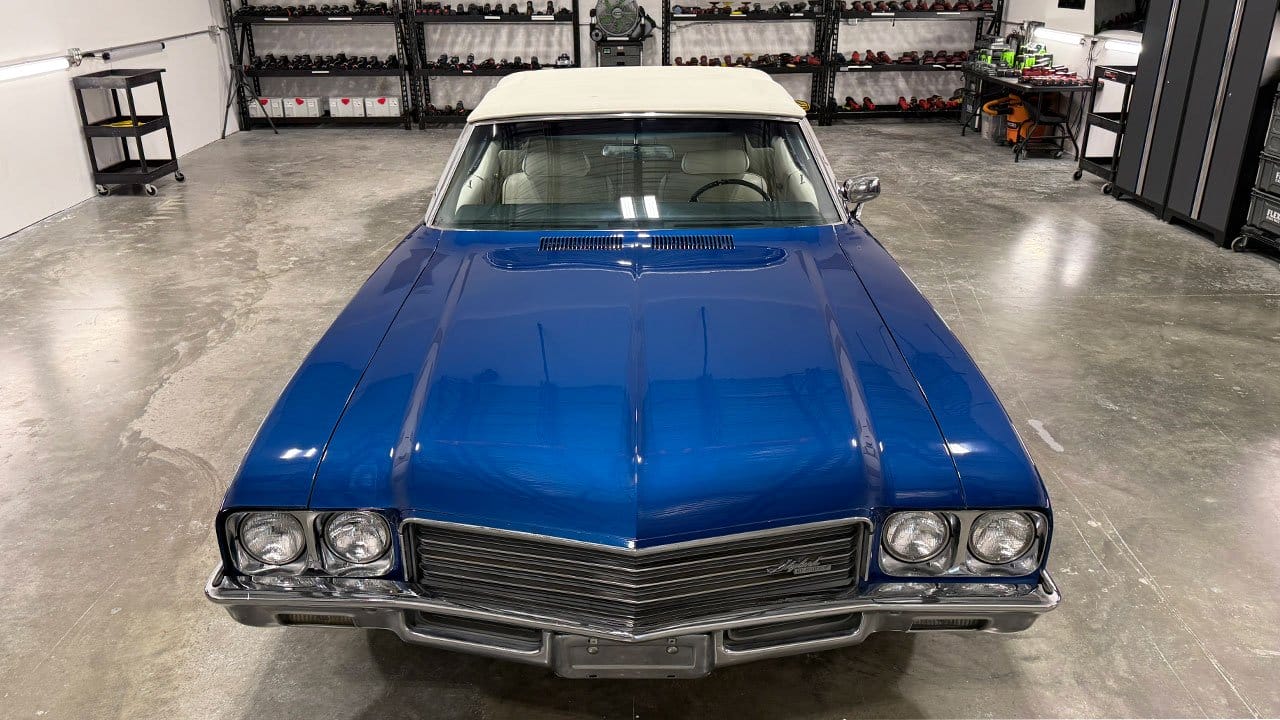
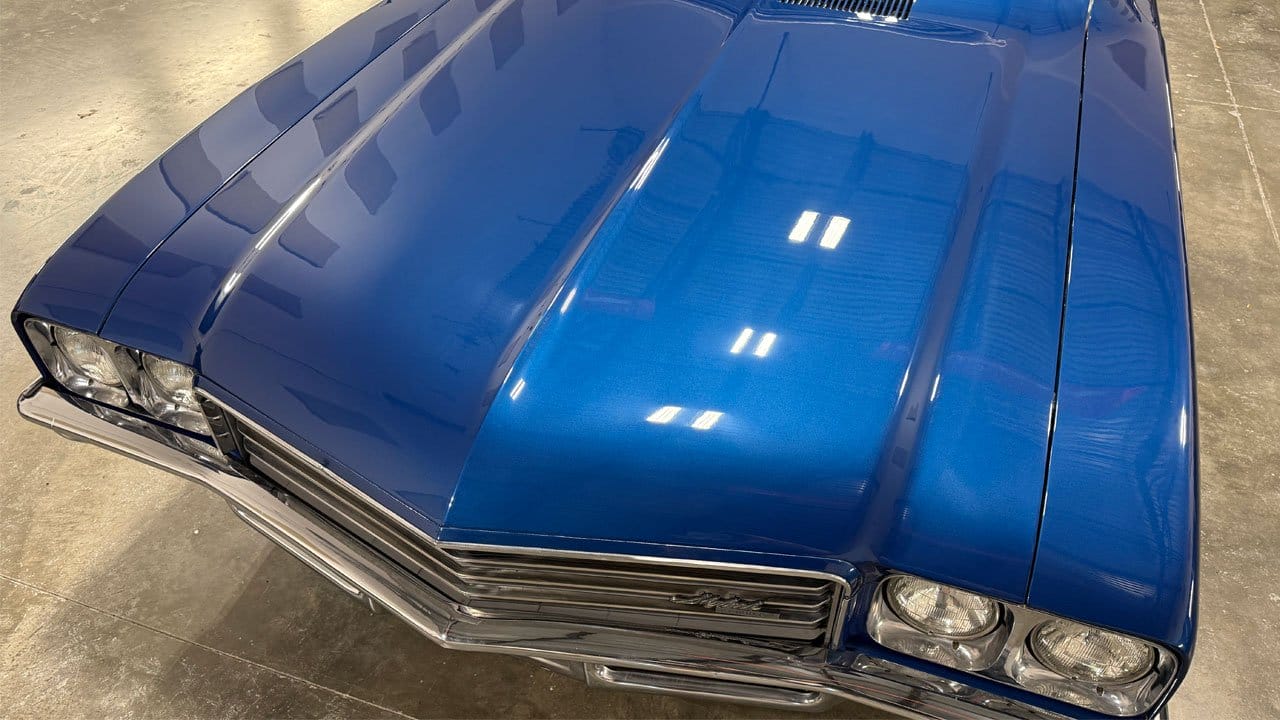
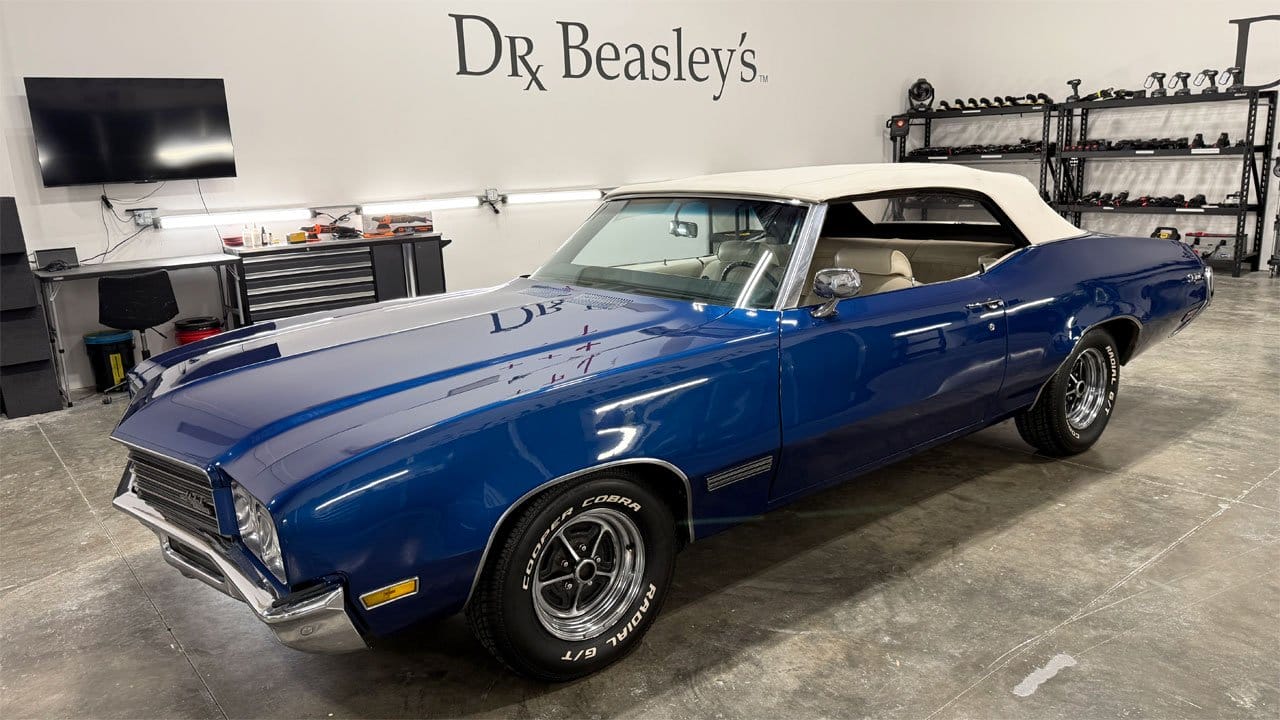
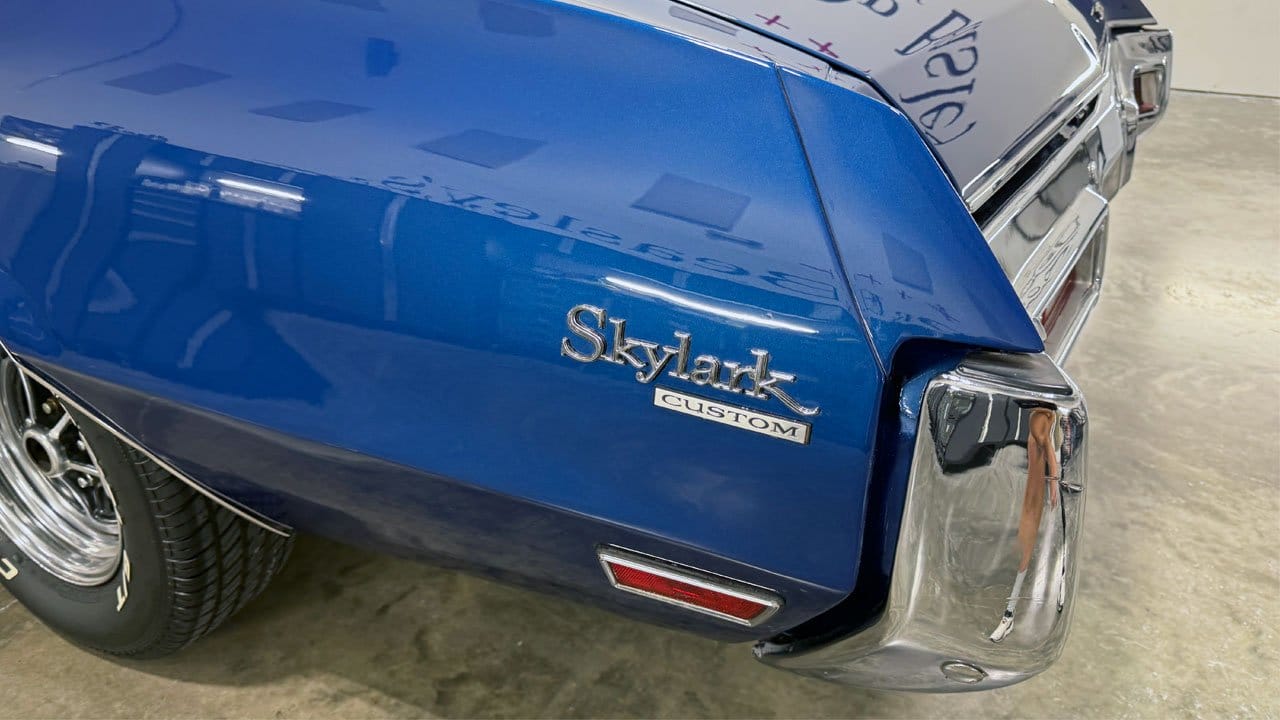
Paint Correction and Ceramic Coating Results
Detailometer Readings - AFTER
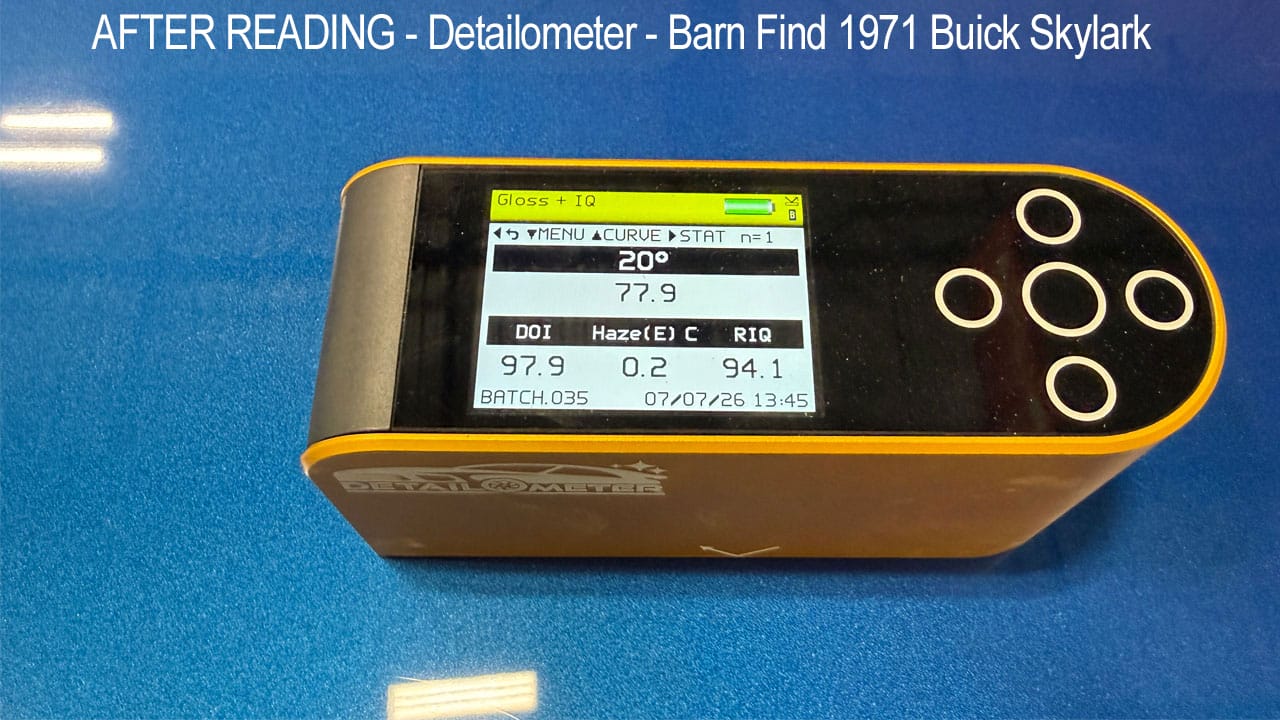
As the readings from the Detailometer shows, there's a dramatic improvement in the 5 different measurements. In simple terms, you want the top number and the two numbers on the sides of the bottom row to be as close to 100 as possible and the Haze reading, in the middle of the bottom row to be as close to zero as possible.
Gloss = 77.9 - Gloss is a measure of how much light is reflected from a sample surface at a defined angle.
D.O.I. = 97.9 - D.O.I. means Distinction of Image - a Mirror is 100% D.O.I.
Haze = 0.2 - Haze is scattered light caused by micro texture
RIQ – 94.1 - Reflective Image Quality - A measurement of surface defects like, orange peel & graininess
Final Results
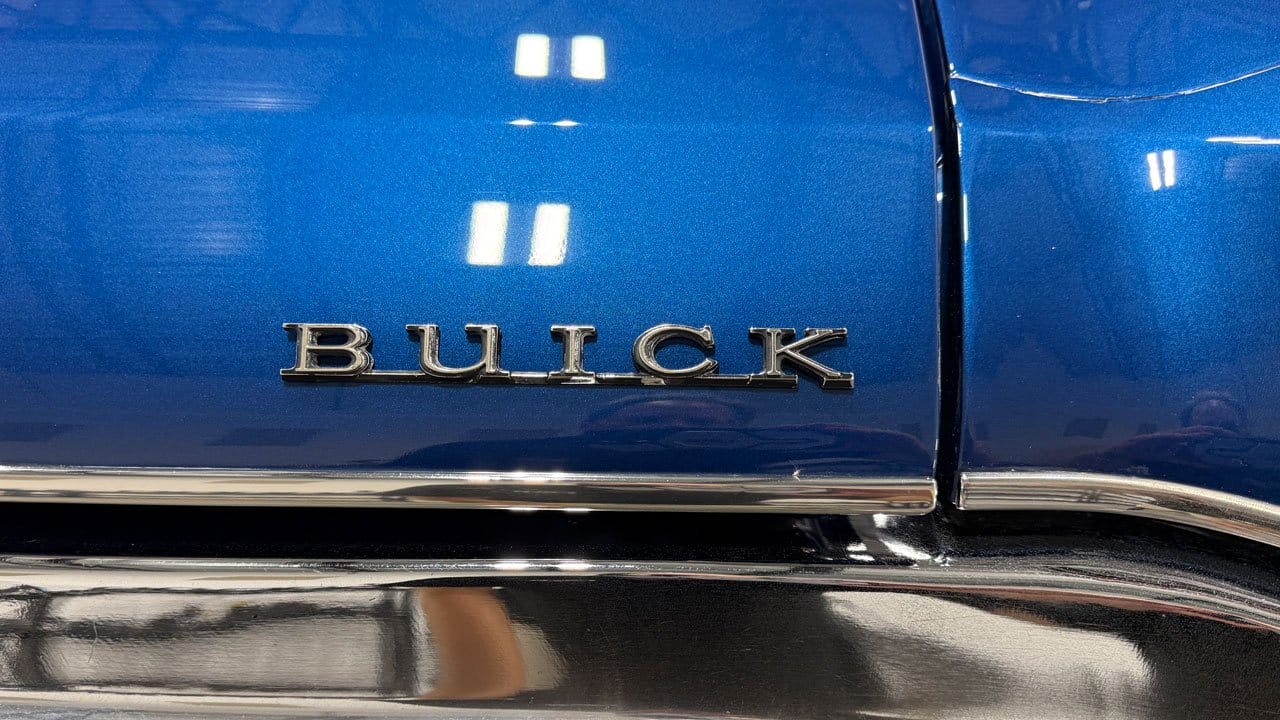
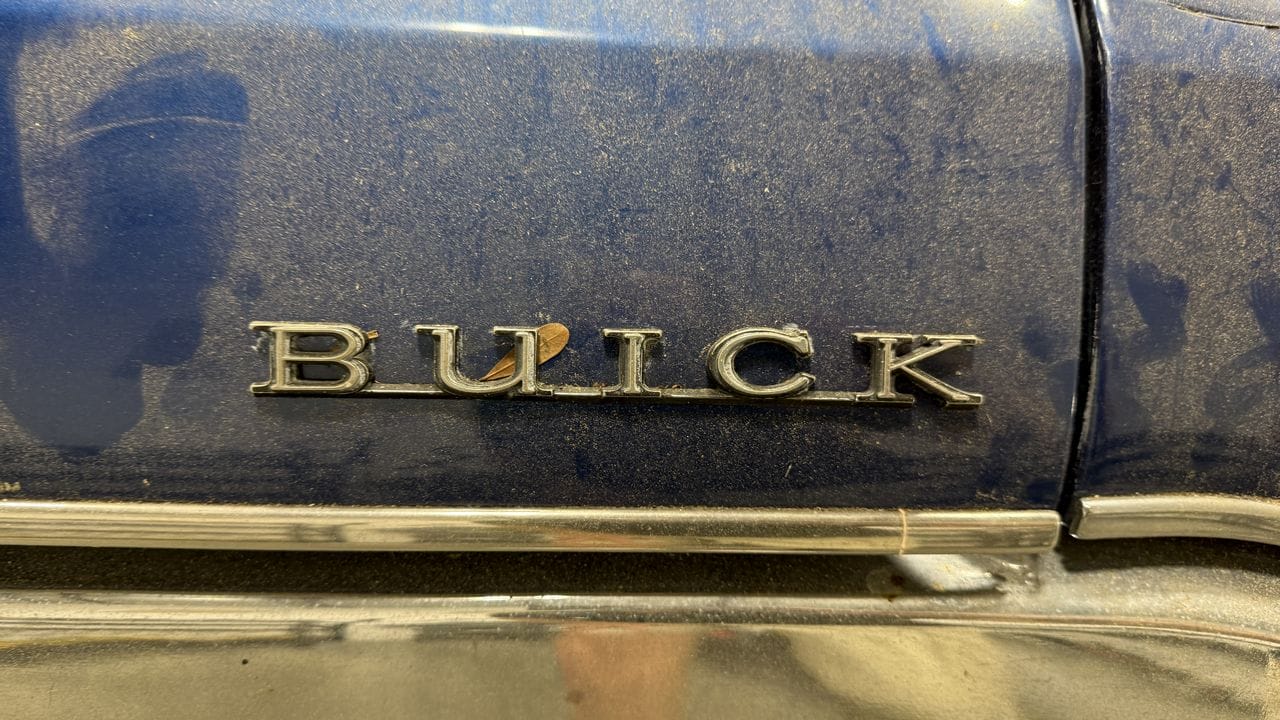
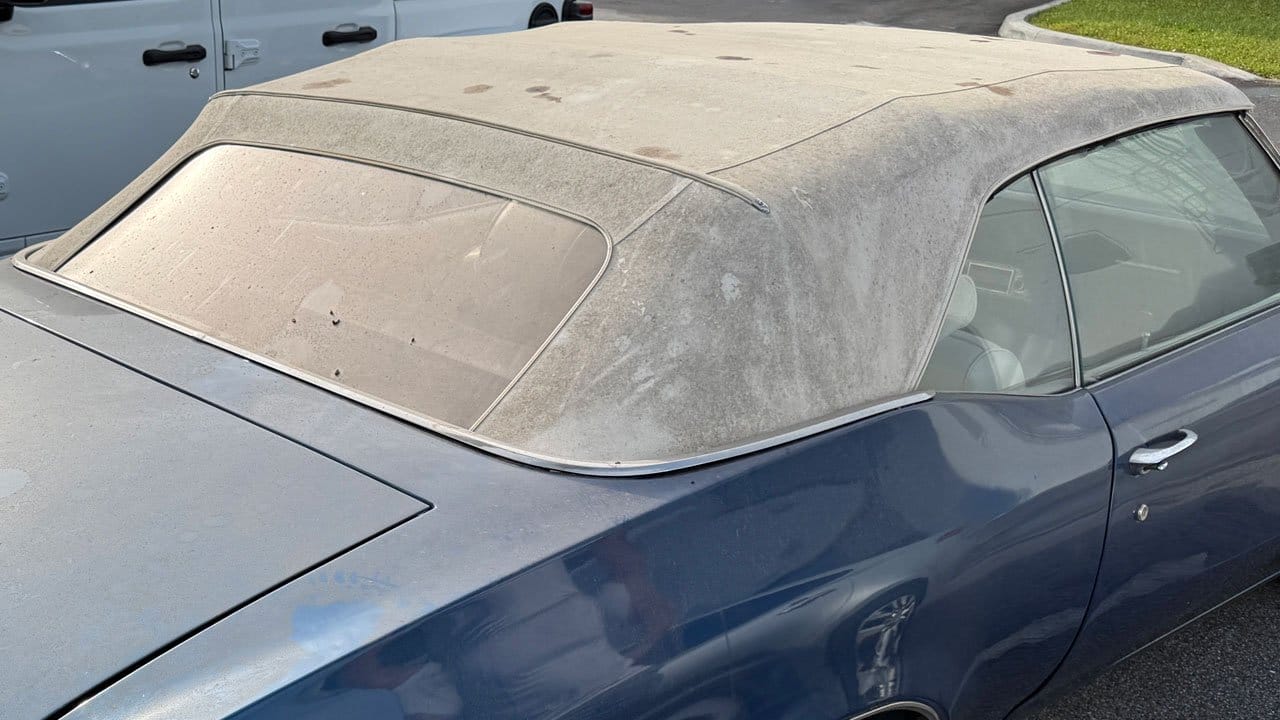
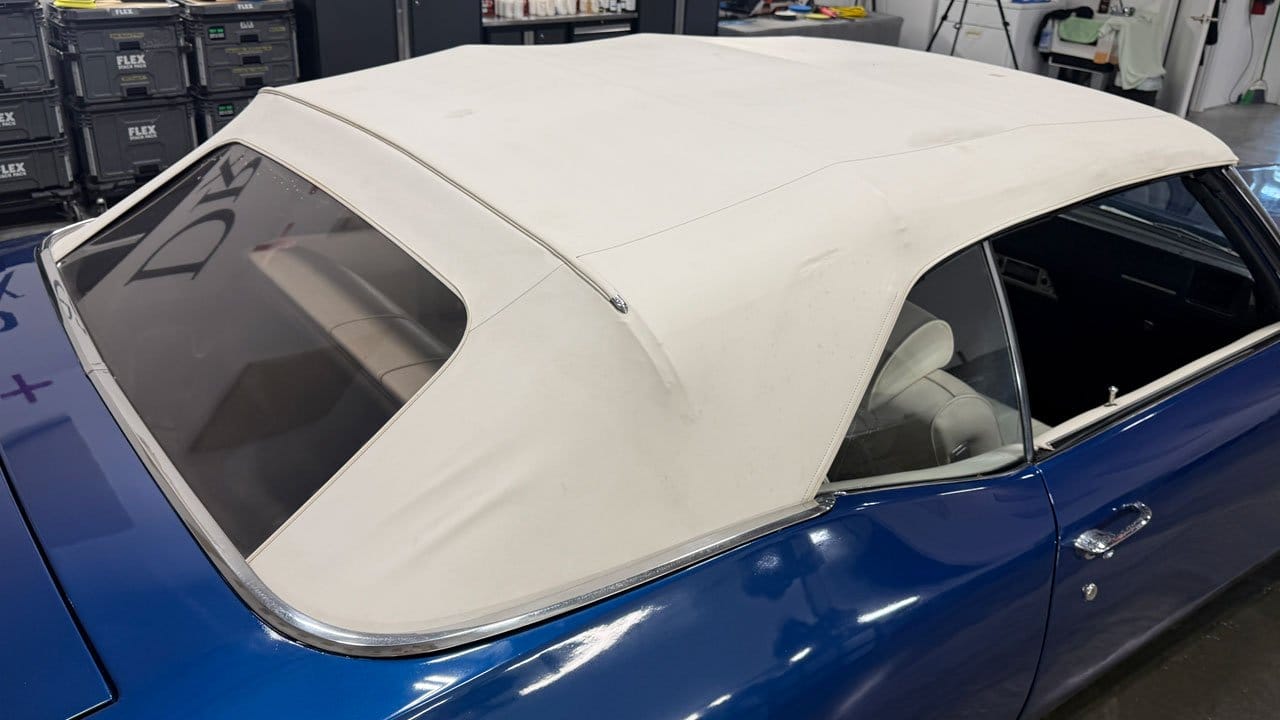
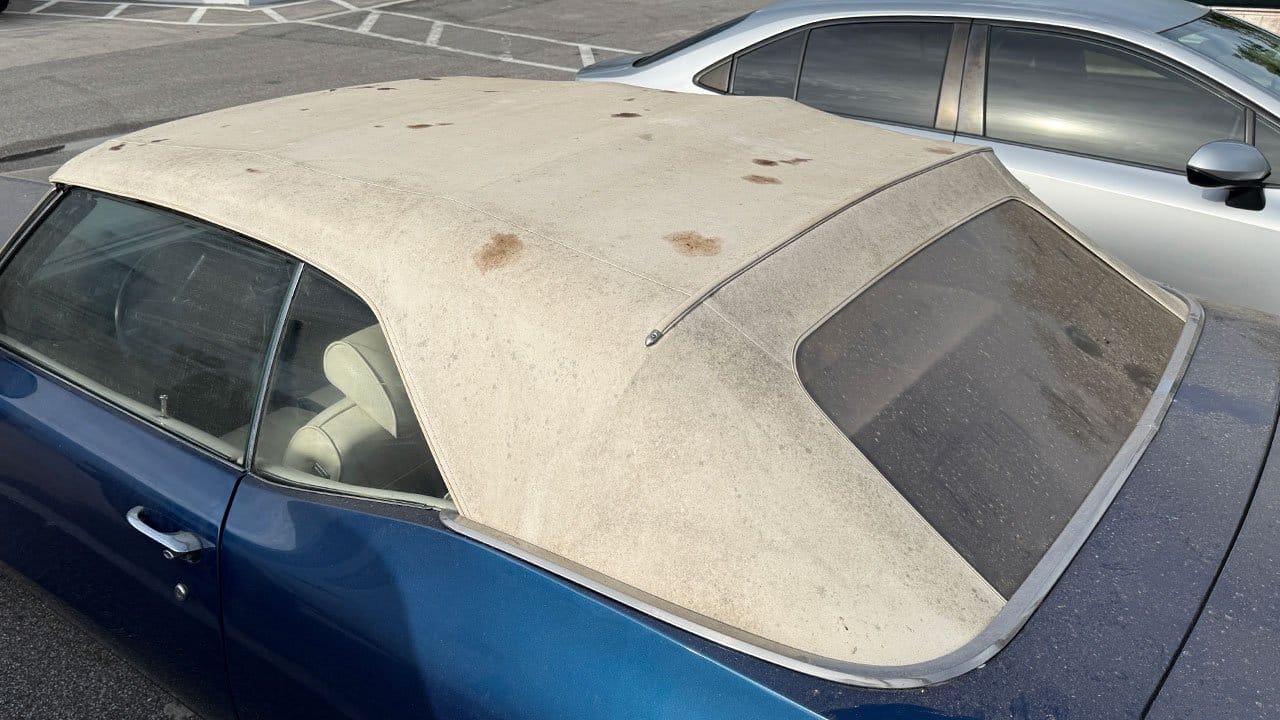
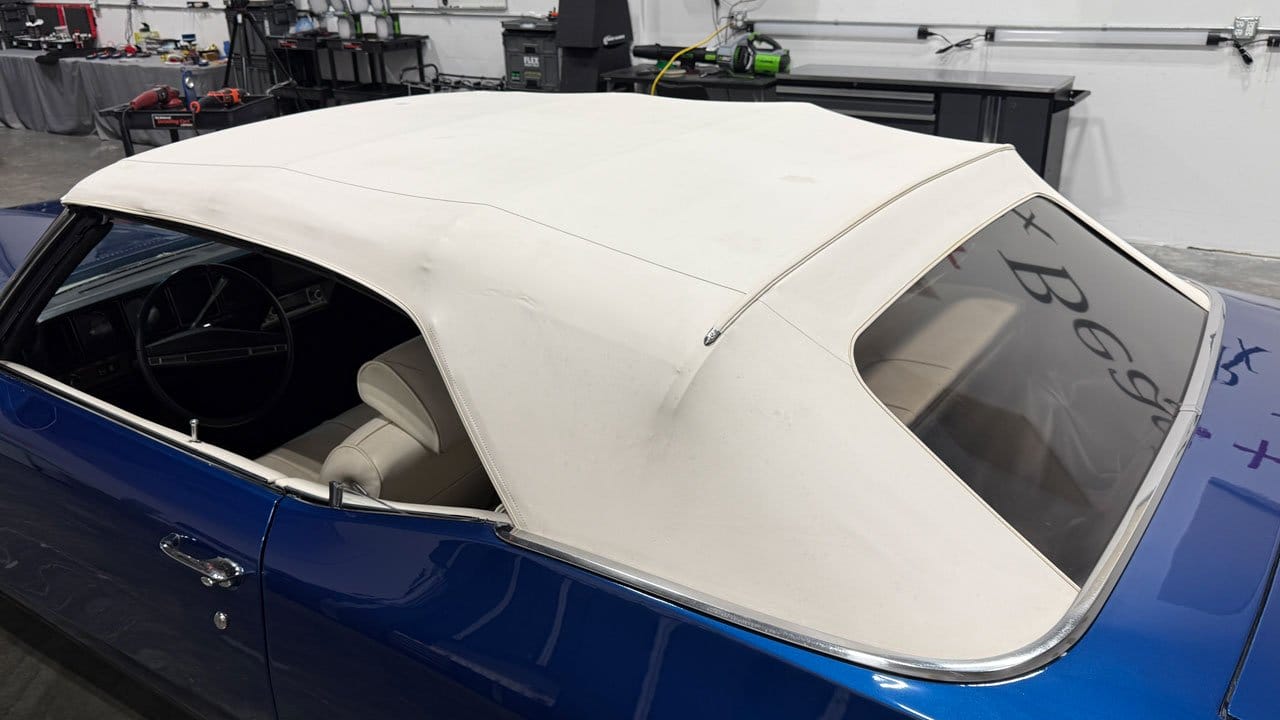
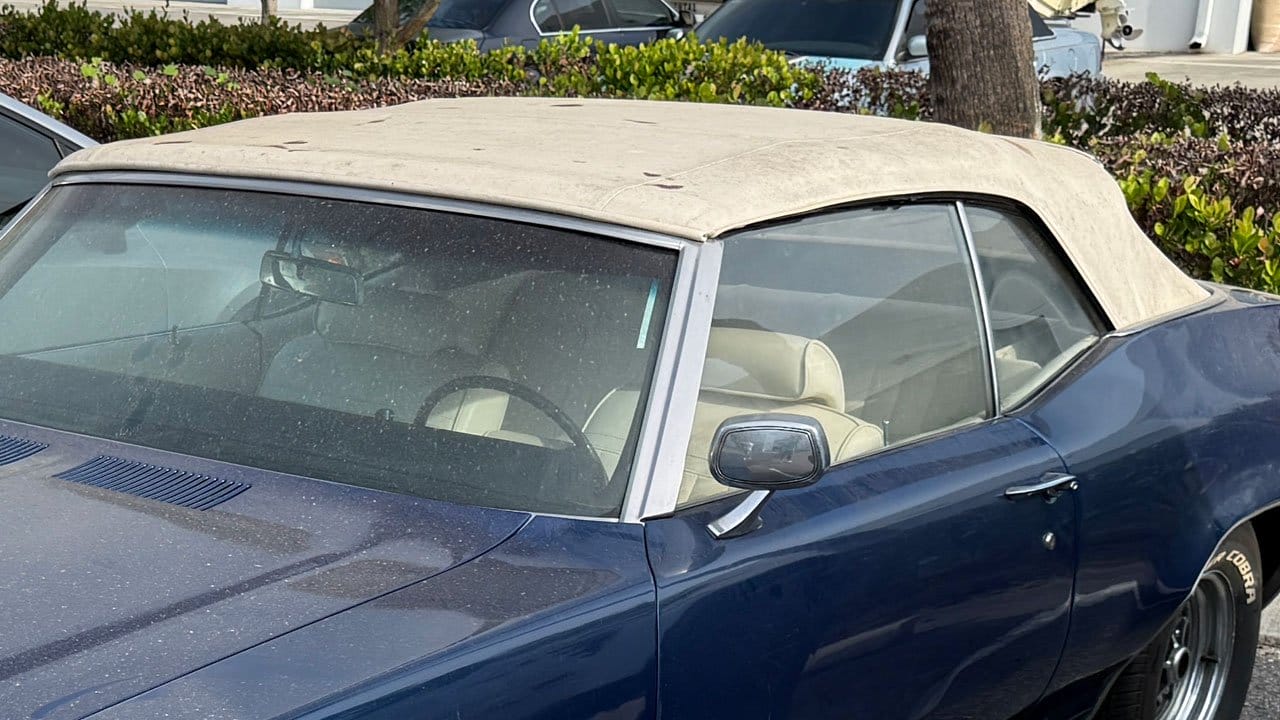
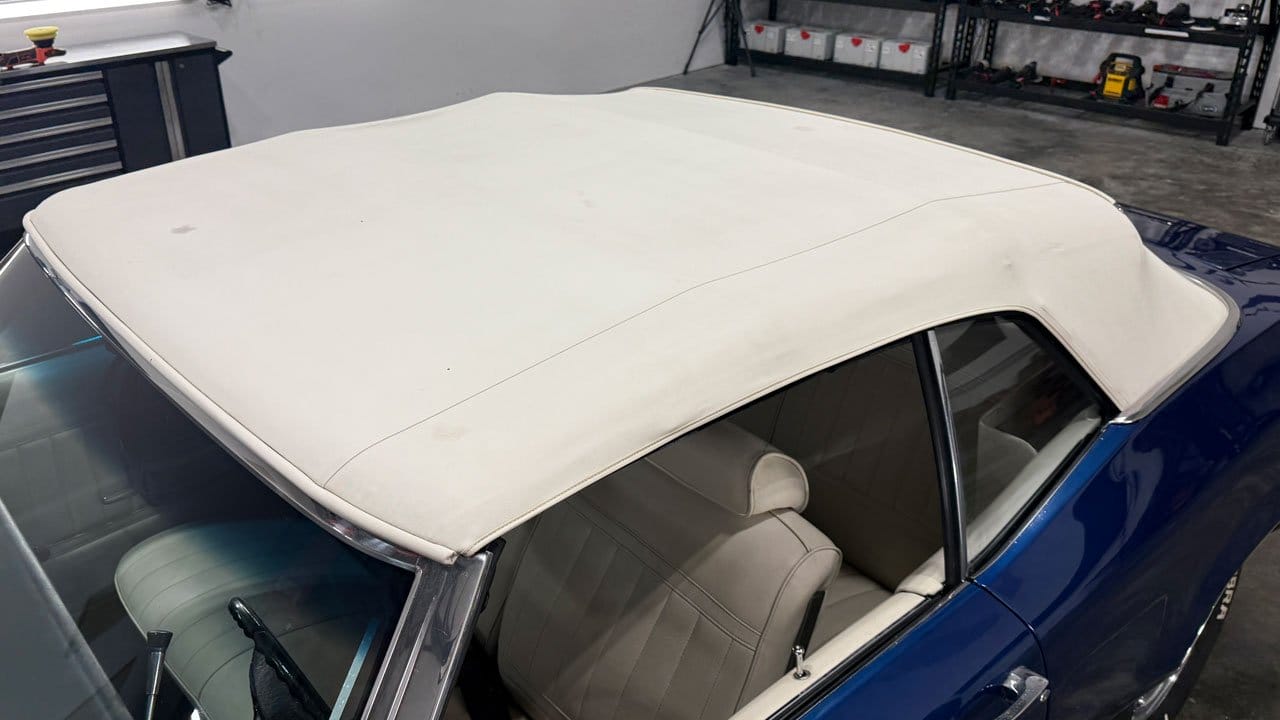
Extreme Vinyl Top Makeover
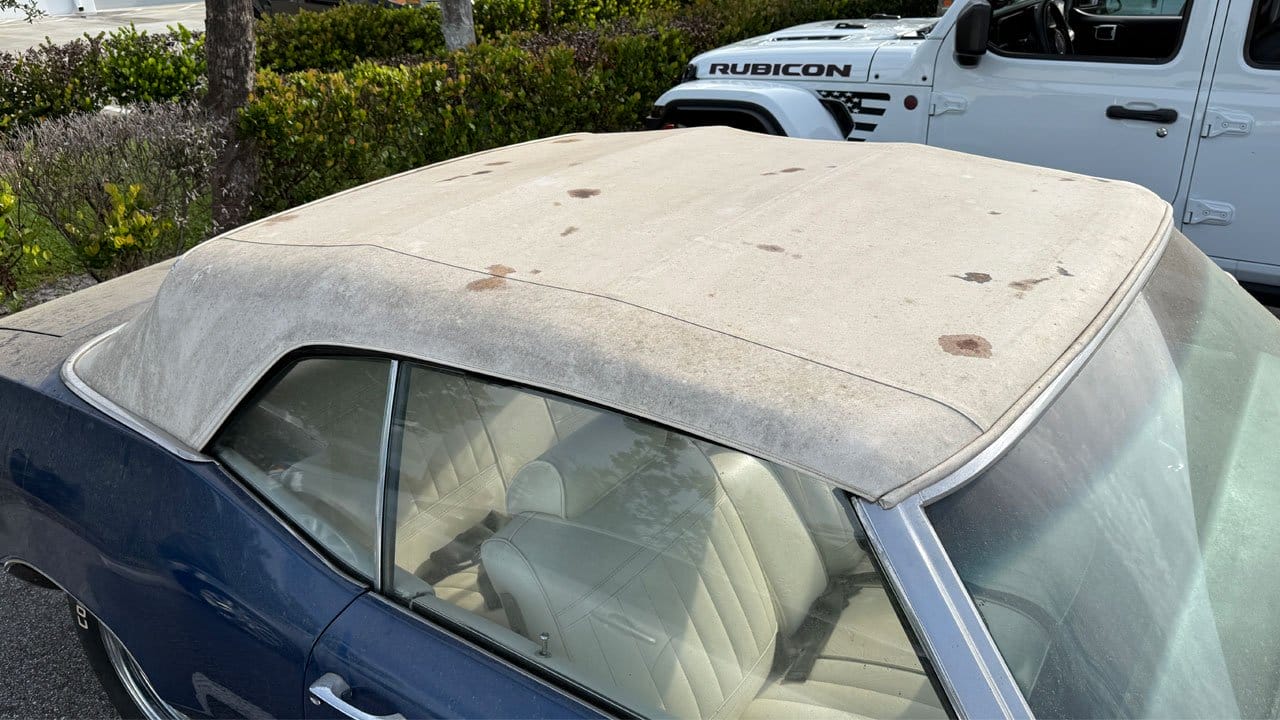
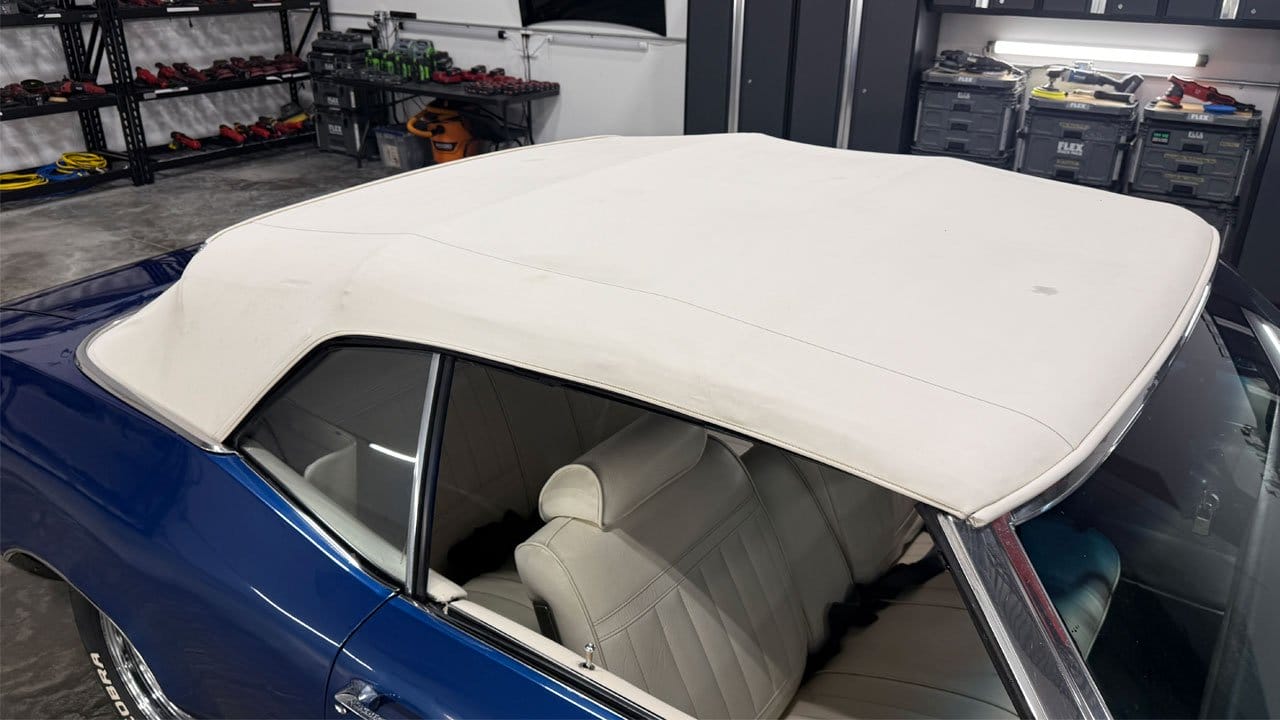
This car sat underneath other cars on car lifts over the years and as a result, there were a lot of fluid stains like transmission fluid, power steering fluid, motor oil, etc. We couldn't fix the neglected paint and send the car back to the owner with a filthy, neglected looking top. Here's the before and after results.
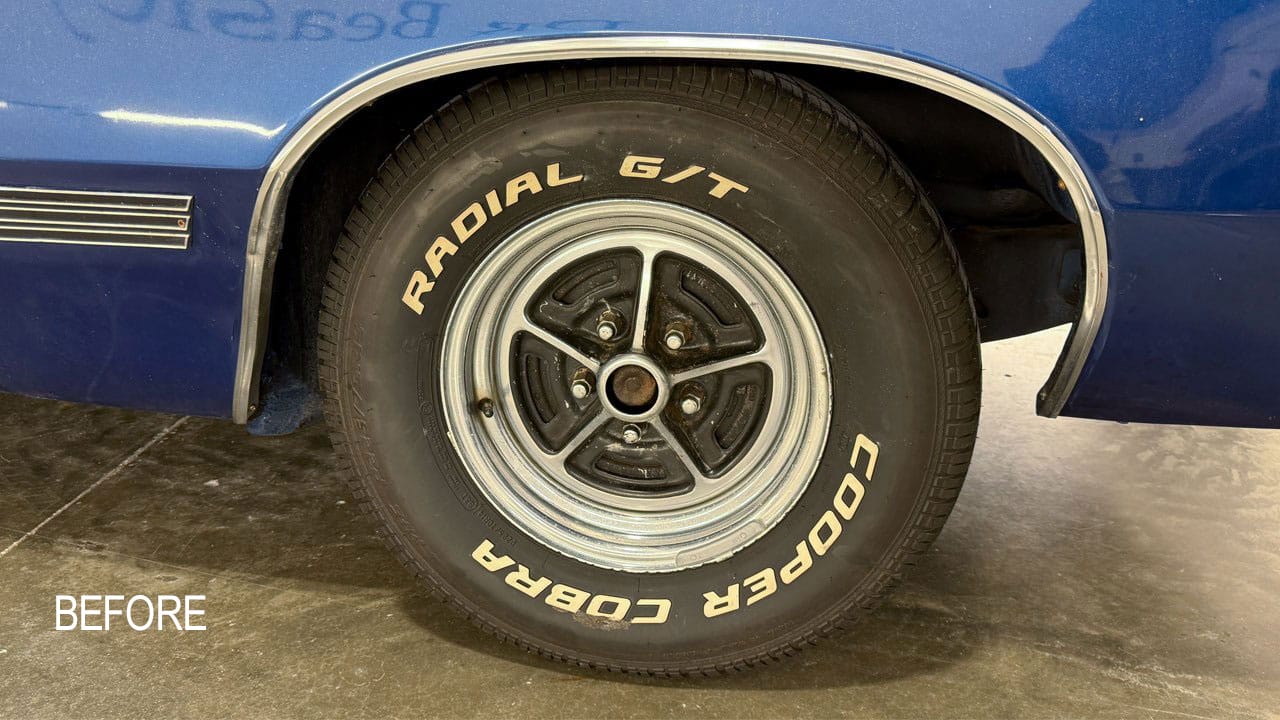
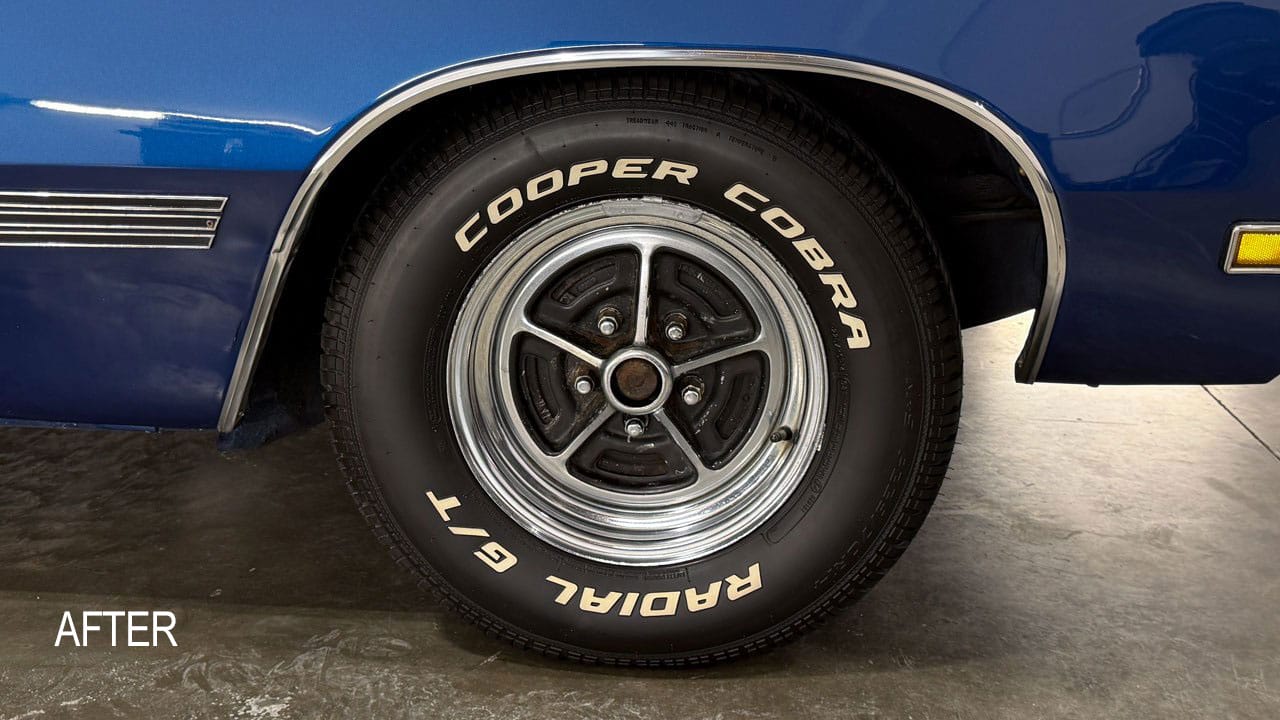
Wheel & Tire Makeover
The wheels and tires were dirty and stained. We used the Dr. Beasley's Foaming Tire Cleaner to clean the tires, Dr. Beasley's Intensive Brake Dust Remover to clean the wheels followed by applying Tire Coat Pro to the tires and Bead Hero to the wheels.
Review
POWER - The DB8 is a solid-performing tool. The 1000-watt electric motor never struggled to maintain the selected speed setting, even under heavy compounding or when I went up on edge to tackle thinner panels using only a portion of the buffing pad.
I estimate I had 5-6 hours into the compounding step and another 4-5 hours into the follow-up polishing step. And after all those hours of buffing, the tool never stopped, slowed down, or overheated.
The 1000-watt electric motor gives this tool the power of a rotary polisher but with the safety of an orbital polisher. There was never a lack of power, no matter what speed setting I used.
For most of the compounding step, I was on the 6-speed setting. For polishing, I knocked the speed down to the 5-speed setting. And the DB8 chewed through both paint correction steps without breaking a sweat.
SMOOTH - Gear-driven orbital polishers are not known for being the smoothest polisher option on the market. The mechanical movements inside the tool that cause the pad to both rotate and oscillate with ZERO pad stalling create a very aggressive action, especially at higher speeds.
The engineering team at Dynabrade has tamed this aggressive rotating and oscillating action and created a smooth, low-vibration gear-driven orbital polisher. This enables you to plow through just about any detailing project as fast as humanly possible while maintaining pro-level results—and without torturing you at the same time.
When holding the polisher and working across flat panels, tight areas, and curved body panels, the tool feels stout and solid. That is to say, the DB8 has a pro-grade fit and finish.
Backing Plate Options -I used both the 5" and 6" backing plates with their corresponding foam cutting and polishing pads.
I normally use larger backing plates and larger pads on gear-driven orbital polishers because larger pads are able to take advantage of all the power these tools provide.
That said, because this polisher came from the factory with the 5" backing plate already attached, I read this as a sign that this would be the best size backing plate for someone new to gear-driven orbital polishers. The smaller matching buffing pad will be easier to control, and the overall experience should be smoother.
I buffed out the entire passenger side using the 5" backing plate and then switched over to the 6" backing plate to buff out the rest of the Buick. I found that, at least for me, I preferred the larger backing plate and corresponding larger buffing pads.
If you're new to gear-driven orbital polishers, I would strongly recommend starting out with the factory 5" backing plate. After spending some time with this configuration, make the change to the larger 6" backing plate.
Again, spend some time behind the polisher using the larger pads and come to your own conclusion about which size works best for you.
Final Thoughts...
In the gear-driven orbital polisher category, the DB8 is a top performer and, in my opinion and limited experience with this specific tool, ranks right up there with other well-established brands in this category.
While the price point is similar to other pro-grade tools, the quality and performance are there to justify the price.
Everything about this tool is well thought out—from the Swivel Ball Power Cord Attachment designed to help prevent power cord breakage, to the powerful 1000-watt motor and the attention to detail throughout the entire tool.
And the fact that it's my favorite color?
I give this polisher two thumbs up.
It's a quality tool that's a real money-maker once you put in the time behind the tool and master the techniques for using gear-driven orbital polishers as your go-to tool for fast paint correction on cars with severely neglected paint.
Products & Pads Used
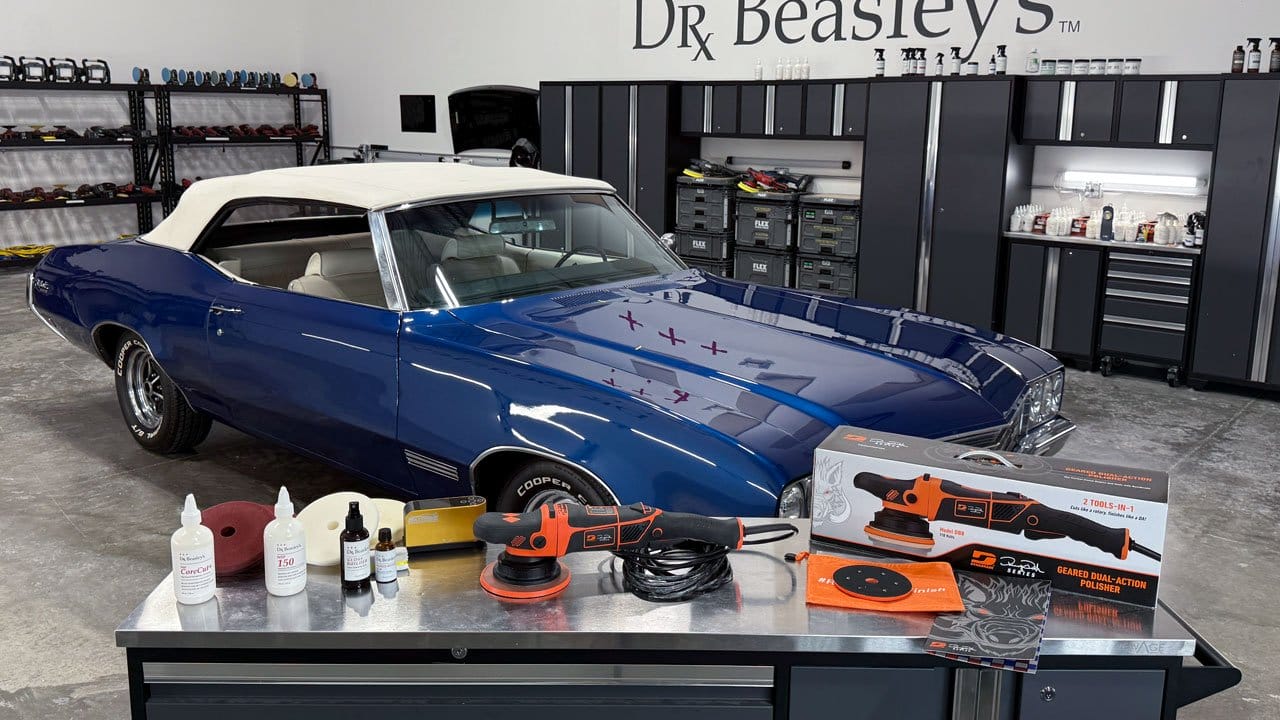
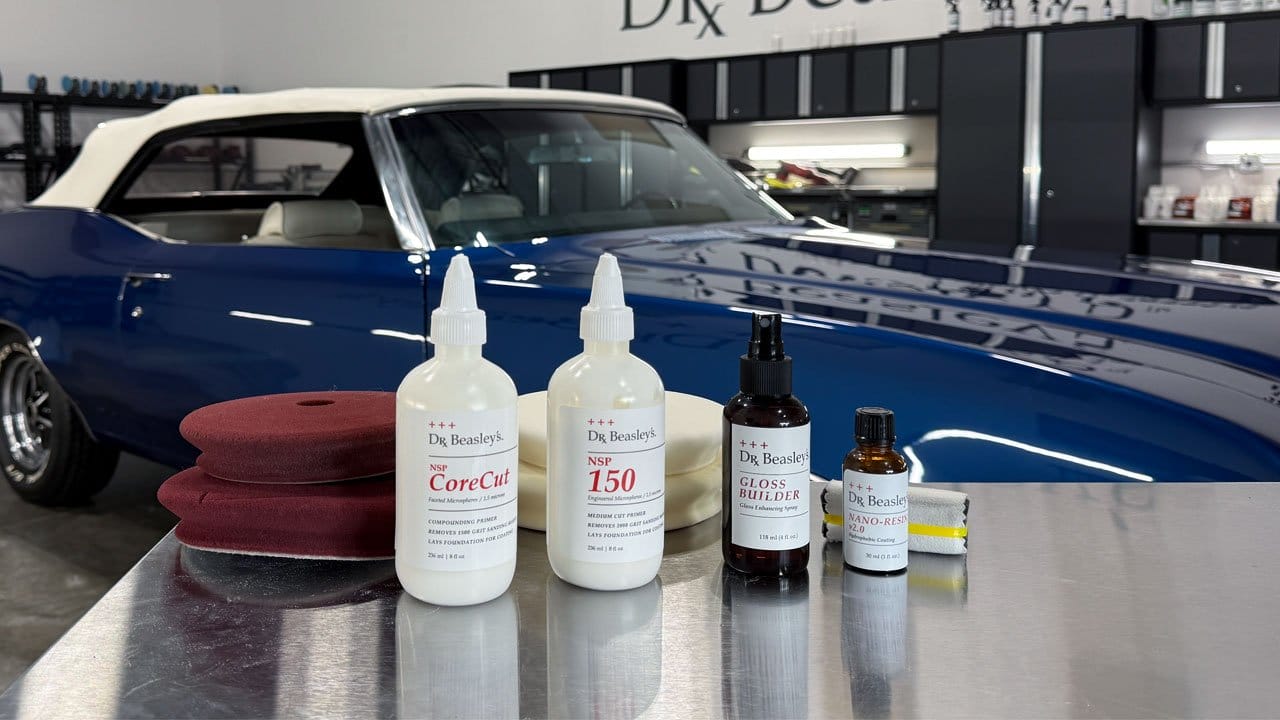
For those wondering what I used to test out the DB8 and undo years of damage and neglect, here's what I used.
Dr. Beasley's CoreCut (compound), with the Buff and Shine Maroon Foam Cutting Pad
Dr. Beasley's NSP 150 (polish), with a Buff and Shine White Foam Polishing/Finishing Pad
Dr. Beasley's Nano-Resin 2.0 Ceramic Coating
My Personal Offer to Help
I’ve been answering car detailing questions professionally since 2002 and moving forward, if after reading this article you have any questions about polishing and waxing, or how to use an AIO, my contact information is below, reach out to me, I’m always happy to help.
Would You Like to Learn How to Machine Polish Like a Pro?
- Would you like to take your detailing skills to a higher level?
- Do you find you learn better by doing versus sitting in a chair looking at a PowerPoint presentation about car detailing?
Here at Dr. Beasley’s Training Center in sunny Stuart, Florida, we teach the most hands-on car and boat detailing classes on planet Earth. And we prove it too. You can find write-ups on the Dr. Beasley’s Blog that photo-documents just how hands-on our classes are plus you’ll see the kinds of cars and boats you’ll be training on.
Click the link below to find the dates, locations, topics, and prices for all upcoming detailing classes.
Upcoming Detailing Classes – Prices – Info – Topics – Locations
And if you ever have any questions, always feel free to reach out to me personally via text, phone call or email.
I hope to see you in a future detailing class!
Sincerely,
Mike Phillips
Mike@drbeasleys.com
760-515-0444