What our 2-Day Car Detailing Class Looks Like - See what you get to do

Mike Phillips

Administrator
Staff member
Joined
May 21, 2021
Messages
1,918
Reaction score
1,037
Points
113
Location
Stuart, Florida
Website
themikephillipsforum.com
What our 2-Day Car Detailing Class Looks Like - See what you get to do

In the below pictures, you will see, (in order), how our car detailing classes look from start to finish. Notice you NEVER see anyone sitting in a chair. Everyone is on their feet, with tools in hand training on amazing training cars - no demo hoods or test panels.


Full Garage!
I took the pictures below the night before the class. You'll see 7 cars in the garage, and there's 2 more cars parked outside for a total of 9 training cars for the first 2-days of this 3-day class. You'll also see the 24' Sea Hunt Center Console detailed on the 3rd day.

If you're looking to take the most hands-on car or boat detailing class, these are the classes to take. No one else shows you the actual cars and boats you'll be training on BEFORE you pay for the class. I always do this so you can have confidence, it's going to be a GREAT class.

And while this class is over, future class dates and topics can be found here,

Future Detailing Classes for 2025


Here's 7 of the cars, with 2 more parked outside, the 2020 Camaro and the 2013 Toyota Matrix.

full


full


full


I've never seen any other detailing class with a real Starsky & Hutch Police Car for the students to train on.

full


More than enough tools and the power to run them.

full


Here's the two cars that were parked outside as there just wasn't enough room to bring them into the garage.

2020 Camaro - Horrendous Hard Water Mineral Staining
I met the owner at a local Walgreens, and she agreed to let us use her Camaro for the September class. As you can see by the pictures, the paint is in absolutely horrible condition.

full


2013 Toyota Matrix
This belongs to my buddy's grandma. With around 80,000 miles on the odometer, my experienced assessment is this car has NEVER been detailed at any level outside of taking the car through a swirl-o-matic car wash.

full


Mike
 
Last edited:
Continued...


7:30am and it's Go Time!

full


I normally cover Extreme Prep Wash on the second day simply because I don't like it when people spend a lot time and money to travel here to Stuart, Florida only to wash cars first thing in the morning. My preferred way to start is with a rotary polisher on a hacked-up car, which is what you see in all the write-ups for past classes.


Extreme Prep Wash
Most people only know about car washing. I don't teach car washing. I teach EXTREME PREP WASH and this includes all the things you can do/clean during the wash process instead of doing it later, where you're going to get the car dirty again or waste time, energy, steps and products. This includes,

  1. Topical Glass Polishing
  2. Headlight Correction
  3. Wet Wash Engine Detail
  4. Wheels and Tires including Machine Scrubbing Tires
  5. Full Body Wash and Rinse
  6. Mechanical Decontamination

First up, I explain the difference between TOPICAL glass polishing and Sub-Surface glass polishing. Both can be done before washing the car and the BENEFTIT to this is any polish splatter around the window frames or on the car will be removed when you wash the car. If you do this AFTER washing the car, (when you've moved the car into the garage), now you'll spend or waster more time cleaning around the windows and wiping splatter off body panels. The car doesn't care which order you detail it so I teach people the old cliche,

Work smarter, not harder

full


Topical Glass Polishing using the Cordless FLEX PE-150 Rotary Polisher with a microfiber pad and Dr. Beasley's NSP 150

full


After demonstrating how to use rotary polisher to polish glass I turn the class loose and then walk around the car and monitor everyone and if needed, suggest tweaks to their technique.

full


full


full


full


Wheels and Tires
Next, I always lead by example and show everyone the best and fastest way to get the wheels and tires clean. One of the things I introduced to our industry back in 2013 is machine scrubbing tires because it's faster and the machine always does a better job than the human.

full


Rotary Polisher Extensions
Here's another unique technique from yours truly. By attaching a 3" rotary polisher extension, this moves the BODY of the tool away from the brush and it makes it much easier to scrub the flat spot on the tire where the tire meets pavement. Look at this amazing picture Yancy took that tells the story.

full


After machine scrubbing tires, I share multiple great wheel cleaning brushes from Braun Brush and EZ Detail.

full


full


full


full


After demonstrating how to use the various tools with Dr. Beasley's wheel and tire cleaners, I turn the class loose, but I always start this by sitting my own butt on the ground and leading by example. I would never ask someone to do something I'm not also willing to do.

full


full


full


Full Contact Body Wash
After topical glass polishing and wheels and tires, we wash the car starting at the top and working our way down. Not pictured, after washing, we rinsed thoroughly and the use clay towels and mitts to mechanically decontaminate the paint as a part of working smarter, not harder. Then a final rinse and move the Camaro inside as one of the first paint correction cars for this class.

full


Next - 2013 Toyota Matrix - Never been detailed
After the Camaro, we moved the Matrix into position and dove straight into Topical Glass Polishing.

full


full


full


Mike
 
Continued...


Headlight Correction - Machine Wet Sanding with Rotary Polishers
For headlight correction, we no longer waste time using ANY size, brand or style of free spinning random orbital polisher to do headlight correction. What I practice and teach others is how to SAFELY use a cordless rotary polisher to machine sand faded, oxidized and yellowed headlights. The SECRET is to use 2-3 interface pads between the backing plate and the sanding discs. The important reason for this is because with the interface pads, you remove the RISK for GOUGING the plastic with a fast-spinning sanding disc on a hard backing plate. Been there done that in a class at the geek and after a student gouged the plastic on a headlight, yours truly then block sanded the headlight until the gouge was removed and the surface was flat again.

Again, teaching people how to work smarter instead of hard by using the FASTEST way to sand away years of dead plastic. With a rotary, just like with paint correction, there's ZERO sanding disc stalling, which wastes time and is nowhere near as effective.

First, another demonstration on how to correctly use a rotary polisher and then I turn the class loose.


full


See the interface pads?
Share this but remember to tell others where you learned this time-saving technique.

full


full


full


full


full


full


More working smarter instead of harder while saving time
Note the hood is up for the headlight correction step? This is for 2 reasons.

1: By opening the hood, we remove ALL RISK for someone to accidently machine sand the clearcoat paint next to the headlight.
We start out with 500 grit sanding discs. If you run a 500 grit sanding disc into a layer of clearcoat paint that is thinner than a Post-It Note, by the time you refine the 500 grit sanding marks to 1000 grit, then 2000 grit and then 3000 grit in order to buff them out, you're going to buff through the clearcoat when you get to the compounding step.

2: For this car, we're going to go over how to do a Wet Wash Engine Detail. This means ANY sanding slurry splatter that gets on the engine doesn't matter BECAUSE we're going to wash the engine and engine compartment. Thus, you save time by working smarter. IF we were not going to do a Wet Wash Engine Detail, then we would have only POPPED the hood open, to remove the hood and thus the paint away from the headlight. This avoids sanding the clearcoat paint on the hood and avoids getting sanding slurry splatter onto the engine and engine compartment. We do place 2 layers of painter's tape around all other surrounding paint by the headlights.


full


The words are thorough and fast.

full


Mike
 
Continued....

Day 1 - Morning Session - Multiple-Step or Show Car Detailing
After the Extreme Prep Wash, it's time to learn how to use a rotary polisher. Not only is this the first tool you will use first thing on the first day, you'll also be using it more and more of the course of the class. My goal is when you leave here, you are confident with your skill level and memory muscle when it comes to using a rotary.


2020 Camaro - Horrendous Hard Water Mineral Staining
I met the owner at a local Walgreens, and she agreed to let us use her Camaro for the September class. As you can see by the pictures, the paint is in absolutely horrible condition.

full


full


full


2013 Toyota Matrix
This belongs to my buddy's grandma. With around 80,000 miles on the odometer, my experienced assessment is this car has NEVER been detailed at any level outside of taking the car through a swirl-o-matic car wash.

full


Swirls, Scratches, Water Spots and Oxidation
The entire car looked just like the paint on the hood. Not only is all the paint filled with swirls and scratches, this clearcoat paint system was also very oxidized, which clearcoat paints take a lot of neglect before they will fade with oxidation.

full


Severely Oxidized Headlights
Besides working great to learn multiple-step paint correction, starting with a rotary polisher, I also brought this car in to teach headlight correction. These are the before pictures, but if you looked at the previous pictures, you would have seen the class machine wet sanding these plastic headlights using 3" Mirka Abralon Sanding Discs on FLEX Cordless Rotary Polishers.

full


full


Always On Time
Our classes start early, and they start on time. By 8:30am in the morning, you'll have a rotary polisher in your hands and training with it on a hacked-up, neglected car.

full


How To Do a Proper Test Spot
As the guy that coined the term Test Spot and the practice of doing a Test Spot before buffing out a car, I understand the importance for each person to not only understand why it's important to do a Test Spot, but also HOW to do a Test Spot correctly, and when needed, how to do multiple Test Spots.


First up - doing a Test Spot on the Camaro to dial in a process and prove it before turning the class loose.

full


full


Next up, doing a Test Spot on the Toyota Matrix to dial in and prove our process.

full


Oxidized Clearcoats
If you look carefully, you can see how clear the paint is after the Test Spot and how faded the surrounding paint is and this milky look is what oxidation looks like when clearcoats oxidize.

full


Here's a close-up after cropping the below out of the above picture.

full


It's Go Time!
After dialing in our process and proving it works to our goals, I turn the class loose. No chairs. No sitting. No PowerPoint. Nothing wrong with chairs, sitting and PowerPoints, it's just no longer my style of teaching car or boat detailing classes.

full


full


full


full


full


Foam after Fiber
We all see a lot of swirled-out cars from the misuse of a rotary polisher with a wool cutting pad. There's nothing wrong with a rotary polisher, it's just important to always finish with foam pads. The uniform texture provided by foam together with your choice of abrasive technology will remove the holograms left by the fibers from the wool cutting pad.

After the first step, the cutting step, next the class switches over to gear-driven orbital polishers to remove the holograms. I put a strong focus on using gear-driven orbital polishers in order to teach the class how to work fast while keeping their quality high. With a gear-driven orbital, there's ZERO pad stalling and thus ZERO wasted time. With free spinning random orbital polishers, you get pad stalling and not only does this waste a lot of time. Monitoring pad stalling leads to Brain Drain, which is mentally tiring.

Here's what I mean, when using free spinning random orbital polishers, most people MARK the side of the backing plates and buffing pads to make seeing if the pad is either rotating or stalling out easier. But this also means the ENTIRE time you're buffing; you MUST LOOK TO SEE if the paint is in fact rotating or simply jiggling and vibrating against the paint.

Later in the class, everyone has the opportunity to use a wide variety of free spinning random, orbital polishers and by the time the class is over, everyone will understand the speed differences and they can make-up their own mind, which style of polisher is best for their style of detailing.

full


full


full


Mike
 
Continued....

While half the class is working on the Camaro, the other half tackle the Toyota Matrix.

full


Facebook, YouTube and Instagram Experts
I always see people on social media tell others, you don't need to take a detailing class, just watch YouTube and then go out to your garage and practice. Nothing wrong with this and I have taught myself how to do things using this approach. (like taking apart the control panel on our Clothes Dryer and installing a new mother board).

That said, no amount of watching YouTube videos will ever have the same impact as taking a REAL hands-on class. In a quality detailing class, the instructor flattens out the learning curve and makes learning new topics, tools and techniques fast and easy.


First a little hands-on guidance...

full


full


Then I remove my hand and let the student take over on their own.

full


Success!

full


full


full


full


Foam after Fiber
After the class does the heavy paint correction with wool pads on rotary polishers, next they switch over to foam pads on gear-driven orbital polishers.

full


How to Install a Ceramic Coating
After all the paint correction steps, it's time to seal the deal by going over the proper techniques for installing a ceramic coating.

full


full


full


full


full


Remember those horrible headlights?
While using the rotary polishers on the car paint, we also went over how to remove sanding scratches out of headlights. Rotary with wool pads first, followed by foam pads on orbital polishers to remove the holograms out of the plastic, and then sealing the restored plastic using Dr. Beasley's Headlight Coating.

full


full


Machine Applying a Tire Dressing
Not only did the class machine scrub the tires to clean them, I also shared how to use the same rotary polisher with a 5" rotary brush to machine apply tire dressings. So much faster and effective than the human hand.

full


full


Mike
 
Continued....

Here's the final results for the 2013 Toyota Matrix

full


full


full


Here's the final results for the 2020 Chevrolet Camaro

full


full


full


full


full


full


full


full


And just to show how bad this car was before the class worked their magic.

full


Here's the before and after for the headlights

full


full


And here's the after results

full


full


These headlights, which are 11 years old and from my own experience, have NEVER been touched since this car left the dealership.


Here's the team that made the magic happen!
And this is just the first two cars for this class, 7 more cars to go, each teaching different tools, products and techniques, and then of course on the third day, the Extreme Boat Detailing Class.

Nice work everyone!

full


full


Mike
 
Continued....

Day 1 - Afternoon Session - One-Step Paint Correction - Your mid-level detailing package
Now that I have everyone warmed up using a rotary polisher to bust out two severely neglected cars, it's time to learn how to do a proper one-step process.


TWO - 1932 Ford Streetrods
For this class session, I have two HIGH-END 1932 Ford Streetrods. One of them is a deuce coupe, or a 1932 Ford 3-Window Coupe and the other is a 1932 Ford Roadster.

In keeping with my decades-long history of photo-documenting the BEFORE condition, here's some before for the orange 1932 Ford, at the time I'm creating this write-up, I cannot find any before pictures for the red 1932 Ford. The paint on the red 1932 Ford was in much better shape but still filled with light swirls and scratches.

full


full


full


full


full


full


full


RaggTopp Fabric Protectant
After washing and allowing a convertible cloth top to fully dry, next you want to apply a fabric protectant. For this 1932 Ford we're using the RaggTopp Fabric Protectant.

full


full


One-Step Test Spots
For the clearcoat paint on the red 1932 Ford, after doing a test spot, we found the Dr. Beasley's NSP 95 Primer plus a 6" yellow Buff and Shine EdgeGuard foam pad on FLEX gear-driven orbital polishers removed all the swirls and scratches to restore a true show car finish. Our Test Spot on the orange 1932 Ford showed us that in order to remove all the swirls and scratches we would need Dr. Beasley's NSP 150 Primer with 6" blue Buff and Shine EdgeGuard foam pads on FLEX BEAST 8mm gear-driven orbital polishers.

full


How do you learn?
Before signing up for any class, TRY to find pictures like you see for our classes. In the pictures below, plus ALL the pictures in this recap article for this class, all you're going to see are people on their feet, tools in hand, training on actual cars, not demo hoods or test panels. And not just cars, but COOL cars.

If you're the kind of person that learns better by doing versus sitting in a chair, then clear your schedule, budget for your travel expenses, and make the trip to Stuart, Florid for a future class. You will never be disappointed. Future Classes

full


full


full


full


full


full


full


full


full


full


full


full


full


full


full


Mike
 
Continued....

Dr. Beasley's Nano-Resin MX Ceramic Coating
After all the paint correction work, next up the class installs the Dr. Beasley's Nano-Resin MX Ceramic Coating

full


full


full


full


Here's the final results!

full


full


full


full


full


full


Here's the team that made the magic happen!

full


Here's a few shots of the orange Deuce Coupe, I think by now the red Roadster had already been picked-up and headed home.

full


full


full


full


Mike
 
Continued....

Let's check out the condition of the single stage paint on the 1976 Ford Grand Torino Starsky and Hutch Police Car with the car parked outside in FULL SUN.

full


full


full


full


full


Every inch of the paint on this car is totally swirled-out.

full


full


full


Now let's use the Lake Country Hand-Held Light and overhead LED lights to inspect with the car moved inside the Stuart, Florida O.R.

full


full


full


full


full


full


full


full


full


How to Test For Single Stage Paint
Testing is pretty easy for colored single stage paint, simply apply some white colored polish onto a white colored applicator or cloth, rub over the paint for a few seconds and then inspect. For WHITE single stage paint, it's a tick trickier because you'll want to use a dark colored cloth or applicator and if possible, a gray or colored polish.

full


An Ounce of Prevention is Worth a Pound of Cure
The owner is a super cool dude and because he knows what's involved with this type of paint restoration, he asked me to have the class be SUPER careful when buffing around the black vinyl pinstriping that separates any white painted sections for the red painted section, and we complied. You'll see a YELLOW painter's tape covering over and protecting the black vinyl pinstriping.


Mike
 
Continued....

When is the last time you washed a Pro Street 1962 Chevrolet Biscayne?

While I do like to cover a LOT of tools, products and techniques when we do the class session on Extreme Prep Wash, I don't like to have my classes spend a lot of time washing cars, so I'm always happy to take care of washing most of the cars before class starts.

full


Swirl City
After a thorough bath, I invested a few minutes in photo-documenting the BEFORE condition.

full


full


full


full


full


She's incredibly abused by the misuse of a rotary polisher
I start my classes teaching people how to use a rotary polisher, but we always finish with ORBITAL polishers to 100%, absolutely avoid the entire hologram issue in the moment and way down the road after the owner has taken possession of all our hard work.


full


full


Mike
 
Continued....

Saturday Morning - 1-Step Ceramic AIO Paint Correction
The third style of detailing we teach is how to do an entry level, or budget package detail job. For this we're using the Dr. Beasley's NSP Z1 Primer, which is a ceramic AIO or All-in-One. This means you start with the product and you also are finishing with this product. It's a one-and-done type process. The key variable, which is determined when doing the Test Spot, is which pad and tool will work best for a true 1-step process.

Polishing Pad
For the single stage paint on the Starsky and Hutch car, we found the yellow Buff and Shine EdgeGuard pads worked perfect to remove all the swirls and scratches. Except for single stage WHITE paint, most other colors of single stage paint tend to be on the softer side and thus easier to correct without getting super aggressive.

Heavy Polishing Pad
For the basecoat/clearcoat paint in the 1962 Chevy, because of how horrific the holograms, swirls and scratches were, we found we need a tick more cut and for this reason we used the Z1 with the blueberry Buff and Shine EdgeGuard foam pads. Buff and Shine describes this blueberry pad as HEAVY Polishing. So, more cut than normal polishing pads but less cut and less chance for pad-marring than actual foam cutting pads. A really nice balance of cut and finish.


Class starts at 7:30am sharp and after some Prep Wash to waterless wash the Starsky and Hutch Ford Torino, it's GO TIME!

full


No Chairs - No sitting - 100% Hands-On
I love these pictures. These pictures are what separates my classes from all the rest. All you see are people on their feet with polishes in hand, training on the real deal. No chairs. No comfy tables to sit at and no PowerPoint presentation. These classes are targeted for people that find they learn better by doing, not sitting in a classroom. If you're the type of person that learns best by taking an academic class, then I strongly recommend taking any other class besides the classes I teach.

full


full


full


full


full


full


full


full


full


full


full


full


full


full


YouTube Certified Detailers
YouTube is a great way to learn how to do something, but it will NEVER replace, in-person, hands-on training. In this example below, Wayne was able to remove all the shallow scratches, but the deeper swirls and scratches remained.

I watched his buffing style and saw that he was doing everything correctly, except he wasn't pressing on the head of the polisher hard enough. The benefit to a gear-driven oribal polisher is that when you need MORE correction ability, you can simply press harder to engage the abrasives and the cut of the pad with the paint to get the job done.

To show him how hard to press down while moving the polisher over the paint, I placed my hand on top of his hand and then simply pressed with the correct amount of pressure so he could feel this amount of pressure and perfect his technique. YouTube is good, in-person in the best.

full


Thank you John!
A special shout-out to my long-time friend John Carnevale from FLEX. John brough the new 24 Volt FLEX polishers for everyone to test out BEFORE they were made public at this year's SEMA show.

full


Sometimes there are defects that require a little more finesse. In this case, there was a deeper scratch that was resisting coming out.

full


Using the same product, pad and tool, I simply pressed a little hard, moved the polisher a little slower and that's all it took to convince the scratch to leave.

full


full


full


Mike
 
Continued....


Here's Travis, an alumni student, here with his son, also an alumni student from past classes that travelled here all the way from Michigan to take this class. Here's Travis using the FLEX PXE-80 in rotary mode with a 3" extension to convince the swirls and scratches out of Starsky and Hutche's Police Car to LEAVE.

full


Christopher was who I call a Go-Getter, he really poured himself into every aspect of this class.

full


Remember just how BAD the paint was on these two cars and keep in mind, the only product the class is using is the Dr. Beasley's NSP Z1 - which is a Ceramic AIO or All-in-One. This means it removes defects, polishes the paint to super high gloss and leaves behind ceramic protection. Remember this because as you scroll down this page you're going to be BLOWN AWAY with the after results.

full


full


full


full


full


Here are the final results from a simple, 1-Step Paint Correction Process using Dr. Beasley's Z1

full


full


full


full


full


full


full


full


full


First training cars are done for Saturday morning!

I love how these classes always attract super high caliber people. I'm confident some of these guys were tired after a FULL day on Friday but they bring their A-Game, and it shows!

full


full


Here's a couple of shots of the Pro Street 1962 Chevy outside, it was a tick cloudy, but I did my best to show the paint is truly swirl-free. The 1976 Ford Torino Starsky and Hutch Police Car left before I could get full sun pictures, but it looks just as amazing.

full


full


full


I had numerous people ask me for pictures of the engine, so here you go. This is high-end build, high horsepower, high torque Ford 351 Windsor.

full


full


Mike
 
Continued....

Saturday Afternoon Session - Removing Orange Peel - Dry Spray - Surface Texture
I can appreciate any person that takes on the huge task of restoring a car, or in this case hotrodding a car and this includes learning how to paint a car for the first time. The paint on this car had a lot of orange peel and dry spray plus surface texture like graininess. I'm so impressed with the class as they completely turned this paint job around and the final results are nothing short of phenomenal.


full


Extreme Orange Peel

full


full


full


full


full


Extreme Dry Spray

full


full


full


Orange Peel - Dry Spray - Surface Texture

full


full


full


full


full


full


No Demo Hoods
I used to use demo hoods for sanding classes, but the problem is, it's so easy to sand and buff on a flat panel about waist high, (demo hood on a hood stand is about waist high). Instead, I bring in the REAL DEAL. The real deal are the types of cars that actually get sanded and this means bringing in the types of cars that get fixed up and then get actual CUSTOM paint jobs. When you hear someone talking about wet sanding, it's in the CONTEXT of sanding a car like this, not the new or late model car in your driveway with the super THIN factory clearcoat.

When custom cars get custom paint jobs, the painter will tend to spray more paint to provide PLENTY of film-build or material for the people doing the sanding and buffing so they can sand the paint flat and then buff out all their sanding marks without ever buffing or burning through the paint.


Hand Wet Sanding
First step for this car is to learn how to wet sand by hand. For this class session, I share tips and techniques for sanding not just the easy to sand larger sections of paint, but how to hand sand around edges and raised body lines. For this first sanding step, we'll be using the Nikken brand of Finishing Papers. Note these are not sand papers, they are FINISHING papers, super high quality unigrit particle size and distribution over the entire face of the sheet of sandpaper. Been using and showing this brand for hand wet sanding since 1987 - that's 38 years.


full


full


full


full


full


full


full


Mike
 
Continued....


It's GO TIME!
After some technique demonstrations plus some question-and-answer time, I turn the class loose to sand down some other dude's streetrod. According to my 100 Year FLEX Anniversary Watch, given to me at Automechanika in Germany, by the President of FLEX, it's 10:30am and my class is on their feet sanding on the real-deal.

full


full


full


full


full


full


full


full


full


full


full


full


Mike
 
Continued....


Machine Dry Sanding
It's now 11:30am, the hand sanding portion is over and it's time to move onto machine dry sanding. For this the class is using the cordless FLEX FX3411 1.6mm 6" DA Sander as well as the FLEX PXE-80 with the optional 6mm drive unit. For sanding discs, the class is using the Eagle Abrasives by KOVAX 2500 Buflex Sanding Discs. The class is refining the 2000 grit hand sanding marks to further flatten-out and remove orange peel, dry spray and surface texture while also making it faster and easier to remove the sanding marks with the next step, using rotary polishers.

full


full


full


full


full


full


full


full


full


full


full


Here's Yancy assisting by showing how to center a sanding disc correctly onto an interface pad.

full


full


full


full


full


full


full


full


full


full


full


full


Mike
 
Continued....

Using a Rotary Polisher to Remove Sanding Marks or Sanding Scratches
After the class has performed a 2-step sanding process, it's time to go back to the rotary and next remove all the sanding marks. First there's some demonstration on how to use the rotary with a wool pad and after that, I turn the class loose.


full


full


Pretty easy to see this is a MODERN single stage paint.

full


Yes, you can take pictures and videos at our classes!
Some classes FORBID the students from taking pictures or videos. We encourage it. If you like to take notes using your phone, better check what the policy is for any other class you're thinking of taking.

full


It's Rotary Polisher GO TIME!
This is just ONE of the reasons I START the students out the first day, first thing in the morning learning how to use and just as important, be COMFORTABLE with running a rotary polisher. When sanding and buffing some other dude's streetrod, you cannot make mistakes. By spending time with the rotary polisher on the first day for the Toyota Matrix and the Chevy Camaro, I can now have confidence my class knows what to do when it comes to removing the sanding marks out of this 1949 Chevy Fleetline Streetrod with a custom, single stage urethane paint job.


full


full


full


full


full


Work Clean
We put a LOT of stress on working clean when detailing cars and in this context, it means using a pad cleaning spur to clean your wool pad often.

full


Love these shots - no chairs and everyone is hands-on - learning by doing!

full


full


full


Look at the GLOSS coming back!

full


full


full


full


full


full


full


full


Cleaning up all the edges
It's a normal thing that after the class as buffed out all the sanding marks, I take over and make sure all the sanding marks next to edges and raised body lines are fully removed.

full


Reminder
The first tool the class learned on the first day, first thing in the morning was the rotary polisher. This is a strategic plan on my part to get the class up-to-speed and comfortable with using rotary polishers so now, they know how to use this tool. Sure, you can remove sanding marks with an orbital or DA polisher, but the fastest and most effective way to remove 100% of the sanding marks is with a wool cutting pad on a rotary polisher and of course great abrasive technology. For this step, the class is using the Dr. Beasley's NSP 150 Primer.

There's an old saying that goes like this,

Use the right tool for the job


While some people are against the rotary polisher now-a-days, I simply believe you use the right tool for the job and for this kind of work, the rotary polisher IS the right tool for the job. And keep in mind, this is CUSTOM paint that is THICKER than factory paint. Thus, there's more film build for sanding, cutting and polishing.


Mike
 
Continued....

Switching over to Gear-Driven Orbital Polishers
Once all the rotary work is completed, next up is the class needs to remove any and all holograms, primarily from the fibers that make up a wool cutting pad. After some testing, we found we needed the cut offered by the heavy polishing blueberry Lake Country EdgeGuard foam buffing pads together with Dr. Beasley's NSP 150 Primer.

full


full


More gloss, clarity and depth-of-color
Each step in this process makes the paint look better and better. In the below pictures you can see the gloss increasing to really bring out the full-richness-of-color for the single stage blue paint on this 1949 Chevy Fleetline Streetrod.

full


full


full


full


Third Polishing Step - Show Car Detailing
The blueberry pad with the NSP 150 Primer left an amazing finish, but t perfect the paint for a show car finish and to take this car's paint to its maximum potential, the class re-polished using a much softer yellow EdgeGuard foam pad and NSP 95.

full


full


full


full


Installing a Ceramic Coating
After all the polishing work, it's time to seal the deal, as my friend Matt Steele would say. For this we're using the Dr. Beasley's Nano-Resin MX Ceramic Coating.

full


full


full


full


full


full


full


full


full


Mike
 
Continued....


Final Results!
I highly recommend taking a moment to scroll up the page and revisit just how bad this paint looked before my class took over. The results you see below are nothing short of striking and dramatic!

full


full


full


full


full


full


full


full


full


full


See the 1972 Corvette Mirror Reflection?

full


full


full


Nice work everyone!
And now each of you completely understands what it means and what it will take to go from start to finish to buff out not a demo hood, or test panel, but the real-deal.

full


full


Mike
 
Continued....


Perfecting White Paint on Classic Glass
This 1972 Corvette has a custom repaint and while it looked pretty good to the untrained eye, there was plenty of room for improvement to maximize the gloss and clarity of the clearcoat laying over the white basecoat. For this car we went back to Z1 with the FLEX BEAST tools and the Buff and Shine blueberry heavy polishing foam pads.

full


full


full


full


full


full


Machine Scrubbing White Lettering
The tires were dingy looking, and the white letters were stained with old tire dressing. To bring the look of the tires and the wheels up to spec to match the rest of the car, we machine scrubbed the tires and hand cleaned the wire wheels as we didn't wash this car but use Dr. Beasley's Prep Wash to do a waterless wash.

full


full


full


Such a simple process but the before and after results speak for themselves.

full


full


Beauty Shots!
I didn't get any after pictures while the car was in the garage, but I snagged a few after Yancy moved the car outside.

full


Super Glossy White Paint!

full


full


full


full


full


full


full


At this point, the class has detailed 8 cars over the course of 2 days. Next up, machine polishing flexible plastic windows.


Mike
 
Continued....


Preserving the Originality of a 1965 Corvette Stingray Roadster
My long-time friend and Corvette aficionado, Pad, purchased this low-mileage survivor car and had her shipped out to Florida. After purchasing the car, Pat brought it to me and I sanded and buffed out the plastic, Plexiglas back window in the original hardtop as it was so filled with swirls and scratches it was difficult to see out of safely.

You can read about that project here,

How to Polish Plexiglass

PolishPlexiglas007.jpg


Don't want to replace - want to preserve
Pat much prefers to keep his classic Corvettes as close to original as possible. The first time he went to use the vinyl convertible top, that's when he noticed the flexible, plastic back window was horribly filled with swirls, scratches, stains and rub marks. Pat asked me if I could fix this? I said I can try, but no promises. Before the class started, I did some testing and dialed-in a process that would remove the majority of the TOPICAL defects. This means the swirls, scratches, stains and rub marks AND of course, some of the plastic material itself, which has turned a brownish cover over the last 60 years.

I'm happy to say, while we couldn't restore perfect clarity to the plastic window because the color change has affect the INNER portion of the plastic, which of course, no one can fix. But Pat was super happy with the results because not only would the window be safer to look through, especially at night, but it also added more beauty to the overall look of this classic Plastic Fantastic.

Here's the original pictures Pat sent me after putting the soft top up for the first time since he purchased this Corvette.

full


full


full


full


Fast Forward to the Day Before Class Starts
Here's the Corvette in the Stuart, Florida detail training garage. In order to do this job the right way, I'll need to buff both sides of the plastic window and experience has taught me to start with the inside portion of the window. I found I could pull the top over itself so I can get to the plastic via machine polishing.

full


I need this flexible plastic window to be supported in some way that it's as flat as possible in order to safely and also efficiently machine buff.

full


Soft, Fuzzy Orange Blanket
Over the years, many of you have seen me use this soft, fuzzy orange blanket for all types of detailing projects. Because it's soft, it won't scratch and becuase it's a large, thin blanket, after folding it a few times, I was able to get it under the plastic window and get the plastic window somewhat flat. At least flat enough to buff.

full


Because I'm going to start with a rotary polisher, which has a tendency to sling splatter dots all over the place, I needed to cover and protect both the outside and the interior using a plastic drop cloth.

full


full


Step 1 - Machine polish with a rotary polisher and Dr. Beasley's NSP 250 Primer
You have to be careful not to over buff and get the plastic hot or you're stretch or warp it. So slow and easy, with light pressure.

full


full


Step 2 - Re-polish to remove holograms using a Lake Country HDO Orange Foam Polishing Pad and Dr. Beasley's NSP 95 on an old-school Porter Cable 7424XP
Unlike long-stroke polishers, it's MUCH easier to maintain pad rotation and pad oscillation when using a SHORT STROKE free spinning random orbital polisher and I'm all about working fast and making work easy.

full


full


full


Missing Pictures
After the NSP 95, I did re-polish with the NSP 45 to maximize clarity. You can see that step in this other project, where I did the same process to the flexible clear plastic window on a 1964 Amphicar.

1964 Amphicar – Paintwork, Glass & Plastic Correction

AmphicarPlastic017.jpg


Gloss Builder
I've been using a new product called Gloss Builder on clear plastics with great success. This is a ceramic product for use before applying a ceramic coating. It maximizes gloss and clarity before installing the coating. I've found it also maximizes clarity for clear plastics after a thorough machine polishing.

full


full


full


Inside Done
After doing a 3-step machine polishing process and applying Gloss Builder, the passenger side INSIDE portion of the window is completed.

full


Time to do the outside
I'm only doing one half of the window to both dial-in my process but to also show the class the before and after difference as they arrive for the first day of class. Later, I'll demonstrate the entire process on the driver's side of the window. Like before, I needed to cover over and protect the black vinyl top and the body panels from any accidental splatter dots.

full


full


full


full


full


full


Mike
 
Continued....

Here's an example of Rub Marks, and there's even rust build-up on the plastic.

full


full


full


full


full


full


full


full


full


full


Repeating the Process
For the outside, I'll repeat the same process I used on the inside. Rotary to Orbital to Orbital using NSP 150, NSP 95 and NSP 45 followed by Gloss Builder.

full


If you look carfully, you can see the BROWN plastic material from the window building-up on the face of the pad. We are able to remove any TOPICAL browning, but it's impossible to remove the browning on the INSIDE of the plastic membrane because doing so means buffing away 100% of the plastic.

full


After the rotary step, I did two more orbital steps followed by Gloss Builder.

full


The difference is stark and dramatic!

full


full


full


full


full


Next up, sharing this process with the class.


Mike
 
Continued....


How to Machine Polish Flexible Clear Plastic Windows
This actually took place first thing Saturday morning, before the class buffed out the Starsky and Hutch car and the 1962 Chevy Biscayne. If you look carefully, the clock on the walls shows it's 7:30am and it's go time, not sit in a chair time and listen to me talk about detailing.

full


Starting out doing the complete process to the inside portion of the driver's side of the back window. Note I'm continuing to use the soft, plush orange blanket to support the plastic as I buff.

full


full


After tackling the inside, next up we repeat the process to the outside. And of course, overlap a little into the previous side where the painter's tape divided the back window into two parts.

full


Rotary first with NSP 150

full


full


See it?
See the brown plastic material building-up on the face of the buffing pad? This tells us we're removing the browning, but only on the outer and inner surface. The brown fading will always affect the inside of the plastic but that's okay because the owner doesn't want to replace the plastic window, he just wants to see out of it.

full


Porter Cable 7424XP with NSP 95

full


Porter Cable 7424XP with NSP 45

full


Applying Gloss Builder to maximize clarity

full


full


full


BOOM!

full


full


full


full


Here's a few pictures of the back window outside under normal light - looks MUCHO better!

full


full


full


And of course, we cleaned and treated the vintage, original vinyl top to complete look of the entire car.

full


Next up, Day 3 - Extreme Boat Detailing


Mike
 
Continued...


Certificate Award Ceremony
At the end of the class, we hold our Certificate Award Ceremony. Some people want a certificate to show they attended one of my classes, some people don't but I'm proud to say, that our Certificates not only look great, but they also list a majority of the topics covered in the class. This way people not only see the certificate, but they also see the topics and techniques you trained and learned.


Charles
(Somehow we didn't get a Cert Picture with Charles or I simply cannot find it)

full


Tome

full


Eric Hoover

full


William Vaccaro

full


Steven

full


Christopher

full


Christopher

full


Keith

full


William

full


Wayne

full


Travis

full


Jim

full


Tyler

full


Ashley

full


Jason

full


Corey Richland

full


Group Shot

full


THANK YOU!

Thank you to everyone for trusting in my name and the good name of Dr. Beasley's to travel all the way to Stuart, Florid to take this class.

I hope you found it exactly as advertised and that's, No Chairs. No Sitting. No Down Time. No PowerPoint. In other words, 100% hands on from the time we started early in the morning until the end of each day and all topics for that day were covered.

I appreciate each and every one of you for staying focused on the task-at-hand so there were no mistakes and each car, and the 24' Sea Hunt boat came out perfect!

If there's ever anything I can do for you, please don't hesitate to email, call or text - I'm always available to you.

Sincerely,

Mike Phillips
mike@drbeasleys.com
Cell: 760-515-0444
 
Continued....


Upcoming 2-Day Car Detailing Classes

1: February 22nd and 23rd


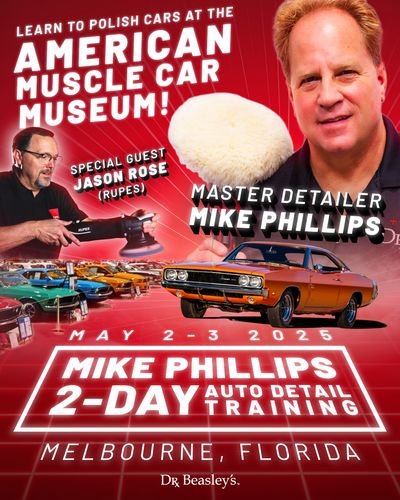
2: May 2nd and 3rd - Class is held at The American Muscle Car Museum in Melbourne, Florida with Guest Instructor - Jason Rose from RUPES


3: September 20th and 21st


Upcoming 2-day Extreme Boat Detailing Class

1: March 15th and 16th


Questions?

Give me a call or shoot me a text, always happy to answer your questions about the classes and/or traveling to Stuart, Florida.

760-515-0444


Mike
 
Continued...


For those travelling to Stuart, Florida for any of our classes, I've already done the legwork for you to make getting here and staying here easy.


Airports - Hotels - Restaurants - Plus things to do in Stuart Florida!

full


Thank you for signing up for one of our detailing classes here at Dr. Beasley’s O. R. - We do everything we can to make it as easy as possible to get here and have a great time! This includes getting you accurate information about the nearby airports with the correct airport codes, the closest and best hotels to stay at while you're here and also the best place to get great FRESH seafood or any type of cuisine you prefer.


Location
Dr. Beasley's O.R.
7934 SW Jack James Drive
Stuart, FL 34997

Airports

The closest and thus fastest and easiest to get to Dr. Beasley’s O. R.

West Palm Beach Airport - Airport Code: PBI

Approximately 30 minutes from Dr. Beasley’s <--Closest airport to Dr. Beasley’s O. R. Straight shot on I-95


Fort Lauderdale Airport - Airport Code: FLL

Approximately 2 hours away from Dr. Beasley’s O. R. - Straight shot on I-95


More Florida Airports - Further away from AutoForge.net

Miami Airport - Airport Code: MIA

Approximately 2 hours and 30 minutes away from Dr. Beasley’s O. R. with great traffic conditions - Straight shot on I-95


Orlando Airport - Airport Code: MCO

Approximately 3 hours away from Dr. Beasley’s O. R. with great traffic conditions. - Must take multiple highways and/or toll roads but doable.


Hotels

Note: Pricing is dynamic and varies by dates.

These first two hotels are the closest to our training center. They are literally right down the road.

Courtyard Stuart
7615 SW Lost River Road
Stuart, Florida 34997
772-781-3344

There is an in-house restaurant, Starbucks and full bar. The Cracker Barrel, McDonald's and Chevron Gas Station/Mini Mart are right next door.


Holiday Inn Express - Stuart Florida
7900 SW Lost River Road
Stuart, FL 34997
772-287-2522

Dunkin Donuts and La Forchetta - an Italian Restaurant are both right next door in the same parking lot. I highly recommend La Forchetta - superb, authentic Italian food. Wendy's is also on the entrance road.


Continued
All other hotels are going to be a few miles down the road but still and easy drive on Kanner Road.

Comfort Suites Stuart-Hutchinson Island - (The name is misleading as this hotel is smack dab in the middle of Stuart, not on Hutchinson Island)
3423 SE Federal Highway
Stuart, FL 34997
772-888-2424
Note: I have not stayed here but past class students that have all say it's really nice and more affordable than the Courtyard Stuart. There is no in-house restaurant or bar.


Quality Inn Downtown Stuart
950 SE Federal Highway
Stuart, FL 34997
772-287-3171

Note: I have not stayed here and have no info about it. It is right next door to a very popular local restaurant Flanigan's, which does have great food and drink.


Restaurants

Stuart has a LOT of great restaurants close by and if you like great seafood that's fresh, then there are plenty to choose from. The below are some of my favorites.

Close to Dr. Beasley’s O. R. and the above listed hotels

Fresh Catch Seafood Grill - Seafood - One of my personal favorite for seafood - we normally hold our Meet-N-Greet at Fresh Catch. The owner's two sons are local commercial fishermen, thus the name fresh catch
1411 SE Indian Street
Stuart, FL 34997
772-286-6711


La Forchetta - Italian - VERY authentic Italian food - highly recommended if you like Italian food. Small size, best to make reservations.
7820 SW Lost River Road
Stuart, FL 34997
772-872-7333


Flanigan's - Award winning ribs, chicken wings and burgers
950 SE Federal Highway
Stuart, FL 34994
772-220-0039


Anthony’s Coal Fired Pizza & Wings - Amazing wings and pizza
2343 Southeast Federal Highway
Stuart, FL 34994
772-287-7741


A tick more of a drive but incredible places with great food

Stuart Boathouse Restaurant - Bar - On the water - great view, great food and drinks - in old downtown Stuart, parking can be tight during peak hours
49 SW Seminole Street
Stuart, FL 34997


Dolphin Bar & Shrimp House - On the water - 2 bars - amazing food
1401 NE Indian River Dr
Jensen Beach, FL 34957
772-781-5136


Kyle G's - Seafood - Steak - Chicken - On the water with amazing Ocean view
10900 S Ocean Drive
Hutchinson Island, FL 34957
772-237-5461


Talk:House - Incredible experience - amazing seafood as well as traditional American cuisine
514 NW Dixie Highway
Stuart, FL 34994
772-692-3662


Things to do around Stuart!

A lot of people attending our classes bring their families and are looking for fun things to do with their kids while mom or dad are at the class. Below are a few resources to get you started.


Bathtub Beach in Jensen Beach - Very close to Stuart
1585 SE MacArthur Blvd, Stuart, FL 34996
This is a easy to access beach with an artificial reef separating it from the ocean, which acts to keep out sharks for a family friendly and kid-safe ocean swimming experience. I'm a distance swimmer myself and always feel safe when I go swimming at Bathtub Beach.
View Webcam


Jensen Beach
4191 NE Ocean Blvd, Jensen Beach, FL 34957
View Webcam


Chastain Beach
1213 SE McArthur Blvd.
Hutchinson Island Beaches, FL
Guarded, seasonally. Natural beach. Bathrooms, showers. Is between the House of Refuge and Bathtub Reef along A1A.


Hobe Sound - (Hobe is pronounced HOPE - you say the letter P instead of the letter B)
Hobe Sound Beach, Jupiter Island, FL 33455
View Webcam


Florida Oceanographic Society
Florida Oceanographic Society is a non-profit organization founded in 1964 with the mission to inspire environmental stewardship of Florida's coastal ecosystems through education, research and advocacy.


Florida Oceanographic Coastal Center is a 57-acre marine life nature center located on Hutchinson Island in Stuart, FL situated between the Indian River and the Atlantic Ocean. As a leading state and nationally recognized environmental organization, Florida Oceanographic offers educational programs to people of all ages and conducts research and restoration programs that lead to healthy coastal ecosystems.
Check out LIVE FISH via the FISH CAM!


Questions? Help? Recommendations?

760-515-0444

-Mike Phillips
 
Back
Top